Description
This tutorial aims to facilitate the understanding of the life cycle of the black soldier fly and to learn how to grow it for domestic use. This technology was documented during the stopover of the Nomade des Mers expedition in Malaysia. The company EntoFood, which we visited, has been doing research on these flies for nearly 8 years and is preparing to launch its large-scale production unit. It will allow the treatment of 300 tonnes of organic waste per day!
Sommaire
Sommaire
Introduction
Waste management, particularly in urban areas, is considered as one of the most important environmental issues for the coming years. The recycling of organic waste (bio-waste) is still quite limited although they represent more than a third of our garbage. Today, most of this organic waste, although recoverable, is buried or incinerated, bringing major environmental problems (pollution of the soil, air and groundwater, demand for increasingly large storage areas, etc.). The strong growth of urban populations makes it a major challenge for municipalities and more and more solutions are being tested.
An increasingly common solution is the conversion of organic waste by insects or larvae, including those of the black soldier fly (Black Soldier Fly, BSF): Hermetia illucens. This solution has attracted a lot of attention over the last decade for its speed of waste treatment as well as for the promising possibility of using harvested BSF larvae as a source of protein for animal feed, thus offering a valuable alternative to conventional feed (fishmeal in particular)
Whether on a medium or small scale, the breeding of black soldier fly larvae requires very few resources and makes it possible to effectively treat bio-waste by transforming it into a compostable and hyper-nutritive residue for the soil. In addition, larval recovery is possible to feed domestic animals (ducks, chicken, geese, fish...).
In summary, this are the advantages of growing BSF:
- The larvae are composed of ±40% protein and ±30% crude fat. This insect protein is of high nutritional quality and can be an interesting resource for animal feed (chickens, geese, ducks, fish...)
- Larvae have been shown to neutralize most disease-transmitting bacteria, such as Salmonella spp or E. coli, thus limiting the risk of disease transmission to animals and humans. [1]
- A reduction in the wet mass of organic waste of between 50 and 80%.
- The residue, a substance similar to compost, contains nutrients and organic matter that can be used directly on crops.
- Livestock farming is inexpensive and does not require sophisticated means of production. This makes it an accessible solution in all regions of the world.
- The black soldier fly (BSF) can be found in nature worldwide in tropical and subtropical regions between latitudes 40°S and 45°N
Youtube
Matériaux
The materials used will depend on the support used to build the living space of your larvae. This can be done in a wooden box, a drum cut in half, a large plastic box...
For an order of size, a box of ----- per ----- will allow to treat ---- kg of waste per week
For the box (120/65/30cm):
- 120/65cm x2 wood boards
- 120/30cm x2 wood boards
- 65/30cm x2 wood boards
- Iron angles
- Hinges
- Screw
- Paint and varnish
- Plastic tray of 100/60/15cm
- Plank and pieces of wood to make the ramp
- Inner tube
- Staples
- Plastic box to collect larvae
For the aviary (80/50/45cm):
- Wood bars of 80/5/2cm x4
- Wood bars of 41/5/2cm x2
- Wood bars of 40/5/2cm x2
- 50/45cm plywood board (for the bottom)
- Hinges
- Screw
- Angles
- Mosquito net
- 50/10cm board (for opening)
For nymphs and egg laying:
- Cardboard or wooden plates separated by pins
- A box to put some waste
- A box to put the nymphs
- Dry substrate (coconut fiber...)
- A box for the hydration of flies
Outils
The tools will also depend on the living space, for the construction of the box you will need:
- An electric or hand saw
- A hole saw
- Drill/screw or screwdriver
- Stapler
- Sander
- Brushes and rollers
Étape 1 - Construction of the breeding box
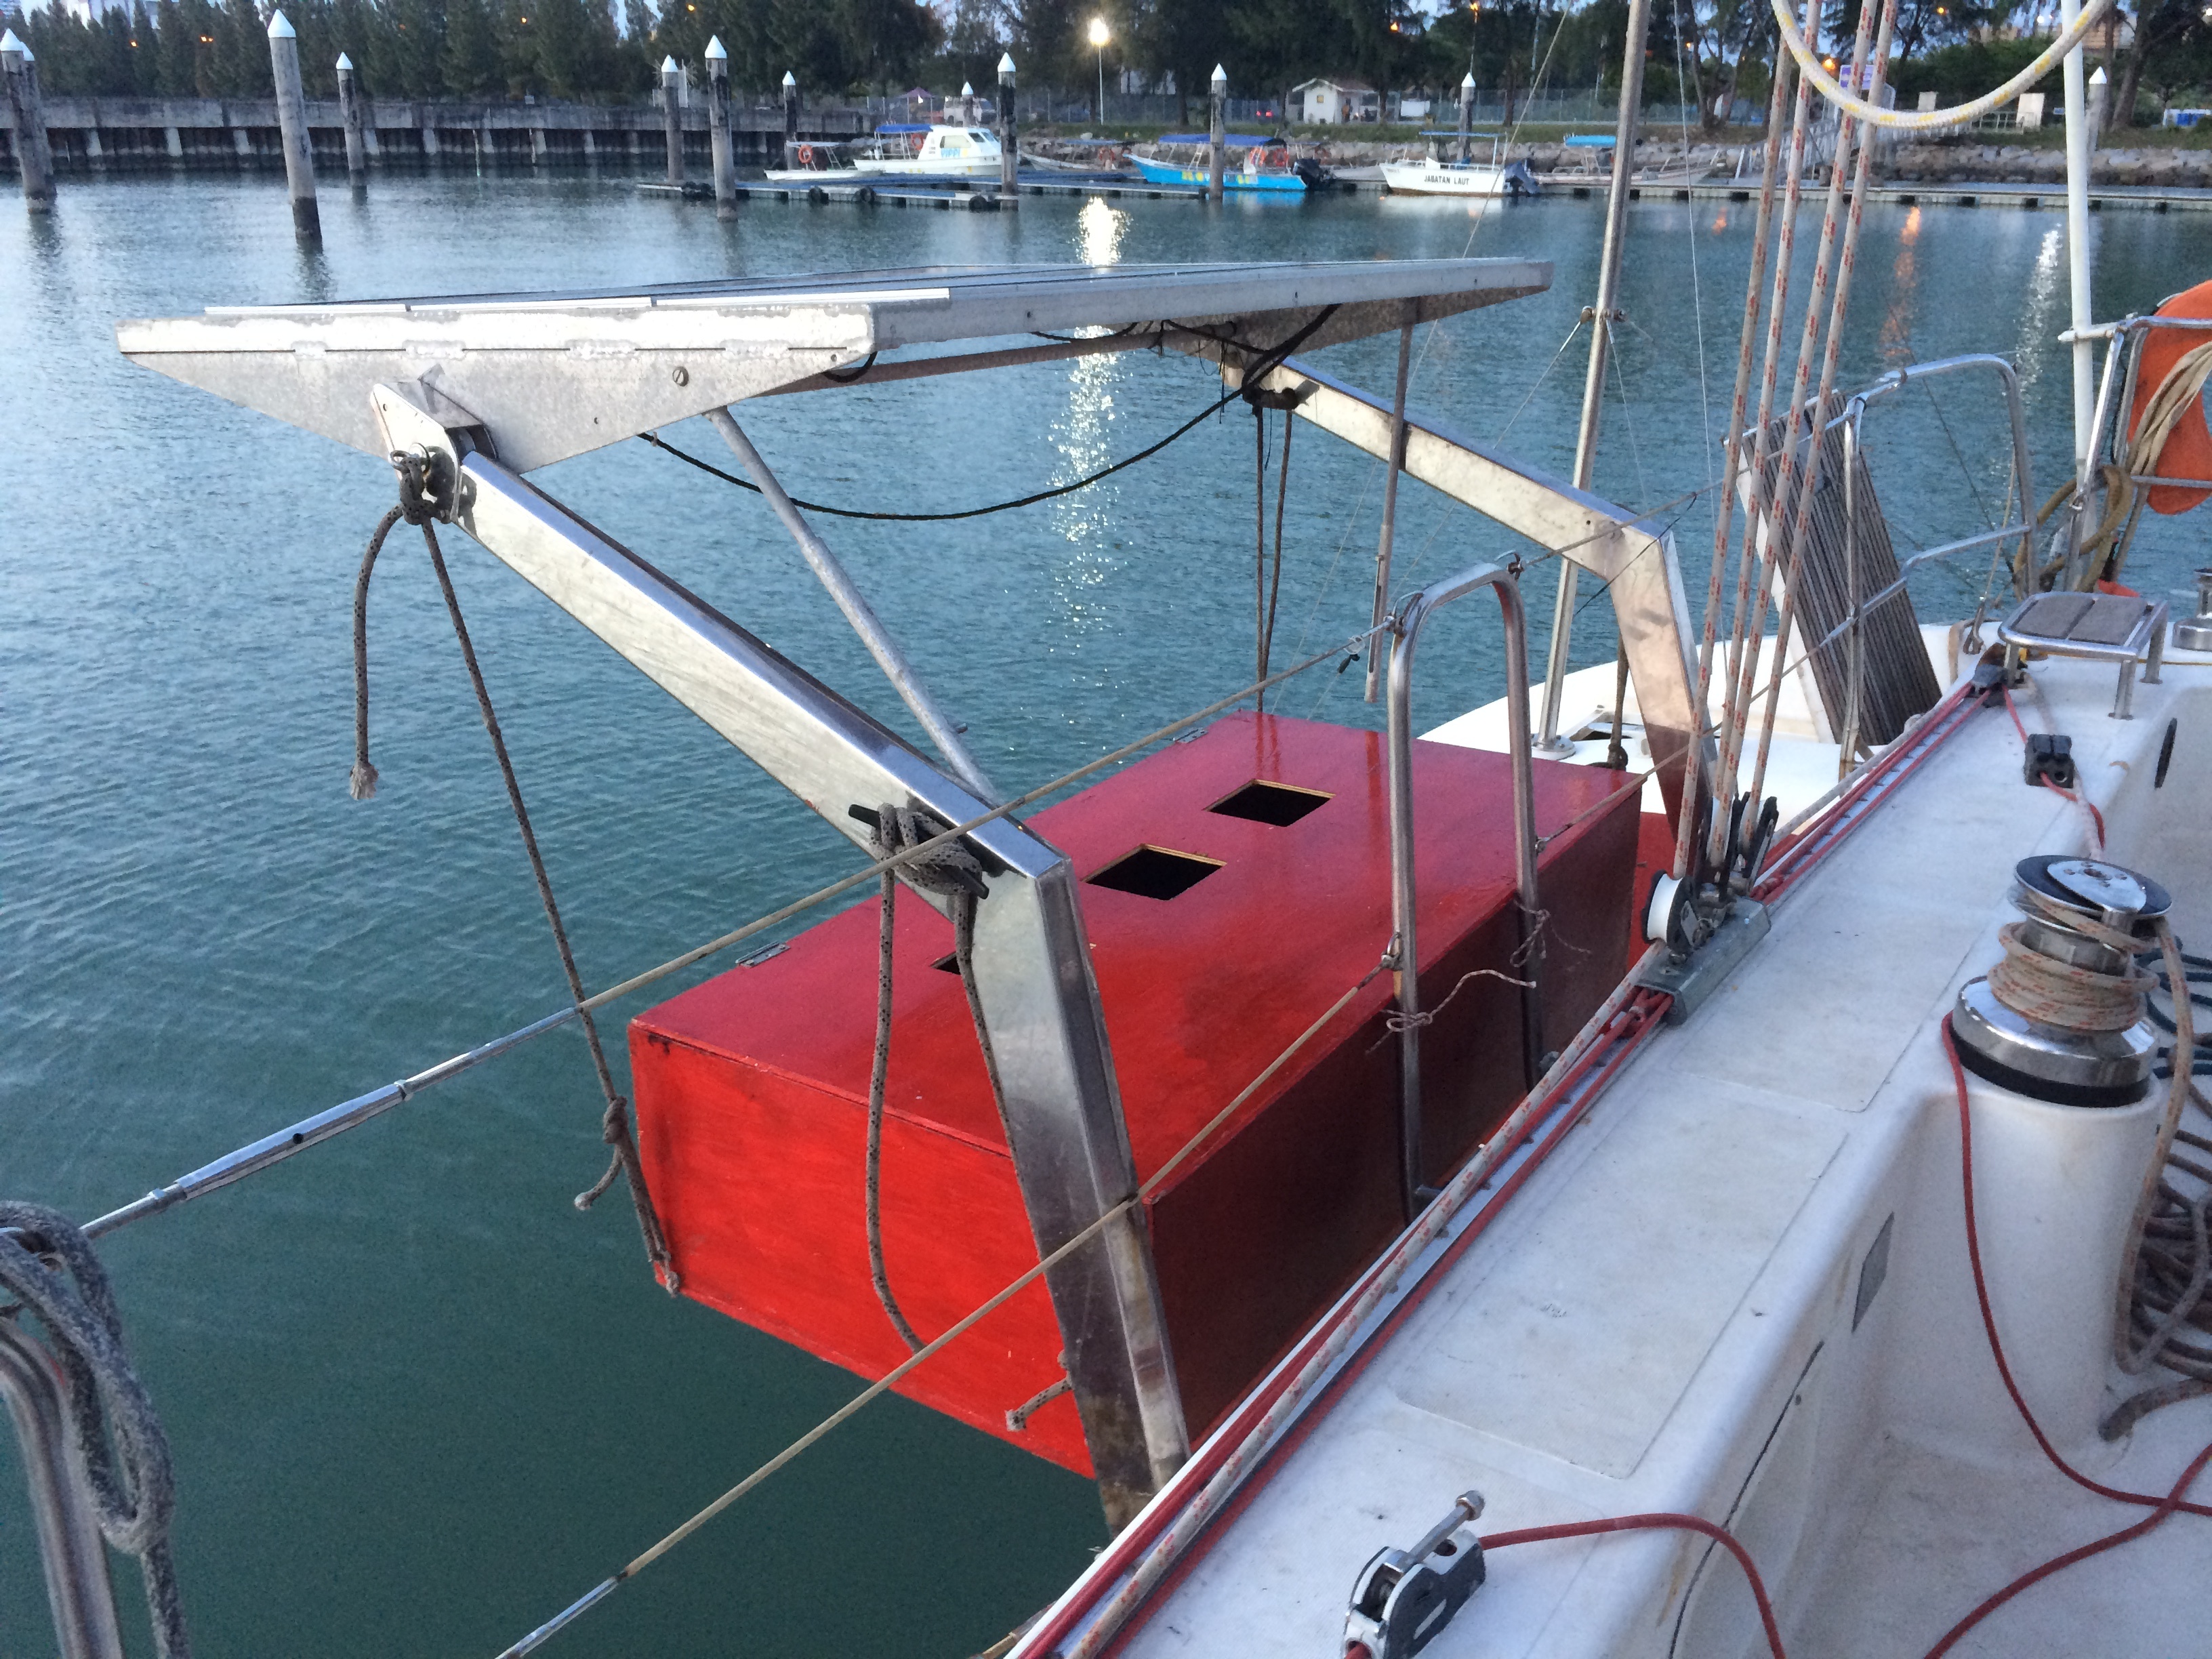
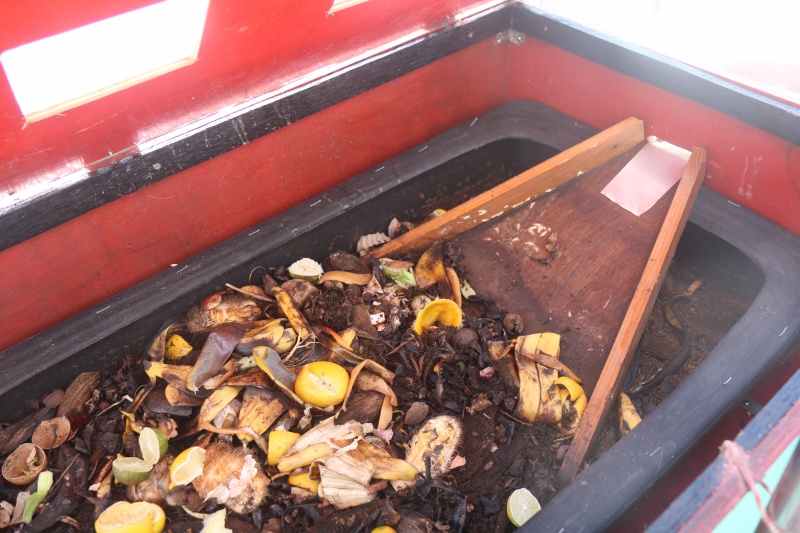
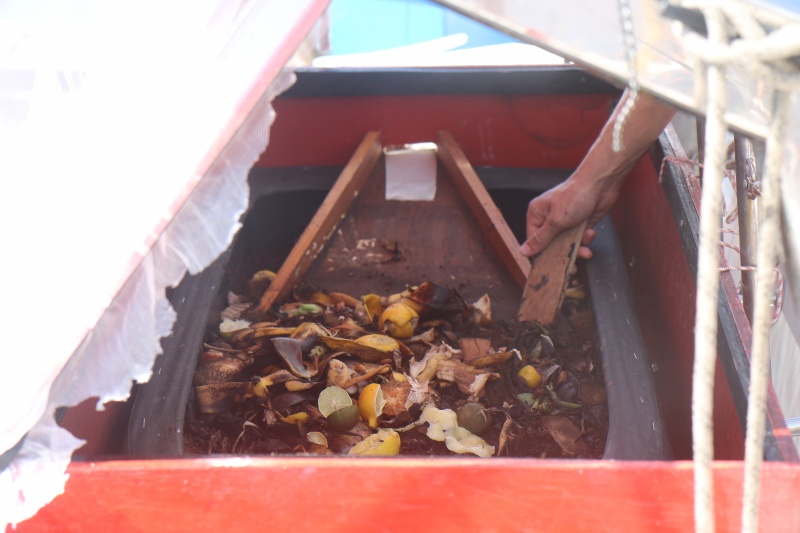
The breeding environment can be made with various materials. For the prototype of the boat for example, we built a wooden box in which we put a plastic bin containing the waste and larvae (See photo). For example, you can use a plastic drum cut on top, or a simple plastic box.
For the construction:
1. Preparation of the boards
- Using an electric or hand saw, cut the 6 boards to the right lengths
- Sand the boards
- Apply an undercoat on all sides of the boards and allow to dry
- Apply a coat of wood paint and let it dry
- Apply a coat of varnish (optional) and let it dry
2. Assembly of the box
- Using the angles and screws, assemble the boards on the bottom of the box
- Using angles and screws, connect the different sides of the box
- Cut out cleats to strengthen the inside of the box and attach the lid to it.
- Using screws, fix the cleats on the upper part of the walls
- Prepare the cover by installing hinges.
- Install the cover on the box and fix the hinges
3. Preparation of the waste box
If the sides of your waste bin are not very high, it may be useful to put an additional barrier against larvae escape
- Pass an old used inner tube all around your tray and leave a part coming out towards the inside
- Staple the inner tube to the tray
- Place the tray at the bottom of the box and stick it against one side
4. Preparation of the slope
- Cut the board in the shape of a trapezoid so that it forms a ramp when placed on the waste and joins the edge of the box at an angle of less than 45 degrees
- Cut cleats to fit the external shapes of the ramp
- Secure them with screws on the ramp
5. Installation of the ramp
To facilitate maintenance, we put the ramp on a hinge to be able to lift it up and easily remove the bin from the waste
- Install a hinge on the lower part of the ramp
- Attach the hinge to the box
6. Cutting of the holes on the box
In order to allow the entry of flies and the exit of larvae, holes must be drilled on the sides of the box.
For larvaes:
- Measure the location where the ramp arrives and count 2cm high for the opening
- Using a drill, make holes at the 4 ends of your opening
- Using a saw, connect these holes to create an opening
For the flies
- On the sides of the box, drill with a hole saw about ten openings of 5cm in diameter
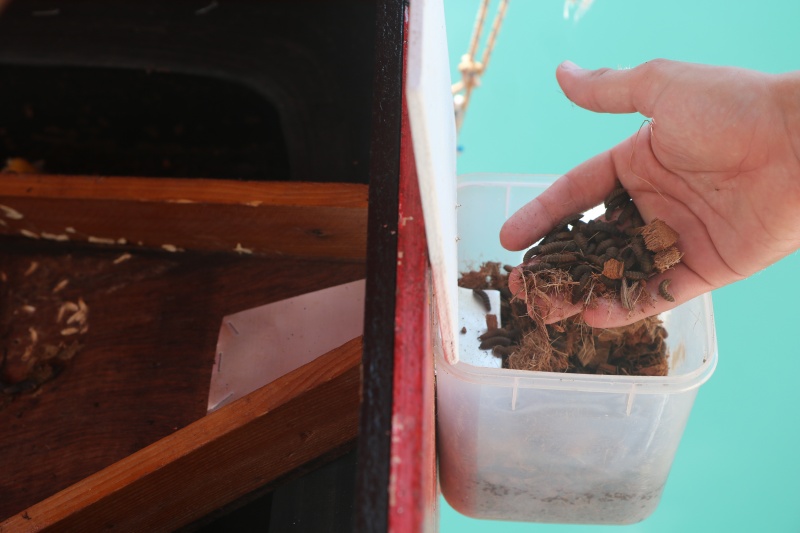
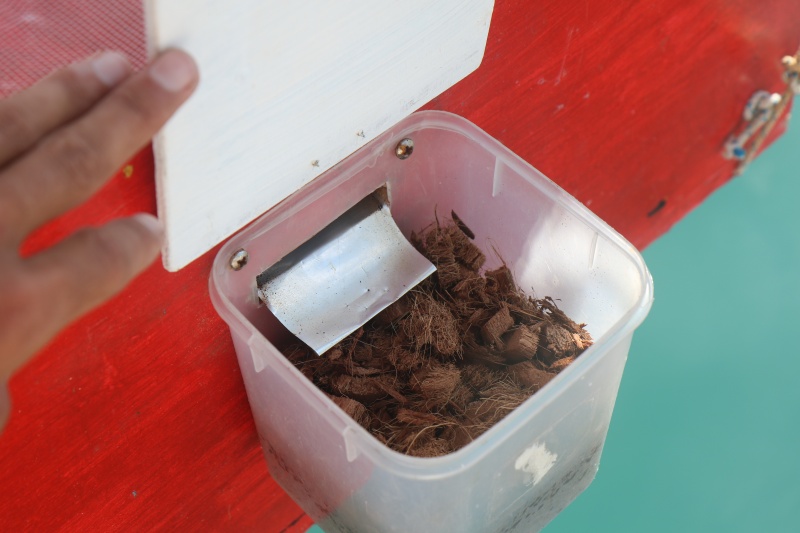
7. Placing of the larvae collection box
- Using screws, fix the plastic box under the larvae exit slot
8. Laying supports (if no separate aviary)
- Cut out pieces of cardboard boxes that are 10cm by 5cm thick.
- Assemble 4 pieces with string
- Attach two screws to the cleats at both ends of the box
- Hang a string on these screws
- Hang the egg-laying supports on the string so that they are as close as possible to the waste
The general recommendations for the design of the living environment are :
- Size your waste bin according to your weekly volume. Indeed, it is not necessary to have a too thick layer of substrate so it is better to be able to spread out your waste rather than stack it.
- Drill holes so that female flies can come and lay eggs inside.
- Place the egg-laying supports above the waste, as close as possible. These can be made of honeycomb cardboard or wooden planks separated by a pin (a gap must be left in which the flies will lay their eggs). During hatching, the larvae will fall directly into the waste.
- Have a well sealed waste box to prevent larvae from escaping in case of lack of food.
- Put a ramp for the exit of the larvae. It can be inclined up to 45 degrees but prefer a softer slope. As larvae tend to follow the edges of the box to find the exit, it may be good if the ramp is the full width of the box.
- Avoid the ventilation holes on top to protect the substrate as much as possible from rain. On the pictures, you can see the plans of the system we had validated and that works on the boat. The fly inlet/outlet holes on the top have been plugged and the aviary attached to the cover has been changed to a separate aviary, see below.
Étape 2 - Construction of the aviary
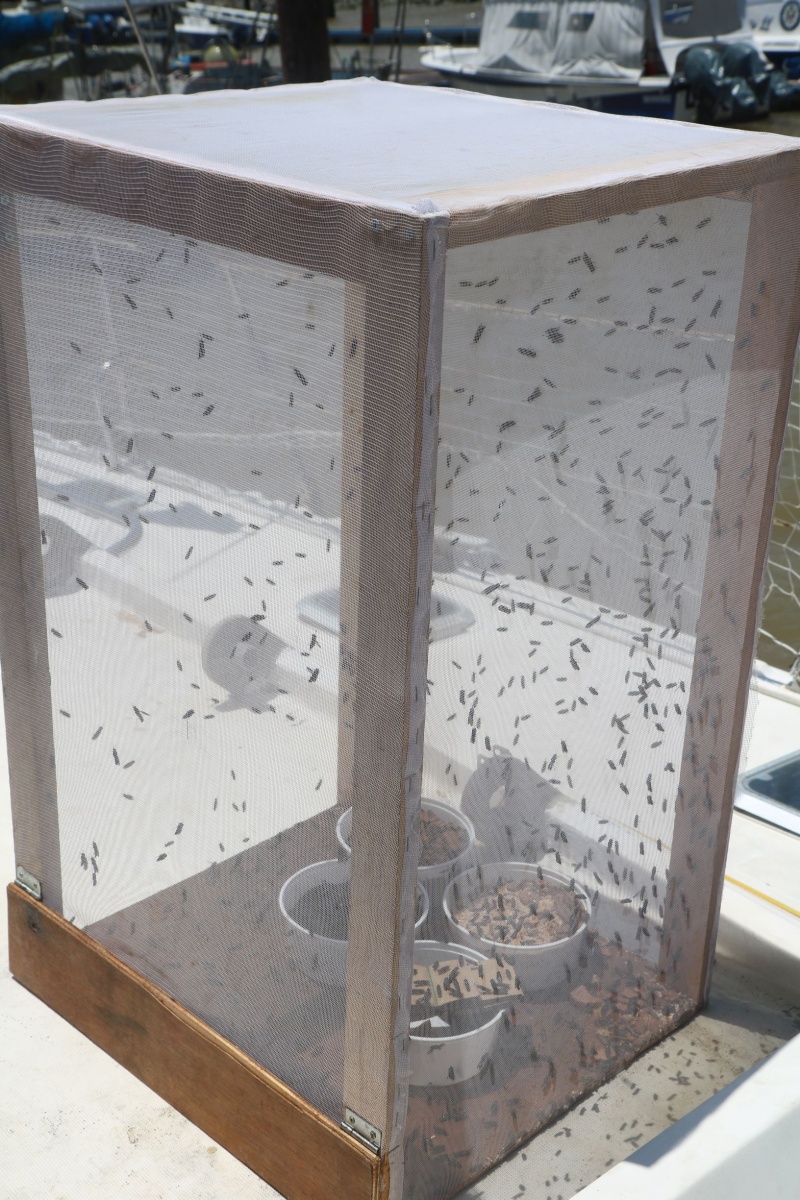
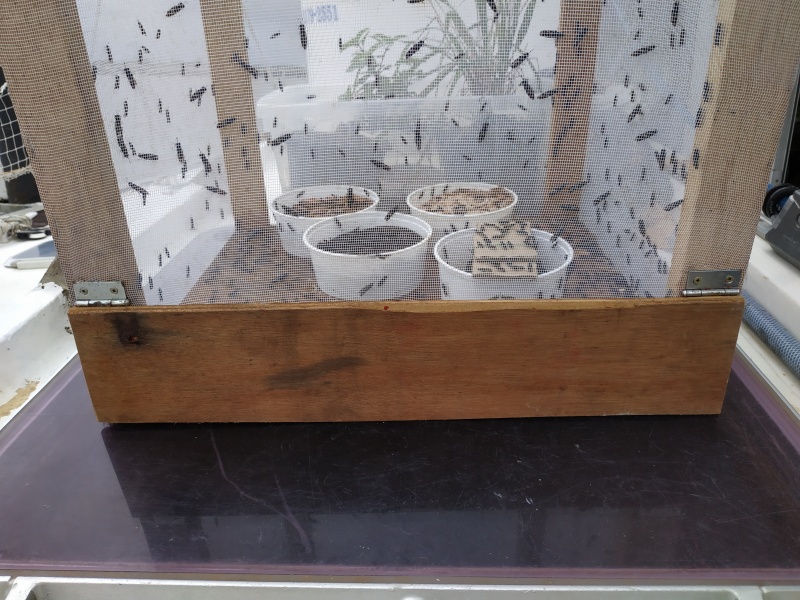
If your BSF breeding project is carried out in a warm environment all year round with a natural presence of flies, this step is unnecessary. If, on the other hand, you think that flies would not come/remain naturally (like us on the boat), it is possible to create a closed-cycle system.
After testing a system where the mosquito net was directly above the box, we decided to build a separate aviary, mainly for waterproofing reasons. We were able to fill in the holes on top of our box and we can protect the flies and eggs in case of bad weather.
For the aviary construction:
Wooden frame:
- With a saw, cut the cleats and board to the right dimensions
- With screws, fix the 4 cleats of 80cm to the 4 corners of the board. Make sure they are all in the same direction.
- With screws, fix a 41cm cleat between two vertical cleats. Put its smallest side vertically, its width should perfectly fit the vertical cleats. It must be at the highest level, in the continuity of the vertical cleats.
- With screws, fix the second 41cm cleat.
- With angles, fix a 40cm strip between two vertical cleats. Put its smallest side horizontally. Its width should perfectly fit the vertical cleats. It must be at the highest level; in the continuity of the vertical cleats.
- Attach the second 40cm cleat.
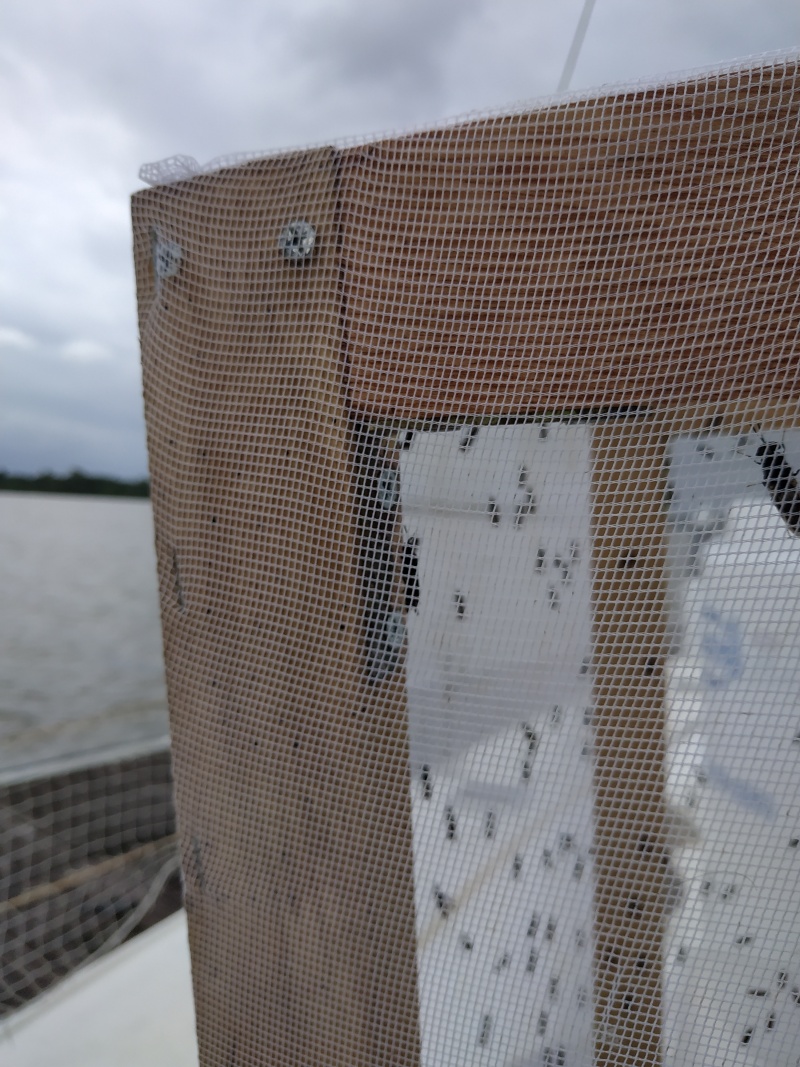
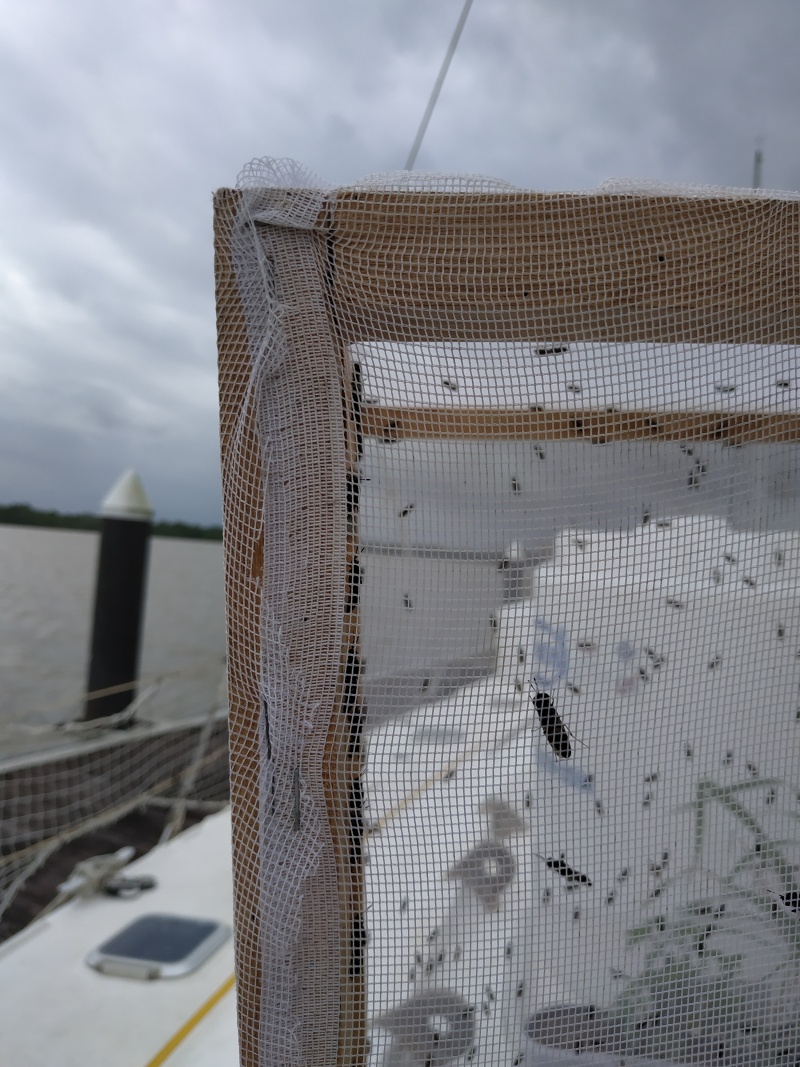
Mosquito net and opening:
- Staple the end of the screen to a cleat, the entire height.
- Pull the screen by stretching it as far as it will go to the next strip.
- Staple it every time you pass a corner until you return to the starting point.
- Do the same on the top of the aviary
- Cut the board for the opening
- Attach two hinges to it
- Attach the two hinges on 2 vertical cleats (over their width)
- Cut the screen over the entire surface of the opening
Larvae management:
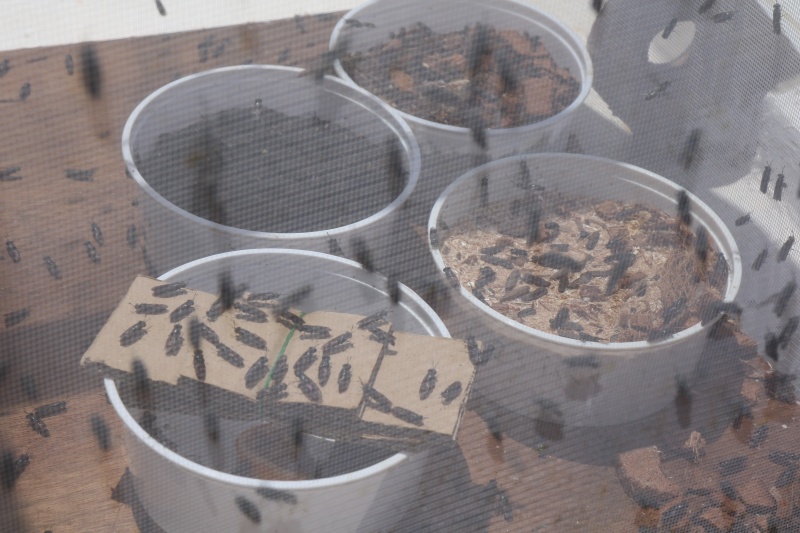
In the aviary, put:
- The egg-laying supports placed above a box in which waste is placed
- The box with the nymphs in their substrate
- A box in which a cloth soaked in water will be placed, to be changed regularly.
Collect the larvae regularly and put the desired number in a box containing the dry substrate in which they will be buried. Adapt the size of the box according to the number of larvae recovered
Transférer la boîte dans cet espace et laisser la transformation en mouche, la reproduction et la ponte se faire. Récupérer les supports de pontes et les suspendre au dessus des déchets dans la boîte dans où attendre que ceux ci éclosent avant de les mettre.
Étape 3 - Cycle de vie des mouches soldats noires
Avant de pouvoir mettre en place un élevage de BSF, il est important de comprendre son cycle de vie.
Celui se décompose en 4 phases principales:
- Stade larvaire
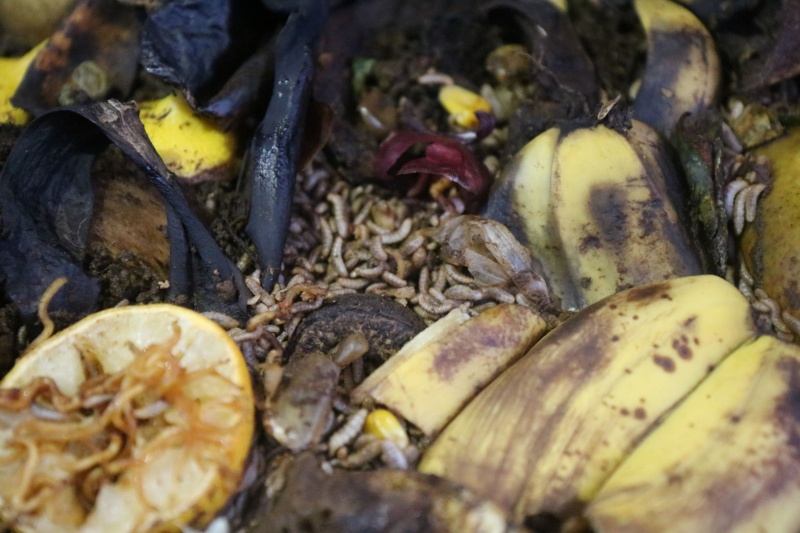
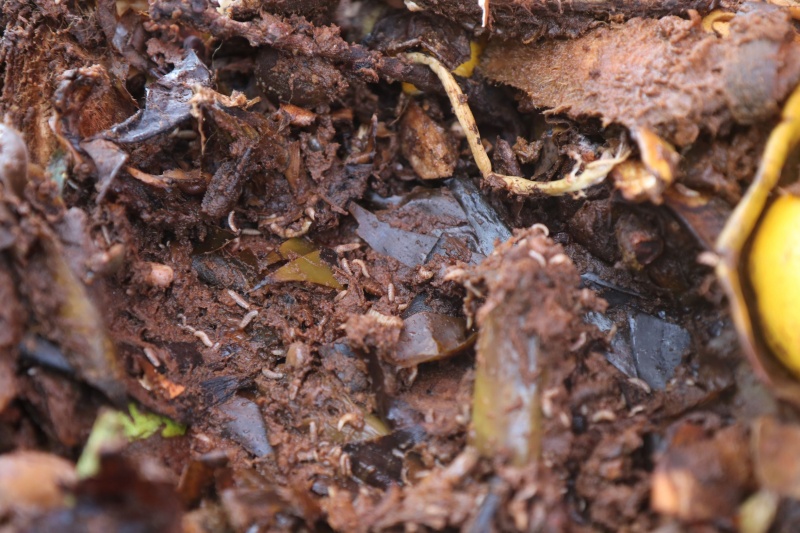
Le stade larvaire est le seul ou la BSF va chercher à se nourrir. Ce sera son unique objectif, dans le but de faire une réserve de graisse suffisante pour pouvoir se transformer en nymphe, puis en mouche et se reproduire. Lors de sa vie, la larve prend 6000 fois sa masse initiale (Comme si un bébé atteignait le poids d'un éléphant en 2 semaines!!). A ce stade, la larve est de couleur blanche et passera de quelques millimètres à 2.5 cm de longueur.
Son environnement se limitera aux déchets que vous lui donnerez, dans lesquels elle s'enfouira pour se nourrir.
Ce stade dure en moyenne entre 14 et 16 jours
Pour les larves, les conditions de vie optimales peuvent être résumées ainsi :
- Climat chaud : la température idéale se situe entre 24 et 30°C. S'il fait trop chaud, les larves ramperont loin de la nourriture à la recherche d'un endroit plus frais. S'il fait trop froid, les larves ralentiront leur métabolisme, mangeront moins et se développeront plus lentement.
- Environnement ombragé : les larves évitent la lumière et recherchent toujours un environnement ombragé, à l'abri de la lumière du soleil. Si leur source de nourriture est exposée à la lumière, ils se déplaceront plus profondément dans la couche de nourriture pour échapper à la lumière.
- Taux d'humidité : la source de nourriture doit être très humide avec une teneur en eau comprise entre 60% et 90% afin que les larves puissent ingérer la substance.
- Pré-Nymphe
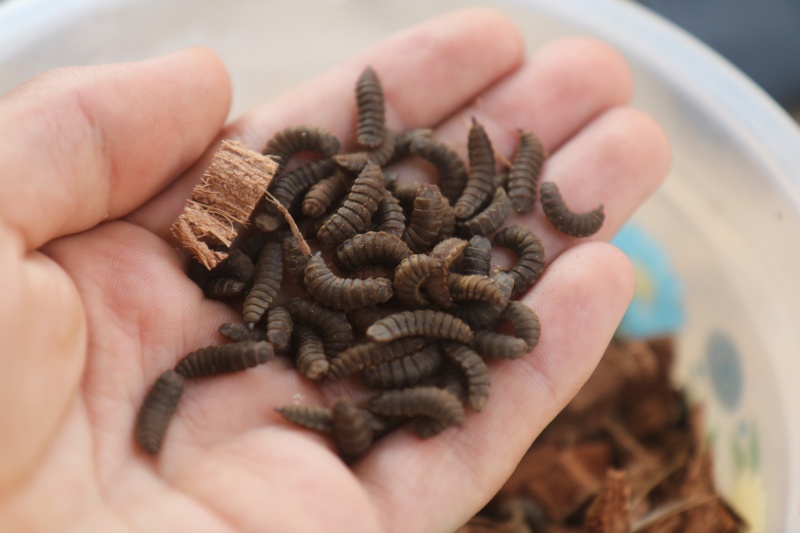
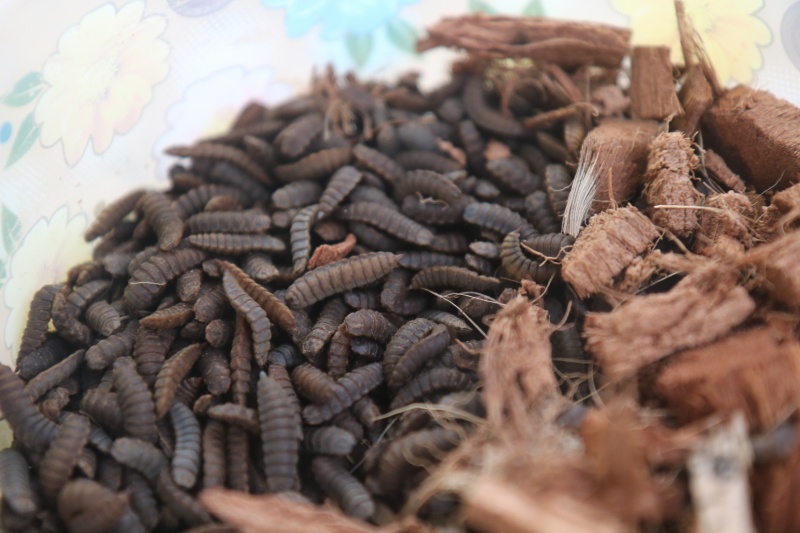
Une fois qu'elle a accumulé assez de réserve, la larve va se transformer en pré-nymphe. A ce moment, elle remplace sa partie buccale par une structure en forme de crochet et devient brun foncé à gris anthracite. Elle utilisera ce crochet pour s'extraire de son environnement humide afin de rejoindre un lieu sec, ombragé et à l'abri des prédateurs pour se transformer en nymphe
Il faut donc prévoir une rampe de sortie vers un endroit sec, dans lequel elle pourra s'enterrer pour pouvoir initier le processus de nymphose
- Nymphe
Une fois dans un environnement propice, la larve devient nymphe, arrête de bouger et est prête à se transformer en mouche. Ce processus va prendre entre deux et trois semaines.
- Mouche
Du moment de son éclosion jusqu'à sa mort, la BSF n'aura qu'un but: se reproduire. Celle-ci vivra environ 1 semaine et n'a pas besoin de se nourrir, seule une source d'eau sera nécessaire pour qu'elle reste hydratée.
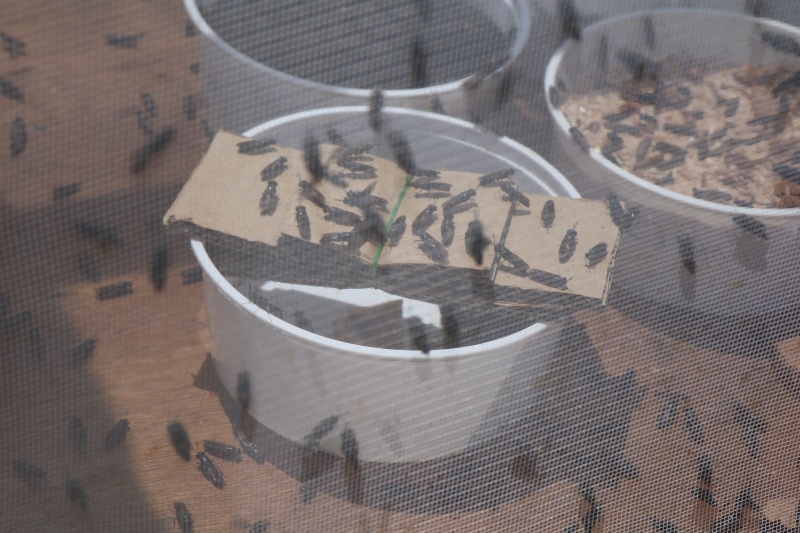
Les BSF ont par contre besoin de la lumière naturelle du soleil pour se reproduire ainsi que d'une température optimale comprise entre 25 et 32°C. Une fois qu'elles ont trouvé leur partenaire, les femelles vont chercher un endroit pour pondre. Elles apprécient particulièrement les interstices et les pondoirs peuvent être composés par exemple de carton alvéolé. De plus, elles vont chercher à pondre au plus près de la source de nourriture afin que dés leur éclosion, les larves puissent se nourrir.
La partie la plus délicate reste la reproduction, le cycle de vie de la mouche étant très court, les conditions d'accouplement doivent être remplies rapidement si l'on veut obtenir les générations suivantes.
Étape 4 - Nourriture
La larve de la BSF peut se nourrir de la plupart des déchets organiques même si elle les dégradera plus ou moins. Il est possible de ne leur rajouter de la nourriture que tout les deux à trois jours mais si les larves n'ont plus assez à manger, elles chercheront à s'extraire du bac pour partir à la recherche d'une autre source de déchets.
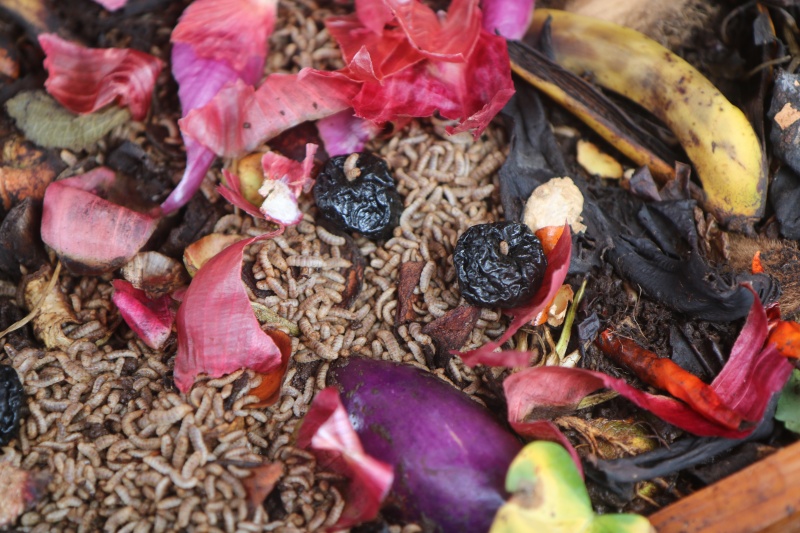
Les larves se nourriront surtout avec des déchets peu fibreux (fruits trop mûrs, légumes, certaines feuilles comme le chou...), il n'est donc pas utile de mettre les déchets verts (feuilles, branches, herbe). De même, les peaux de fruits épaisses (banane, orange, citron...) ou les noyaux ne seront pas dégradés complètement. Pour autant, elles gratteront toute la nourriture disponible et il peut être intéressant de les mettre, cela ne réduira juste pas le volume des déchets.
Il est aussi possible de leur donner des déjections animales ou humaines (fientes, toilettes sèches...). Les larves détruisant naturellement les bactéries telles que la salmonelle, il semble possible de pouvoir les donner aux animaux sans risque de transmission.
Les conditions de substrat optimales pour les larves peuvent être résumées ainsi :
- Profondeur: une dizaine de cm. S'il y'a plus, les larves iront s'enfouir plus profondément et pourraient ne pas ressortir. S'il y'a moins celles ci ne pourront pas s'enfouir correctement.
- Nutriments : les substrats riches en protéines et les hydrocarbonates facilement disponibles assurent une bonne croissance larvaire.
- Aspect de la nourriture: les larves n'ayant pas d’appareil de mastication, l'accès aux nutriments sera plus facile si le substrat est composé de petits morceaux ou même sous forme liquide ou pâteuse.
- Fréquence de remplissage: toujours vérifier que les larves ont assez de nourriture. Si les larves encore blanches (pas encore au stade de pré-nymphes) cherchent à s'extraire cela peut en être la cause.
- Humidité: 80% d'humidité est l'idéal. Si le substrat est trop sec elles ne pourront pas bien assimiler les aliments, si il est trop humide elles chercheront à sortir vers un endroit plus sec.
Étape 5 - Récolte des larves
Au bout de 2 semaines passée à se nourrir des déchets, les larves de BSF peuvent être récoltées. A ce stade, les larves ont atteint leur poids maximum, mais ne se sont pas encore transformées en pré-nymphe. Leur valeur nutritionnelle est donc à son maximum. La récolte est le processus par lequel les larves sont séparées du résidu. Pour ce faire, on peut utiliser un tamis à manuel ou automatisé qui permet de séparer facilement les larves des résidus.
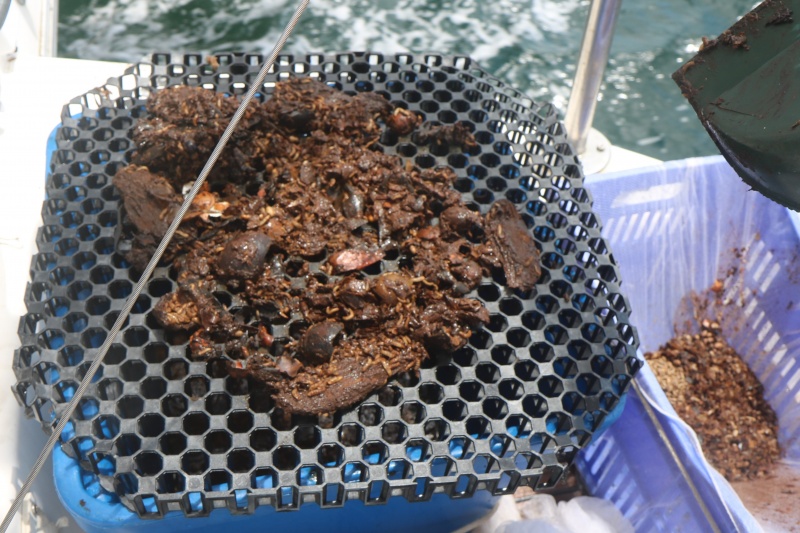
- Utiliser une pelle pour étaler un couche de compost et de larves sur le tamis. D'après nos essais, il est préférable d'utiliser un tamis avec des mailles relativement grande.
- Verser de l'eau sur la couche étalée pour emporter les larves dans le bac
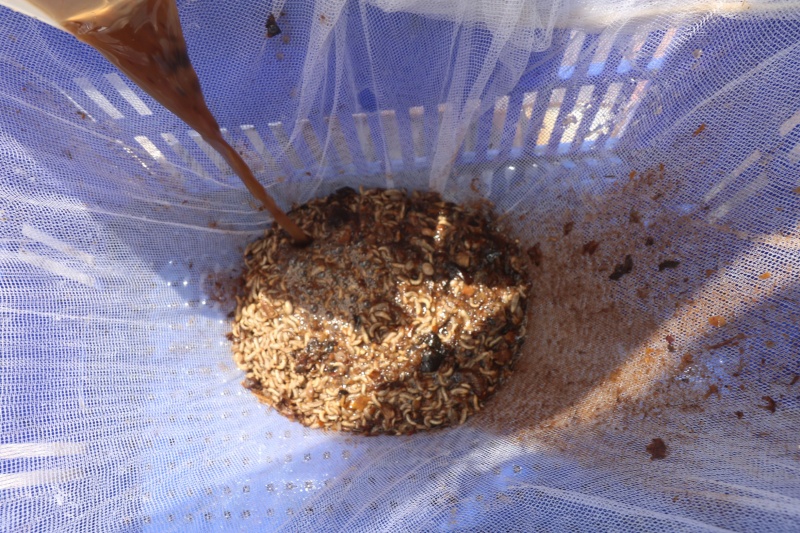
- Une fois le bac plein, verser le dans une caisse sur laquelle vous aurez au préalable installée un filtre plus fin pour récupérer les larves (une moustiquaire fonctionne très bien).
- Les larves ainsi récoltées peuvent être données directement à manger à des animaux (volailles, poissons...) ou déshydratées (au four solaire par exemple) et réduites en farine pour les conserver.
- Le résidu de déchets organiques peut être séché au soleil et utilisé comme compost.
Notes et références
[1] Erickson, M. C., M. Islam, C. Sheppard, J. Liao, and M. P. Doyle. 2004. Reduction of Escherichia coli 0157:H7 and Salmonella enterica serovar Enteritidis in chicken manure by larvae of the black soldier fly. J. Food Protection. 67:685-690
https://www.eawag.ch/en/department/sandec/projects/mswm/black-soldier-fly-biowaste-processing/
Published
 Français
 English
 Deutsch
 Español
 Italiano
 Português