(Page créée avec « Solar multicooker. ») |
(update property name) |
||
| (34 révisions intermédiaires par 3 utilisateurs non affichées) | |||
| Ligne 1 : | Ligne 1 : | ||
| − | {{ | + | {{Tuto Details |
|SourceLanguage=fr | |SourceLanguage=fr | ||
|Language=en | |Language=en | ||
|IsTranslation=1 | |IsTranslation=1 | ||
|Main_Picture=Multicuiseur_solaire_IMG_8725.JPG | |Main_Picture=Multicuiseur_solaire_IMG_8725.JPG | ||
| − | |Description= | + | |Description=Solar oven + Heat saving slow cooker+ dryer. |
|Area=Food, Energy | |Area=Food, Energy | ||
|Type=Tutorial | |Type=Tutorial | ||
| Ligne 12 : | Ligne 12 : | ||
|Cost=30 | |Cost=30 | ||
|Currency=EUR (€) | |Currency=EUR (€) | ||
| − | |Tags=Solaire, Cuisson, four, marmite, | + | |Tags=Solaire, Cuisson, four, marmite, LT4Refugees |
|SourceLanguage=fr | |SourceLanguage=fr | ||
|Language=en | |Language=en | ||
|IsTranslation=1 | |IsTranslation=1 | ||
}} | }} | ||
| − | {{ | + | {{Introduction |
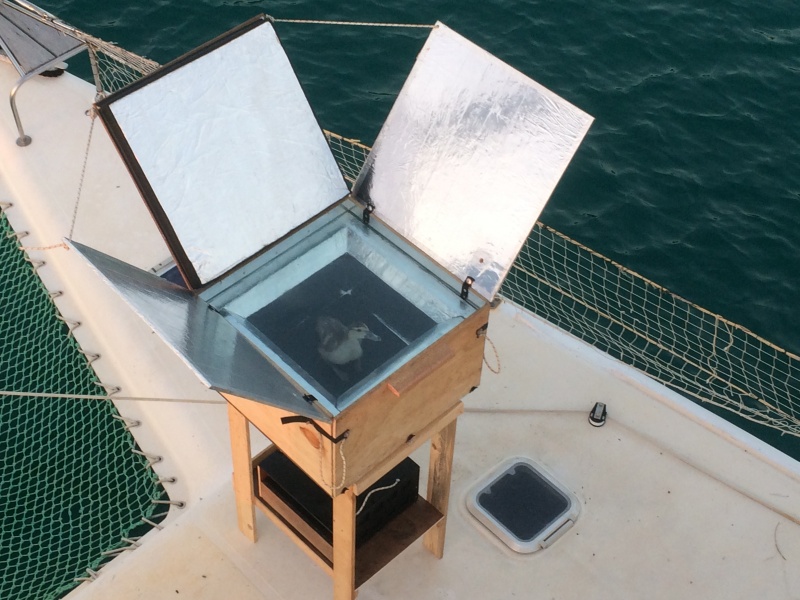
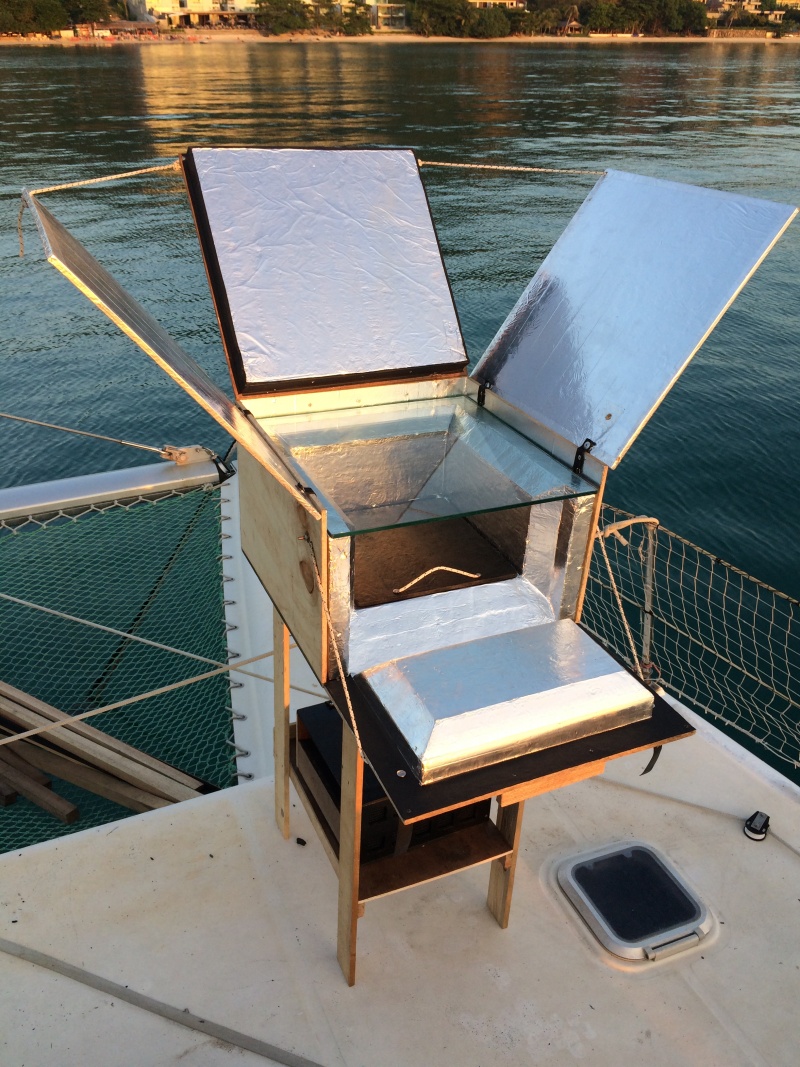
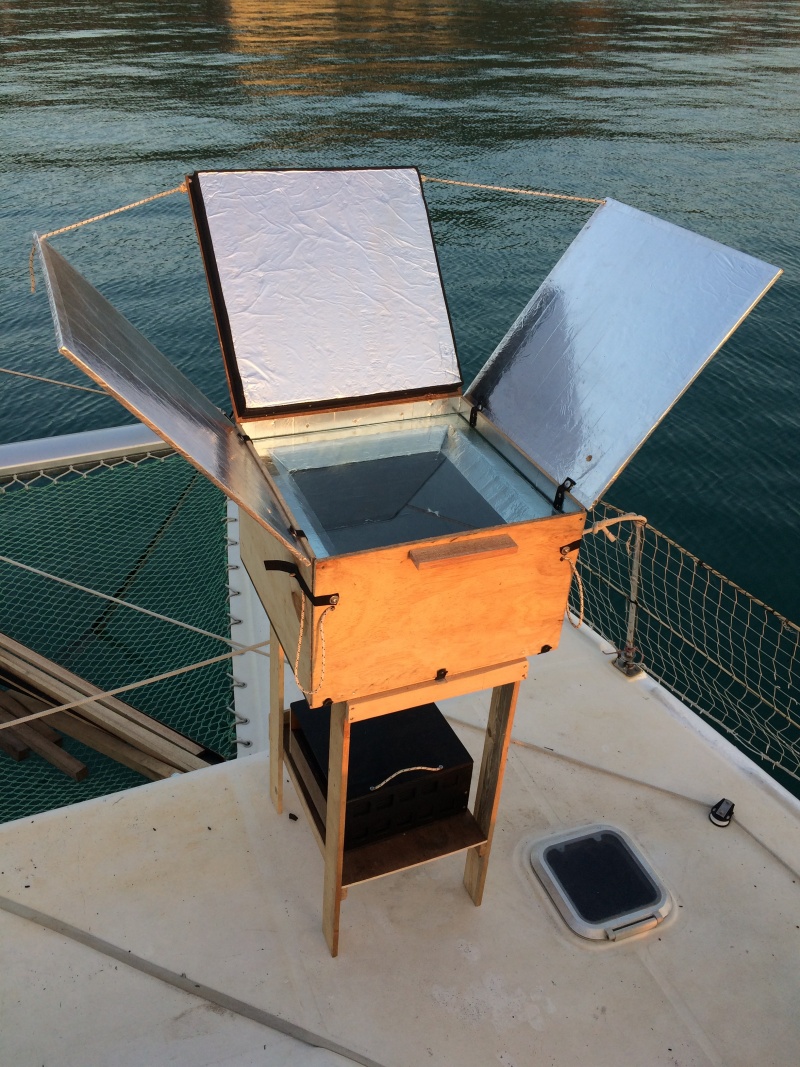
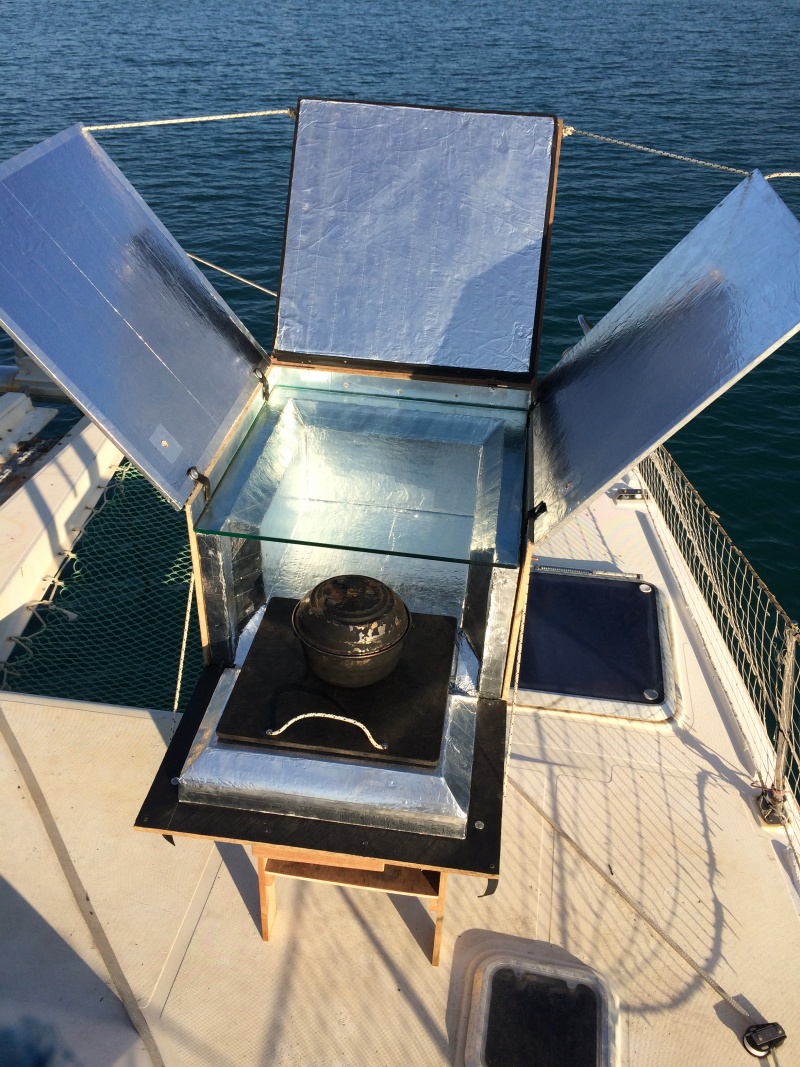
| − | |Introduction= | + | |Introduction=This model combines different low-tech technologies. The solar oven traps the sun's rays and concentrates them behind a glass window to increased the temperature in the cooking chamber. If the insulation of the oven is thick enough, the cooking will continue even with the panels closed. |
| + | When the oven is hot, if the door is open, the hot environment is perfect for drying fruit because they are protected from the direct sunlight. | ||
| − | + | Ps : A »The closed box can be used as a cooler. | |
}} | }} | ||
| − | {{ | + | {{Materials |
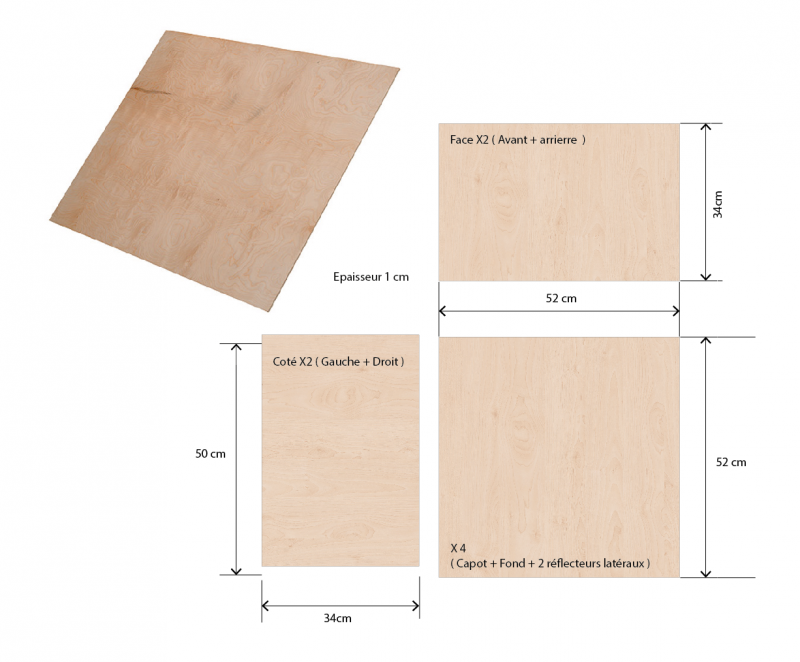
|Step_Picture_00=Multi_cuiseur_Solaire_Capture_d_e_cran_2017-12-10_a_12.55.31.png | |Step_Picture_00=Multi_cuiseur_Solaire_Capture_d_e_cran_2017-12-10_a_12.55.31.png | ||
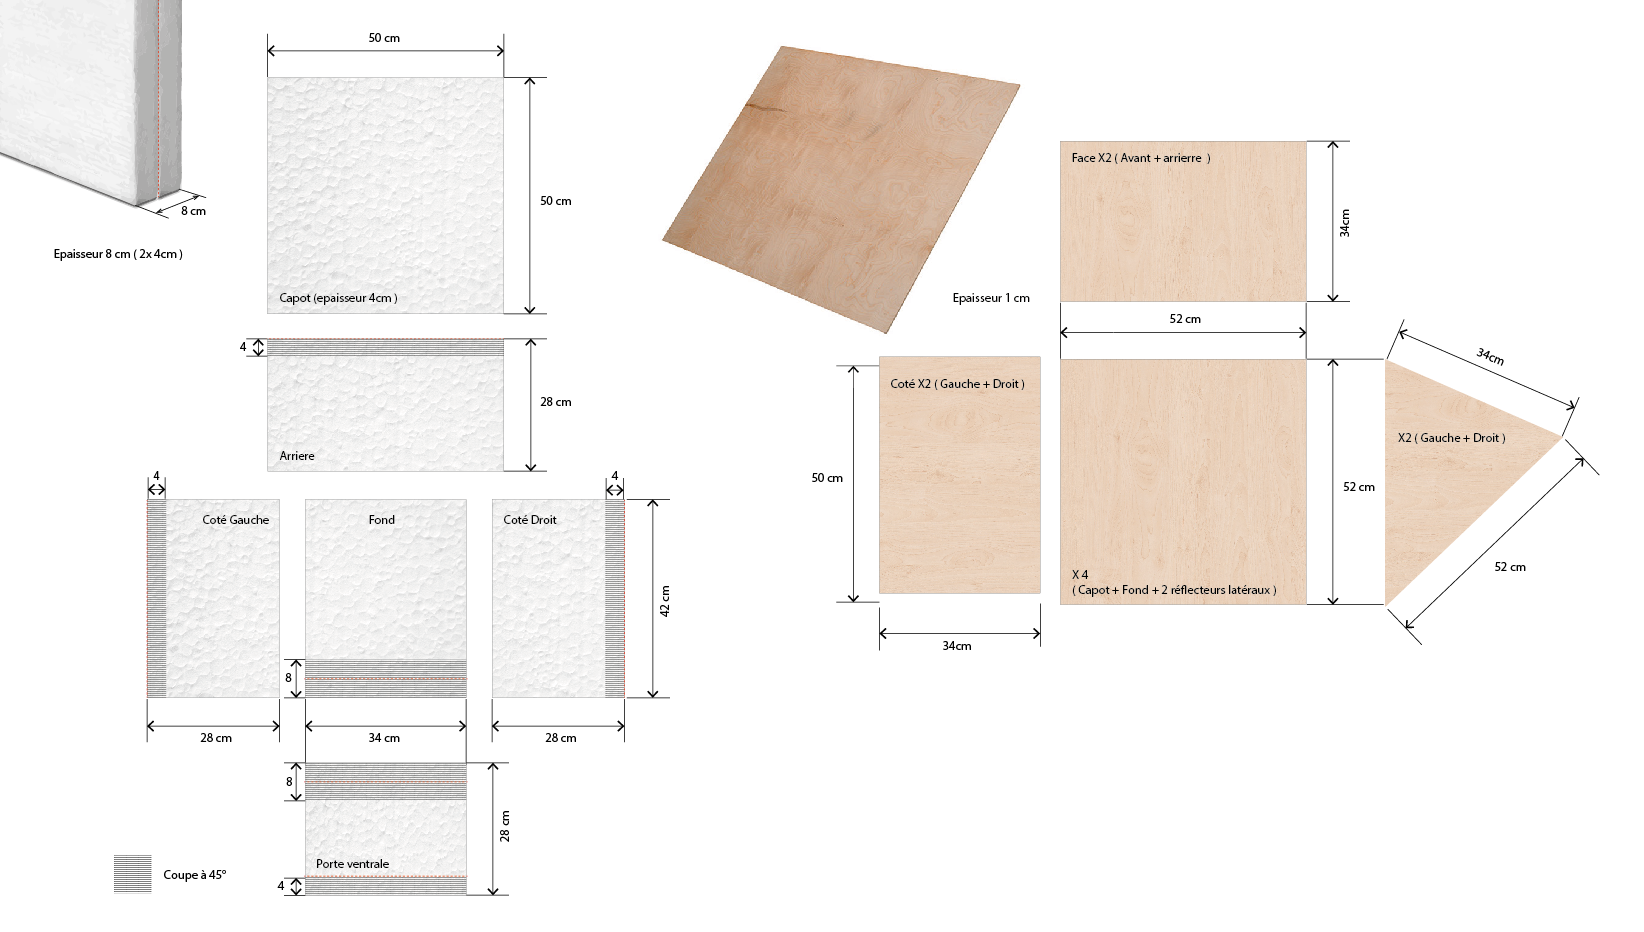
| − | |Material= | + | |Material=• Polystyrene boards |
| − | + | • Wood boards. | |
| − | + | • 8mm glass (size: 50cmX50cm) | |
| − | + | • Aluminium scotch or survival blanket ( silver side outwards ). | |
| − | + | • Pop-rivets. | |
| − | + | • Inner tube | |
| − | + | • Cords. | |
| − | + | • Screws. | |
| − | |Tools= | + | |Tools=• Cutter |
| − | + | • Saw | |
| − | + | • Screw driver | |
| − | + | • Riveting machine | |
}} | }} | ||
| − | {{ | + | {{Separator}} |
| − | {{ | + | {{Tuto Step |
|Step_Picture_00=Multi_cuiseur_Solaire_IMG_8616.JPG | |Step_Picture_00=Multi_cuiseur_Solaire_IMG_8616.JPG | ||
|Step_Picture_01=Multi_cuiseur_Solaire_IMG_8608.JPG | |Step_Picture_01=Multi_cuiseur_Solaire_IMG_8608.JPG | ||
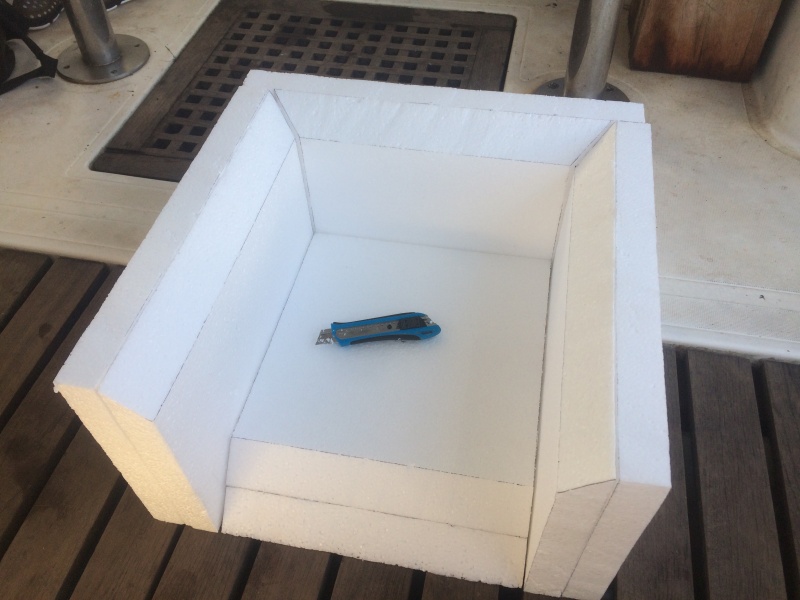
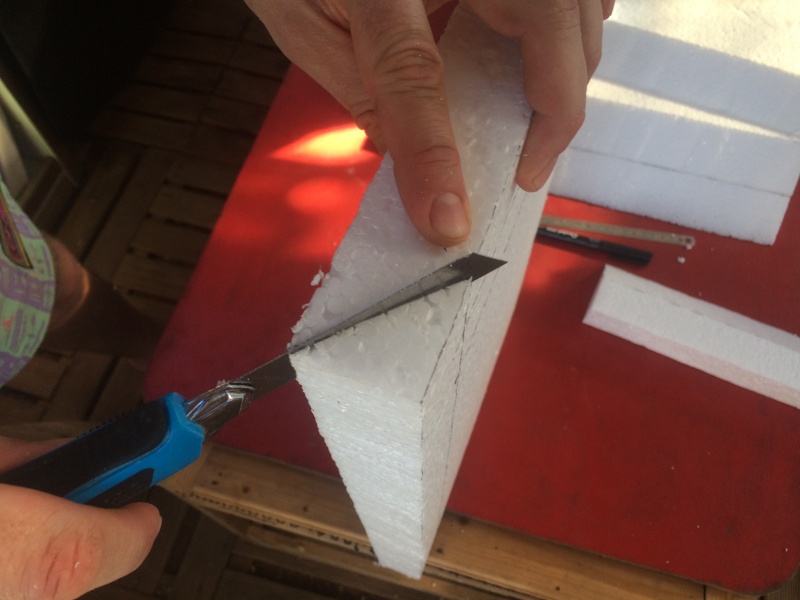
| − | |Step_Title= | + | |Step_Title=Build the polystyrene structure. |
|Step_Content= | |Step_Content= | ||
}} | }} | ||
| − | {{ | + | {{Tuto Step |
|Step_Picture_00=Multi_cuiseur_Solaire_Capture_d_e_cran_2017-12-10_a_12.50.39.png | |Step_Picture_00=Multi_cuiseur_Solaire_Capture_d_e_cran_2017-12-10_a_12.50.39.png | ||
|Step_Picture_01=Multi_cuiseur_Solaire_IMG_8638.JPG | |Step_Picture_01=Multi_cuiseur_Solaire_IMG_8638.JPG | ||
|Step_Picture_02=Multi_cuiseur_Solaire_IMG_0761.JPG | |Step_Picture_02=Multi_cuiseur_Solaire_IMG_0761.JPG | ||
| − | |Step_Title= | + | |Step_Title=Cover the inside with aluminium or survival blanket (silver side up) |
|Step_Content= | |Step_Content= | ||
}} | }} | ||
| − | {{ | + | {{Tuto Step |
|Step_Picture_00=Multi_cuiseur_Solaire_Capture_d_e_cran_2017-12-10_a_12.50.48.png | |Step_Picture_00=Multi_cuiseur_Solaire_Capture_d_e_cran_2017-12-10_a_12.50.48.png | ||
|Step_Picture_01=Multi_cuiseur_Solaire_Capture_d_e_cran_2017-12-10_a_13.01.29.png | |Step_Picture_01=Multi_cuiseur_Solaire_Capture_d_e_cran_2017-12-10_a_13.01.29.png | ||
| − | |Step_Title= | + | |Step_Title=Build the wood structure. |
|Step_Content= | |Step_Content= | ||
}} | }} | ||
| − | {{ | + | {{Tuto Step |
|Step_Picture_00=Multi_cuiseur_Solaire_IMG_0766.JPG | |Step_Picture_00=Multi_cuiseur_Solaire_IMG_0766.JPG | ||
|Step_Picture_01=Multi_cuiseur_Solaire_IMG_8640.JPG | |Step_Picture_01=Multi_cuiseur_Solaire_IMG_8640.JPG | ||
| − | |Step_Title= | + | |Step_Title=Attach the reflective panels. |
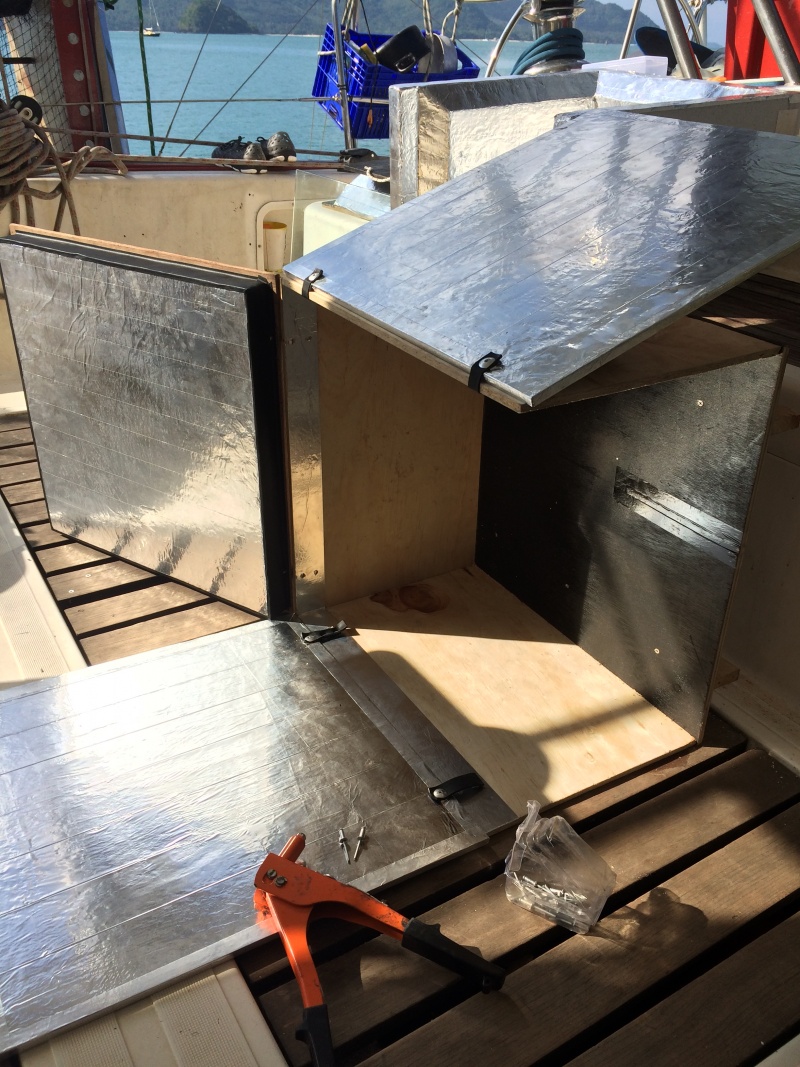
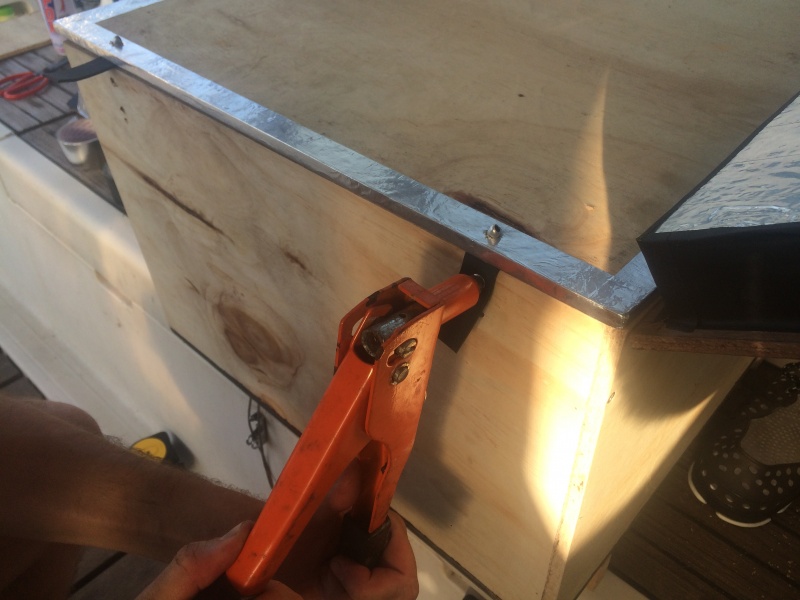
| − | |Step_Content= | + | |Step_Content=The use of the inner tube for the hinges enables a stable position and the right tension. The cords will help to keep the panels to 90° in relation to the sunlight. They also attach the panels to the base when they are closed. |
}} | }} | ||
| − | {{ | + | {{Tuto Step |
|Step_Picture_00=Multicuiseur_solaire_IMG_0804.JPG | |Step_Picture_00=Multicuiseur_solaire_IMG_0804.JPG | ||
|Step_Picture_01=Multicuiseur_solaire_IMG_0805.JPG | |Step_Picture_01=Multicuiseur_solaire_IMG_0805.JPG | ||
| − | |Step_Title= | + | |Step_Title=Build the oven door. |
| − | |Step_Content= | + | |Step_Content=The door is also insulated to minimize the thermal bridges. |
}} | }} | ||
| − | {{ | + | {{Tuto Step |
|Step_Picture_00=Multicuiseur_solaire_IMG_08211.JPG | |Step_Picture_00=Multicuiseur_solaire_IMG_08211.JPG | ||
|Step_Picture_01=Multicuiseur_solaire_IMG_0844.JPG | |Step_Picture_01=Multicuiseur_solaire_IMG_0844.JPG | ||
|Step_Picture_02=Multicuiseur_solaire_IMG_0846.JPG | |Step_Picture_02=Multicuiseur_solaire_IMG_0846.JPG | ||
|Step_Picture_03=Multicuiseur_solaire_IMG_0848.JPG | |Step_Picture_03=Multicuiseur_solaire_IMG_0848.JPG | ||
| − | |Step_Title= | + | |Step_Title=Cook. |
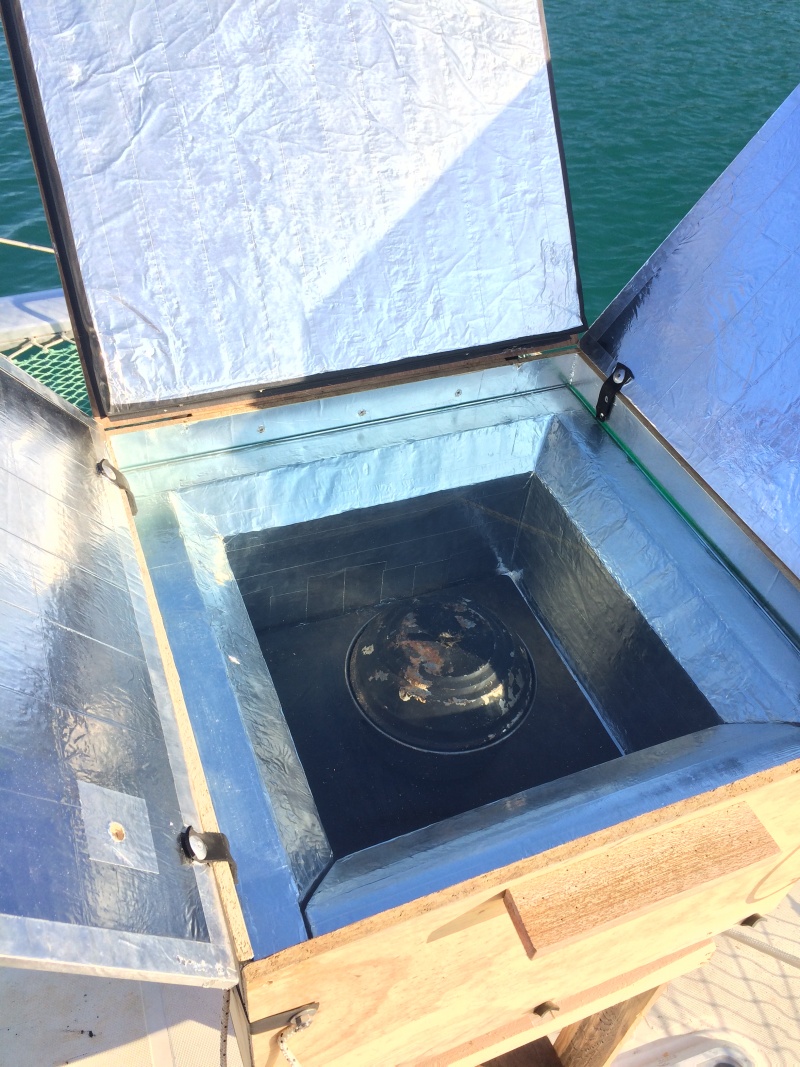
| − | |Step_Content= | + | |Step_Content=Once hermetically sealed, the oven's temperature can reach up to 90°C. The cooking tray helps by absorbing the sunlight. |
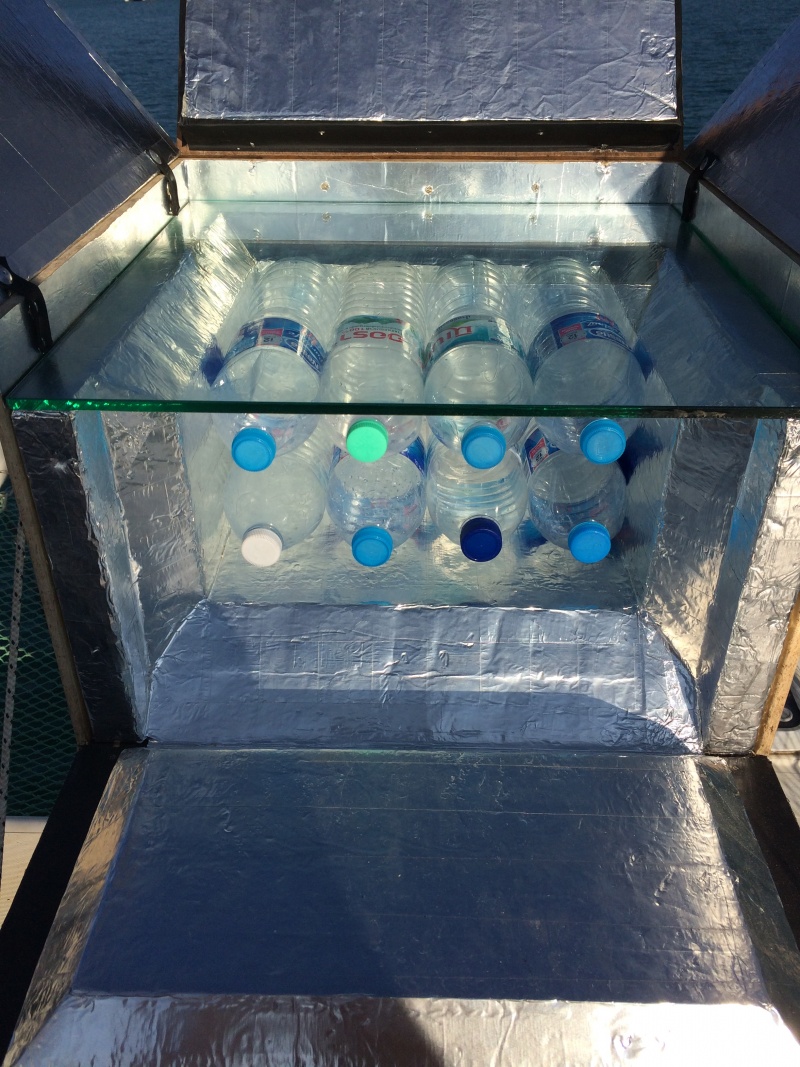
| + | This oven is designed to store and warm eight normal water bottles of 1,5L. | ||
}} | }} | ||
| − | {{ | + | {{Tuto Step |
|Step_Picture_00=Multicuiseur_solaire_IMG_8770.JPG | |Step_Picture_00=Multicuiseur_solaire_IMG_8770.JPG | ||
|Step_Picture_01=Multicuiseur_solaire_IMG_0836.JPG | |Step_Picture_01=Multicuiseur_solaire_IMG_0836.JPG | ||
|Step_Picture_02=Multicuiseur_solaire_IMG_0818.JPG | |Step_Picture_02=Multicuiseur_solaire_IMG_0818.JPG | ||
| − | |Step_Title= | + | |Step_Title=Build the dryer. |
| − | |Step_Content= | + | |Step_Content=Shielded from the sunlight with a ventilation grill. |
}} | }} | ||
| − | {{ | + | {{Notes |
|Notes= | |Notes= | ||
}} | }} | ||
| − | {{ | + | {{Tuto Status |
|Complete=Published | |Complete=Published | ||
}} | }} | ||
Version actuelle datée du 22 octobre 2019 à 16:07
Description
Solar oven + Heat saving slow cooker+ dryer.
Sommaire
Sommaire
- 1 Description
- 2 Sommaire
- 3 Introduction
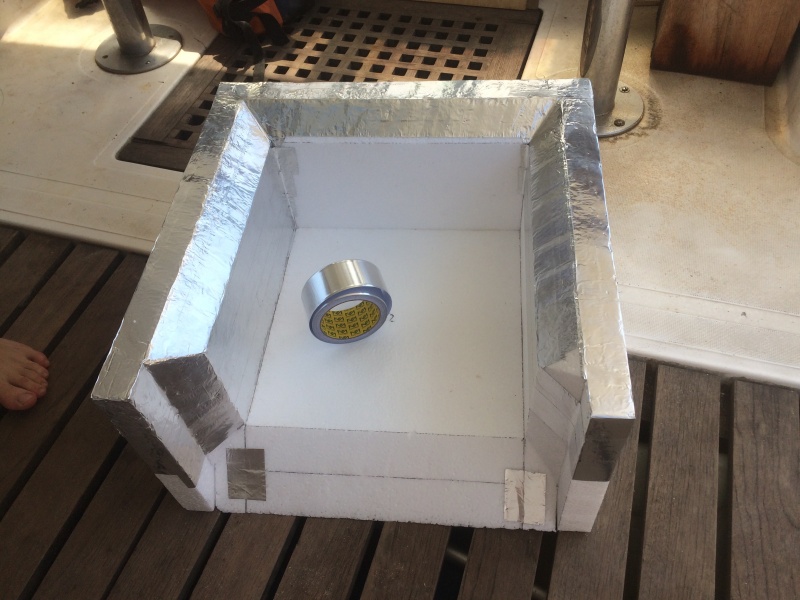
- 4 Étape 1 - Build the polystyrene structure.
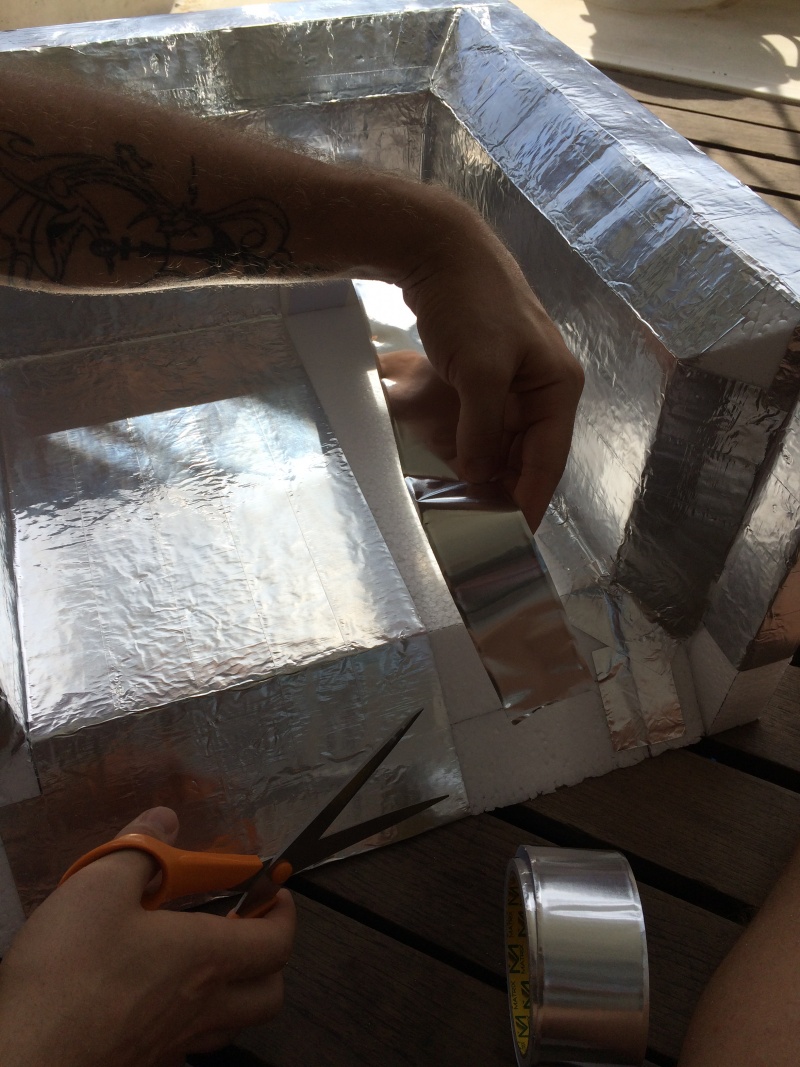
- 5 Étape 2 - Cover the inside with aluminium or survival blanket (silver side up)
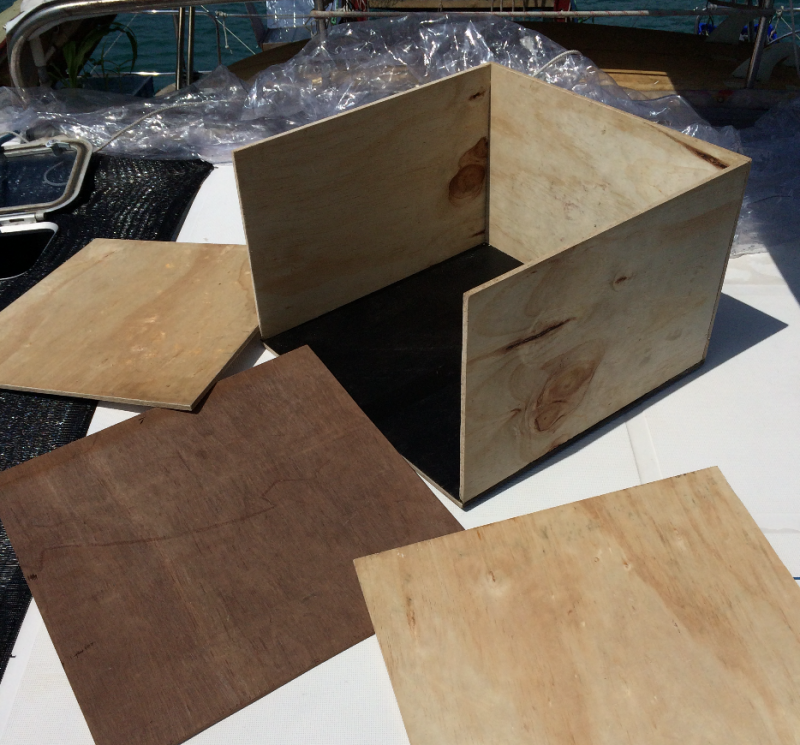
- 6 Étape 3 - Build the wood structure.
- 7 Étape 4 - Attach the reflective panels.
- 8 Étape 5 - Build the oven door.
- 9 Étape 6 - Cook.
- 10 Étape 7 - Build the dryer.
- 11 Commentaires
Introduction
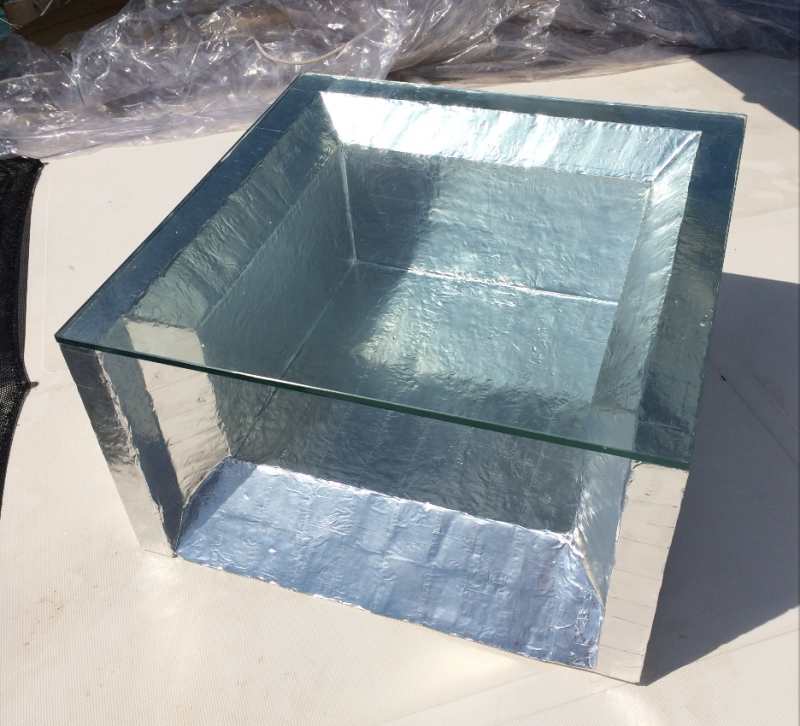
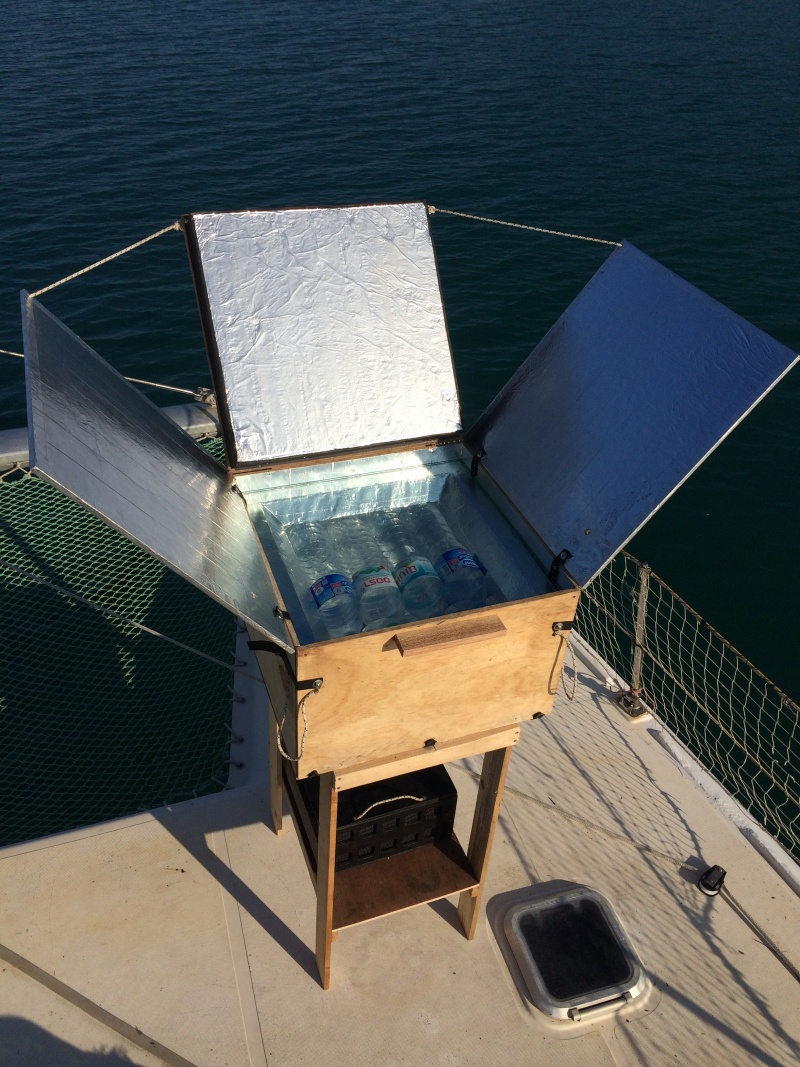
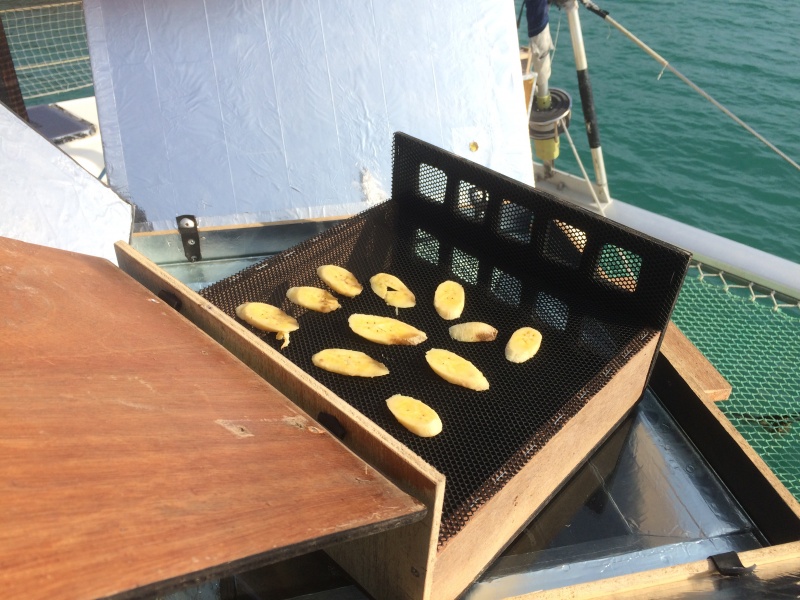
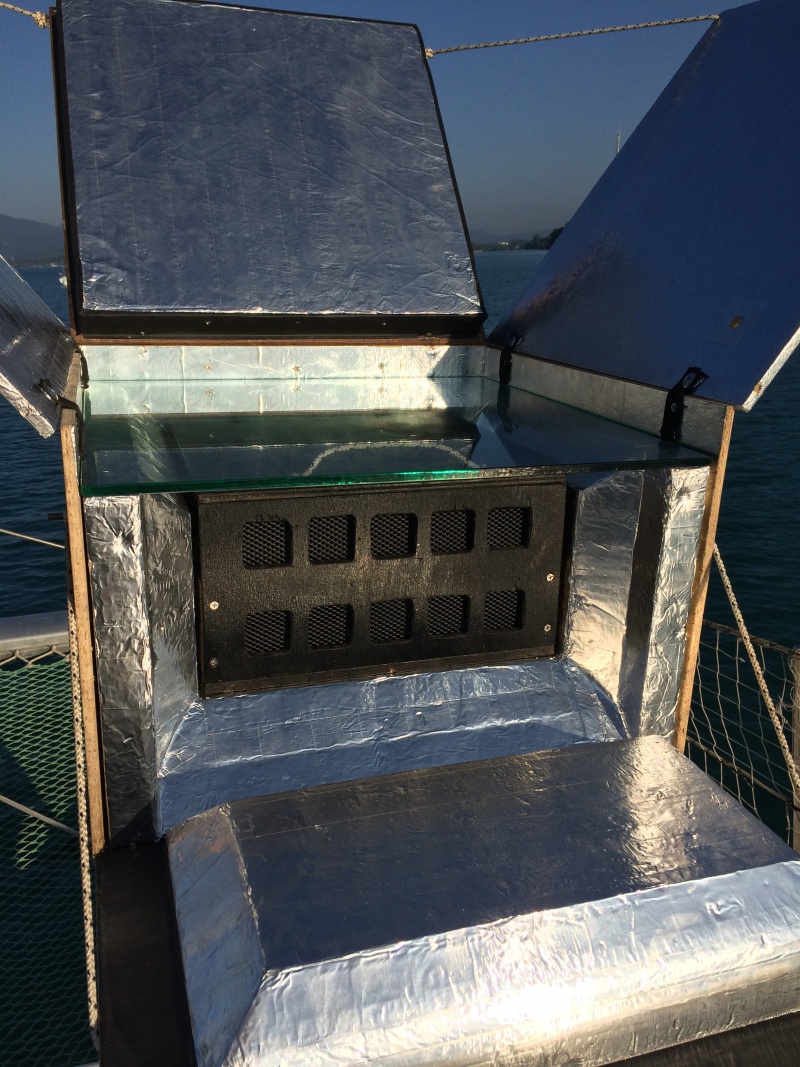
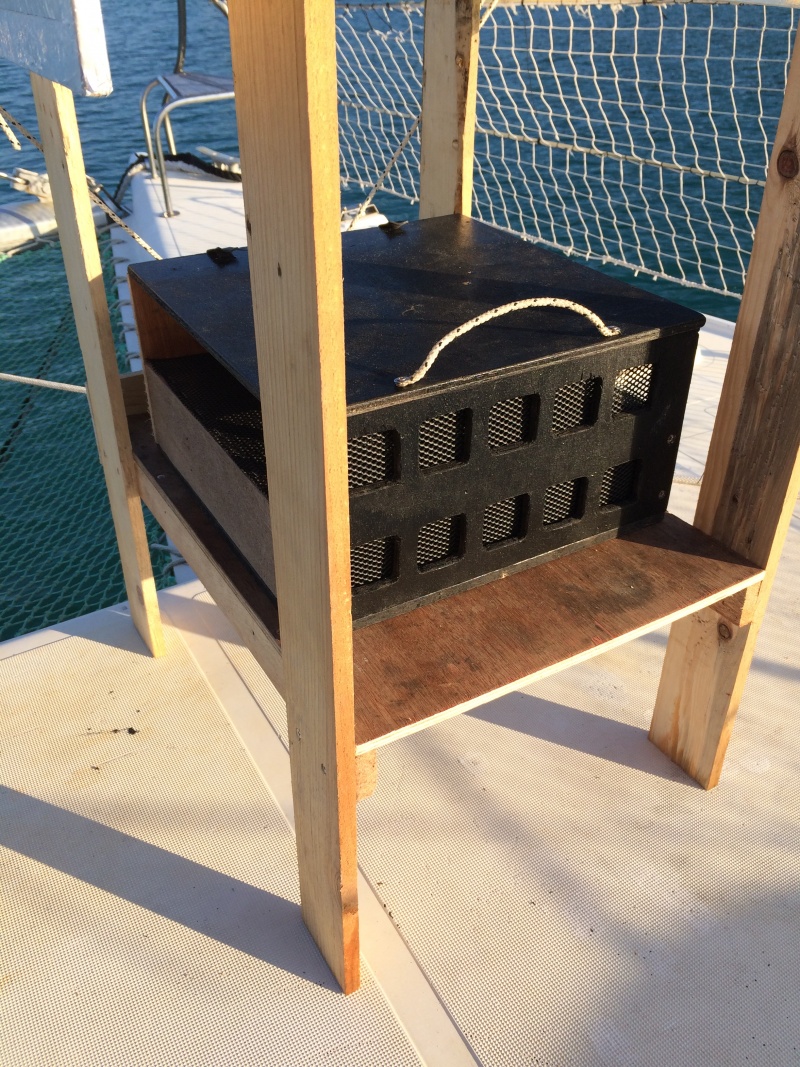
This model combines different low-tech technologies. The solar oven traps the sun's rays and concentrates them behind a glass window to increased the temperature in the cooking chamber. If the insulation of the oven is thick enough, the cooking will continue even with the panels closed. When the oven is hot, if the door is open, the hot environment is perfect for drying fruit because they are protected from the direct sunlight.
Ps : A »The closed box can be used as a cooler.
Étape 4 - Attach the reflective panels.
The use of the inner tube for the hinges enables a stable position and the right tension. The cords will help to keep the panels to 90° in relation to the sunlight. They also attach the panels to the base when they are closed.
Étape 6 - Cook.
Once hermetically sealed, the oven's temperature can reach up to 90°C. The cooking tray helps by absorbing the sunlight. This oven is designed to store and warm eight normal water bottles of 1,5L.
Published
 Français
 English
 Deutsch
 Español
 Italiano
 Português