Description
Harvesting rainwater and separating the first dirty rainwaters, washing the roofs, from the clean following ones. Here is a simple and efficient method based on a T-shaped pipe and a floating ball!
Introduction
Rainwater is fresh water, that we can almost drink (depending on regions and local pollution). It is interesting to harvest rainwater for various domestic uses : sanitation facilities (shower, toilets), watering a garden, ... When filtered, it can also be used for drinking.
An ingenious system of rainwater harvest has been implemented in Desde Oriente, at Punte de Lobos in Chile. In this place, there is a house where a bunch of inventions are tested in order to become self-sufficient and reduce one's environmental impact. There, all roofs are fitted with a gutter that allows to collect rainwater and direct it to a tank where it will be stored.
The issue lies in the fact that the first liters of rainwater wash the roofs from its accumulated dust, dead leaves and dirt. The simple and efficient tip is to separate these first dirty liters from the next thanks to a T-shaped pipe and a floating ball. This methods prevents the leaves, dirt and particles to clog the smaller piping and filters for clean water.Youtube
Matériaux
PVC pipes of different diameters, bends, junctions, T-shaped pipe
a 50 liters container
A ping-pong ball
Outils
Drill, drill bits
Saw or angle grinder
Equipements de protection individuelle
Étape 1 - Installation du système de récupération d'eau de pluie
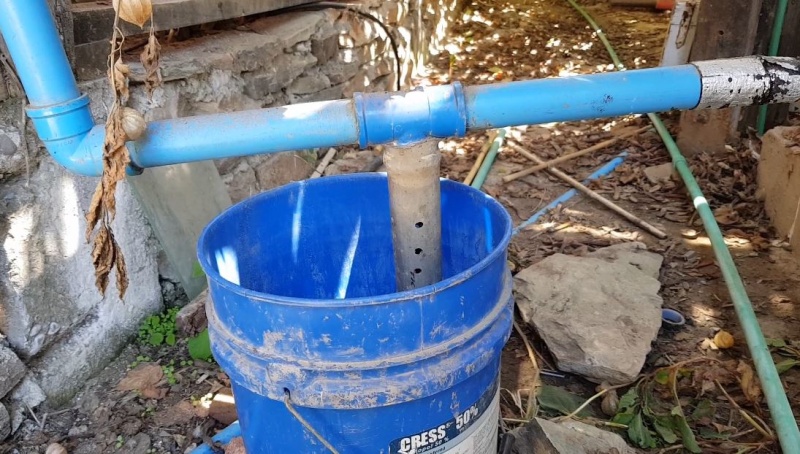
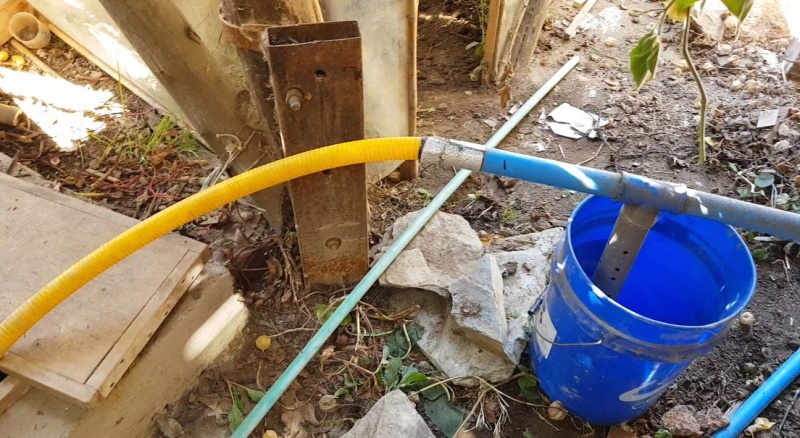
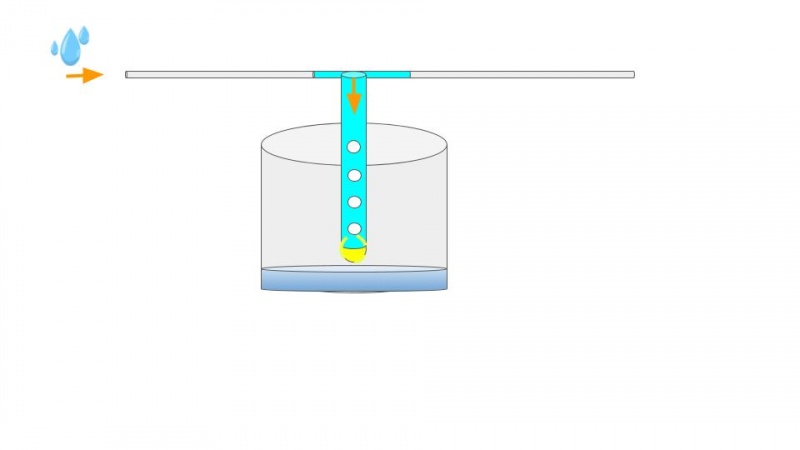
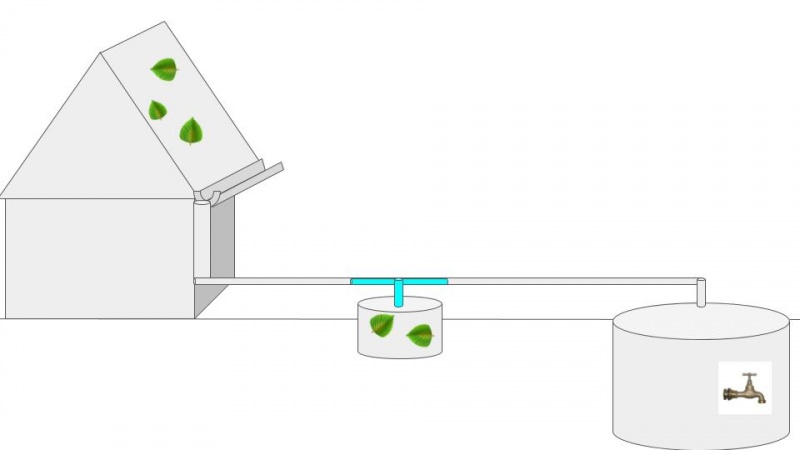
Le tuyau qui mène les eaux de pluie au réservoir (1) arrive horizontalement et se sépare en T :
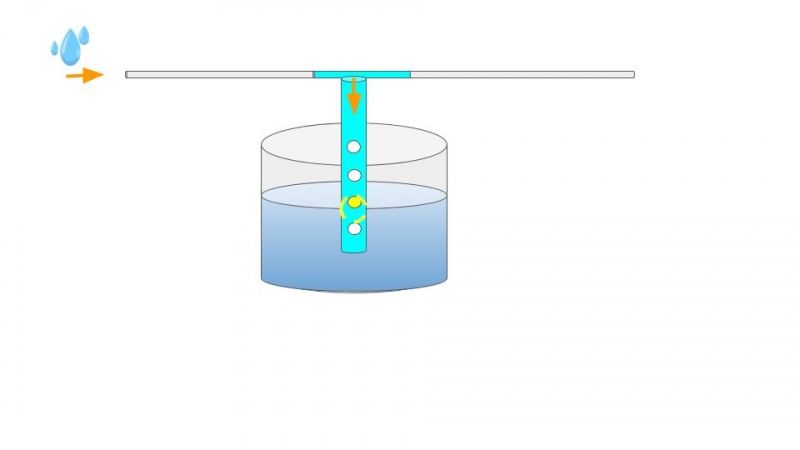
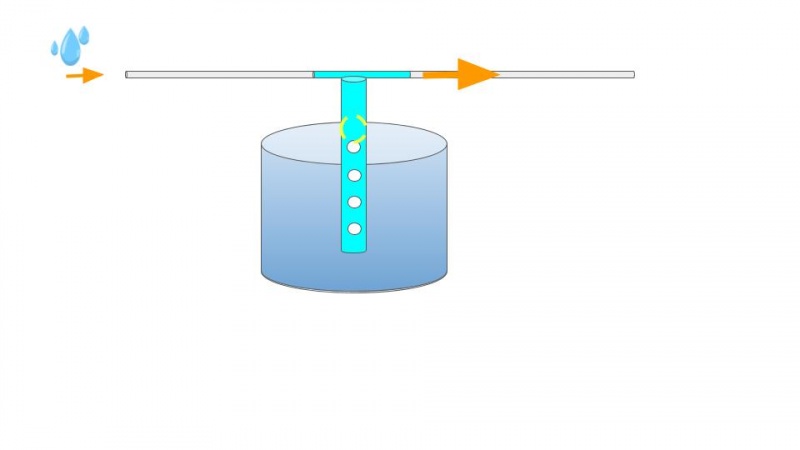
- Tout d'abord, l'eau va préférentiellement passer dans le tube vertical d'environ 50cm de long, qui conduit à un récipient (2) d'environ 50L (à adapter en fonction de la surface du toit). Ce tube est percé d'orifices, laissant sortir l'eau dans le récipient (2). A l'intérieur de ce tube se trouve une balle qui flotte et monte à mesure que le niveau d'eau dans le récipient (2) augmente. La balle monte jusqu'à ce qu'elle arrive au dessus des orifices. Le tube vertical est alors bouché, et l'eau va ainsi circuler dans le tube horizontal du T.
- Ce tube horizontal va conduire les eaux suivantes, propres, directement dans le réservoir (1) d'eau destinée à la consommation, également d'eau potable.
Les premiers 50L d'eau qui ont lavé le toit, récupérés dans le récipient (2) peuvent être utilisés pour l'arrosage du jardin.
Notes et références
Merci à Jorge, Rodrigo et Sean pour leur accueil à DesdeOriente !
Suivez le projet de Jorge a DesdeOriente, à Punta de Lobos, Chile, sur Instagram “desdeorientepuntadelobos” ou desdeoriente.cl.
La prochaine étape est de créer un lieu également autonome en eau et en énergie en plein cœur de Santiago, afin de démontrer qu'en ville aussi c'est possible ! Restez à l'affût !
Système hydraulique : http://lowtechlab.org/wiki/Système_hydraulique_global_d%27une_habitation
Système électrique :
http://lowtechlab.org/wiki/Système_électrique_global_d%27une_habitation
Nous sommes deux étudiantes en exploration de Low Tech en Amérique du Sud, pour suivre nos découvertes, c'est par ici : https://www.facebook.com/LAtelierLowTech/
Published
 Français
 English
 Deutsch
 Español
 Italiano
 Português