Description
How to create a filmed or written tutorial on the Lab' ?
Introduction
A low-tech can be an outcome from traditionnal or modern know-hows. It founds its utility in towns, just as well as in the countryside. It can make part of rich and industrialized environments, or in developing countries.
We advise you to think about its questions, spread out in three main themes : the need, the accessibility and the respect, in order to know if your project is truly a low-tech.
THE NEED Does the dispositive answers a basic need ? Food, energetic, or hygienic needs, drinkable water access, tools ?
ACCESSIBILITY Is it accessible from financial, technic, and materials point of view ? Is its realization cost affordable for this kind of need ? Does it calls on an artisanal know-how ? Are the ressources, materials and tools, locals or easily available in markets, fablabs or rubbish dump ?
RESPECT Does it respects environment ? Is it energy-friendly, fixable, or an outcome of recycling ? Does it respects local populations ? Is it appropriate with local way of life and culture ?
BE CAREFUL ! Avoid to submit a polluting dispositive. Avoid to promote a specific product or material that would not be open-source.
- Remarque : For non-complete low-techs documentations, it is asked to fill up a minimum, the context paragraph, along with the function of the low-tech. You can then share your ideas, experiences on the discussion part of the Lab'.
Étape 1 - The Fabrication Manual
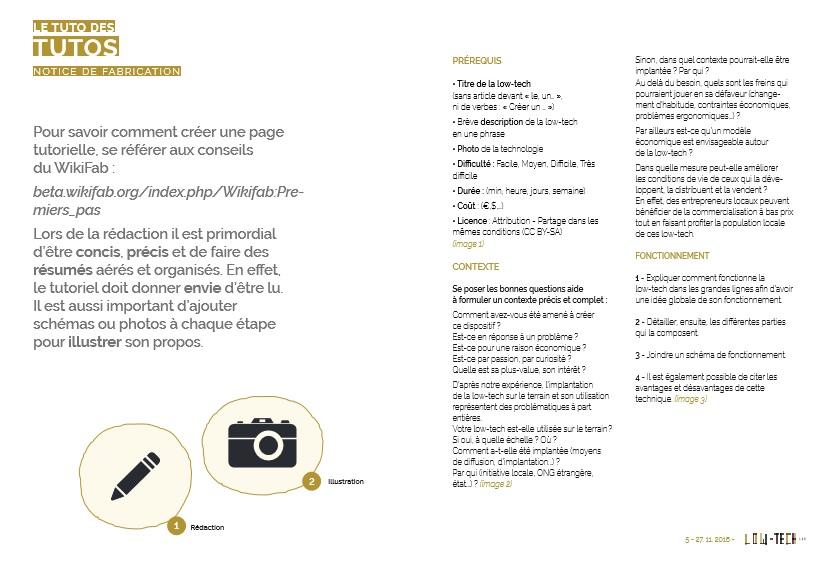
PREQUISITES
- Low-tech name (with no prepositions "the, a, etc.", with no verbs as "Create a/an..")
- Brieve description of the Low-Tech in one line
- Technology picture
- Difficulty : Easy, Middle, Hard, Very Hard
- Duration : (min, hour, day, week)
- Cost : (€, $, etc.)
- License : Attribution - Sharing in the same conditions (CC BY-SA) (image 1)
CONTEXT
To ask yourself right questions helps to formulate a precise and complete context : How have you been creating this device ? Was it to answer a problem ? Was it for an economic reason ? Was it for a hobby, or to fullfill your curiosity ? What is its added value, its interest ? According to our experience, the integration of the low-tech of the field represents a real problematic. Is your low-tech used on the field ? If yes, how big ? Where ? How has it been integrated (sharing means, integration ways, etc.) ? By who (local initiative, foreign NGO, state, etc.) ? (image 2) Otherwise, how could it be implemented ? By who ? Beyond the necessity, what are the obstacles that could disfavor it (changing in the habits, economic constraints, ergonomic problematics, etc.) ? Furthermore, is a business model possible around the low-tech ? In which way could it improve the life of the ones developing it, dealing it, selling it ? Indeed, local entrepreneurs can beneficiate of low cost commercialization, making local population profit of these low-techs in the same time.
Est-ce en réponse à un problème ?
Est-ce pour une raison économique ?
Est-ce par passion, par curiosité ?
Quelle est sa plus-value, son intérêt ?
D’après notre expérience, l’implantation de la low-tech sur le terrain et son utilisation représentent des problématiques à part entières.
Votre low-tech est-elle utilisée sur le terrain ?
Si oui, à quelle échelle ?
Où ?
Comment a-t-elle été implantée (moyens de diffusion, d’implantation...) ?
Par qui (initiative locale, ONG étrangère, état...) ? (image 2)
Sinon, dans quel contexte pourrait-elle être implantée ?
Par qui ?
Au delà du besoin, quels sont les freins qui pourraient jouer en sa défaveur (changement d’habitude, contraintes économiques, problèmes ergonomiques...) ?
Par ailleurs est-ce qu’un modèle économique est envisageable autour de la low-tech ?
Dans quelle mesure peut-elle améliorer les conditions de vie de ceux qui la développent, la distribuent et la vendent ?
En effet, des entrepreneurs locaux peuvent bénéficier de la commercialisation à bas prix tout en faisant profiter la population locale de ces low-tech.
FUNCTIONING
1 - Explain how is working the low-tech in the high lines, in order to get a global idea of its functioning. 2 - Detail, then, the different parts composing it. 3 - Join a functioning schematic 4 - It is also possible to cite pros and cons of this technique. (image 3)
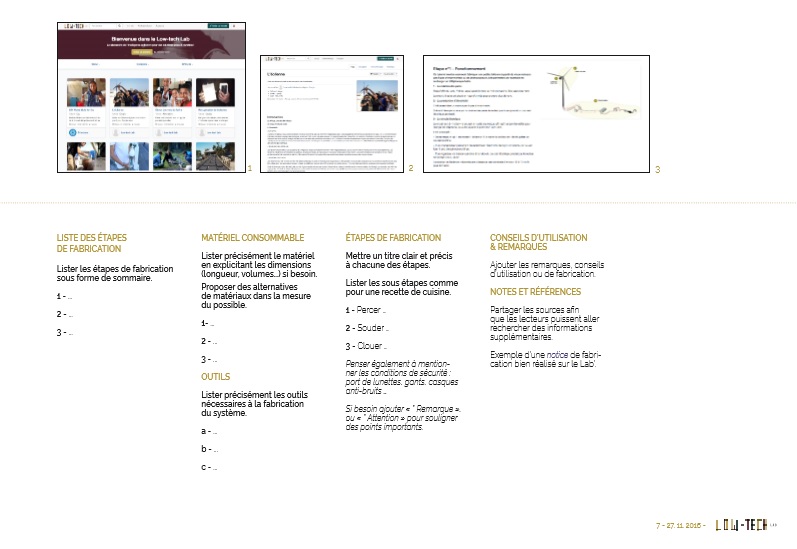
LIST OF FABRICATION STEPS
List fabrication steps in the form of a summary.
1 - ...
2 - ...
3 - ...
CONSUMABLE MATERIAL
List precisely the material, expliciting dimensions (distances, volumes, etc.) if needed. Present, if possible, alternatives in the choice of materials.
1 - ...
2 - ...
3 - ...
TOOLS
List precisely needed tools to build the system.
a - ...
b - ...
c - ...
FABRICATION STEPS
Put a light and clear title to every steps. List sub-steps as you do for a cooking receipe. A sub-step represents an action.
1 - Drill ...
2 - Melt ...
3 - Nail ...
This also to mention security conditions : wearing of glasses, gloves, ear protectors, etc. If needed, add "*Remarks" or "*Warnings" to underline critical points.
DIRECTIONS FOR USE & REMARKS
Add remarks, directives of use, of fabrication.
NOTES AND REFERENCES
Share sources in order to let the readers look for additionnal informations.
Example of a step by step how to correctly realized on the Lab' : http://lab.lowtechlab.org/index.php?title=L%27%C3%A9olienne (So far in French)
Étape 2 - The movie making
1 - Tools
A camera, a microphone, SD cards, batteries, a tripod. Check before use the state of your tools : SD card with sufficient disk space, battery charged, etc.
2 - Location of the movie
Choose where does the action takes place, in order to have a good sound quality and good luminosity:
- Indoor, beware of the lack of light and artificial lights, that will impact your video quality. Think of fridges, clocks as well, that could create parasite sounds. These will be disappointing for the spectator watching your video.
- Outdoor, beware of backlighting and the lack of light. Concerning the sound, the wind is fatal. Protect your microphone and its exposure !
"In both cases:"
- Be careful that no big light pits are in your field of view.
- Avoid too big spaces, the backplane should rather be short.
- Filming during the day is highly recommended. At night, you'll get granulas on your images.
3 - Positionning of the camera
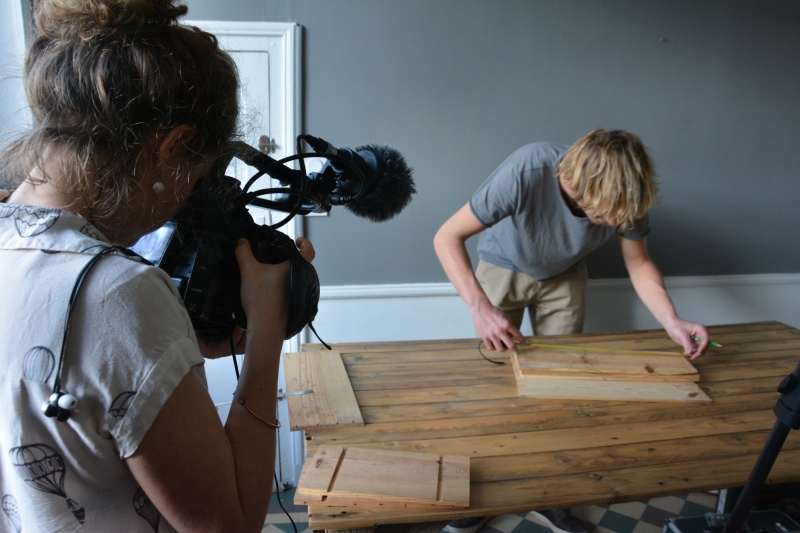
In order to know where to place the camera, ask the actor what he's going to do at each step. It is therefore easy to place the camera without being annoyed with his hands. On the workbench should only be present the material used at the precise step. This permits not to be visually polluted.
4 - Scenes
"Dissect steps" :
Film one scene per step, if possible.
- Vary short and large scenes to air the video.
- For explicative scenes (explanation of a step, of the context), prefer large scenes.
- For active scenes (filming the action), prefer short scenes.
- It is highly recommended to film two frames per action.
- Head to foot framings are not recommended, prefer middle range frames or short frames. - When someone is speaking, do not "cut his head off" during framing. Let an empty space above him.
- Avoid to place the person right in the center of the frame. Putting him on the side will bring dynamism to your scene.
- Filming static scenes is highly recommended to avoir any shaking.
- Put the camera on a tripod or on something static.
5 - Focus
For the focus, check whether the camera is on automatic or manual mode.
- If it is on automatic, well check that the camera is focusing on the action and not on the person head.
- If it is on manual, set the focus on the action before starting to film.
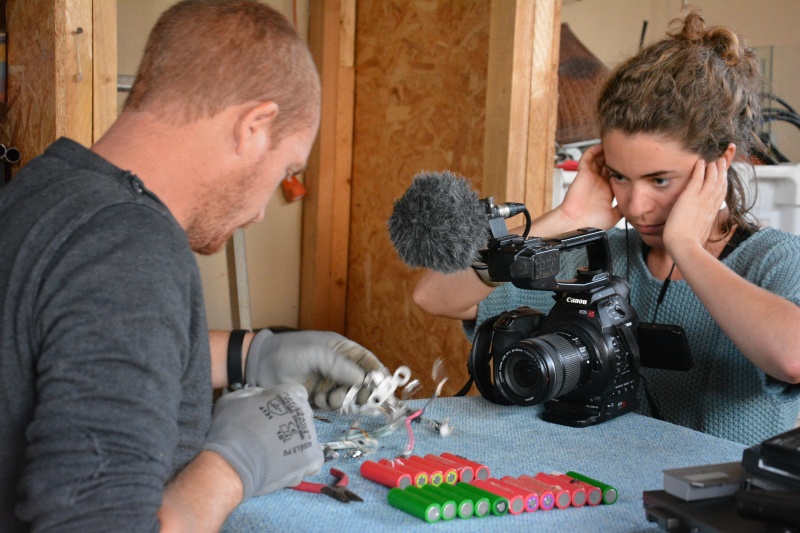
""Example"": "Here, I'm going to melt the white wire on the + pole...". We need here a close plane, we focus on the object to melt, and we check that our hands are not between the object and the camera when we film. ""Be careful"" : For tutos realized with smartphones, the difficulty is to realize static scenes. Put the phone on a stable, static place during the whole sequence.
6 - Filming in order to edit the video
- Don't tell yourself that mistakes can be rectified at video editing.
- Avoid to film in black and white or vertically.
- Launching the video recordings, let a dead time before action starts or discussion begins in order to facilitate video editing.
- Make simple rushes for get an easy video edition.
7 - Content
The video content will tighly be linked to the written step by step.
"Context video : (2 minutes)"
- Present the low-tech and its economical, environmental, social or other interests.
- Present an issue solved by the low-tech (problematic and solution)
- Do not hesitate to start from a larger context to a local one, or even personal one.
- It is important to choose with the speaker, what is going to be said. Le scene will be explicative, so prefer a large frame scene.
- Add cut-scenes (action) for this part don't be only a monolog in front of the camera. Think as well to make action scenes "on the field", that will be in concordance with the context.
"Fabrication video : (5-10 minutes)"
Ask yourself which kind of video is preferable to realize. Notably when speaking of explanations : will they be voice-overed, lived, or subtitled ?
- Beware of hands between the camera and the action.
- Always keep in mind that everyone has to understand the action. For this, it can be interesting to explain : "I'm doing this action for this reason, with this material that I got at this place ..."
- Do not forget to mention safety intructions.
"Dissect the fabrication in several key-steps:"
- The functioning: present the functioning principle of the low-tech
- The material : materials and tools necessary for the fabrication
- The fabrication : dissect every step, one scene for one action, and explain them precisely, speaking loud and articulating.
- The use : scenes on its situation.
- Advices : It is possible to finish the video giving some advices.
Étape 3 - Video Edition
1 - Unrush
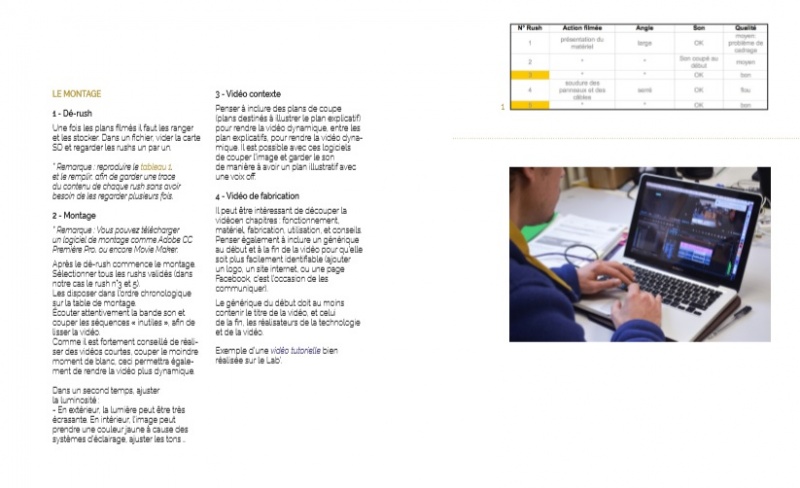
Once the scenes are filmed, they need to be sorted and stored. In a folder, cut-paste the SD card files and watch the rushes one by one.
- Remark : reproduce table 1, and fill it, in order to keep a mark of every rush content, without needing to watch it several times.
2 - Video Edition
- Remark : You can download a movie-making software as Adobe CC Première Pro, or Movie Maker. After the unrush, begins the video edition. Select all validated rushes (in this case, rushes 3 and 5). Place them in the chronological order on the video edition timeline. Listen carefully the soundtrack and cut-off non-useful sequences, in order to smooth the video.
As it's highly recommended to realize short videos, cut every gaps. This will allow as well to get more dynamism. In a second time, ajust luminosity : - Outdoors, the light can be very strong. - Indoors, the picture can take a yellow tint, because of lighting systems. Adjust tones.
3 - Context video
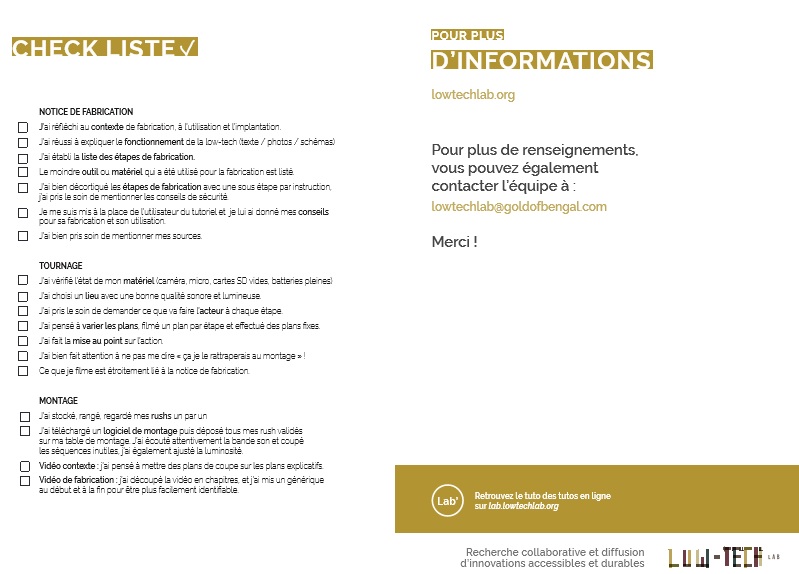
Think about including cut scenes : emergency scenes made to be placed between explicative scene, to get a more dynamic film. With these softwares, it is possible to cut the image while keeping the sound, in order to have an illustrative scene with a voice-over.
4 - Fabrication video
It can be interesting to cut the video in chapters : functioning, material, fabrication, use and advices. Think as well about including a generic at the beginning and the end of the video. This way, it will be easily identified (add a logo, a website or a Facebook page, this is the best moment to communicate them). The generic at the beginning should at least contain the video title. The generic at the end should contain the names of the low-tech and the video makers.
Étape 4 - Check List
WRITTEN STEP BY STEP :
- I thought about the context of the fabrication, about its use, and its integration.
- I understood how the low-tech is functioning. I know how to explain it well. I have pictures and schematics to illustrate it.
- I established the list of fabrication steps
- Every single object used for the fabrication is listed
- I've well dissected fabrication steps with a substep for every instruction. I have been careful to mention safety instructions.
- I've been thinking as a potential user of my tutorial and I gave him my advices for the fabrication of the low-tech and how to use it.
- I've been careful to mention my sources.
SHOOTING :
- I checked the state of my material (camera, microphone, empty SD cards, batteries full)
- I chose a place with good sound and light qualities.
- I took care to ask the actor what is he going to do for each step.
- I thank about varying the scenes, filming one scene per step and shooting static scenes.
- I focused right on the action
- I've well noted not to tell myself "this, I will rectify it during video edition" !
- What I'm shooting is tighly linked to the written step by step.
VIDEO EDITING:
- I stored, sorted, watched to every of my rushes, then I filled out table 1 to keep a mark of the content.
- I've downloaded a video-edition software in which I placed all my rushed chronologically on the timeline. I've listened carefully the soundtrack and cut non-useful sequences. I've also adjusted the luminosity parameter.
- I thank about adding cut scenes on explicative scenes.
- I dissected the video in chapters as for example functioning, material, fabrication, use, advices. I added a generic a tthe beginning and the end to be easily identifiable.
Étape 5 - La phase de test
Ne pas hésiter à s’entraîner à faire ses étapes à côté de chez soi pour se rendre compte de la logistique et de la charge de travail nécessaire. C’est aussi un bon moyen de connaître ton rythme de travail afin de ne pas être surpris lors de ton voyage tout en découvrant des low-tech à côté de chez toi !
Published
 Français
 English
 Deutsch
 Español
 Italiano
 Português
Wegwerp Overall SMS Type 5/6 Wit
Beschermhoes van non-woven SMS met elastische enkels, gezicht, manchetten en tailleband om de maat aan te passen. Een zelfklevende flap voor een betere sluiting aan de voorkant. Type 5 & 6 met volledige conformiteit met classificatie volgens EN 14325
Materiaal: SMS 100% polypropyleen 50 g / m2 Beschikbare kleuren: wit, Blauwe, Rood, Maat: XL-XXL
https://wegwerp-overall.nl/product-category/overalls/