(Mise à jour pour être en accord avec la nouvelle version de la source de la page) |
|||
| Ligne 33 : | Ligne 33 : | ||
|Step_Picture_01=Ordinateur_low-tech_zero-wireless-details.PNG | |Step_Picture_01=Ordinateur_low-tech_zero-wireless-details.PNG | ||
|Step_Picture_02=Ordinateur_low-tech_keyboard_mouse_screen.jpg | |Step_Picture_02=Ordinateur_low-tech_keyboard_mouse_screen.jpg | ||
| − | |Material= | + | |Material=*[https://www.kubii.fr/ Raspberry Pi Zero W] |
| − | *[https://www.kubii.fr/ Raspberry Pi Zero W] | ||
*64GB [https://geni.us/rfl16gomicrosd MicroSD] burnt with a Raspbian image (if you have not already set up your SD card, you could take a look at [http://raspbian-france.fr/creez-carte-sd-raspbian-raspberry-pi-windows/ the tutorial for Windows], and [http://raspbian-france.fr/creation-carte-sd-raspberry-raspbian-sous-gnulinux/ the one for Linux]). | *64GB [https://geni.us/rfl16gomicrosd MicroSD] burnt with a Raspbian image (if you have not already set up your SD card, you could take a look at [http://raspbian-france.fr/creez-carte-sd-raspbian-raspberry-pi-windows/ the tutorial for Windows], and [http://raspbian-france.fr/creation-carte-sd-raspberry-raspbian-sous-gnulinux/ the one for Linux]). | ||
| − | * | + | *RecoveryUSB or wireless keyboard |
| − | * | + | *Recovery USB or wireless mouse |
| − | * | + | *Recovery monitor with HDMI connection |
*HDMI port | *HDMI port | ||
*Micro HDMI adapter | *Micro HDMI adapter | ||
*Micro USB adapter | *Micro USB adapter | ||
| − | |||
|Tools= | |Tools= | ||
}} | }} | ||
Version du 6 mars 2023 à 17:41
Description
A basic computer model that still meets most of our daily needs. All for a price not exceeding 30 euros!
Sommaire
Sommaire
- 1 Description
- 2 Sommaire
- 3 Introduction
- 4 Étape 1 - Optional: Set up your SD card (if a Raspbian image is not already burnt on it)
- 5 Étape 2 - First system startup with the prepared SD card - Install Raspbian
- 6 Étape 3 - Raspbian configuration
- 7 Étape 4 - Consult Wikipedia offline.
- 8 Étape 5 - Option 1: Use Kiwix as a Reader
- 9 Étape 6 - Option 2: Use Kiwix as a Hotspot
- 10 Notes et références
- 11 Commentaires
Introduction
Today we will focus on a subject at the frontier of high and low tech: the computer! This extremely useful tool, which has become indispensable for most of us, is often too over-equipped for our usage. This obviously has an impact on its price, which excludes a large part of the world. Not to mention the environmental impact, especially due to the extraction of minerals needed for their manufacture, which, in most cases are rarely recycled at the end of their lifespan.
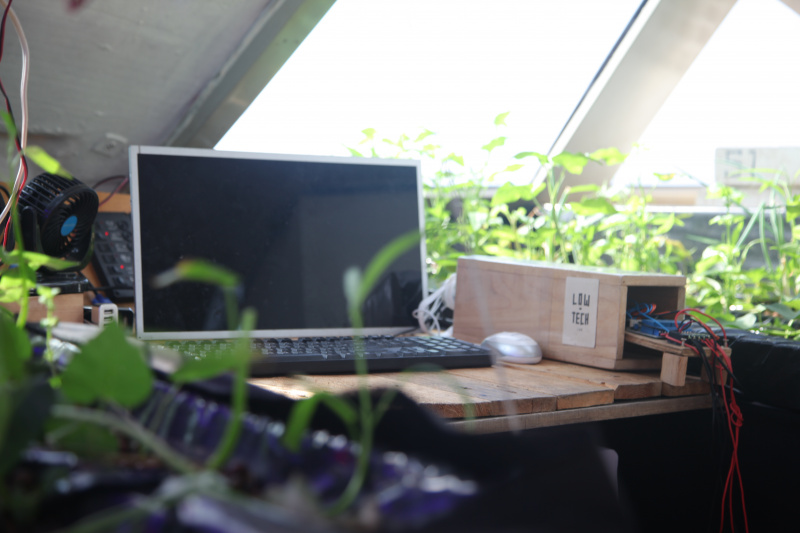
Today we offer you a very basic computer model that still meets most of our daily needs:
- Classic desktop processing (document writing, creating slideshows, etc)
- Internet browsing (social media, sending emails, etc)
- A very basic multimedia use (no photo editing, video, etc)
All of this for a price not exceeding 30 euros! To do this, we will use a mini-computer, the Rasberry Pi, in its simplest version the Rasberry Pi Zero W. For other computer hardware (screen, keyboard, mouse) we will use those salvaged from old computers.
Be it a school that wants to create a computer lab, an individual who wants a computer for his home, a grandparent who wants to discover IT or an aspiring developer who wants to get into Linux, there are many reasons to build a desktop PC with Raspberry Pi.
Together, let us see how you can assemble your own desktop PC running on Linux built on top of Raspberry Pi.
Matériaux
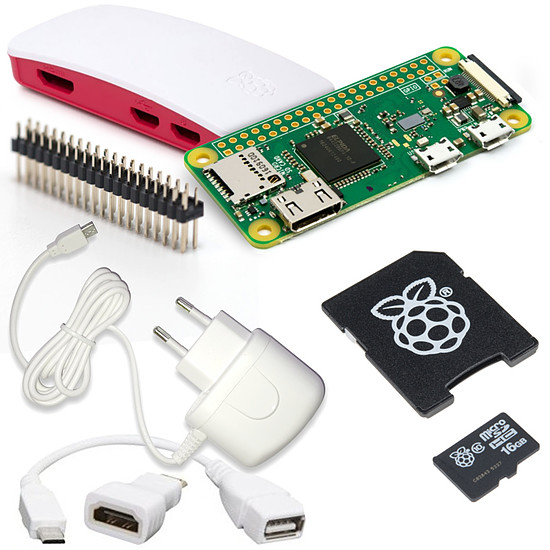
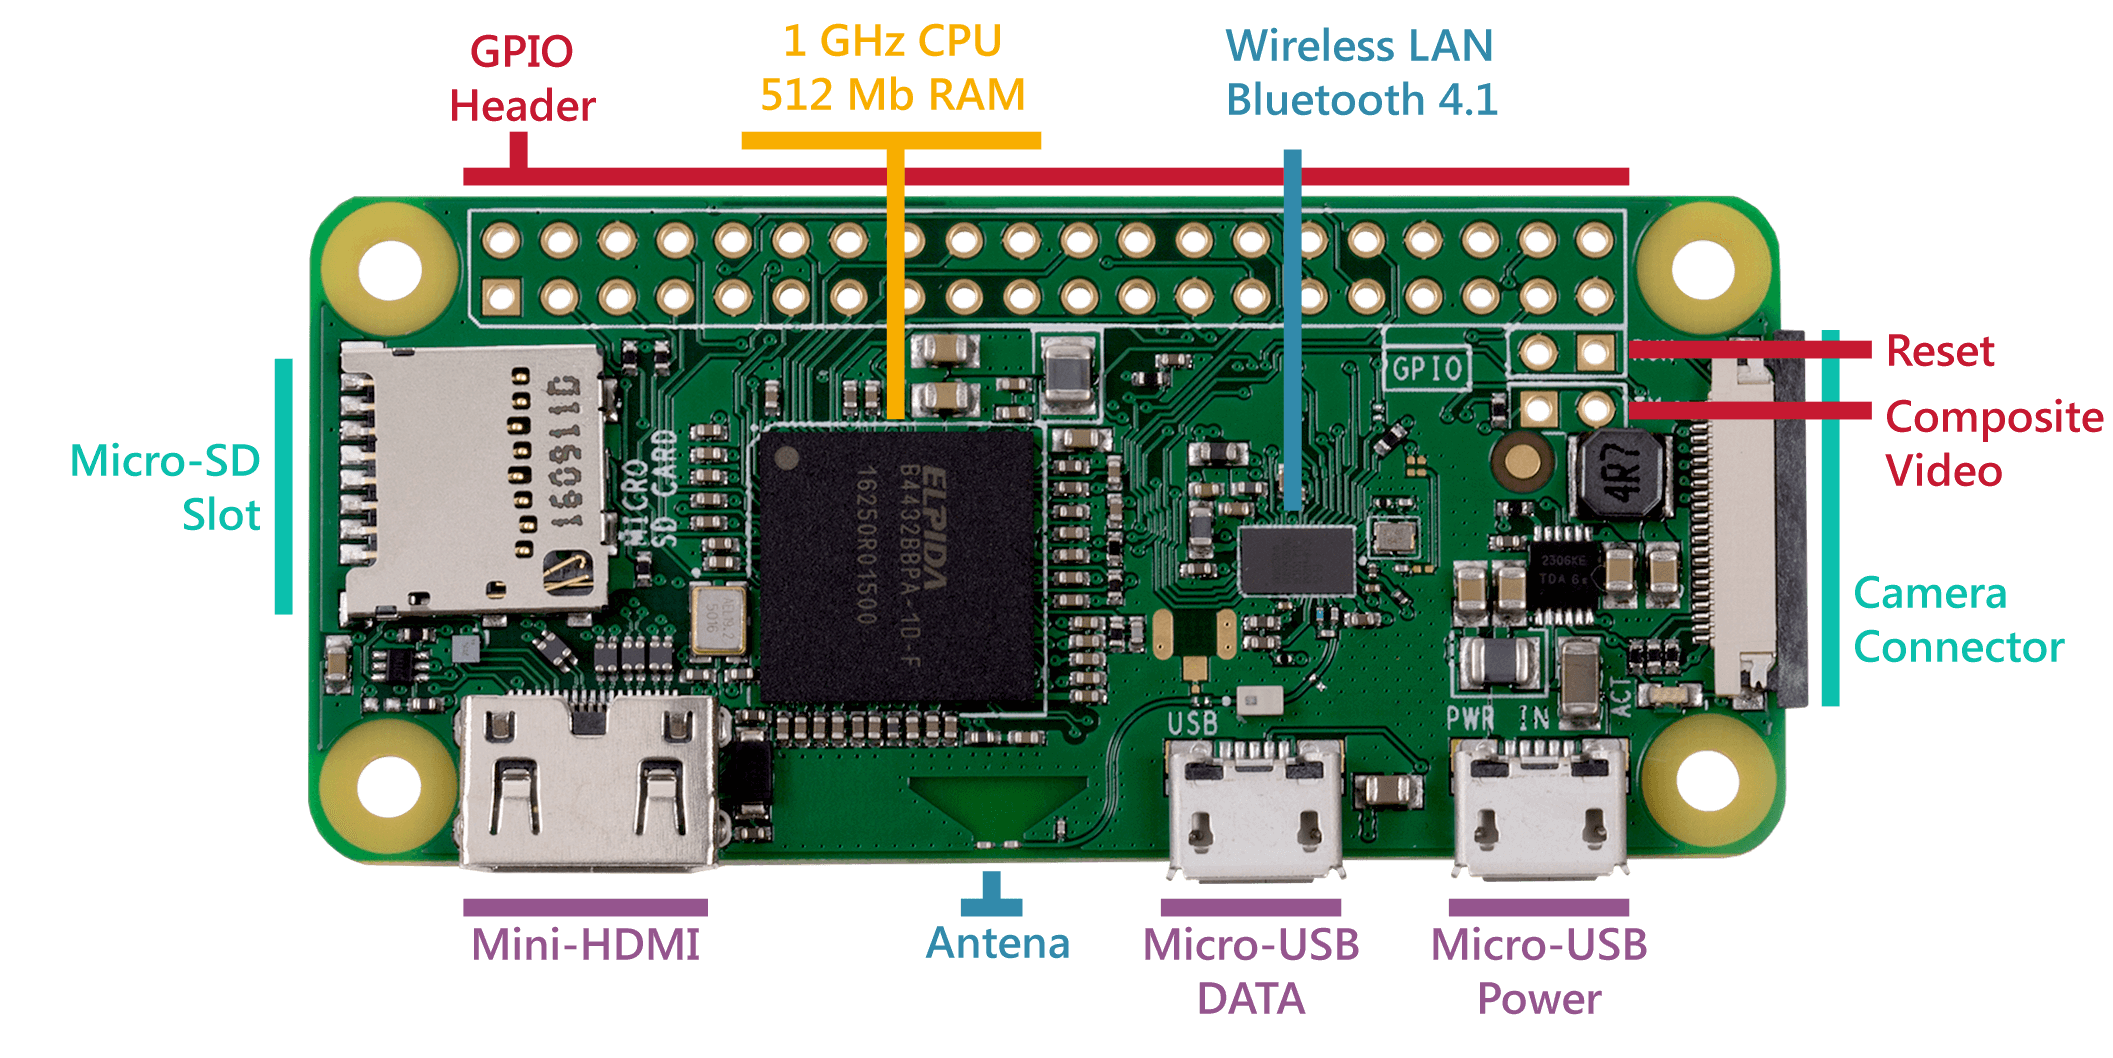
- Raspberry Pi Zero W
- 64GB MicroSD burnt with a Raspbian image (if you have not already set up your SD card, you could take a look at the tutorial for Windows, and the one for Linux).
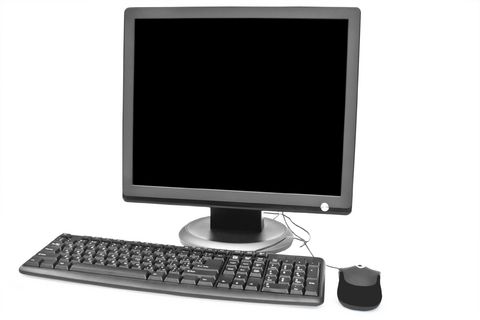
- RecoveryUSB or wireless keyboard
- Recovery USB or wireless mouse
- Recovery monitor with HDMI connection
- HDMI port
- Micro HDMI adapter
- Micro USB adapter
Outils
Étape 1 -
Optional: Set up your SD card (if a Raspbian image is not already burnt on it)
Optional: Set up your SD card (if a Raspbian image is not already burnt on it)
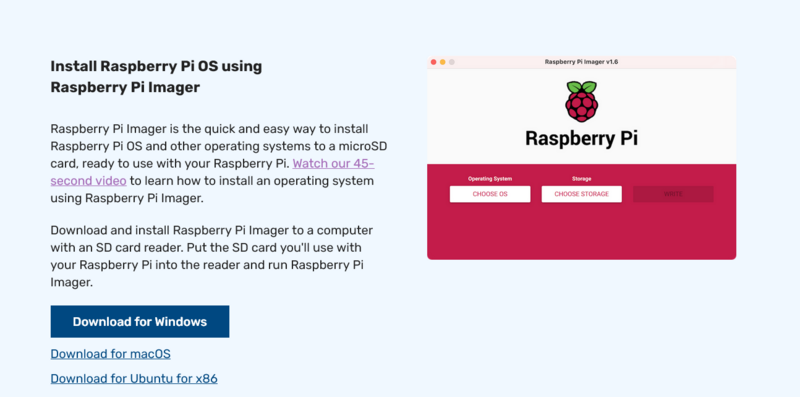
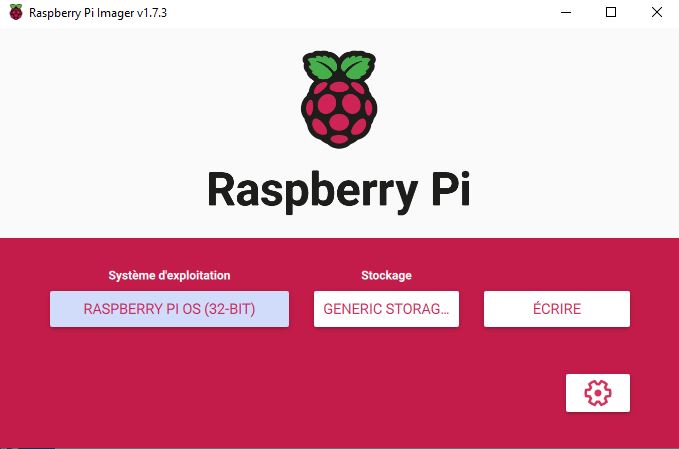
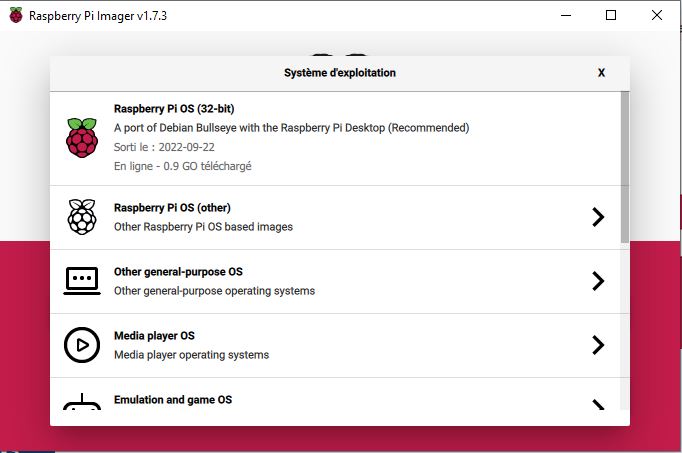
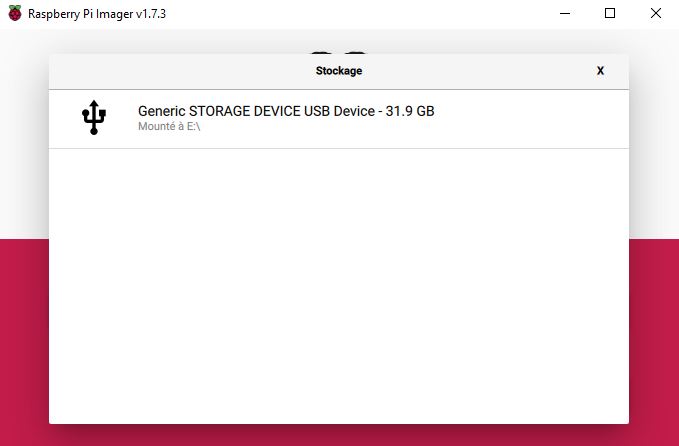
The Raspberry Pi does not have a hard disk. Instead, it uses an SD card as its hard disk. We will have to install an operating system on it, here we will choose Raspbian, a robust distribution adapted for a large majority of uses and optimized for the Raspberry Pi. We recommend that you choose an SD card that is fast and reliable, the performance of the Raspberry Pi being strongly influenced by the quality of the chosen SD card.
- For this step, you will need to download the latest distribution of Raspbian, this is what we will install on the SD card of your Raspberry Pi.
- Note that as far as hardware is concerned, you will have to be able to write to the SD card, which requires either a computer with an adapted port or getting an external card reader.
You should now have a Raspbian 'zip' file, decompress it and you should get an 'img' file.
Insert your SD card into the card reader of your computer, and once it is recognized, launch Win32DiskImager and click on the icon representing a folder on the left of the 'Image File' field. (image 1) This will open a file explorer, go to the 'img' file generated previously by decompressing the Raspbian ZIP file.
On the right of the folder icon, in the 'Device' field, choose the drive corresponding to your MicroSD card, do not choose the wrong drive! (image 2)
Once this is done, click on the 'Write' button, you will then see the progress of the write operation of your image on your SD card.
The Raspbian card is ready, all you have to do is insert it in your Raspberry Pi and plug in the latter.
Étape 2 - First system startup with the prepared SD card - Install Raspbian
Armed with your Raspberry Pi ZW kit and the hardware specified above, you should be able to proceed with the first system startup and install Raspbian (in fact you will see that the installation is done all by itself) .
First, connect your Raspberry to the monitor and keyboard, without connecting it to the power supply, and insert the SD card.
Once this is done, connect the power cable of the Raspberry. The first system startup can be a little long, because during this, the Raspberry is going to install the Raspbian system.
During this system startup (and subsequent ones), you will see multiple lines of commands scrolling by. These are commands executed by the system in order to startup. Ignore them, just wait for the system to finish startup.
In addition, during startup, the red led should stay fixed and the green one should flash for a few seconds before turning off. If this is not the case, and if the Raspberry does not appear to startup on the screen, even after about thirty seconds, this means that it is unable to startup from the card. In fact, it is unable to find the code which allows it to 'boot' and install Raspbian.
This problem can be caused by many factors, but the source is almost always the SD card.
If the problem does not arise from there, it can come from a bad partitioning of the card, or a bad copy of the Raspbian system. In this case, you should re-partition your card, and reinstall your Raspbian system.
Once the system is started up, it is (probably) going to ask you to identify yourself. During the first system startup the default login is 'pi' and the password is 'raspberry'.
-On Linux systems, the passwords are not displayed while typing. So, do not be surprised if you do not see the usual little asterisks when you type your password and type it normally, then validate by pressing 'Enter'.
If the password is incorrect, it could be because the keyboard is in the 'QWERTY' configuration and not 'AZERTY' by default. You would then have to type 'rqspberry' as the password.
There you go! You have access to the system, you just installed Raspbian! I All that remains now is to configure Raspbian!
This entire step is taken from the site: https://raspbian-france.fr/installer-raspbian-premier-demarrage-configuration/
Étape 3 - Raspbian configuration
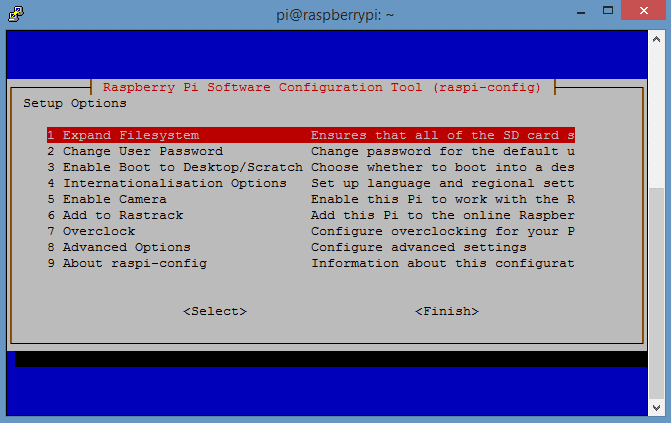
If this is your first system startup, you should get an interface allowing you to choose configuration options. This interface is in the form of a keyboard-navigable menu.
If you do not see this interface on startup, you can get get it by launching the terminal and typing the command sudo raspi-config Once on this configuration interface, we will configure Raspbian such that you have optimal conditions during your subsequent usages and you could get the most out of your Raspberry.
- A Raspbian system on the entire card
First, we will confirm that the Raspbian system utilizes the entire card (careful, this step should only be done if you use one Raspbian distribution on your SD card. If multiple versions coexist, like with NOOBS) for example, then do not perform this step.
To do this, you should place your cursor on the first choice 'Expand Filesystem' and press 'Enter'. The menu will disappear and lines of commands will be executed. Once the system is done, it will again display a window similar to the previous menu informing you about the success of the operation.
Confirm, and you are returned to the menu.
- Switch the keyboard to AZERTY
If you tried to type in text, you probably realized that the keyboard behaves a bit strangely.
In fact, your keyboard is still configured in 'QWERTY' mode and not in 'AZERTY', as is the norm for French keyboards. We will thus fix this problem.
To do this, again choose the forth line 'Internationalisation options'.
Like before, you will see a second menu. This time, choose the third line 'Change Keyboard Layout'. It could take some time before the window is displayed (in general, all the steps for the keyboard can be a bit long).
It is absolutely necessary that a keyboard be connected to be able to configure the keyboard!
On the new window, confirm directly without changing the keyboard type. Except for special cases, this should be fine. Another new window is displayed, choose «Autre». On the new window, choose the keyboard «Français», then the option «Par defaut», «Pas de touche «compose»», and finally «Non».
- Switch Raspbian and the Raspberry to French
To continue with internationalization, we are going to switch the entire system to French mode.
To do this, we will modify what are called 'locales'. These are settings defining a set of texts in multiple languages. You should, therefore, go to the fourth option, 'Internationalisation options' and press 'Enter'.
This time, you should choose the first line, 'Change locale'.
A window is displayed (it can take a while), and explains what the locales are.
You should go down till the line 'en_GB.UTF-8 UTF-8' and select it by pressing the 'Space' key. An asterisk then appears within square brackets preceding the choice (it is possible that the line is already selected. In this case, keep it selected, i.e. with an asterisk displayed within square brackets).
You should again go down, this time till the line 'fr_FR.UTF-8 UTF-8' and repeat the same operation as above.
You should now go to the field 'Ok' at the bottom left of the window. To do this, press the tab key (the key with the two arrows). Then press Enter.
A new window is displayed asking you to choose the default locales. Go to fr_FR.UTF-8, then again use the tab key to go to 'Ok' and press Enter.
The system again executes some commands. This could take some time. Once the commands are executed, you will again be in front of the basic configuration menu (the latter will probably remain in English, it is normal).
The following video shows all the steps described above: https://www.youtube.com/watch?time_continue=24&v=9QHIS36LxE4
This entire step is available on the site: https://raspbian-france.fr/installer-raspbian-premier-demarrage-configuration/
Étape 4 - Consult Wikipedia offline.
We recommend using the Low-tech computer to be able to consult Wikipedia offline.
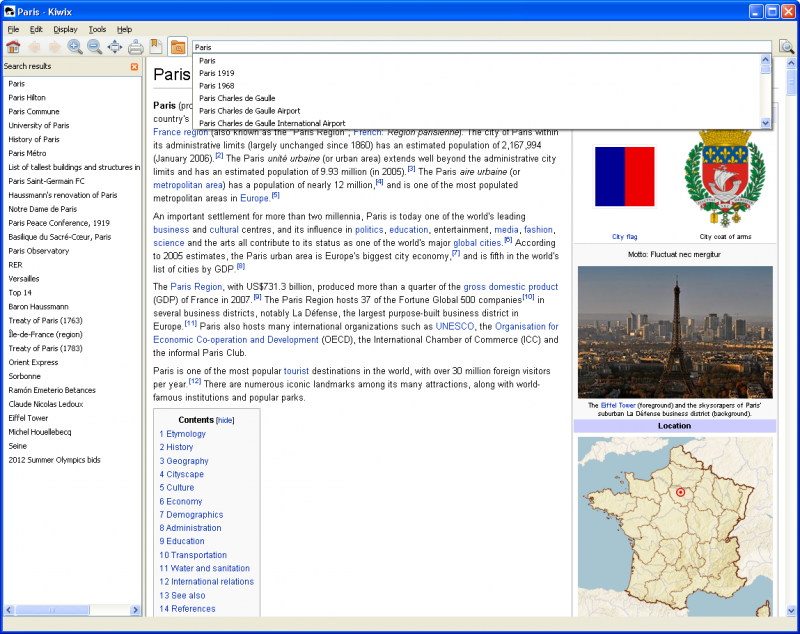
To do this, we will use the Kiwix software. This free software allows you to have the entire Wikipedia encyclopedia (and many other contents) in hand wherever you are! On a boat in the middle of nowhere or even in prison, it allows access to all of human knowledge. You do not need internet access, everything is saved on your computer, your USB key or DVD.
For this you will need:
- Kiwix (the software)
- The ZIM file with the Wikipedia content in the specific language that the user wants (for ex. French).
We will present two slightly different installation options:
- Option 1: Use Kiwix as a Reader
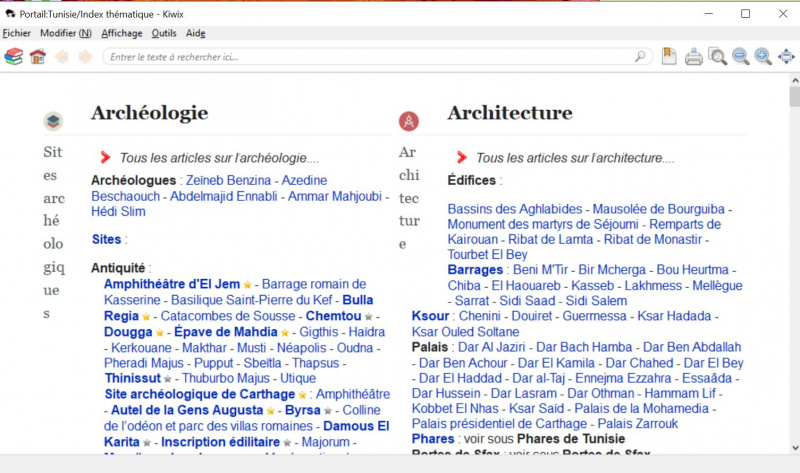
The KIWIX Reader allows you to consult offline, without an internet connection, content packages (Wikipedia, TEDx, ...) in ZIM format. It is available for all major operating systems (Windows, Mac, GNU/Linux, Android). It comes as a standalone application or browser plugin. Install it and consult Wikipedia content directly on your Low-tech computer.
- Option 2: Use Kiwix as a Hotspot
KIWIX hotspot allows you to convert a low-cost mini-computer like the Raspberry Pi into a relay to distribute free content, without an internet connection, via a local network. This solution is especially useful for schools, libraries, communities, humanitarian organizations, etc. End users only need a device capable of detecting the network with the browser, they do not need to download and install anything on their device. KIWIX Hotspot works on Windows, macOS and Linux.
Étape 5 - Option 1: Use Kiwix as a Reader
We will describe here the installation on a PC with the Windows operation system, but all versions are available [[1]].
- Download the software and double click on the file to open it.
- The first time you open Kiwix, a window inviting you to visit the library should appear. If this is not the case (or if you want whatever is available at all times), go to Fichier > Parcourir la bibliothèque. Choose your language, then download the corresponding ZIM file.
- Once the ZIM file is downloaded, Kiwix should ask you if you want to open it. If this is not the case (or if you want to open an old file), click on 'Ma bibliothèque' in the top left corner of the application window.
Étape 6 - Option 2: Use Kiwix as a Hotspot
To complete this installation you will need:
- a computer (running on Windows, macOS or GNU/Linux) with an SD card reader.
_ a microSD card (or SD depending on the Raspberry Pi model that you use). Choose one of good quality with adequate memory for the size of the content you wish to diffuse. 32GB is a good start. For the heavy version of English Wikipedia, you will need 128GB or more.
- Go to https://download.kiwix.org/release/kiwix-hotspot/ and open the sub directory containing the most recent version. Download the installer corresponding to the operating system of the computer you used to set up the SD card (Windows 32 or 64 BIT, macOS or Linux).
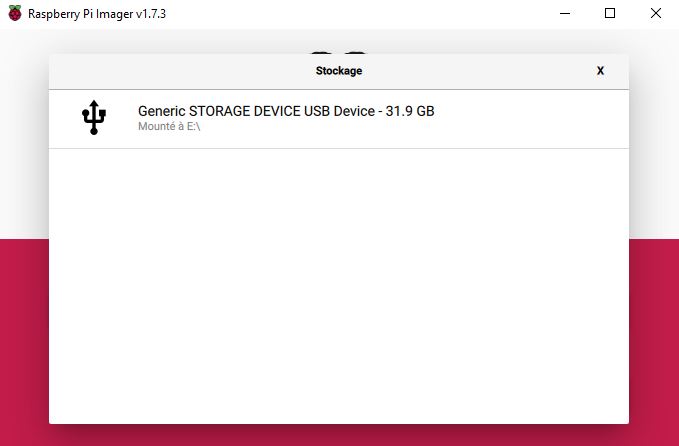
- Prepare your SD card: To avoid any problem ensure that your SD card is indeed empty and formatted.
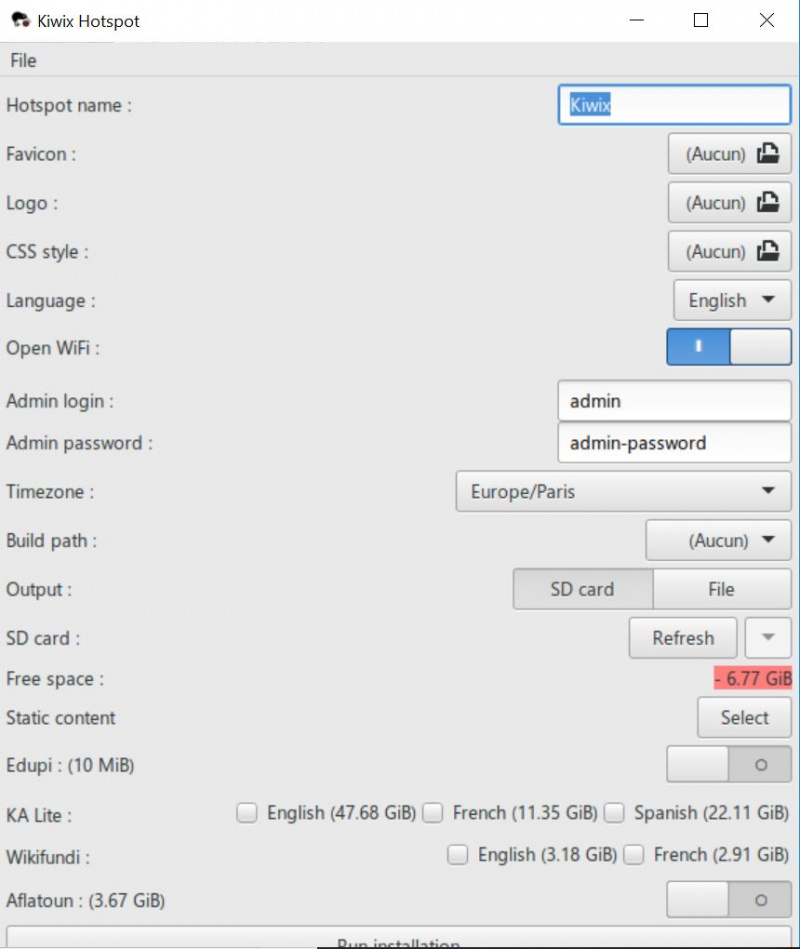
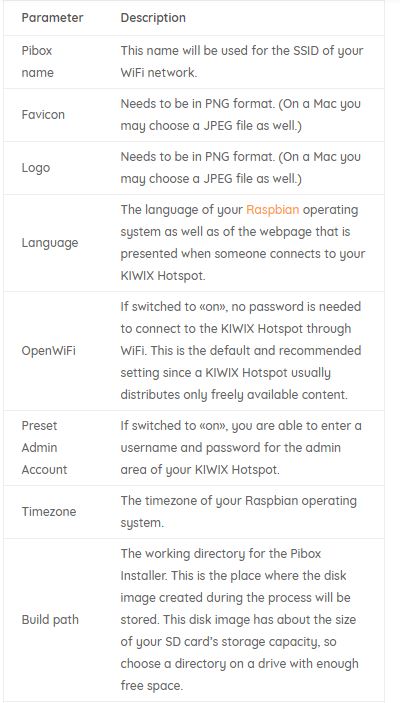
- Main Screen: After launching the Kiwix Hotspot program, you will see the main screen (image 1). The different configuration parameters are described in images 2 and 3.
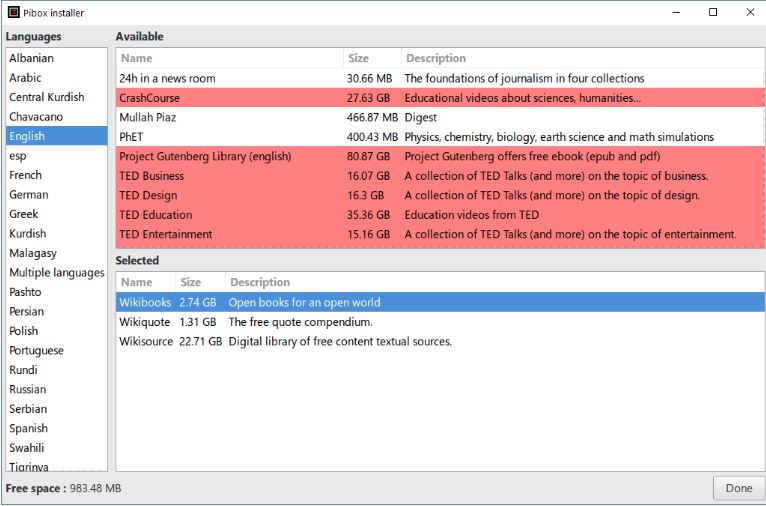
- Select content: The 'content selector' allows you to choose the content packages that will be installed on your network. It is possible to choose your preferred language to only display content in the selected language (see image 4).
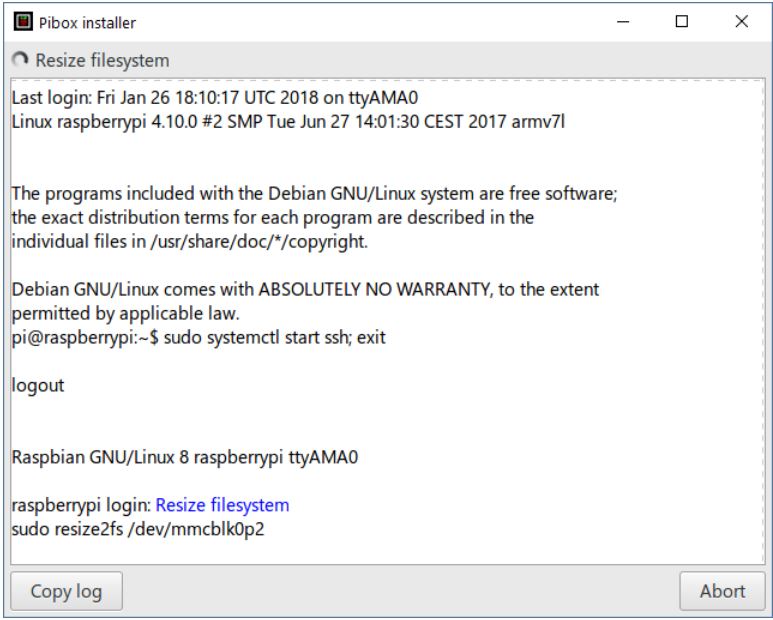
- Installation: Once you have made your choices, chick on 'Run installation' on the main screen. The window 'Installer status' will be displayed (image 5).
The installation can take many hours. Do not interrupt even if you get the impression that nothing is happening. Wait until a dialog box indicates to you that the installation is complete. Be careful to ensure that your computer does not go into Sleep mode.
- Once the installation is complete, remove the SD card from your computer.
- Insert the SD card in your Raspberry Pi, connect it to the power supply and let it startup (this can take one or two minutes).
- Connect your computer, tablet or smartphone to the local WiFi network with the name you chose during installation.
- Open your internet browser and enter the following address in the address bar: http://<name>.hotspot, where <name> is the 'Project Name' you used during the installation (the same as the WiFi network).
- You should now see the Kiwix Hotspot homepage (see image 6).
Notes et références
- Installation and configuration of Raspbian: https://raspbian-france.fr/installer-raspbian-premier-demarrage-configuration/
- Create your desktop computer under Linux for less than 200€ with the Raspberry Pi: https://raspbian-france.fr/ordinateur-bureau-linux-raspberry-pi/
- Install and use KIWIX on Windows or macOS : https://www.kiwix.org/en/documentation/installing-and-using-kiwix-on-windows-or-macos/
- How to configure KIWIX Hotspot : https://www.kiwix.org/en/documentation/how-to-set-up-kiwix-hotspot/
English translation by Preethi Poovathumkadavil
Published



 Français
 English
 Deutsch
 Español
 Italiano
 Português