Description
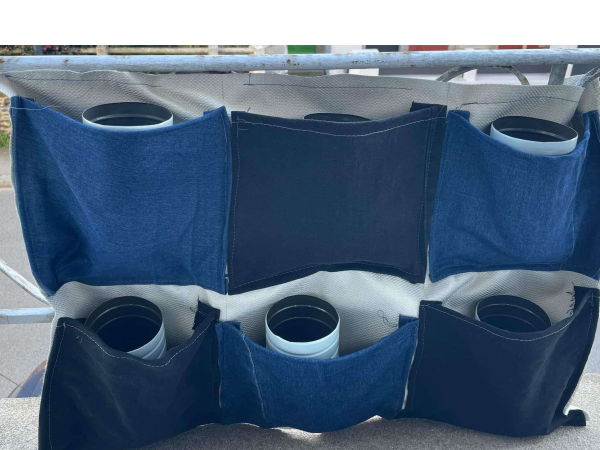
A mini kitchen garden that can be hung on a balcony. It's made from plastic bottles and old clothes.
Sommaire
Sommaire
- 1 Description
- 2 Sommaire
- 3 Introduction
- 4 Video d'introduction
- 5 Étape 1 - Choose the number of plant bags
- 6 Étape 2 - Cutting the bottles
- 7 Étape 3 - Cut 30x25 rectangles from the recovered fabric
- 8 Étape 4 - Sew the rectangles onto the large piece of fabric
- 9 Étape 5 - Attach the finished vegetable garden to your balcony and add the bottles
- 10 Étape 6 - Fill the bottles with soil and plants
- 11 Étape 7 - Some advice:
- 12 Notes et références
- 13 Commentaires
Introduction
In our desire to reuse waste and create a mini kitchen garden, we've put together this tutorial to help other students with the same idea. What's more, as we live in a rainy region, we've chosen to set up this vegetable garden outside to take advantage of rainwater and save on running water.
Today, many students live alone in flats and find it difficult to eat properly. There are many recipes for tasty dishes using herbs and plants, but some students prefer not to use them in order to save money on food. Unfortunately, this takes away from the flavour of the dishes. One solution would be to grow your own herbs, but this can be complicated in a flat, where there is already a lack of space and conditions are not optimal.
In our desire to reuse waste and create a mini flat garden, we set up this tutorial to help other students with the same desire. We created a balcony vegetable garden using recycled bottles and fabric. All the materials are available to every student. Once made, the planter can be hung from the railing of a balcony. There, it can enjoy the sun, but also the rain (in our lovely city of Brest).
This project will show you how to make your own flat planter and give you tips on maintaining and watering the plants.
Youtube
Étape 1 - Choose the number of plant bags
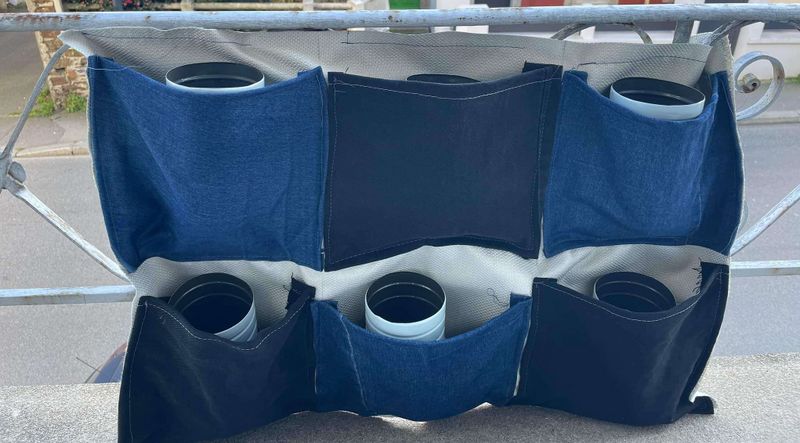
In this tutorial we explain how to make a balcony planter with 6 pockets. But you can add/remove pockets to make your planter bigger or smaller as required.
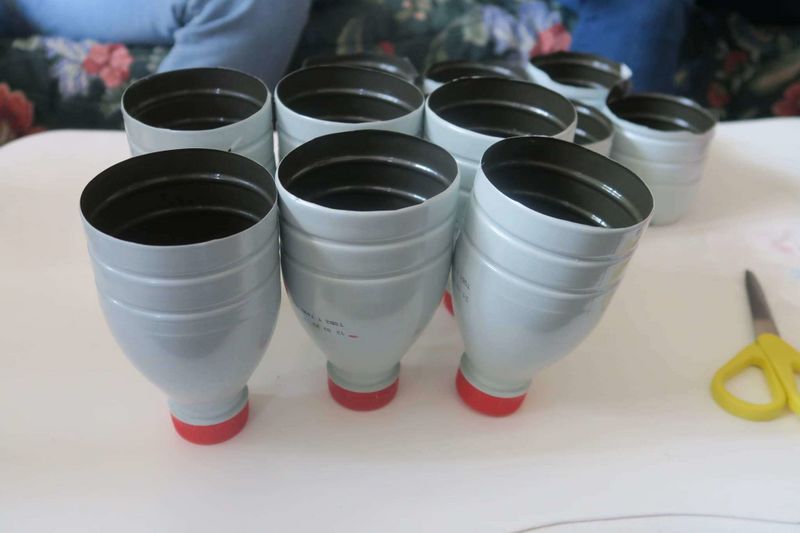
Étape 2 - Cutting the bottles
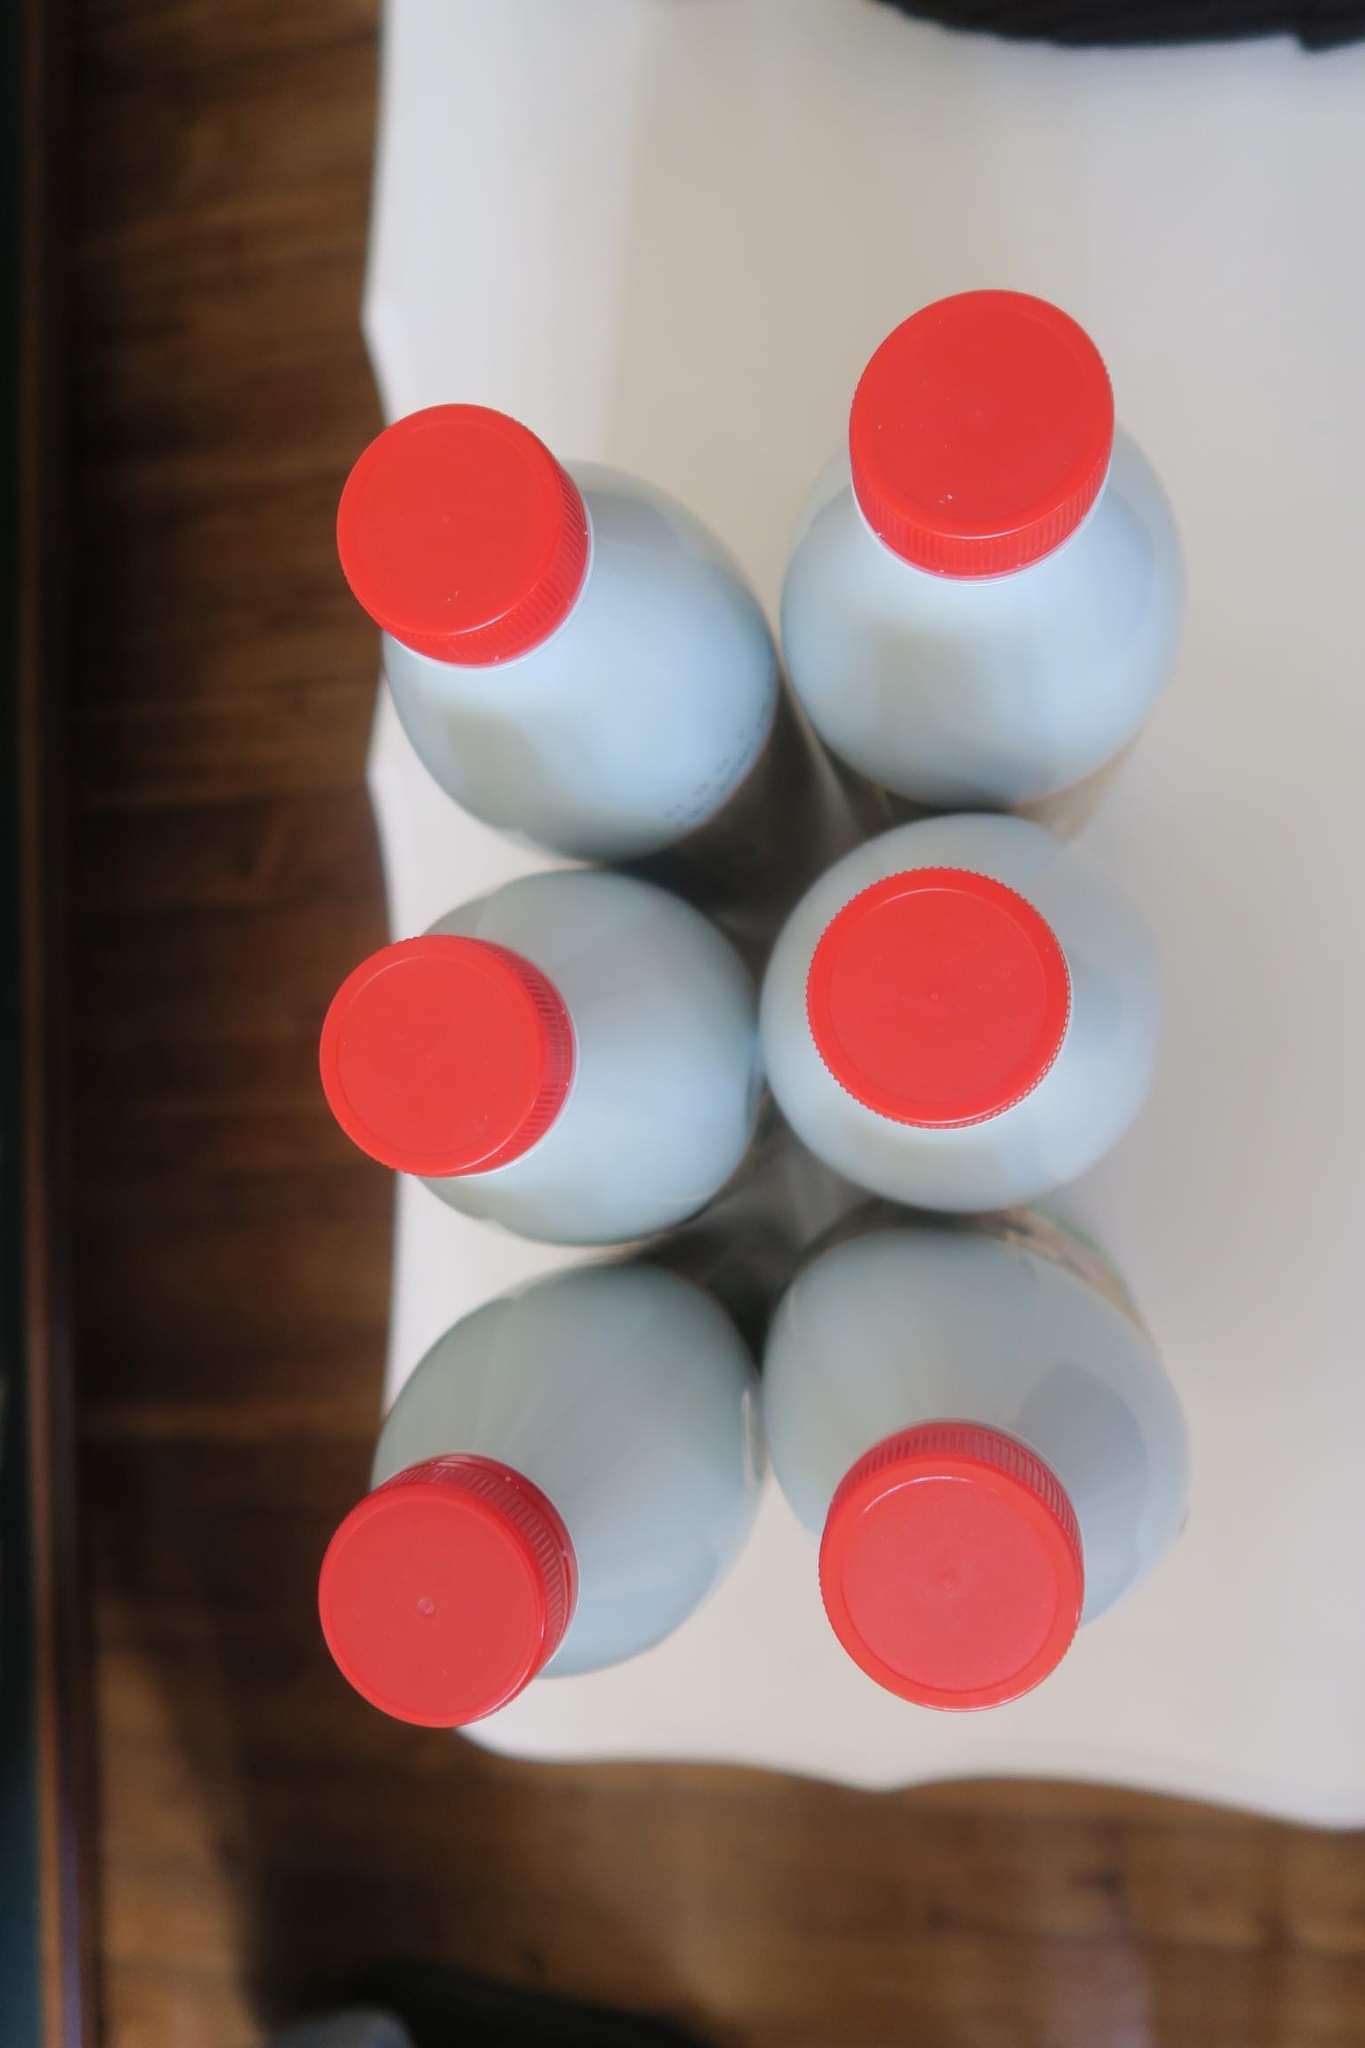
The first step is to cut the bottles as shown in the photo to obtain the top of the bottle.
We take the top of the bottle, as this will allow us to drain off any stagnant water.
You can unscrew the cap from the bottle or poke holes in it with a spike if, like us, it rains a lot in your area.
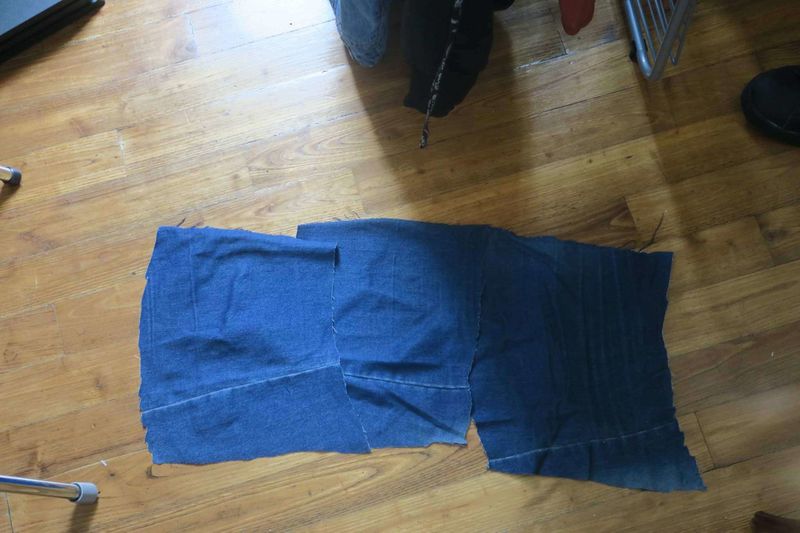
Étape 3 - Cut 30x25 rectangles from the recovered fabric
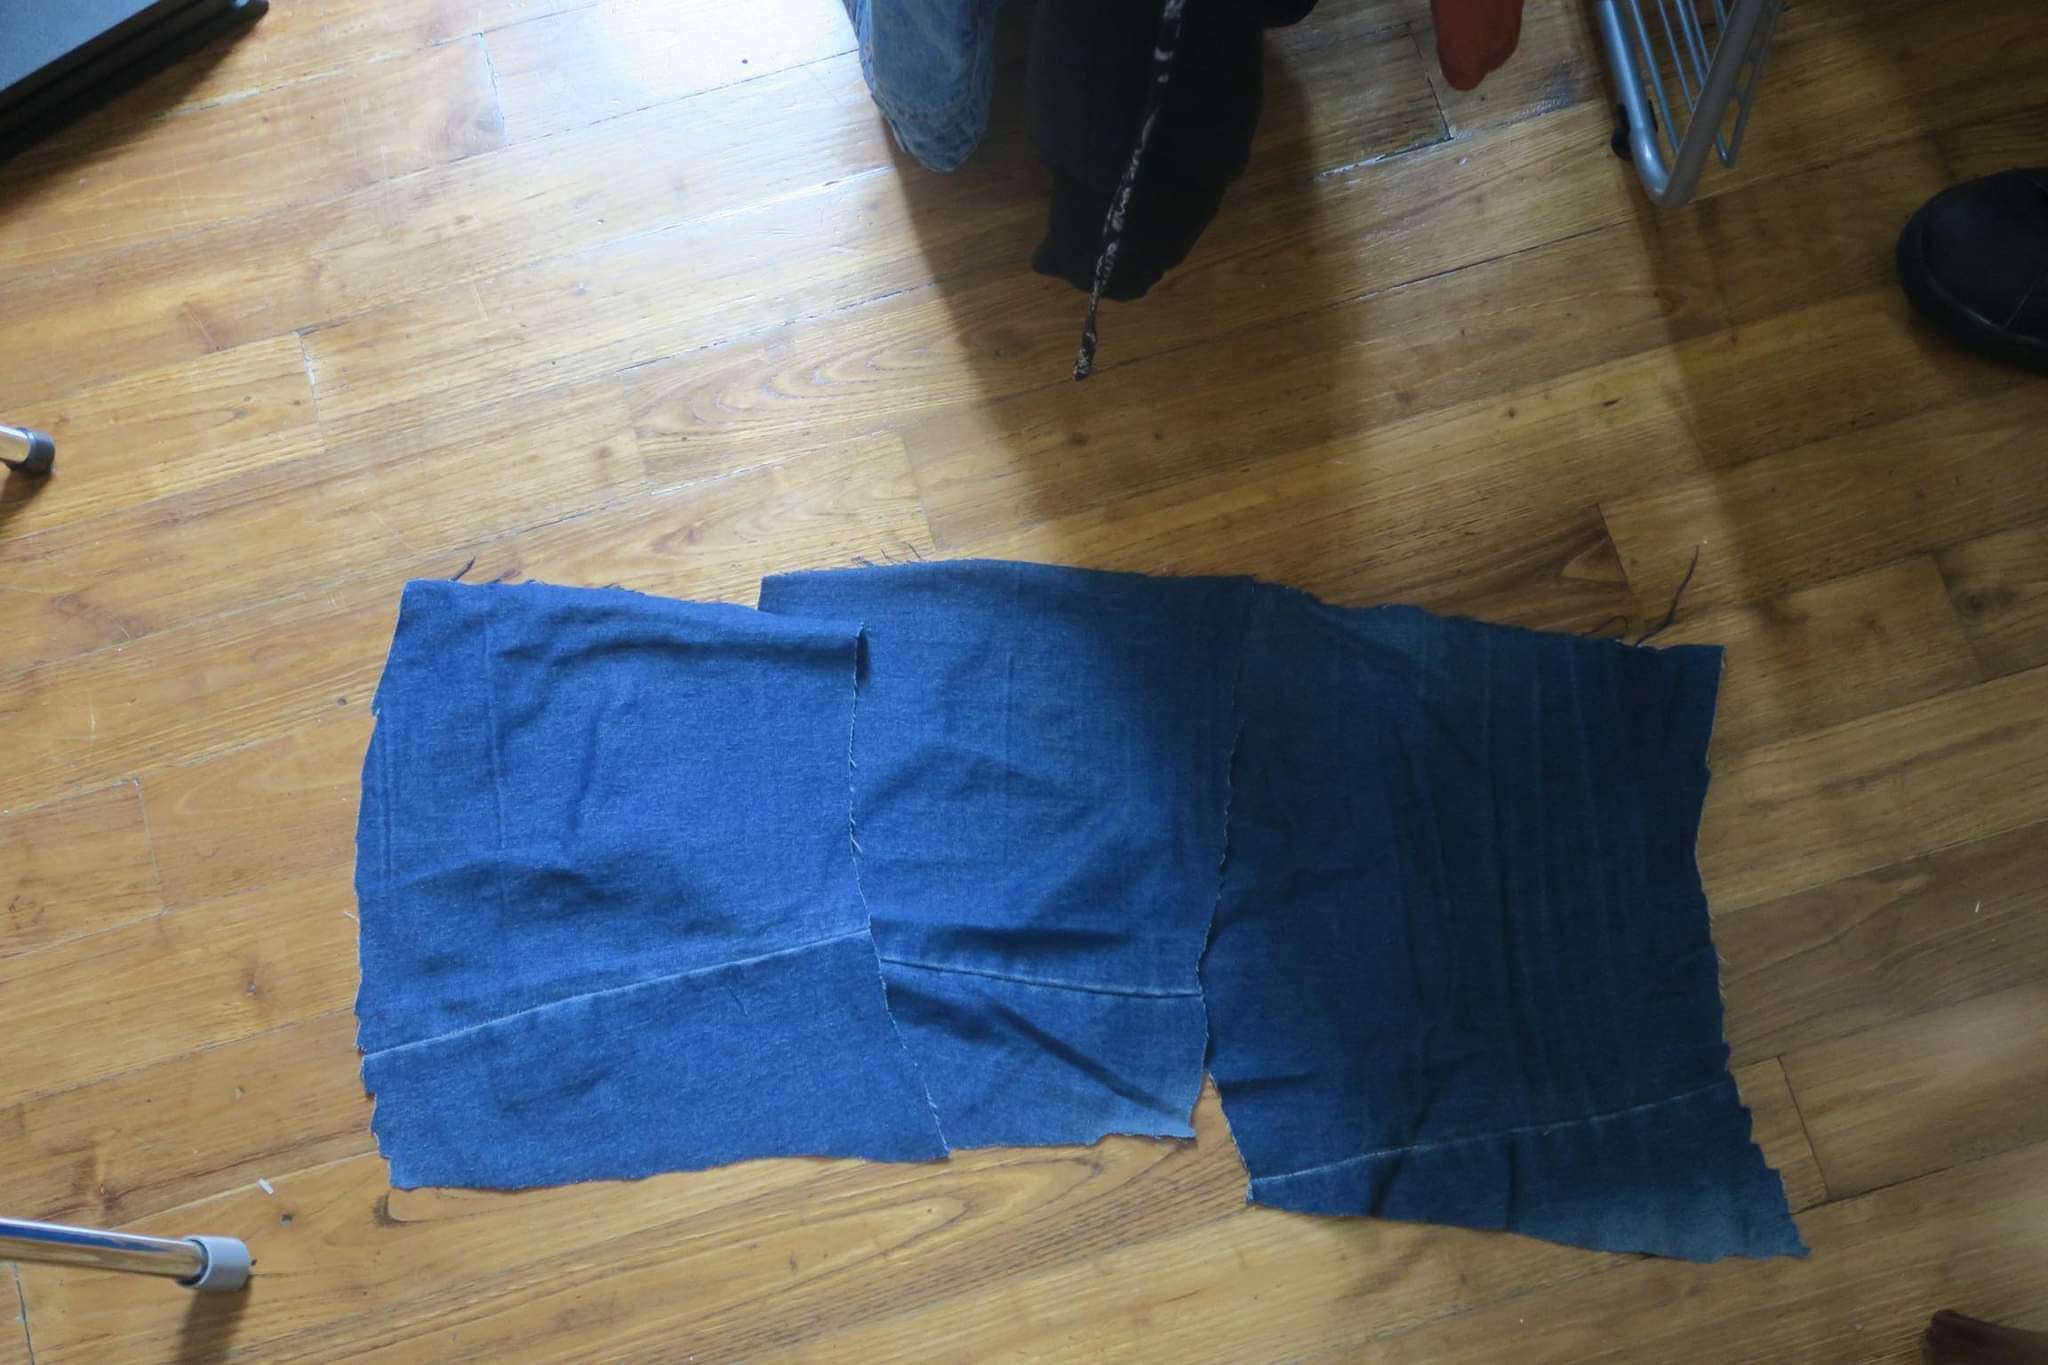
The second step is to find rectangles of fabric, which can be cut from old clothes. For example, we cut out some trousers.
Cutting trousers: If, like us, you choose to cut out trousers, first cut the leg lengthways to flatten the fabric and then cut the rectangles.
Cut out as many rectangles as you have bottles. Each rectangle should be 30 cm long and 25 cm wide.
Étape 4 - Sew the rectangles onto the large piece of fabric
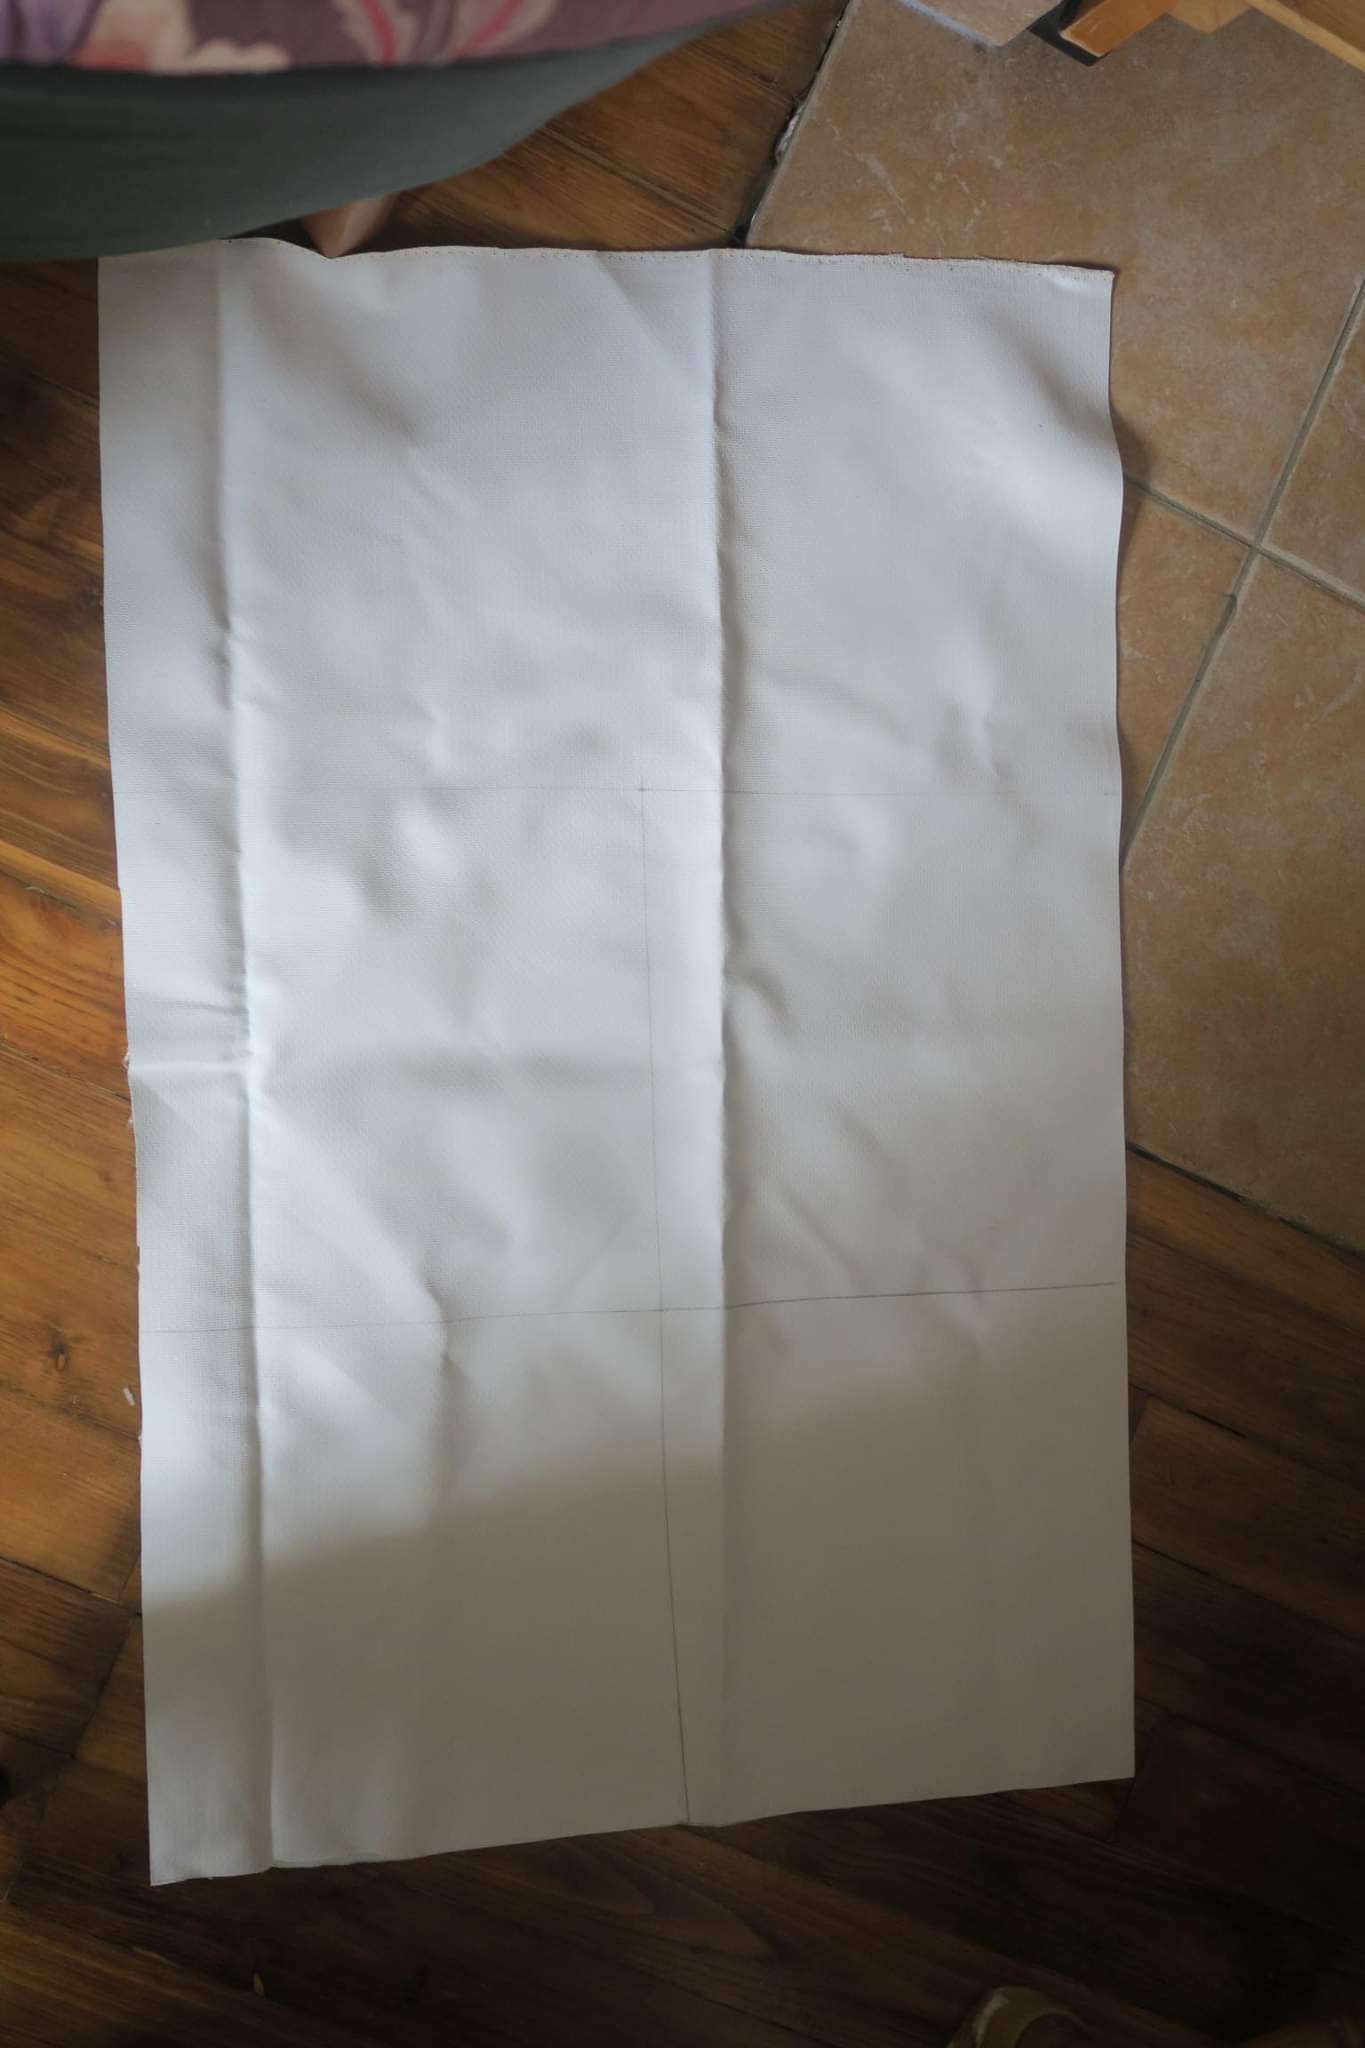
Before sewing, make sure you leave a little space on the outside of your large piece of fabric to act as a "support". This space will be used in the next step to sew a lace to attach your planter to the balcony.
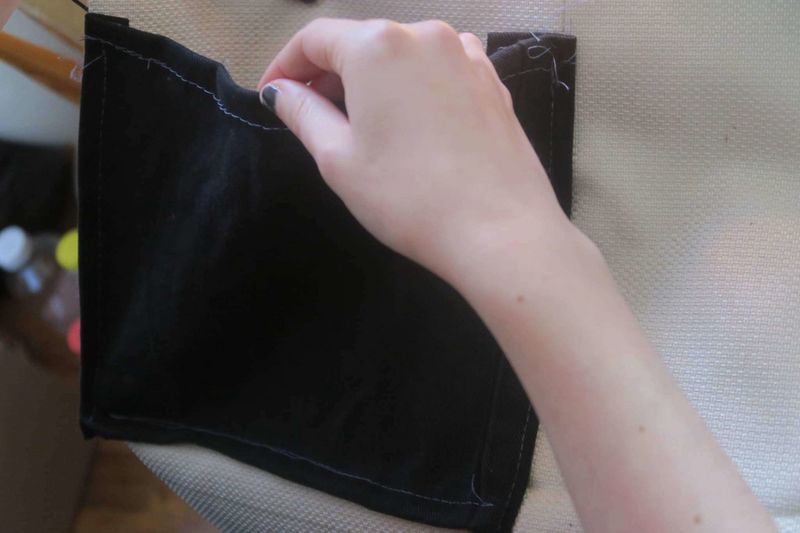
Sew the rectangles onto the large piece of fabric to make pockets in which to place the bottle tops. To do this:
- Hem one of the long sides of the rectangles, this side will be the top of our pocket which will remain open.
- Then sew the right-hand side, folding it over to ensure a clean seam.
- We do the same for the left side.
- Finally, fold the bottom part over and sew it to form the bottom of the pocket.
Étape 5 - Attach the finished vegetable garden to your balcony and add the bottles
This is the penultimate step before enjoying your balcony planter:
We need a way to tie up our vegetable garden.
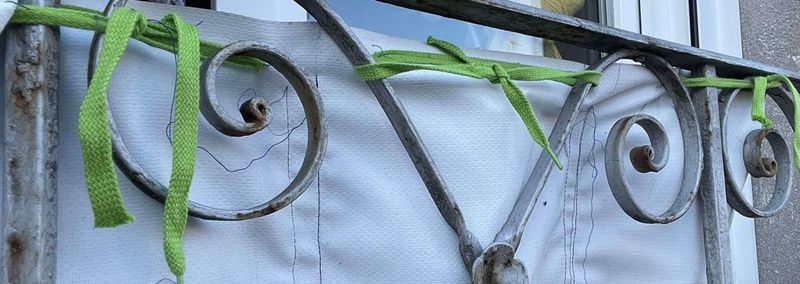
We're going to use shoelaces for this.
Using a lace, we'll sew 1/3 of the lace, in the middle, to the top (the space we left in the previous step) of our "support" fabric. The more laces we sew, the stronger the attachment will be and the better our vegetable garden will hold up on the balcony.
Étape 6 - Fill the bottles with soil and plants
And now you've filled your planter!
All that's left is to make sure that it's sufficiently watered every day and that the water doesn't stagnate in the bottles.
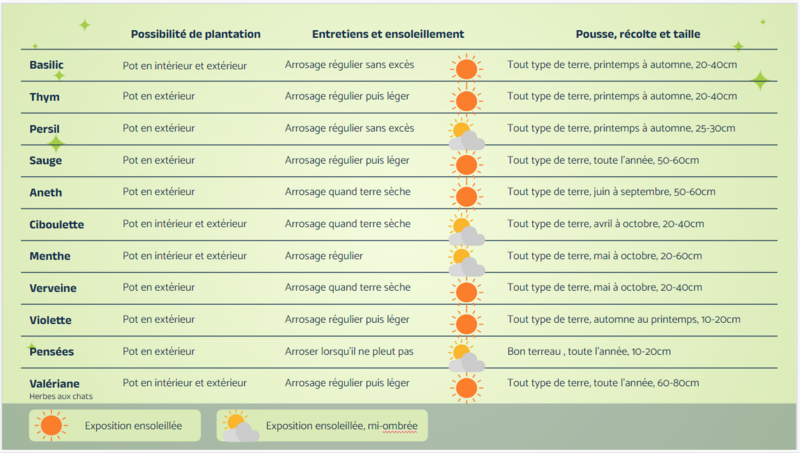
Here is a table of some of the plants we suggest you plant in your window box, along with the conditions you need to help them grow
.
Étape 7 - Some advice:
- Use the water from cooking vegetables to water your plants (this water is rich in minerals and vitamins, so you don't need to use fertiliser).
- Above all, don't use rice or pasta cooking water, as the starch in it will kill your plants.
- You can recover the water used in your shower while you wait for the water to heat up.
- Put the most water-hungry plants on top and the least water-hungry plants underneath.
Notes et références
You need to know how to sew to complete this tutorial.
This project was carried out during a Low-Tech module in SHES-S8 at ENIB, by Corentin SAULNIER, Gentilla YANN, Pierre-Olivier LADET, Laetitia CORNUEL & Camille CLAVIER.
We would like to thank our supervisor, Marjolaine BERT from the Eko association, for her advice.
Draft
 Français
 English
 Deutsch
 Español
 Italiano
 Português