(Page créée avec « Use ») |
(Page créée avec « Drill a pipe every 4 centimeters using a sewing needle along the entire length of the desalinator. At the end of this pipe, provide a tap that will siphon the arrival of s... ») |
||
| Ligne 64 : | Ligne 64 : | ||
|Step_Picture_00=D_salinisateur_solaire_IMG_6684.JPG | |Step_Picture_00=D_salinisateur_solaire_IMG_6684.JPG | ||
|Step_Title=Use | |Step_Title=Use | ||
| − | |Step_Content= | + | |Step_Content=Drill a pipe every 4 centimeters using a sewing needle along the entire length of the desalinator. At the end of this pipe, provide a tap that will siphon the arrival of seawater. At the other end, this pipe is drowned to the bottom in a bottle of seawater, located higher than the desalinator so that the flow can be done. Provide a tap at the outlet of the seawater bottle to adjust the flow. The pierced portion of the seawater inlet tube is wrapped in the fabric protruding above the frames, thus, all seawater will be trapped by the fabric. |
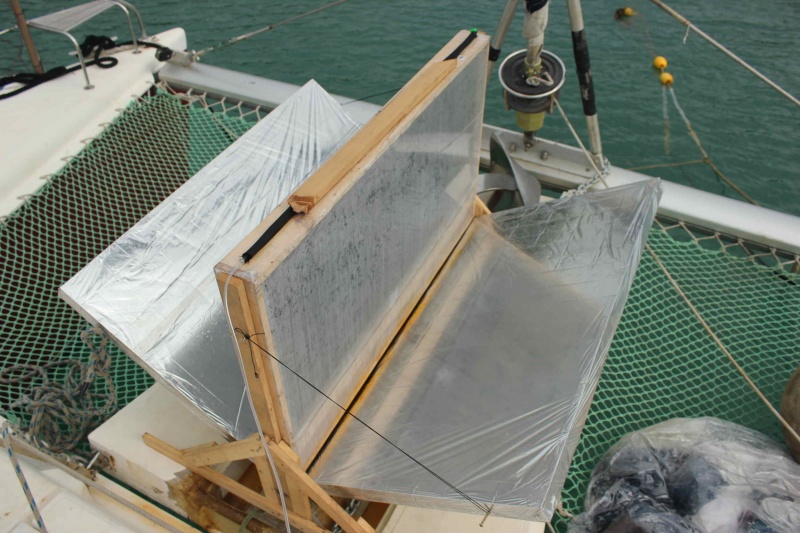
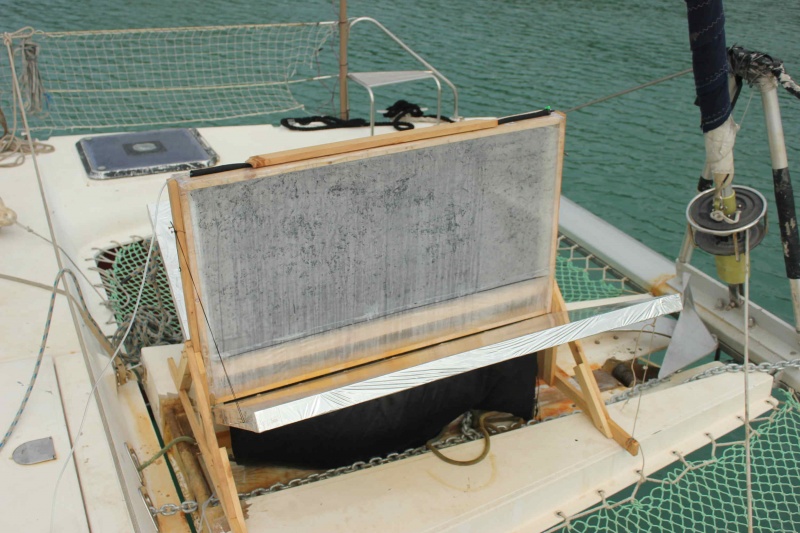
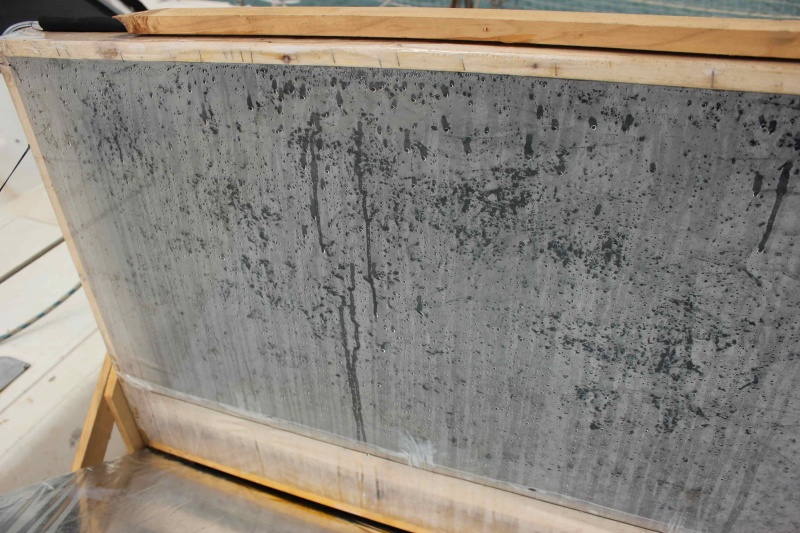
| − | + | Put the desalinator in the sun, open the reflectors, siphon the sea water, and observe the condensation inside the tarpaulins! Pretty soon, fresh water should flow down the frames and fill the bottle! Slightly bend the desalinator with wedges so that fresh water flows gently to the evacuations. | |
}} | }} | ||
{{ {{tntn|Tuto Step}} | {{ {{tntn|Tuto Step}} | ||
Version du 15 janvier 2018 à 16:36
Description
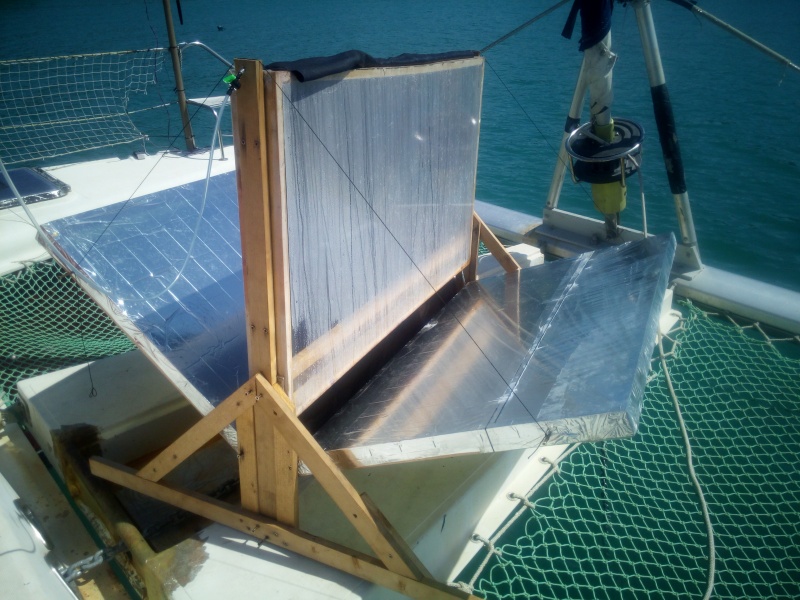
A cloth impregnated with seawater is wedged between two frames on which transparent sheets have been stretched. Thanks to the sun and two reflectors made with a cover of survival, the water of the fabric will evaporate then come to trickle on the baches, while the salt will remain trapped by the fabric. The desalinated water flows down the frames and is collected in a can with two pipes. At the bottom of the frames, waterproofness is essential to the proper functioning of the desalinator.
Sommaire
Sommaire
- 1 Description
- 2 Sommaire
- 3 Étape 1 - Manufacture of freshwater recovery frames
- 4 Étape 2 - Laying the tarpaulin on the freshwater recovery frames.
- 5 Étape 3 - Drilling the evacuation of fresh water.
- 6 Étape 4 - Manufacture of solar reflectors
- 7 Étape 5 - Assembly
- 8 Étape 6 - Use
- 9 Étape 7 - Remarques
- 10 Notes et références
- 11 Commentaires
Matériaux
- Wooden cleats (used in this tutorial: 44 * 22mm)
- Small plastic tube diameter 5 or 6 mm
- Two bottles of 5 or 6 liters
- Strong and transparent plastic tarpaulin
- Cotton fabric
- Blanket
- Wood screws
- Inner tube
Outils
- Screwdriver or screwdriver
- Drill and drills
- Handsaw
- Tapestry stapler
- Neoprene glue
Étape 1 - Manufacture of freshwater recovery frames
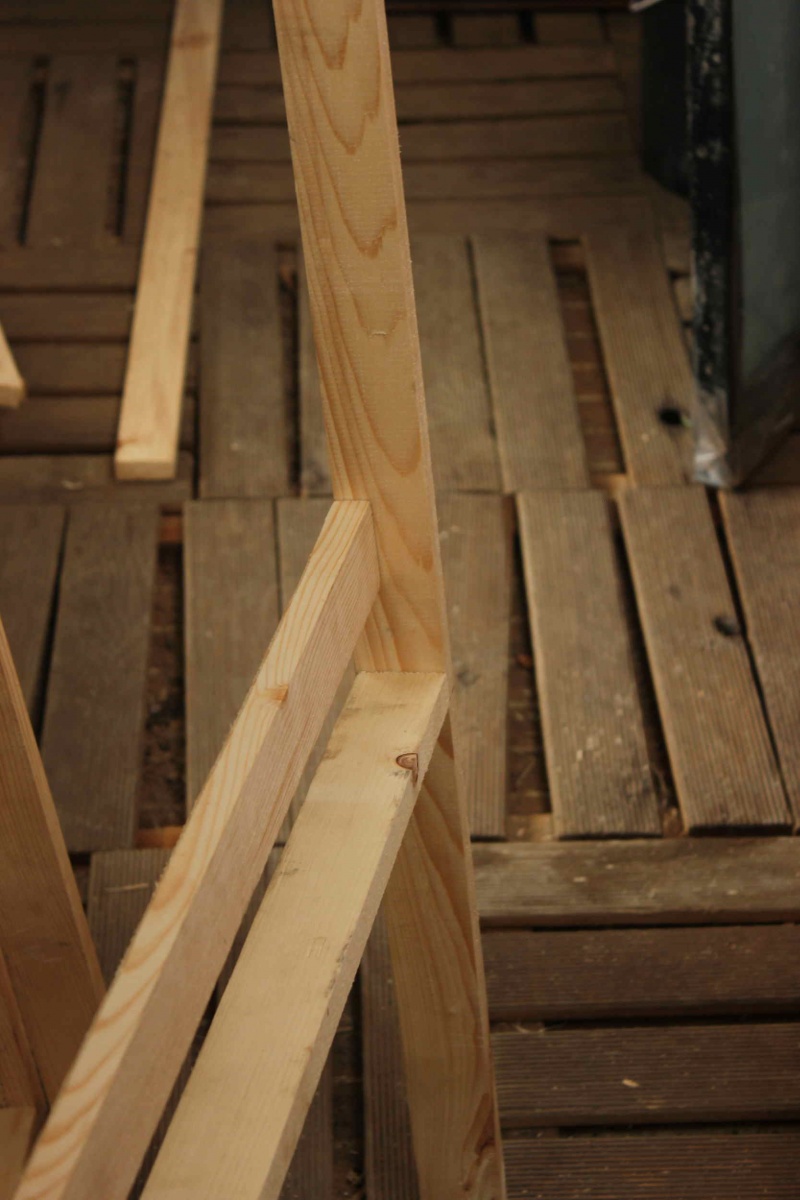
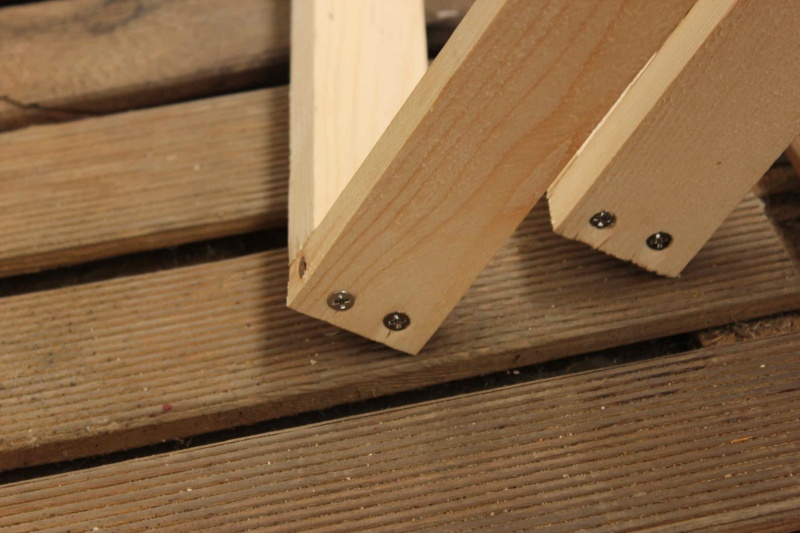
For this model, the chosen floor area is 110 cm horizontal by 66 cm vertical. The wooden battens used have a section of 44 mm by 22 mm. The thickness of the frame is 44 mm. The frame is assembled with screws. At about 10 centimeters from the bottom of the frame, a cleat is added, as can be seen in the picture. It makes it possible to stiffen the frame, to stretch the sheet and to separate the freshwater and seawater parts (no risk of salt contamination).
Étape 2 - Laying the tarpaulin on the freshwater recovery frames.
The tarpaulin should extend about 10 centimeters on each side of the frame, to ensure effective stapling and tension. Begin by stapling the tarpaulin on the separation strip as shown in the diagram (diagram to be added). The tarpaulin should then surround the lower part of the frame and go up, without any staple less than 7 or 8 centimeters from the bottom, at the risk of having water leaks. It will bend the overflowing plastic and staple so as to ensure a tight tank at the bottom of the frame. Finally, cover the panel of the whole tarpaulin and stretch it as much as possible by stapling it inside the frame. Repeat these operations for the second frame.
Étape 3 - Drilling the evacuation of fresh water.
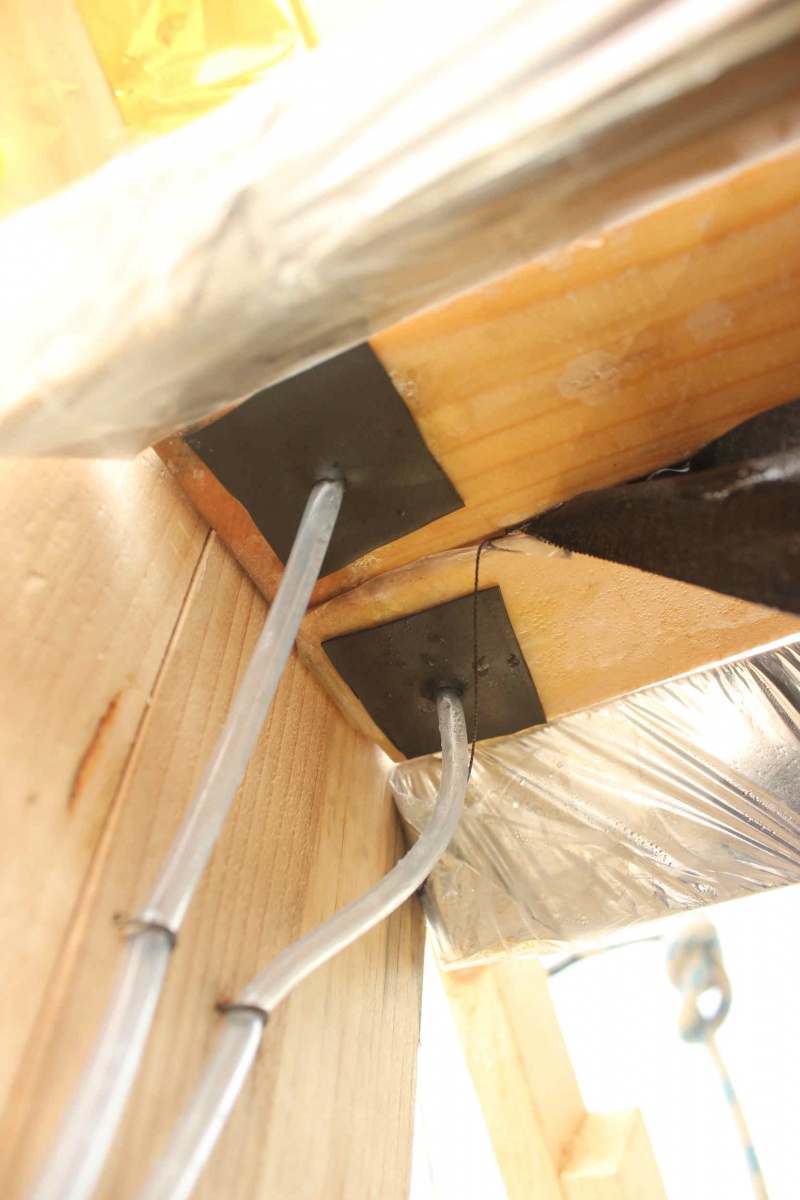
Choose a lower corner of the frames to drill through the tarpaulin and wood a hole of diameter slightly smaller than the diameter of the tube you have. This tube will be forced into the hole and through a patch in air chamber which has the role of making a tight connection between the pipe and the cover (the hole drilled in the air chamber is much smaller than the tube, that is forced back into the air chamber). The patch will be glued to the tarpaulin with neoprene glue. The two pipes thus fixed to the frame will open into the freshwater recovery bottle. We will take care to make a hole in the cap of this bottle to allow a good flow. Both pipes pass through the cap. Plan to secure the two tubes to avoid pulling on the inner tube patches while handling the desalinator.
Étape 4 - Manufacture of solar reflectors
Make two frames of the same dimensions as the previous ones, but without the reinforcement. Tense and staple the survival blanket and the tarpaulin on the frame. The tarp serves to protect the survival blanket, which is fragile. This is the silver side of the cover that will face the sun!
Étape 5 - Assembly
Staple the fabric stretched over one of the two freshwater recovery frames, without the sides touching the vertical edges of the frame. The fabric is stapled between the top of the frame and the reinforcement! Be careful not to make a hole in the bottom of the frame! Secure the two frames facing each other by enclosing the fabric in between. Allow 10 centimeters of fabric exceed at the bottom and top of the frames. Provide feet to keep the desalinator up. Finally, fix the reflectors to the whole so that you can tilt them according to the height of the sun. They will be held in position using twine.
Étape 6 - Use
Drill a pipe every 4 centimeters using a sewing needle along the entire length of the desalinator. At the end of this pipe, provide a tap that will siphon the arrival of seawater. At the other end, this pipe is drowned to the bottom in a bottle of seawater, located higher than the desalinator so that the flow can be done. Provide a tap at the outlet of the seawater bottle to adjust the flow. The pierced portion of the seawater inlet tube is wrapped in the fabric protruding above the frames, thus, all seawater will be trapped by the fabric. Put the desalinator in the sun, open the reflectors, siphon the sea water, and observe the condensation inside the tarpaulins! Pretty soon, fresh water should flow down the frames and fill the bottle! Slightly bend the desalinator with wedges so that fresh water flows gently to the evacuations.
Étape 7 - Remarques
Cette low-tech est actuellement en plein test. Les points testés sont les suivants : - position optimale du désalinisateur et des réflecteurs par rapport au soleil - collecte efficace de l'eau douce - réglage du débit d'eau de mer
Notes et références
- Réalisé par Thomas Piboum et Karel Janik pour Nomade des Mers.
Yes
 Français
 English
 Deutsch
 Español
 Italiano
 Português