(Cette version a été marquée pour être traduite) |
|||
| Ligne 2 : | Ligne 2 : | ||
|Main_Picture=Tent_heating_stove_1.png | |Main_Picture=Tent_heating_stove_1.png | ||
|Licences=Attribution (CC BY) | |Licences=Attribution (CC BY) | ||
| − | |Description=<translate>Simple wood stove to heat a tent or housing</translate> | + | |Description=<translate><!--T:1--> Simple wood stove to heat a tent or housing</translate> |
|Area=Habitat, Energy | |Area=Habitat, Energy | ||
|Type=Tutorial | |Type=Tutorial | ||
| Ligne 19 : | Ligne 19 : | ||
}} | }} | ||
{{ {{tntn|Materials}} | {{ {{tntn|Materials}} | ||
| − | |Material=<translate>* A part of a metal pipe at the scrapyard (diameter 20cm / Thickness 4mm) | + | |Material=<translate><!--T:2--> |
| + | * A part of a metal pipe at the scrapyard (diameter 20cm / Thickness 4mm) | ||
* Metal sheet 2mm thickness | * Metal sheet 2mm thickness | ||
* Metal wire 2mm diameter you can weld | * Metal wire 2mm diameter you can weld | ||
| Ligne 25 : | Ligne 26 : | ||
* Some scrap bars (minimum 6mm diameter) | * Some scrap bars (minimum 6mm diameter) | ||
* Metal net</translate> | * Metal net</translate> | ||
| − | |Tools=<translate>* Grinding machine | + | |Tools=<translate><!--T:3--> |
| + | * Grinding machine | ||
* Welding machine</translate> | * Welding machine</translate> | ||
}} | }} | ||
| Ligne 33 : | Ligne 35 : | ||
|Step_Picture_01=Tent_heating_stove_3.png | |Step_Picture_01=Tent_heating_stove_3.png | ||
|Step_Picture_02=Tent_heating_stove_4.png | |Step_Picture_02=Tent_heating_stove_4.png | ||
| − | |Step_Title=<translate>Main body</translate> | + | |Step_Title=<translate><!--T:4--> Main body</translate> |
| − | |Step_Content=<translate>Take the pipe diameter 20cm and cut it. 20Cm high. | + | |Step_Content=<translate><!--T:5--> |
| + | Take the pipe diameter 20cm and cut it. 20Cm high. | ||
| + | <!--T:6--> | ||
Cut a small opening 5x5cm at the bottom of the pipe. | Cut a small opening 5x5cm at the bottom of the pipe. | ||
| + | <!--T:7--> | ||
Cut a piece of metal sheet, same shape of the pipe, you can mark it before cutting. . Weld it at the bottom of your stove, same side of your opening.</translate> | Cut a piece of metal sheet, same shape of the pipe, you can mark it before cutting. . Weld it at the bottom of your stove, same side of your opening.</translate> | ||
}} | }} | ||
| Ligne 47 : | Ligne 52 : | ||
|Step_Picture_04=Tent_heating_stove_9.png | |Step_Picture_04=Tent_heating_stove_9.png | ||
|Step_Picture_05=Tent_heating_stove_10.png | |Step_Picture_05=Tent_heating_stove_10.png | ||
| − | |Step_Title=<translate>Mesh preparation</translate> | + | |Step_Title=<translate><!--T:8--> Mesh preparation</translate> |
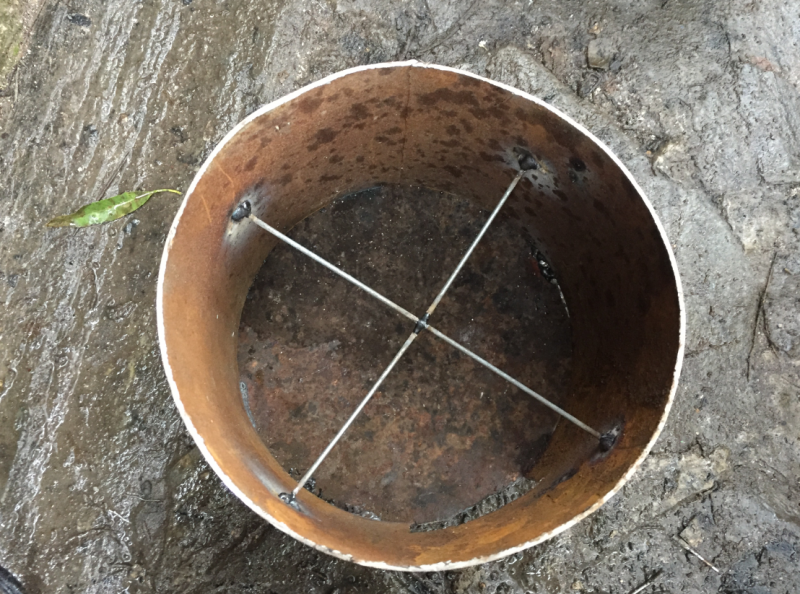
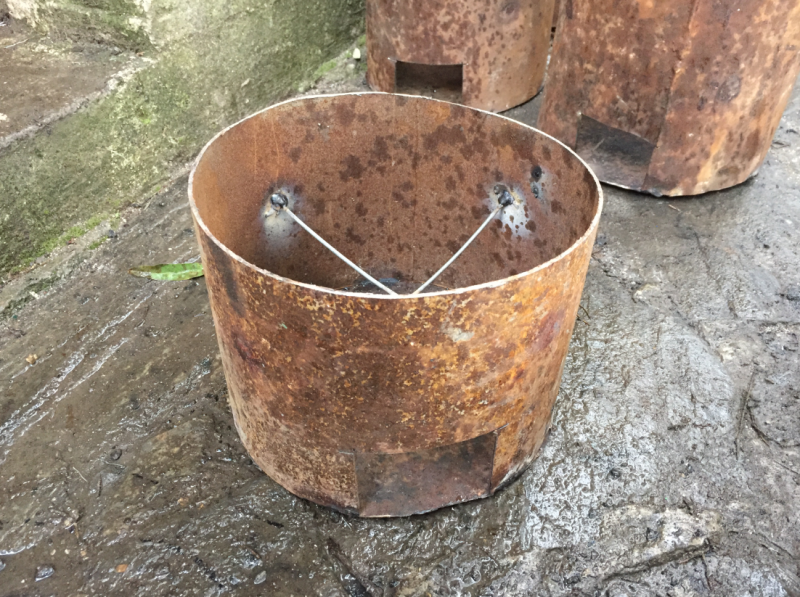
| − | |Step_Content=<translate>Cut 2 pieces of wire, weld them middle height of the stove with cross shape. | + | |Step_Content=<translate><!--T:9--> |
| + | Cut 2 pieces of wire, weld them middle height of the stove with cross shape. | ||
| + | <!--T:10--> | ||
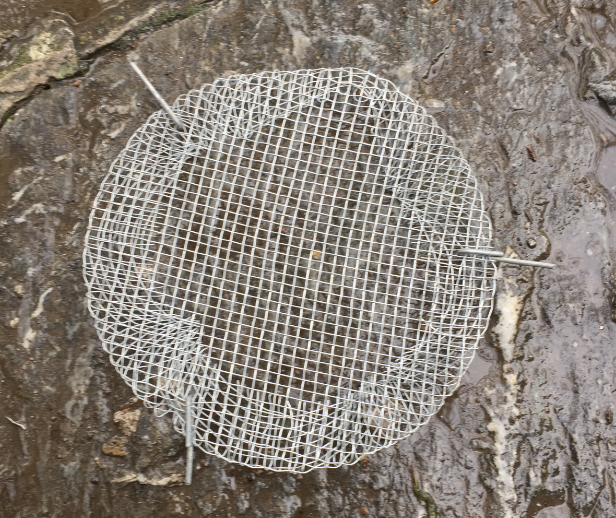
Cut a circle in the metal net (10cm more than the pipe diameter), bend it down to do the exact shape of your stove to reinforce to border of the circle. | Cut a circle in the metal net (10cm more than the pipe diameter), bend it down to do the exact shape of your stove to reinforce to border of the circle. | ||
| + | <!--T:11--> | ||
Cut at least 3 small pieces of wire and bend them through the net. You have to be in the double layer part. The end of the hook has to face up. | Cut at least 3 small pieces of wire and bend them through the net. You have to be in the double layer part. The end of the hook has to face up. | ||
| + | <!--T:12--> | ||
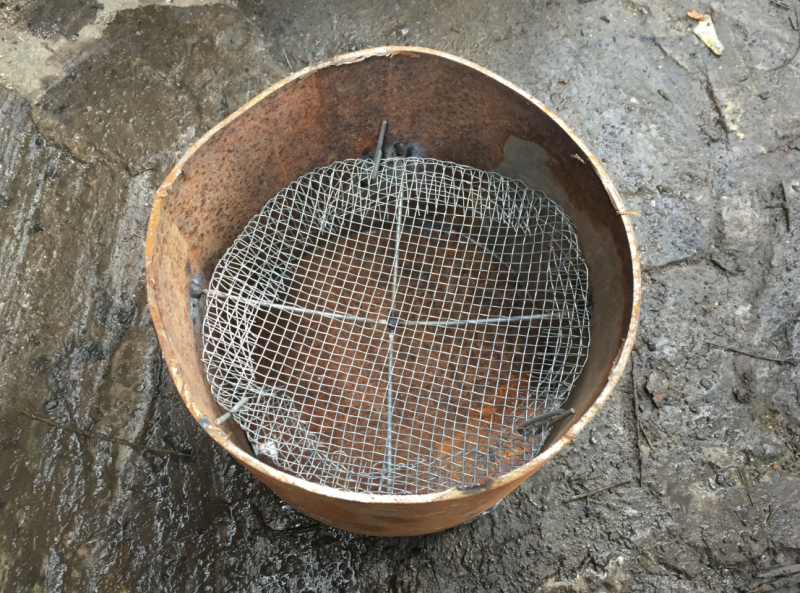
Put the net on the top of your cross. Net bending down, hook bending up. | Put the net on the top of your cross. Net bending down, hook bending up. | ||
| + | <!--T:13--> | ||
Weld them.</translate> | Weld them.</translate> | ||
}} | }} | ||
| Ligne 61 : | Ligne 71 : | ||
|Step_Picture_00=Tent_heating_stove_11.png | |Step_Picture_00=Tent_heating_stove_11.png | ||
|Step_Picture_01=Tent_heating_stove_12.png | |Step_Picture_01=Tent_heating_stove_12.png | ||
| − | |Step_Title=<translate>Top cover</translate> | + | |Step_Title=<translate><!--T:14--> Top cover</translate> |
| − | |Step_Content=<translate>Cut a circle in a metal sheet, same shape of your stove. This will become the cover of your stove. Fix it to your stove with an hinge. Weld the hinge at the back of your stove, opposite side of your small opening.</translate> | + | |Step_Content=<translate><!--T:15--> Cut a circle in a metal sheet, same shape of your stove. This will become the cover of your stove. Fix it to your stove with an hinge. Weld the hinge at the back of your stove, opposite side of your small opening.</translate> |
}} | }} | ||
{{ {{tntn|Tuto Step}} | {{ {{tntn|Tuto Step}} | ||
|Step_Picture_00=Tent_heating_stove_13.png | |Step_Picture_00=Tent_heating_stove_13.png | ||
|Step_Picture_01=Tent_heating_stove_14.png | |Step_Picture_01=Tent_heating_stove_14.png | ||
| − | |Step_Title=<translate>Lock</translate> | + | |Step_Title=<translate><!--T:16--> Lock</translate> |
| − | |Step_Content=<translate>Create a simple system to lock your stove. One buckle on your cover, one buckle over the opening and one hook.</translate> | + | |Step_Content=<translate><!--T:17--> Create a simple system to lock your stove. One buckle on your cover, one buckle over the opening and one hook.</translate> |
}} | }} | ||
{{ {{tntn|Tuto Step}} | {{ {{tntn|Tuto Step}} | ||
|Step_Picture_00=Tent_heating_stove_15.png | |Step_Picture_00=Tent_heating_stove_15.png | ||
| − | |Step_Title=<translate>Feet</translate> | + | |Step_Title=<translate><!--T:18--> Feet</translate> |
| − | |Step_Content=<translate>Finally, cut 3 pieces of rebars (length 15cm) bend them a bit to have curved legs which are more stable. | + | |Step_Content=<translate><!--T:19--> |
| + | Finally, cut 3 pieces of rebars (length 15cm) bend them a bit to have curved legs which are more stable. | ||
| + | <!--T:20--> | ||
Weld them 3 points equal distances. | Weld them 3 points equal distances. | ||
| + | <!--T:21--> | ||
Test the stability of your stove. Move the place of the legs if necessary.</translate> | Test the stability of your stove. Move the place of the legs if necessary.</translate> | ||
}} | }} | ||
{{ {{tntn|Tuto Step}} | {{ {{tntn|Tuto Step}} | ||
| − | |Step_Title=<translate>Instructions for use:</translate> | + | |Step_Title=<translate><!--T:22--> Instructions for use:</translate> |
| − | |Step_Content=<translate>1. choose a place for the stove and do a mud or small stone bed for the stove. The bed size should be twice the stove diameter and 2cm thick. This bed will avoid ashes to make something burn in your interior. | + | |Step_Content=<translate><!--T:23--> |
| + | 1. choose a place for the stove and do a mud or small stone bed for the stove. The bed size should be twice the stove diameter and 2cm thick. This bed will avoid ashes to make something burn in your interior. | ||
| + | <!--T:24--> | ||
2. Keep the stove outside to make fire. | 2. Keep the stove outside to make fire. | ||
| + | <!--T:25--> | ||
3. Cut small pieces of wood to not waste too much | 3. Cut small pieces of wood to not waste too much | ||
| + | <!--T:26--> | ||
4. Burn the wood on the top of the net and use the hole as an air entrance (blow) | 4. Burn the wood on the top of the net and use the hole as an air entrance (blow) | ||
| + | <!--T:27--> | ||
5. Never close the stove when burning | 5. Never close the stove when burning | ||
| + | <!--T:28--> | ||
6. Wait the time when there is no smoke anymore, when all the wood has been burned | 6. Wait the time when there is no smoke anymore, when all the wood has been burned | ||
| + | <!--T:29--> | ||
7. Close the stove properly with the lock | 7. Close the stove properly with the lock | ||
| + | <!--T:30--> | ||
8. Bring the stove in your interior by protecting your hands with fabrics. | 8. Bring the stove in your interior by protecting your hands with fabrics. | ||
| + | <!--T:31--> | ||
9. Enjoy the heat | 9. Enjoy the heat | ||
| + | <!--T:32--> | ||
10. Make sure you have air rotation in the place you heat to not suffocate | 10. Make sure you have air rotation in the place you heat to not suffocate | ||
| + | <!--T:33--> | ||
11. Remove the ashes before starting a new fire</translate> | 11. Remove the ashes before starting a new fire</translate> | ||
}} | }} | ||
Version du 14 février 2019 à 09:45
Description
Simple wood stove to heat a tent or housing
Matériaux
- A part of a metal pipe at the scrapyard (diameter 20cm / Thickness 4mm)
- Metal sheet 2mm thickness
- Metal wire 2mm diameter you can weld
- An hinge you can weld
- Some scrap bars (minimum 6mm diameter)
- Metal net
Outils
- Grinding machine
- Welding machine
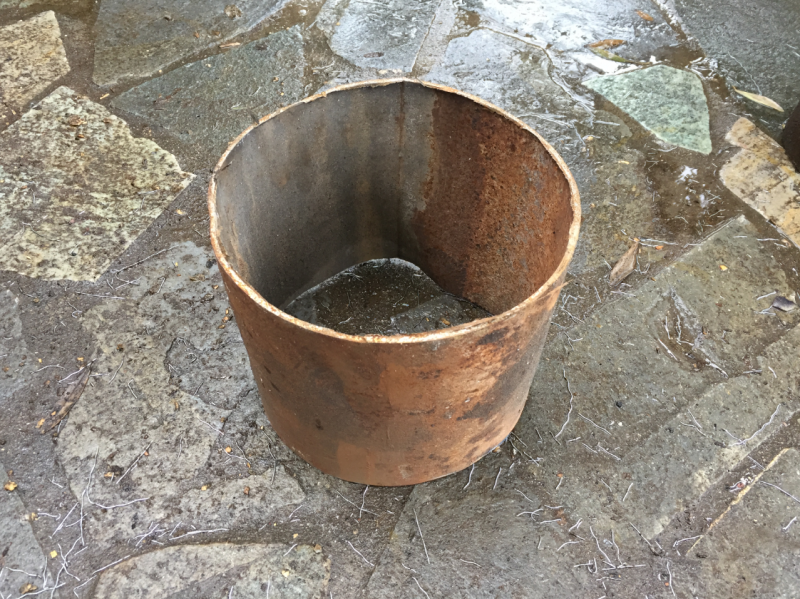
Étape 1 - Main body
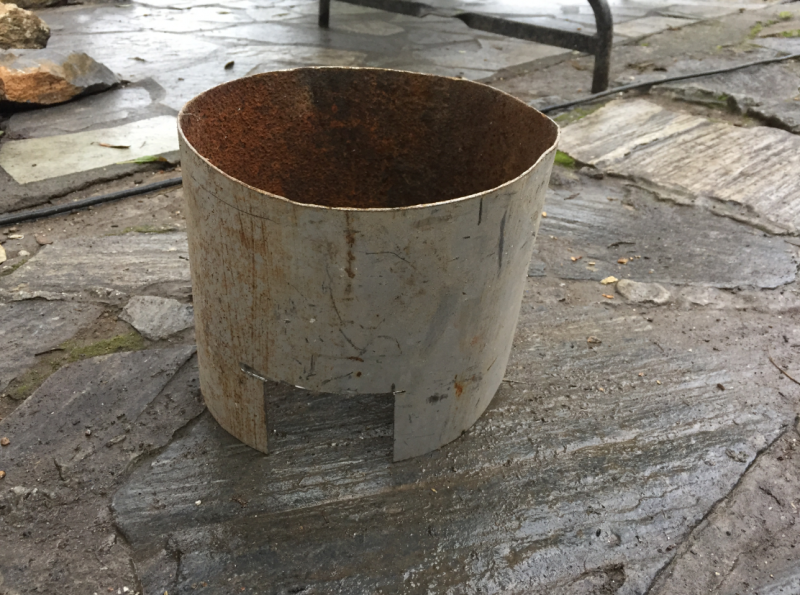
Take the pipe diameter 20cm and cut it. 20Cm high.
Cut a small opening 5x5cm at the bottom of the pipe.
Cut a piece of metal sheet, same shape of the pipe, you can mark it before cutting. . Weld it at the bottom of your stove, same side of your opening.
Étape 2 - Mesh preparation
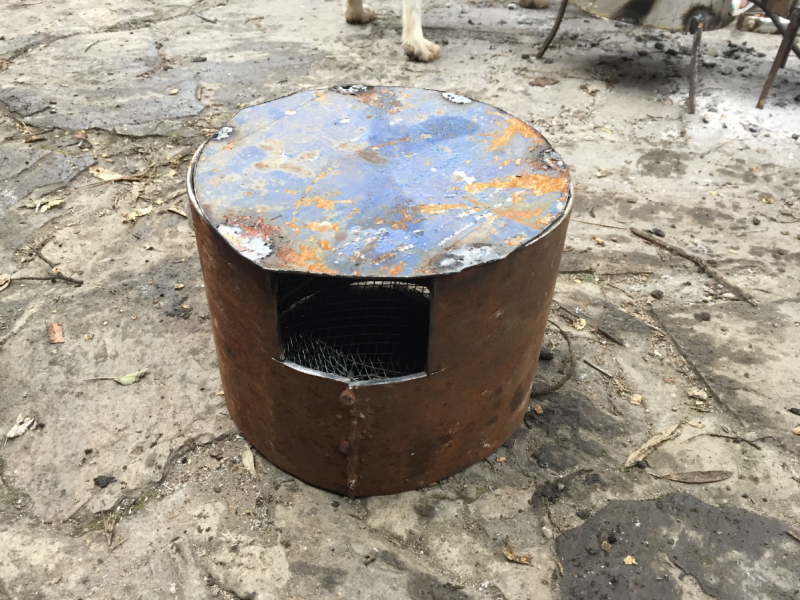
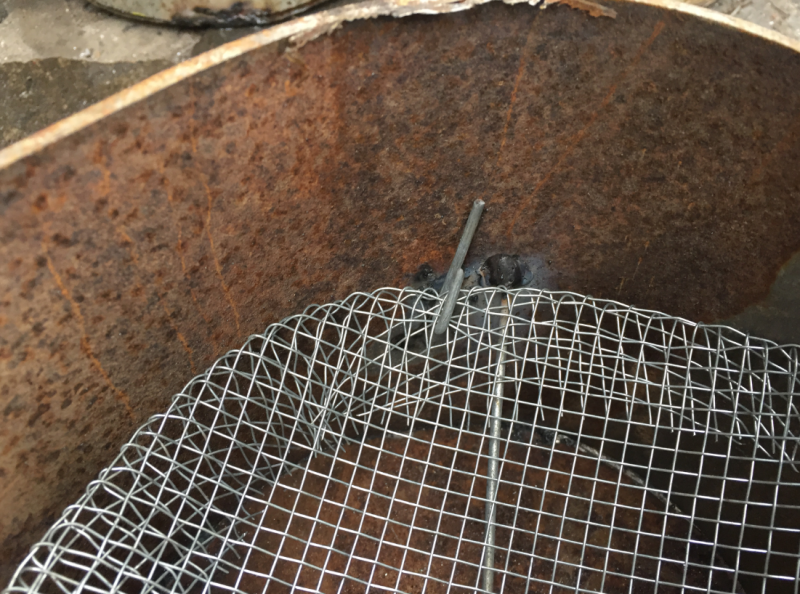
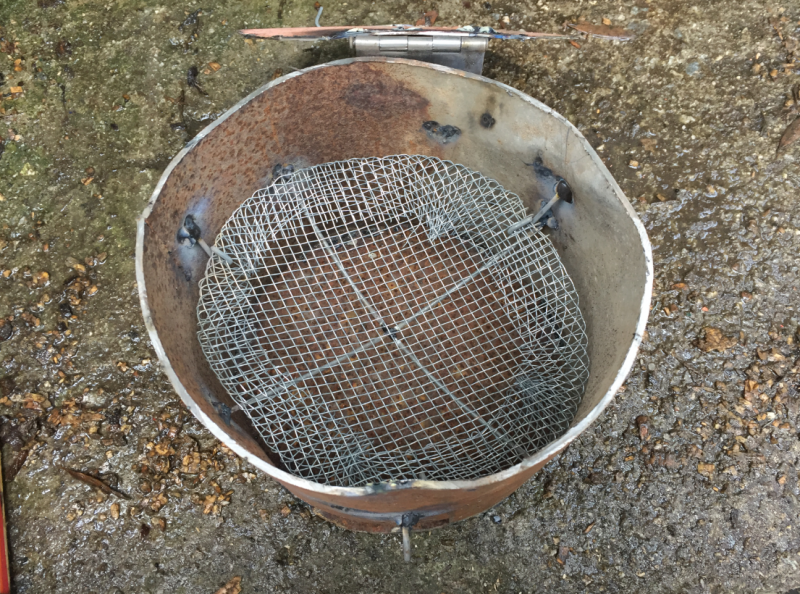
Cut 2 pieces of wire, weld them middle height of the stove with cross shape.
Cut a circle in the metal net (10cm more than the pipe diameter), bend it down to do the exact shape of your stove to reinforce to border of the circle.
Cut at least 3 small pieces of wire and bend them through the net. You have to be in the double layer part. The end of the hook has to face up.
Put the net on the top of your cross. Net bending down, hook bending up.
Weld them.
Étape 3 - Top cover
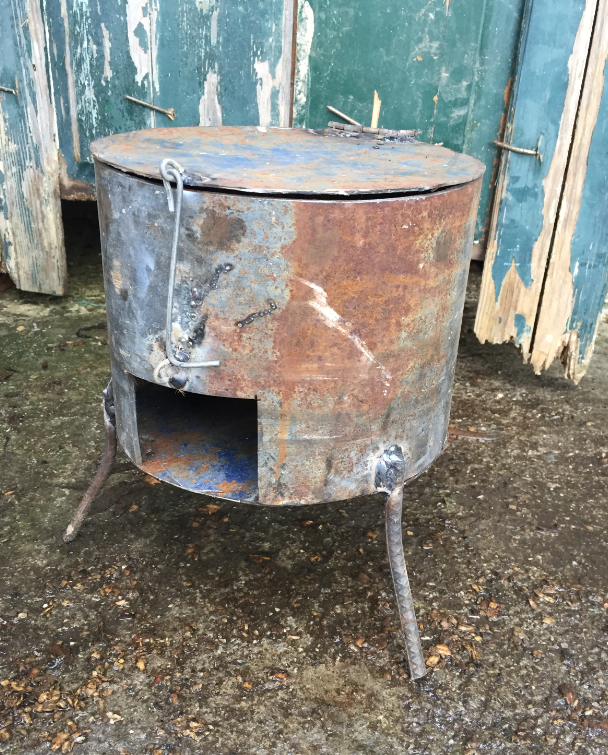
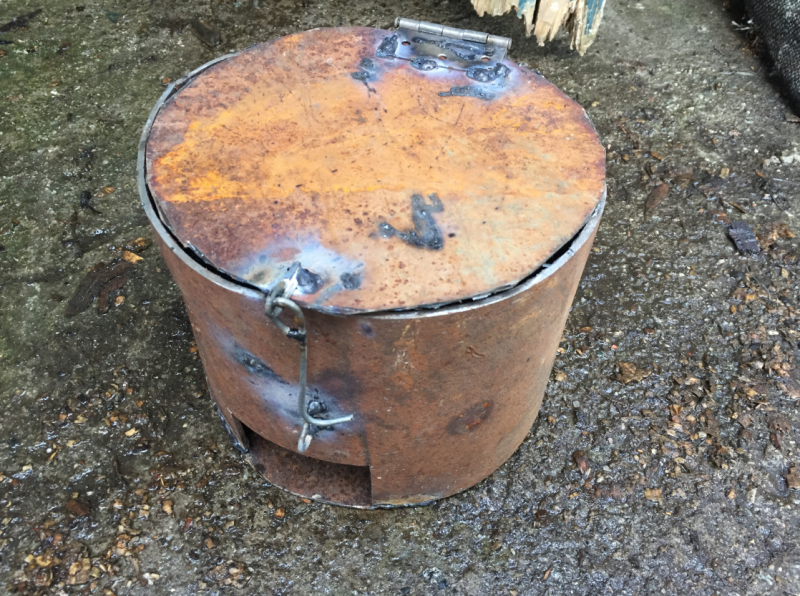
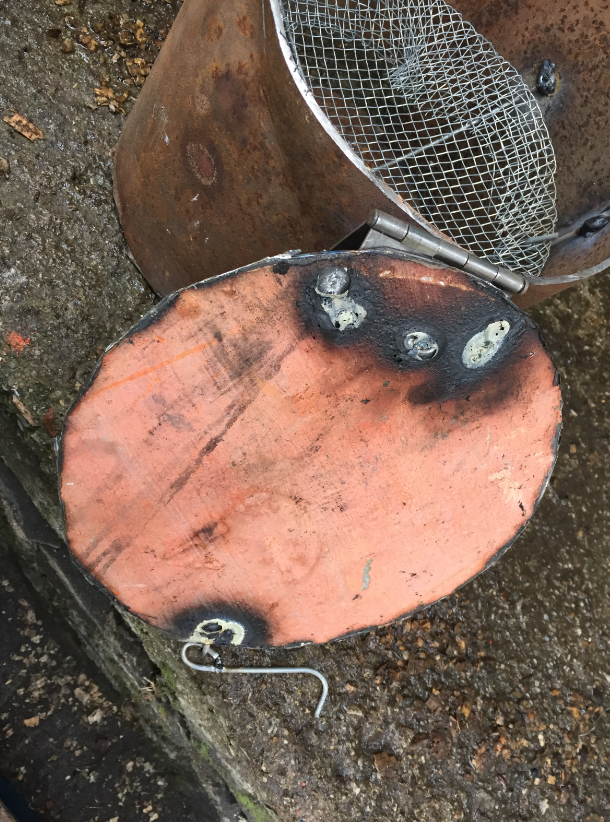
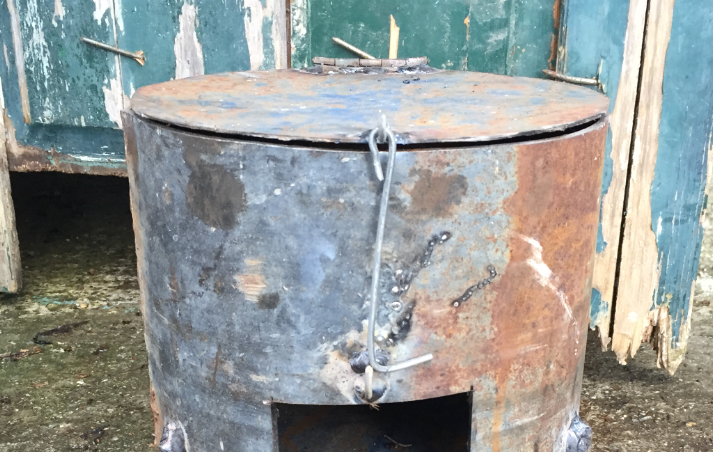
Cut a circle in a metal sheet, same shape of your stove. This will become the cover of your stove. Fix it to your stove with an hinge. Weld the hinge at the back of your stove, opposite side of your small opening.
Étape 4 - Lock
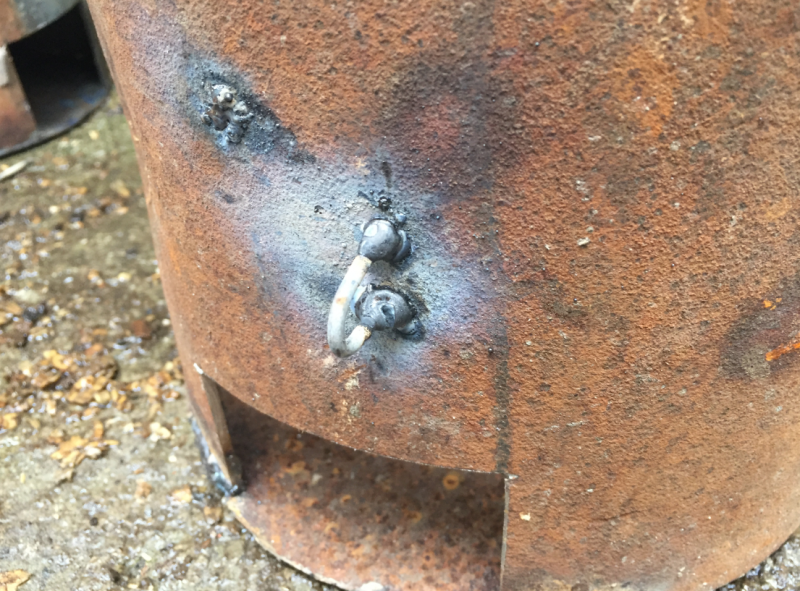
Create a simple system to lock your stove. One buckle on your cover, one buckle over the opening and one hook.
Étape 5 - Feet
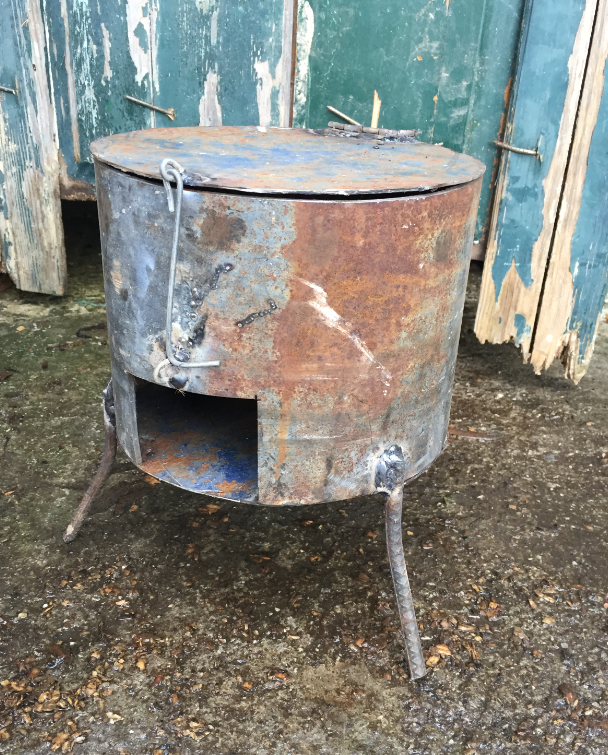
Finally, cut 3 pieces of rebars (length 15cm) bend them a bit to have curved legs which are more stable.
Weld them 3 points equal distances.
Test the stability of your stove. Move the place of the legs if necessary.
Étape 6 - Instructions for use:
1. choose a place for the stove and do a mud or small stone bed for the stove. The bed size should be twice the stove diameter and 2cm thick. This bed will avoid ashes to make something burn in your interior.
2. Keep the stove outside to make fire.
3. Cut small pieces of wood to not waste too much
4. Burn the wood on the top of the net and use the hole as an air entrance (blow)
5. Never close the stove when burning
6. Wait the time when there is no smoke anymore, when all the wood has been burned
7. Close the stove properly with the lock
8. Bring the stove in your interior by protecting your hands with fabrics.
9. Enjoy the heat
10. Make sure you have air rotation in the place you heat to not suffocate
11. Remove the ashes before starting a new fire
Published
 Français
 English
 Deutsch
 Español
 Italiano
 Português