(Page créée avec « Using multiple barriers approach is the best way to reduce risks of drinking unsafe water. Each step of the process, from sources protection to water treatment and safe st... ») |
(Mise à jour pour être en accord avec la nouvelle version de la source de la page) |
||
| (48 révisions intermédiaires par un autre utilisateur non affichées) | |||
| Ligne 1 : | Ligne 1 : | ||
{{Tuto Details | {{Tuto Details | ||
| − | |||
| − | |||
| − | |||
|Main_Picture=Filtre_bio-sable_pour_eau_potable_couverture.jpg | |Main_Picture=Filtre_bio-sable_pour_eau_potable_couverture.jpg | ||
|Licences=Attribution-ShareAlike (CC BY-SA) | |Licences=Attribution-ShareAlike (CC BY-SA) | ||
| Ligne 27 : | Ligne 24 : | ||
Using multiple barriers approach is the best way to reduce risks of drinking unsafe water. Each step of the process, from sources protection to water treatment and safe storage, is responsible for a decrease of sanitary risks. The treatment process includes: water source protection, sedimentation, filtration, disinfection and safe storage. | Using multiple barriers approach is the best way to reduce risks of drinking unsafe water. Each step of the process, from sources protection to water treatment and safe storage, is responsible for a decrease of sanitary risks. The treatment process includes: water source protection, sedimentation, filtration, disinfection and safe storage. | ||
| − | + | People often focus on one-step particular technology, instead of considering water treatment process as a whole. Even though individual technologies as this filter can improve water quality, it is essential to control the whole process to ensure the best water quality. | |
| − | ''' | + | '''Water treatment at home''' |
| − | * | + | * Sedimentation removes big particules and often >50% of pathogens. |
| − | * Filtration | + | * Filtration removes smaller particules and often > 90% of pathogens. |
| − | * | + | * Disinfection removes, disactivates or kills remaining pathogens. |
| − | + | Water treatment process at home is mainly based of pathogens elimination from drinking water, which is the most important water issue in the world. This tutorial only focuses on the filtration part. | |
| − | |||
| − | ''' | + | '''Operating principle :''' |
| − | + | Bio-sand filter is an optimization of classic sand filter, that has been used for century to filter freshwater before drinking it. | |
| − | + | The bio-sand filter is composed of five different areas: | |
| − | * 1) ''' | + | * 1) '''reservoir zone''' : Where water will be poured into the filter. |
| − | * 2) ''' | + | * 2) '''resting water zone''' : This water maintains wet sand, and lets oxygen through to the biological layer. |
| − | * 3) ''' | + | * 3) '''biological zone''' : Develops on the 5-10 first cm of the sand surface. Sand eliminates pathogens, particules and other contaminants. As in slow sand filters, a layer of micro-organisms (also known as schmutzedecke) develops in the 1-2 cm of the sand surface. |
| − | * 4) ''' | + | * 4) '''non-biological zone''' : Do not contains micro-organisms (or very few) because of oxygen and nutrients deprivation. |
| − | * 5) ''' | + | * 5) '''gravel zone''' : Maintains the sand and protects the output pipe from clogging. |
| − | + | Pathogens and suspended matters are eliminated by a combination of physical and biological processes, that take place in the sand and biological layers: | |
| − | * ''' | + | * '''Mechanical trap''' : Suspended matters and pathogens are physically blocked in spaces between the grains of sand. |
| − | * ''' | + | * '''Predation''' : Pathogens are eaten by other micro-organisms of the biological layer. |
| − | * ''' | + | * '''Adsorption''' : Pathogens are attached one to another, to suspended matters and to the grains of sand. |
| − | * ''' | + | * '''Natural death''' : Pathogens die or end their life cycle, because there is not enough food or oxygen for their survival. |
| − | ''' | + | '''Theoretical efficacity''' : |
| − | + | This filter is intented for classical fresh water, non excessively polluted by elements like arsenic for example. In case of particularly polluted water, complementary filtration systems will have to be added. | |
| − | + | Analysis results after biosand filtration with CAWST filter: | |
| − | * | + | * Bacterias : Up to 96,5% in the lab, 87,9 to 98,5% on the field. |
| − | * Virus : 70 | + | * Virus : 70 to > 99% in the lab. |
| − | * | + | * Protozoa: > 99,9% in the lab. |
| − | * | + | * Helminth (parasitic worms): Up to 100% in the lab and on the field. |
| − | * | + | * Iron : 90-95% on the field. |
'''Source: CAWST''' | '''Source: CAWST''' | ||
| + | }} | ||
| + | {{TutoVideo | ||
| + | |VideoType=Youtube | ||
| + | |VideoURLYoutube=https://youtu.be/y0OsnJ0Uz5Q | ||
}} | }} | ||
{{Materials | {{Materials | ||
|Step_Picture_00=Filtre_bio-sable_pour_eau_potable_schema.jpg | |Step_Picture_00=Filtre_bio-sable_pour_eau_potable_schema.jpg | ||
| − | |Material=* | + | |Material=* One meter of PVC pipe for drinking water adduction, 100mm diameter. |
| − | * | + | * One PVC plug, adapted to the pipe. |
| − | * | + | * One cover |
| − | * | + | * PVC glue. |
| − | * | + | * Sand, if possible from crushed stones, diameter 0-1mm, in order to fill 60 of the pipe. |
| − | * | + | * Gravel zone, 6-10 mm, in order to fill 10cm of the pipe. |
| − | * | + | * Flexible plastic pipe intented for food. |
| − | * 3 | + | * 3 bends, adapted to the flexible pipe. |
| − | * Silicone | + | * Silicone |
| − | |Tools=* | + | |Tools=* Gloves and protection glasses |
| − | * | + | * Hacksaw |
| − | * | + | * A basin |
| − | * | + | * Sandpaper |
| − | * | + | * A driller |
}} | }} | ||
| − | |||
{{Tuto Step | {{Tuto Step | ||
| + | |Step_Title=Filter body preparation | ||
| + | |Step_Content=* Grind slightly the inside of the PVC plug (using sandpaper) and the outside of one end of the PVC pipe. Stick them together using PVC glue. | ||
| + | |||
| + | * Drill a hole of the bends diameter in the flexible pipe, 75cm from the bottom of the PVC. Connection between pipe and bend will have to be perfectly sealed. | ||
| + | |||
| + | * Drill many holes in the cover (it has to be a plastic cap). | ||
| + | |||
| + | '''Remark''' : It it recommended that the cover is perfectly adapted to the tube and that is can also be used as "sieve", so that added water would fall slowly on the sand without disturbing the biological layer. | ||
|Step_Picture_00=Filtre_bio-sable_pour_eau_potable_IMG_1040.JPG | |Step_Picture_00=Filtre_bio-sable_pour_eau_potable_IMG_1040.JPG | ||
|Step_Picture_01=Filtre_bio-sable_pour_eau_potable_IMG_1047.JPG | |Step_Picture_01=Filtre_bio-sable_pour_eau_potable_IMG_1047.JPG | ||
|Step_Picture_02=Filtre_bio-sable_pour_eau_potable_4.jpg | |Step_Picture_02=Filtre_bio-sable_pour_eau_potable_4.jpg | ||
|Step_Picture_03=Filtre_bio-sable_pour_eau_potable_8.jpg | |Step_Picture_03=Filtre_bio-sable_pour_eau_potable_8.jpg | ||
| − | |||
| − | |||
| − | |||
| − | |||
| − | |||
| − | |||
| − | |||
| − | |||
}} | }} | ||
{{Tuto Step | {{Tuto Step | ||
| − | + | |Step_Title=Flexible pipe preparation | |
| − | + | |Step_Content=* In the flexible pipe, cut several pieces of 8cm, 75cm, 5cm and 10cm. | |
| − | |Step_Title= | ||
| − | |Step_Content=* | ||
| − | * | + | * Drill several holes of about 5mm in the 8cm piece. |
| − | * | + | * Place a bend between the 8cm and the 75cm part. |
| − | * | + | * At the other end of the 75cm piece, insert a bend. |
| − | * | + | * Place a bend between the 5cm and 10cm parts. |
| + | |Step_Picture_00=Filtre_bio-sable_pour_eau_potable_3.jpg | ||
| + | |Step_Picture_01=Filtre_bio-sable_pour_eau_potable_IMG_1049.JPG | ||
}} | }} | ||
{{Tuto Step | {{Tuto Step | ||
| + | |Step_Title=Gravels wahsing | ||
| + | |Step_Content=* Wash gravels with clean freshwater. Repeat the operation until no particles are suspended in the washing water. | ||
|Step_Picture_00=Filtre_bio-sable_pour_eau_potable_IMG_1037.JPG | |Step_Picture_00=Filtre_bio-sable_pour_eau_potable_IMG_1037.JPG | ||
| − | |||
| − | |||
}} | }} | ||
{{Tuto Step | {{Tuto Step | ||
| + | |Step_Title=Sand washing | ||
| + | |Step_Content='''Remark''': It is advised to use sand from crushed rock. In case it is not possible, rivier sand can be used. In the worst case, sea sand can also be used but has to be desalinated beforehand. In each case, the sand should be of between 0 and 1mm. | ||
| + | |||
| + | * Wash the sand using clean freshwater, and empty suspended particles and dirty water. | ||
| + | |||
| + | * To test the washing, put a bit of sand in a closed jar with clean water and shake it. If most of the suspended elements fall to the bottom of the jar within 4 secondes and the water is only slightly turbid, the washing is ok. It is not necessary to remove all suspended micro-particles, otherwise it would reduce filter efficacity. | ||
| + | Generally 4 or 5 washes are necessary. | ||
| + | |||
| + | '''[https://www.biosandfilters.info/topic/sand This video explains in details sand washing.]''' | ||
|Step_Picture_00=Filtre_bio-sable_pour_eau_potable_IMG_1029.JPG | |Step_Picture_00=Filtre_bio-sable_pour_eau_potable_IMG_1029.JPG | ||
|Step_Picture_01=Filtre_bio-sable_pour_eau_potable_IMG_1035.JPG | |Step_Picture_01=Filtre_bio-sable_pour_eau_potable_IMG_1035.JPG | ||
|Step_Picture_02=Filtre_bio-sable_pour_eau_potable_IMG_1036.JPG | |Step_Picture_02=Filtre_bio-sable_pour_eau_potable_IMG_1036.JPG | ||
| − | |||
| − | |||
| − | |||
| − | |||
| − | |||
| − | |||
| − | |||
| − | |||
| − | |||
}} | }} | ||
{{Tuto Step | {{Tuto Step | ||
| + | |Step_Title=Filter assembly | ||
| + | |Step_Content= | ||
|Step_Picture_00=Filtre_bio-sable_pour_eau_potable_5.jpg | |Step_Picture_00=Filtre_bio-sable_pour_eau_potable_5.jpg | ||
|Step_Picture_01=Filtre_bio-sable_pour_eau_potable_7.jpg | |Step_Picture_01=Filtre_bio-sable_pour_eau_potable_7.jpg | ||
| − | |||
| − | |||
}} | }} | ||
{{Tuto Step | {{Tuto Step | ||
| − | |Step_Title= | + | |Step_Title=Filter use |
| − | |Step_Content=''' | + | |Step_Content='''Notes''': |
| − | 1) | + | 1) Biosand filter can be used for any source of water, including rainwater, underground water, river or lake water. The source must be as clean as possible. If the source is highly contaminated, filtered water can still contain contaminants. |
| − | 2) | + | 2) With time, the biological layer will adapt to a certain degree of water contamination. If a source with a different level and kind of contamination is used, the layer might not be able to consume all pathogens. The biological layer may need several days to adapt to a new kind of water: its contamination and nutrients. It is advised to systematically use the same water source to ensure the best treatment quality. |
| − | 3) | + | 3) The biological layer requires '''1 month ''' from the first filtration before being fully efficient. |
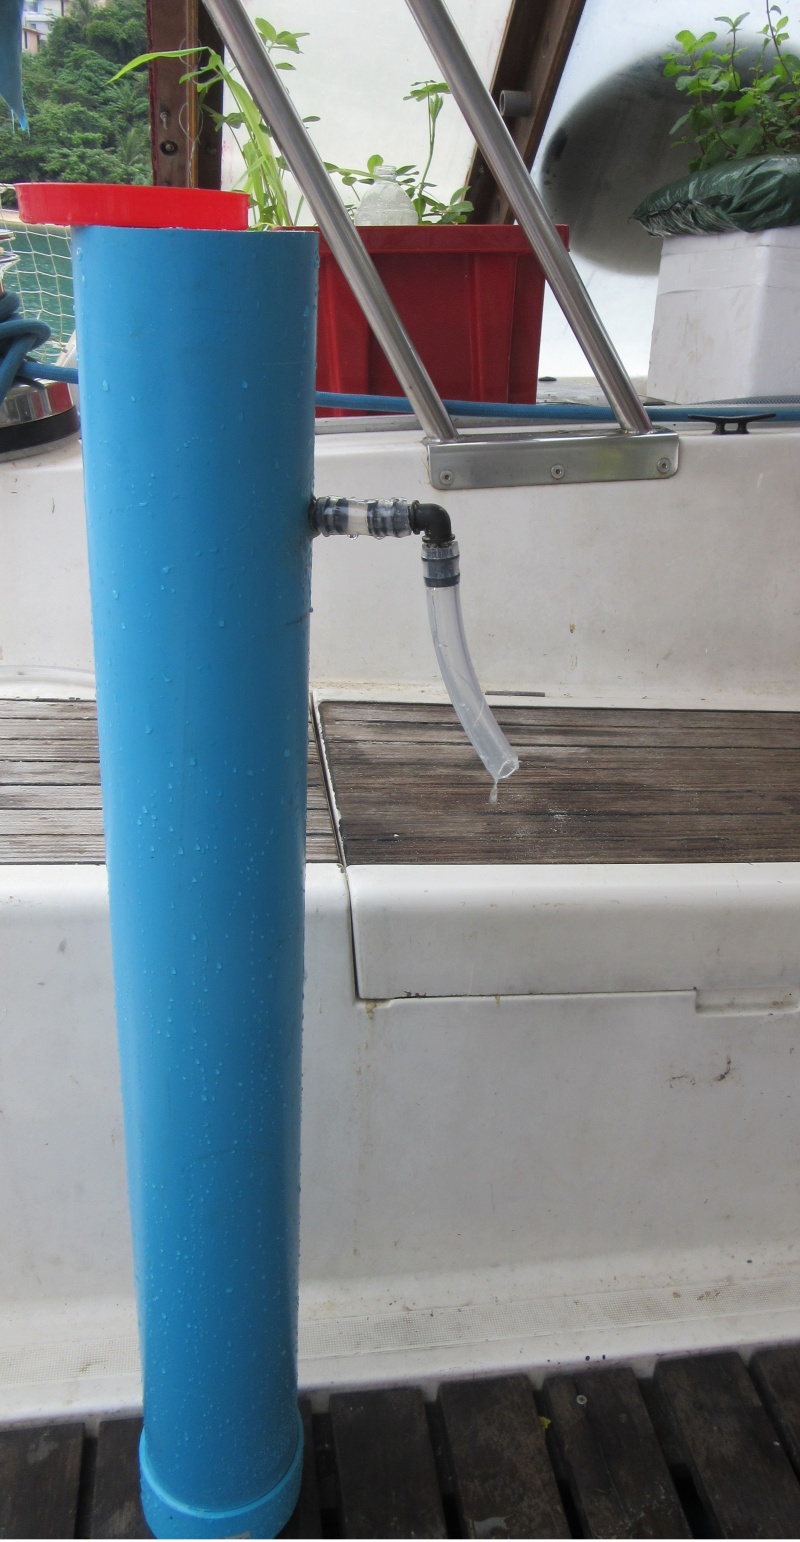
| − | * | + | * Pour water through the drilled cover until reservoir zone is full. Through piston effect, water will flow through the output pipe. Do not drink this water during the first month. |
| − | * | + | * Repeat filling everyday so that biological layers oxygenates and has pathogens to eat. Respect a 1h minimum and 48h maximum delay between two fillings. Below 1h, the filter will not act properly and above 48h, the biological layer degradates. |
| − | * | + | * After a month, water is suppoed to be clean enough, but it is highly recommanded to test it before first consumption and on a regular basis. |
| − | * | + | * If the water source has ot be modified, wait a few days until the biological layer adapts. |
| − | * | + | * Store the filtered water off the ground, protected from small animals, in the shadow. Drink it as soon as possible. |
}} | }} | ||
{{Tuto Step | {{Tuto Step | ||
| − | |Step_Title= | + | |Step_Title=Maintenance |
|Step_Content= | |Step_Content= | ||
}} | }} | ||
{{Notes | {{Notes | ||
|Notes= | |Notes= | ||
| + | }} | ||
| + | {{PageLang | ||
}} | }} | ||
{{Tuto Status | {{Tuto Status | ||
|Complete=Published | |Complete=Published | ||
}} | }} | ||
| + | {{Separator}} | ||
Version actuelle datée du 11 janvier 2023 à 11:16
Description
Filter for drinking water using sand and a bacterial layer.
Sommaire
Introduction
Remark This technology is currently being tested. Results on the water quality will be available within a few months.
This filter was created for individual use (5L/day) and is adapted from the work of NGO CAWST and Dr David Manz, who has been working since 2001 to spread bio-sand filters to families in need. The version presented in this tutorial is easier to build and more compact than the family filter version.
Multiple barriers approach:
Using multiple barriers approach is the best way to reduce risks of drinking unsafe water. Each step of the process, from sources protection to water treatment and safe storage, is responsible for a decrease of sanitary risks. The treatment process includes: water source protection, sedimentation, filtration, disinfection and safe storage.
People often focus on one-step particular technology, instead of considering water treatment process as a whole. Even though individual technologies as this filter can improve water quality, it is essential to control the whole process to ensure the best water quality.
Water treatment at home
- Sedimentation removes big particules and often >50% of pathogens.
- Filtration removes smaller particules and often > 90% of pathogens.
- Disinfection removes, disactivates or kills remaining pathogens.
Water treatment process at home is mainly based of pathogens elimination from drinking water, which is the most important water issue in the world. This tutorial only focuses on the filtration part.
Operating principle :
Bio-sand filter is an optimization of classic sand filter, that has been used for century to filter freshwater before drinking it.
The bio-sand filter is composed of five different areas:
- 1) reservoir zone : Where water will be poured into the filter.
- 2) resting water zone : This water maintains wet sand, and lets oxygen through to the biological layer.
- 3) biological zone : Develops on the 5-10 first cm of the sand surface. Sand eliminates pathogens, particules and other contaminants. As in slow sand filters, a layer of micro-organisms (also known as schmutzedecke) develops in the 1-2 cm of the sand surface.
- 4) non-biological zone : Do not contains micro-organisms (or very few) because of oxygen and nutrients deprivation.
- 5) gravel zone : Maintains the sand and protects the output pipe from clogging.
Pathogens and suspended matters are eliminated by a combination of physical and biological processes, that take place in the sand and biological layers:
- Mechanical trap : Suspended matters and pathogens are physically blocked in spaces between the grains of sand.
- Predation : Pathogens are eaten by other micro-organisms of the biological layer.
- Adsorption : Pathogens are attached one to another, to suspended matters and to the grains of sand.
- Natural death : Pathogens die or end their life cycle, because there is not enough food or oxygen for their survival.
Theoretical efficacity :
This filter is intented for classical fresh water, non excessively polluted by elements like arsenic for example. In case of particularly polluted water, complementary filtration systems will have to be added.
Analysis results after biosand filtration with CAWST filter:
- Bacterias : Up to 96,5% in the lab, 87,9 to 98,5% on the field.
- Virus : 70 to > 99% in the lab.
- Protozoa: > 99,9% in the lab.
- Helminth (parasitic worms): Up to 100% in the lab and on the field.
- Iron : 90-95% on the field.
Youtube
Matériaux
- One meter of PVC pipe for drinking water adduction, 100mm diameter.
- One PVC plug, adapted to the pipe.
- One cover
- PVC glue.
- Sand, if possible from crushed stones, diameter 0-1mm, in order to fill 60 of the pipe.
- Gravel zone, 6-10 mm, in order to fill 10cm of the pipe.
- Flexible plastic pipe intented for food.
- 3 bends, adapted to the flexible pipe.
- Silicone
Outils
- Gloves and protection glasses
- Hacksaw
- A basin
- Sandpaper
- A driller
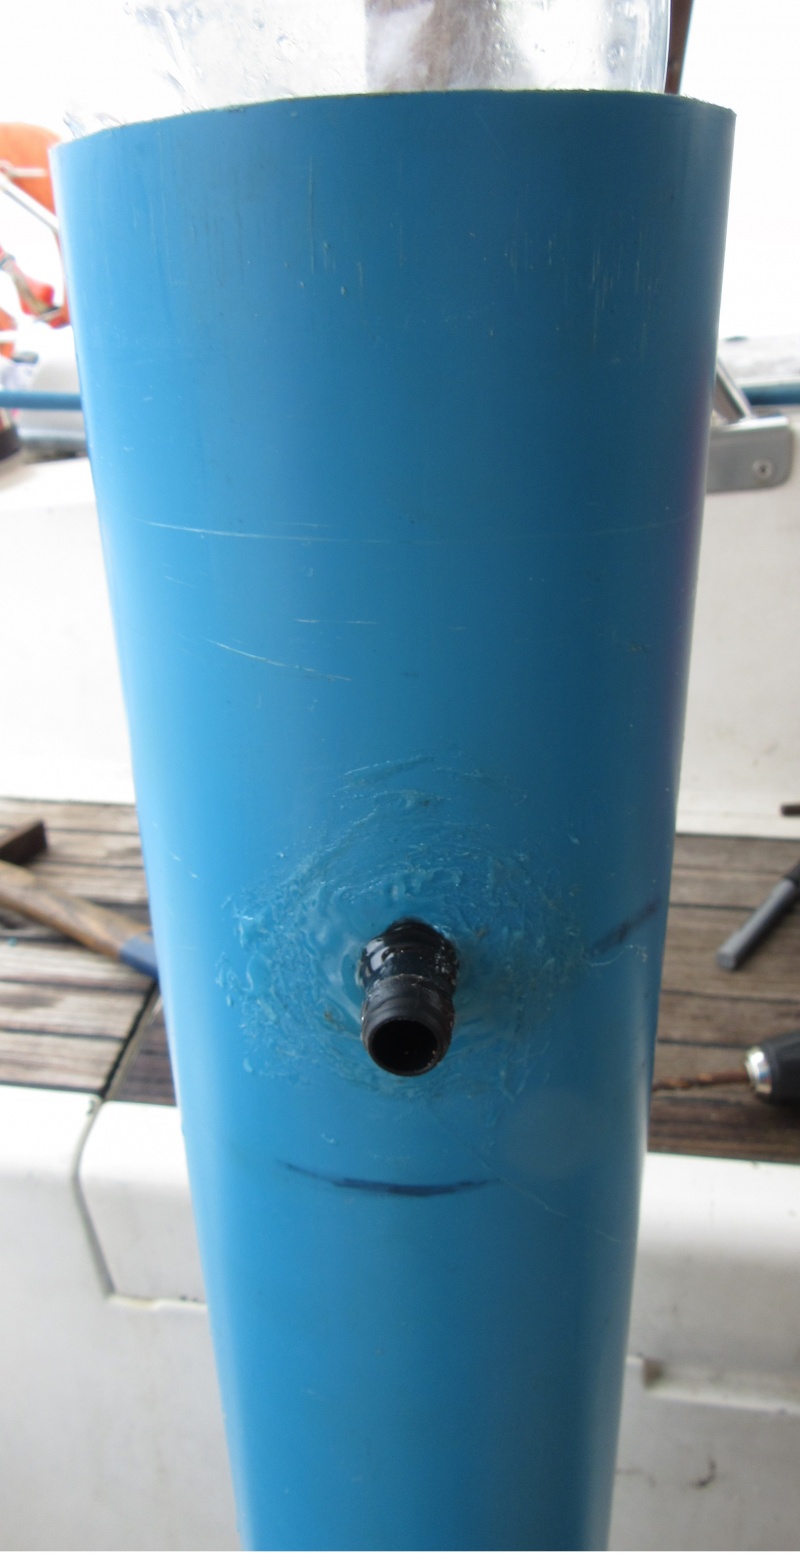
Étape 1 - Filter body preparation
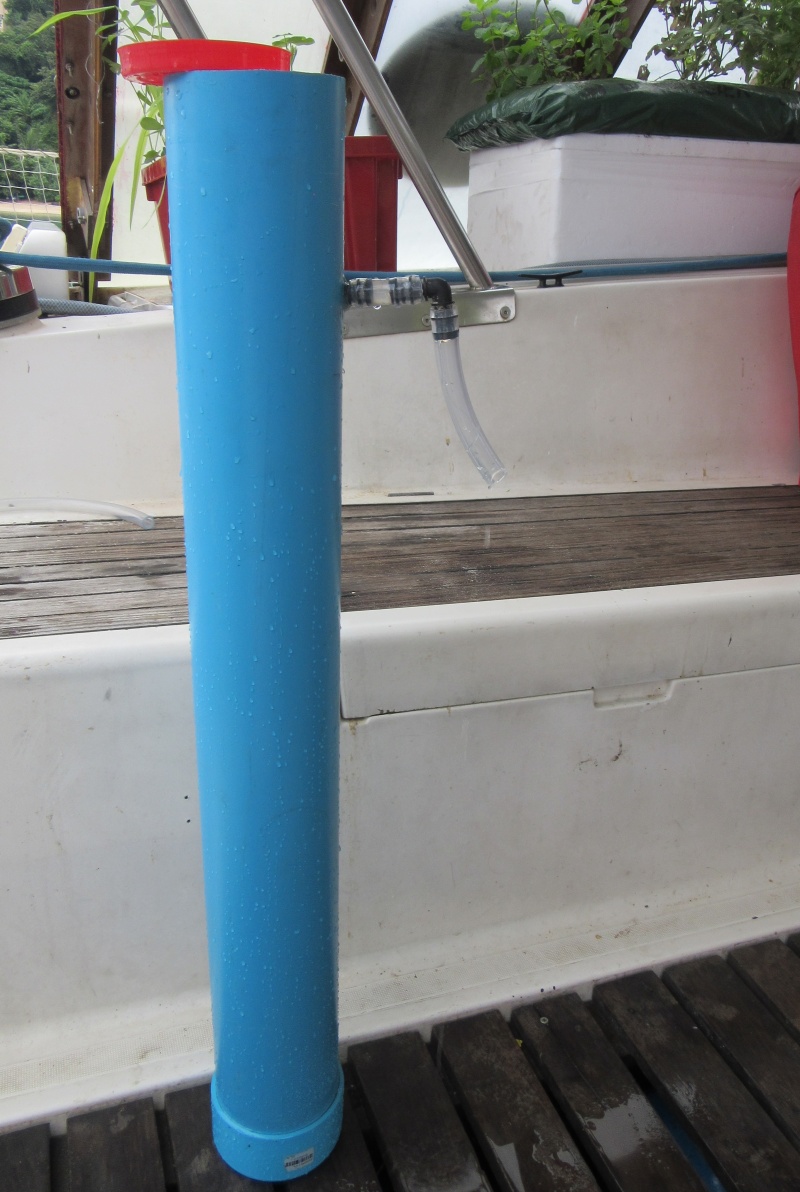
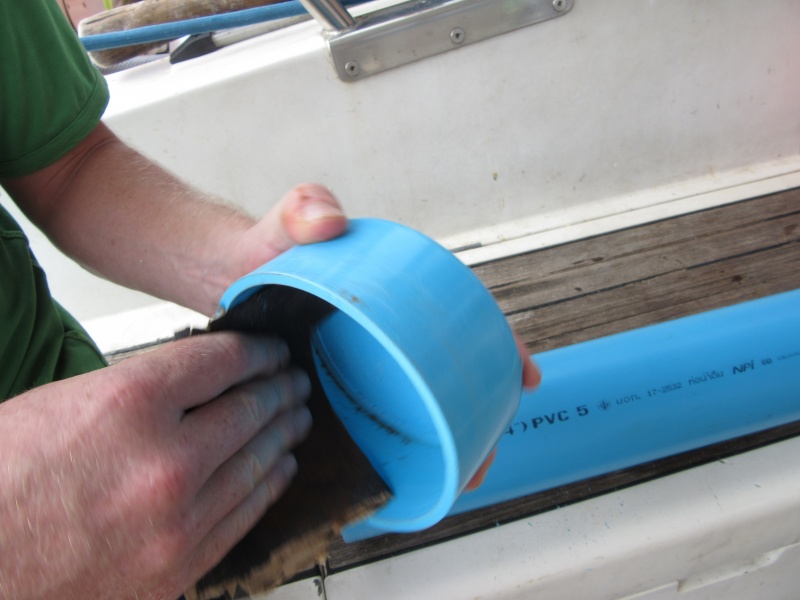
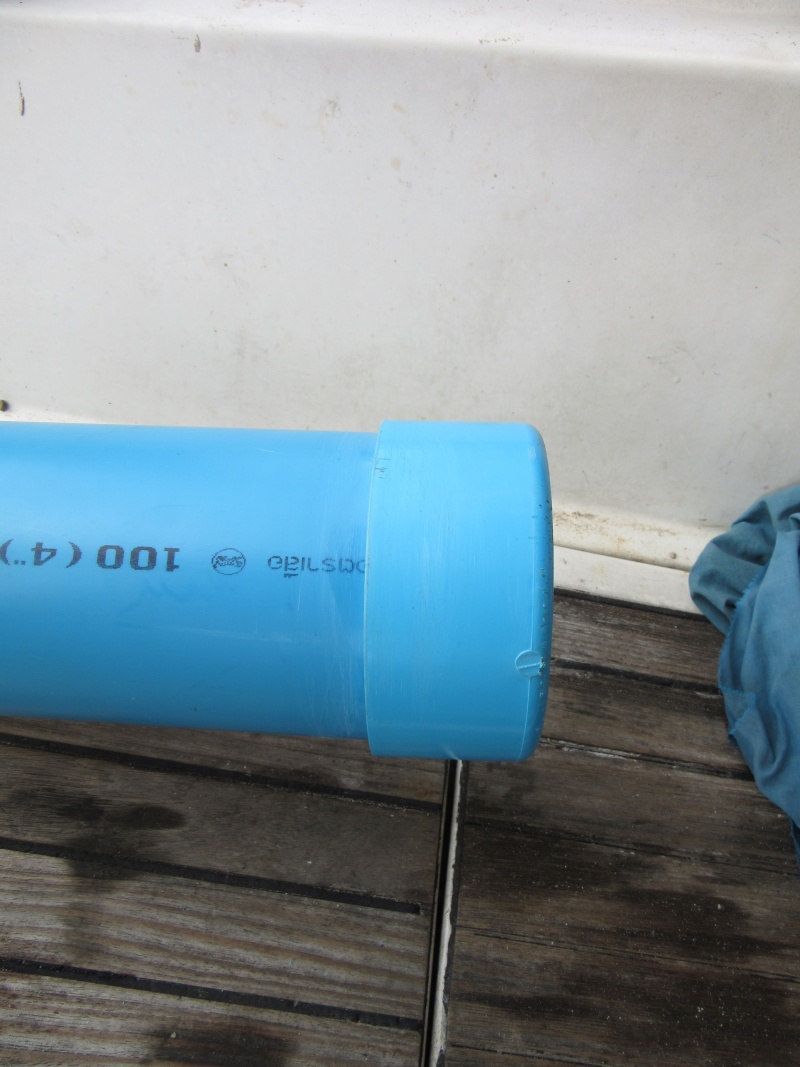
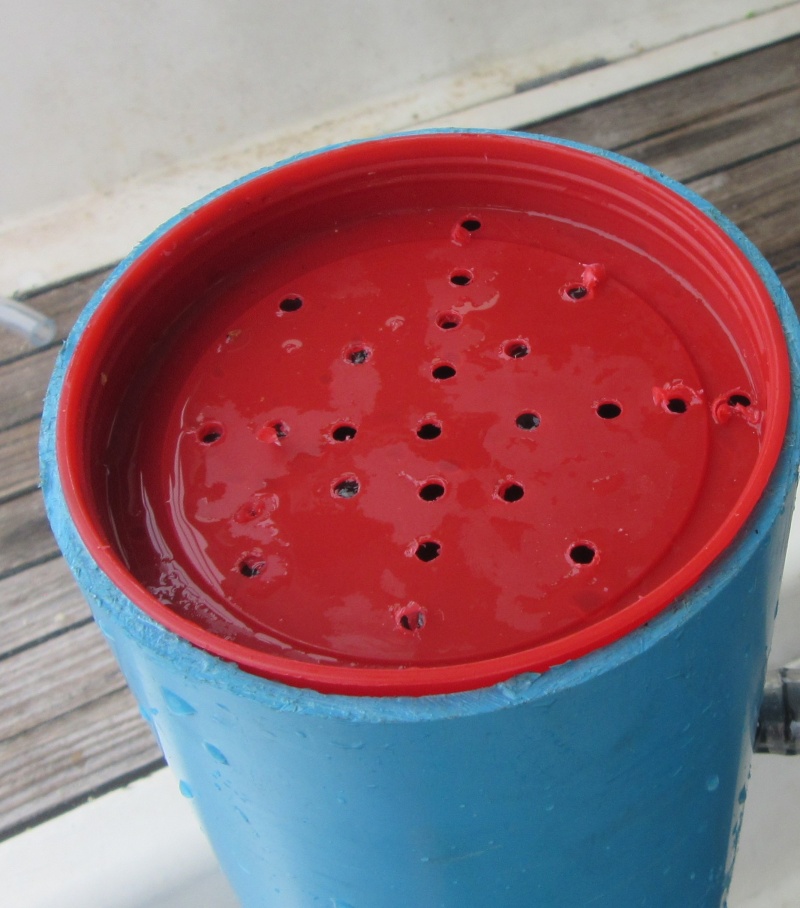
- Grind slightly the inside of the PVC plug (using sandpaper) and the outside of one end of the PVC pipe. Stick them together using PVC glue.
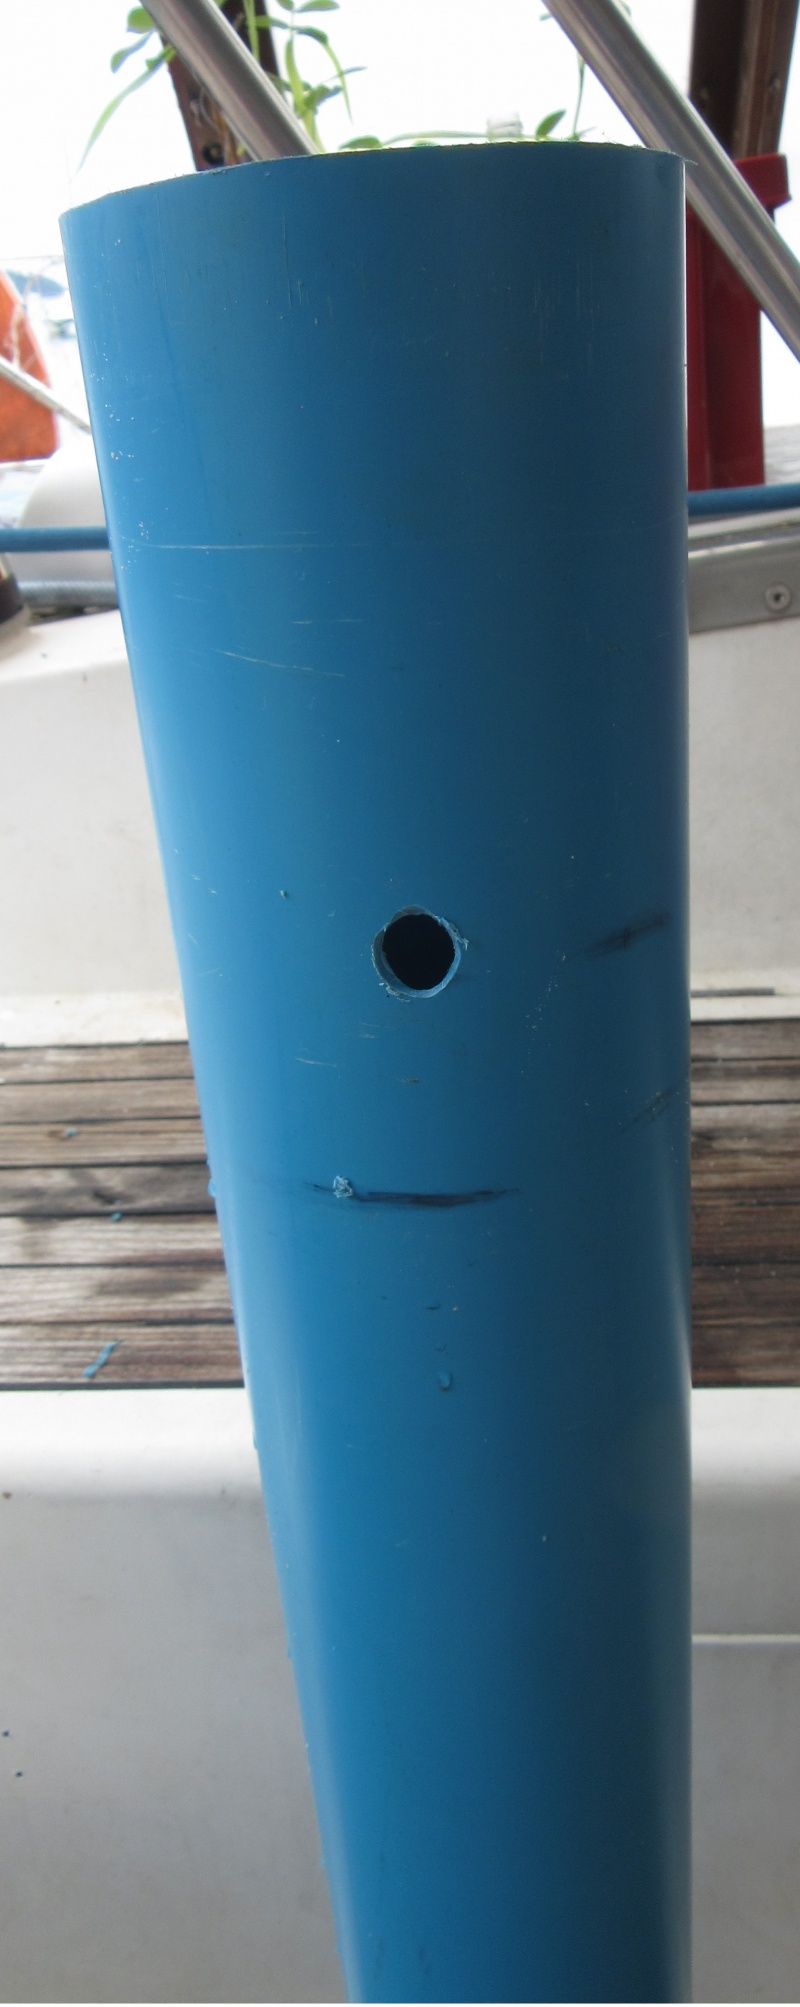
- Drill a hole of the bends diameter in the flexible pipe, 75cm from the bottom of the PVC. Connection between pipe and bend will have to be perfectly sealed.
- Drill many holes in the cover (it has to be a plastic cap).
Remark : It it recommended that the cover is perfectly adapted to the tube and that is can also be used as "sieve", so that added water would fall slowly on the sand without disturbing the biological layer.
Étape 2 - Flexible pipe preparation
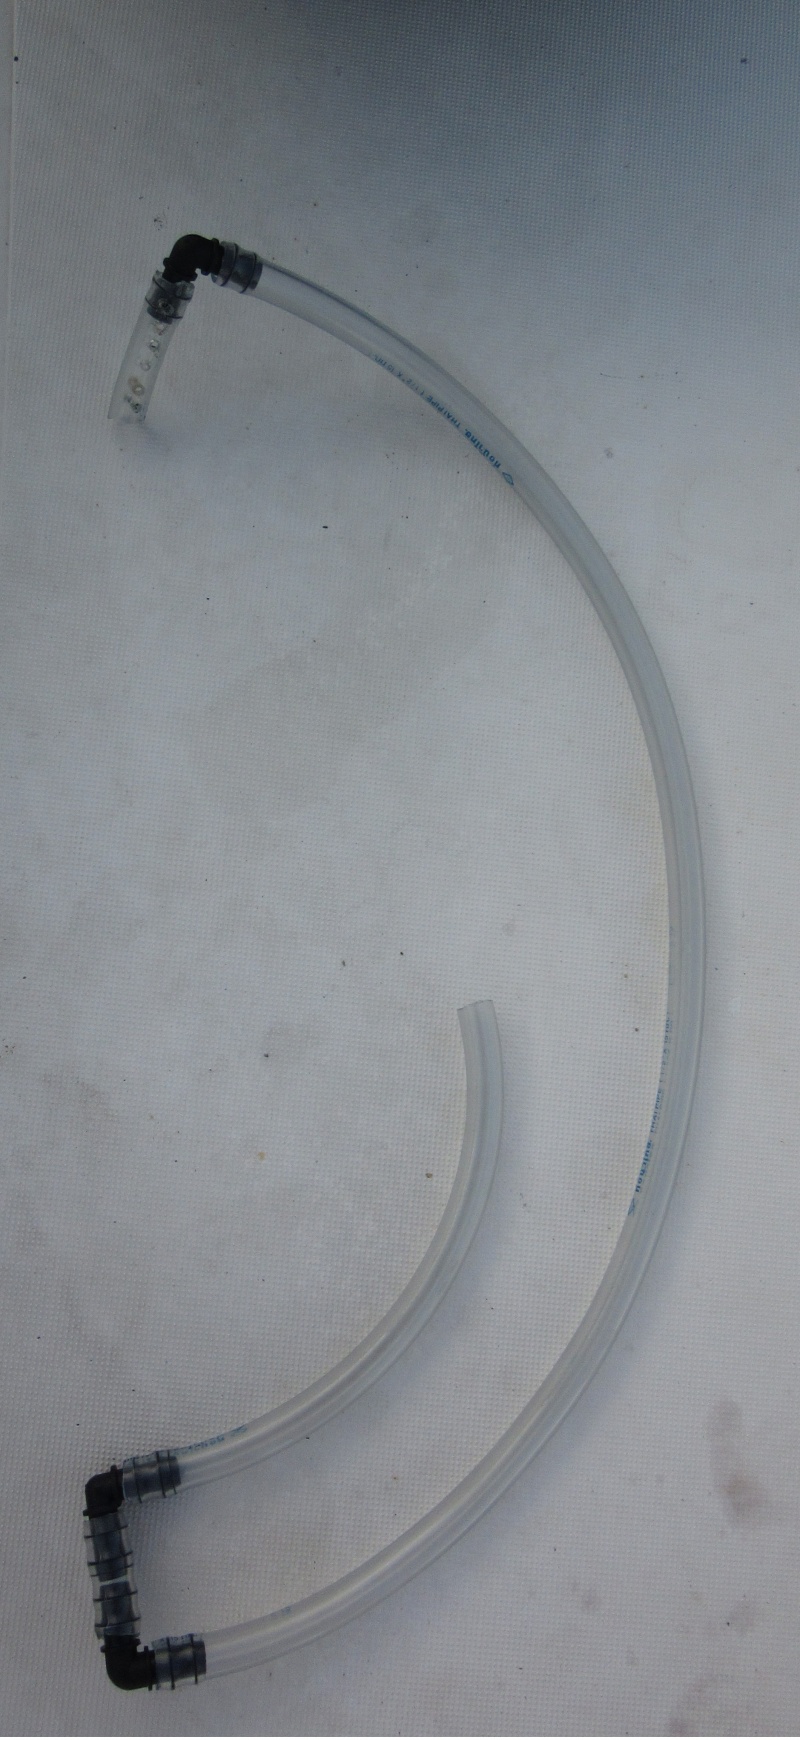
- In the flexible pipe, cut several pieces of 8cm, 75cm, 5cm and 10cm.
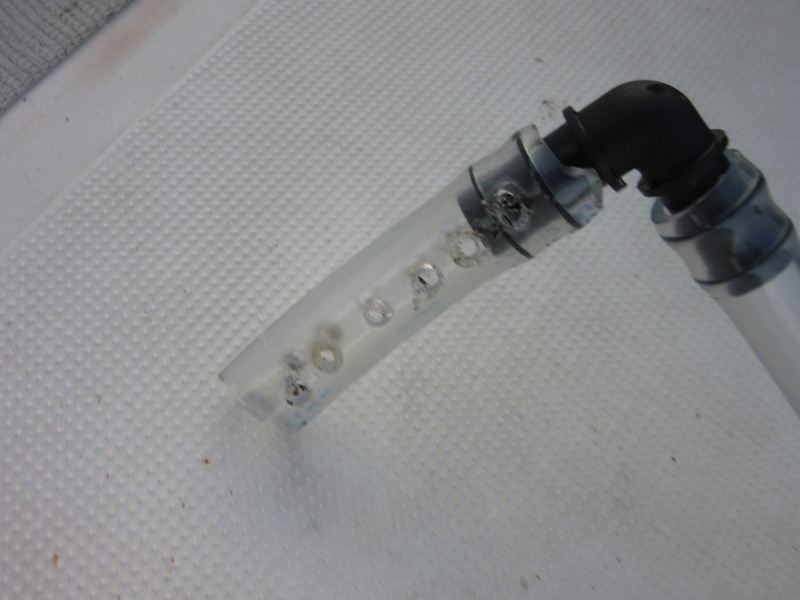
- Drill several holes of about 5mm in the 8cm piece.
- Place a bend between the 8cm and the 75cm part.
- At the other end of the 75cm piece, insert a bend.
- Place a bend between the 5cm and 10cm parts.
Étape 3 - Gravels wahsing
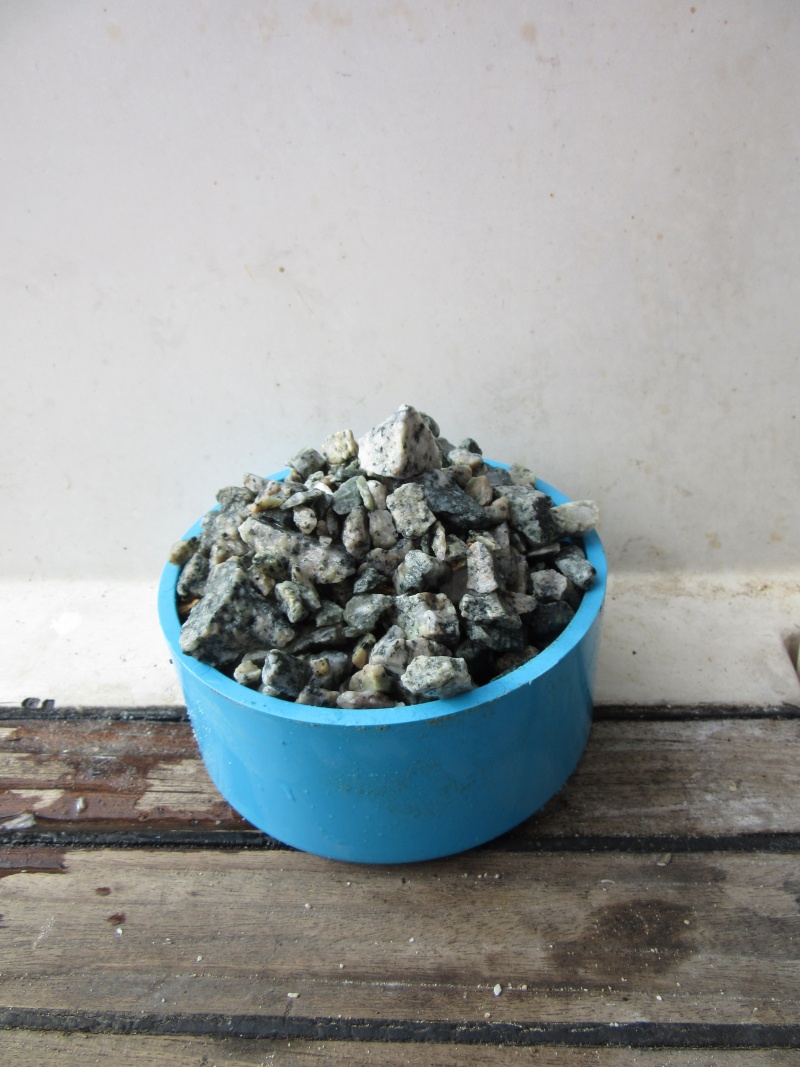
- Wash gravels with clean freshwater. Repeat the operation until no particles are suspended in the washing water.
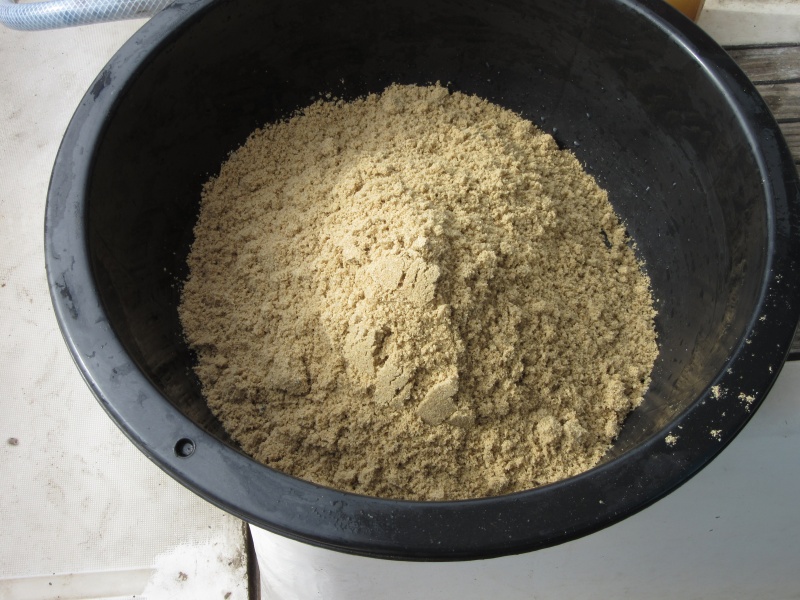
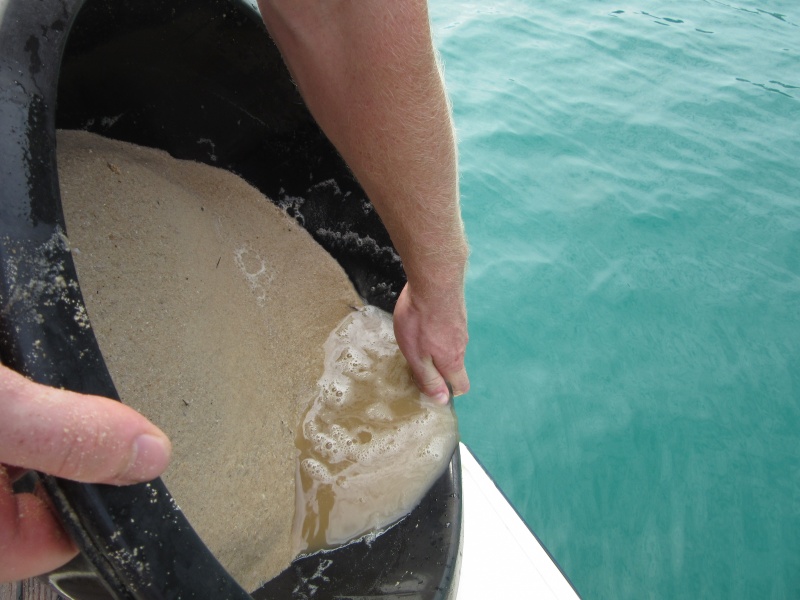
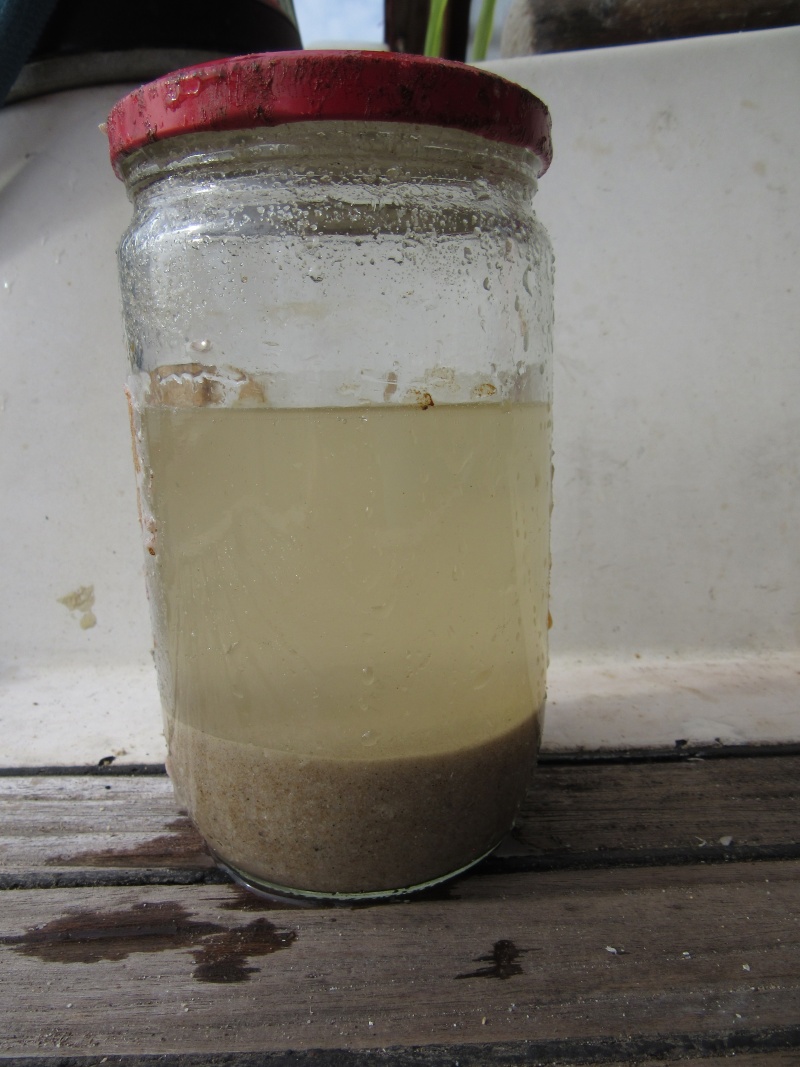
Étape 4 - Sand washing
Remark: It is advised to use sand from crushed rock. In case it is not possible, rivier sand can be used. In the worst case, sea sand can also be used but has to be desalinated beforehand. In each case, the sand should be of between 0 and 1mm.
- Wash the sand using clean freshwater, and empty suspended particles and dirty water.
- To test the washing, put a bit of sand in a closed jar with clean water and shake it. If most of the suspended elements fall to the bottom of the jar within 4 secondes and the water is only slightly turbid, the washing is ok. It is not necessary to remove all suspended micro-particles, otherwise it would reduce filter efficacity.
Generally 4 or 5 washes are necessary.
Étape 6 - Filter use
Notes:
1) Biosand filter can be used for any source of water, including rainwater, underground water, river or lake water. The source must be as clean as possible. If the source is highly contaminated, filtered water can still contain contaminants.
2) With time, the biological layer will adapt to a certain degree of water contamination. If a source with a different level and kind of contamination is used, the layer might not be able to consume all pathogens. The biological layer may need several days to adapt to a new kind of water: its contamination and nutrients. It is advised to systematically use the same water source to ensure the best treatment quality.
3) The biological layer requires 1 month from the first filtration before being fully efficient.
- Pour water through the drilled cover until reservoir zone is full. Through piston effect, water will flow through the output pipe. Do not drink this water during the first month.
- Repeat filling everyday so that biological layers oxygenates and has pathogens to eat. Respect a 1h minimum and 48h maximum delay between two fillings. Below 1h, the filter will not act properly and above 48h, the biological layer degradates.
- After a month, water is suppoed to be clean enough, but it is highly recommanded to test it before first consumption and on a regular basis.
- If the water source has ot be modified, wait a few days until the biological layer adapts.
- Store the filtered water off the ground, protected from small animals, in the shadow. Drink it as soon as possible.
Étape 7 - Maintenance
Published

 Français
 English
 Deutsch
 Español
 Italiano
 Português