(Page créée avec « Warmer ») |
(Mise à jour pour être en accord avec la nouvelle version de la source de la page) |
||
| (89 révisions intermédiaires par 2 utilisateurs non affichées) | |||
| Ligne 3 : | Ligne 3 : | ||
|Main_Picture_annotation={"version":"3.5.0","objects":[{"type":"image","version":"3.5.0","originX":"left","originY":"top","left":-5,"top":-66,"width":3000,"height":4000,"fill":"rgb(0,0,0)","stroke":null,"strokeWidth":0,"strokeDashArray":null,"strokeLineCap":"butt","strokeDashOffset":0,"strokeLineJoin":"miter","strokeMiterLimit":4,"scaleX":0.2,"scaleY":0.2,"angle":0,"flipX":false,"flipY":false,"opacity":1,"shadow":null,"visible":true,"clipTo":null,"backgroundColor":"","fillRule":"nonzero","paintFirst":"fill","globalCompositeOperation":"source-over","transformMatrix":null,"skewX":0,"skewY":0,"crossOrigin":"","cropX":0,"cropY":0,"src":"https://wiki.lowtechlab.org/images/3/3b/Chaufferette_photo_chaufferette.jpg","filters":[]}],"height":450,"width":600} | |Main_Picture_annotation={"version":"3.5.0","objects":[{"type":"image","version":"3.5.0","originX":"left","originY":"top","left":-5,"top":-66,"width":3000,"height":4000,"fill":"rgb(0,0,0)","stroke":null,"strokeWidth":0,"strokeDashArray":null,"strokeLineCap":"butt","strokeDashOffset":0,"strokeLineJoin":"miter","strokeMiterLimit":4,"scaleX":0.2,"scaleY":0.2,"angle":0,"flipX":false,"flipY":false,"opacity":1,"shadow":null,"visible":true,"clipTo":null,"backgroundColor":"","fillRule":"nonzero","paintFirst":"fill","globalCompositeOperation":"source-over","transformMatrix":null,"skewX":0,"skewY":0,"crossOrigin":"","cropX":0,"cropY":0,"src":"https://wiki.lowtechlab.org/images/3/3b/Chaufferette_photo_chaufferette.jpg","filters":[]}],"height":450,"width":600} | ||
|Licences=Attribution (CC BY) | |Licences=Attribution (CC BY) | ||
| − | |Description= | + | |Description=<div class="mw-translate-fuzzy"> |
| + | The purpose of this tutorial is to make hand-held warmers. These can be heated up to around 50°C when activated, and can be used in the mountains, for example, to keep warm when hiking. | ||
| + | </div> | ||
|Area=Tools | |Area=Tools | ||
|Type=Tutorial | |Type=Tutorial | ||
| Ligne 14 : | Ligne 16 : | ||
}} | }} | ||
{{Introduction | {{Introduction | ||
| − | |Introduction= | + | |Introduction=When we go out in the mountains, we sometimes find ourselves exposed to the cold, particularly on the extremities of the body (hands, feet). |
| − | + | Some people really struggle to keep warm, and ski touring (to avoid the wasteful and environmentally-friendly ski lifts!) can become a real nightmare! | |
| − | + | Some sports shops offer hand-warmers for a little extra comfort. These are small plastic containers that warm up to around 50°C when activated. | |
| − | + | Some are reusable, for around 20€ a pair, while others are not, for around 15€ for 30. | |
| − | + | In a complete low-tech approach, we should first ask ourselves about this need for comfort. But before we get there, and for those who may already have given this in-depth thought but still feel the need to have warmers, it's possible to make reusable (almost! See the discussion on the problems to be solved) and economical ones yourself (see the discussion on the problems to be solved). It's possible to make your own warmers that are reusable (almost! See discussion on the problems to be solved) and economical (that's confirmed!)! | |
}} | }} | ||
{{Materials | {{Materials | ||
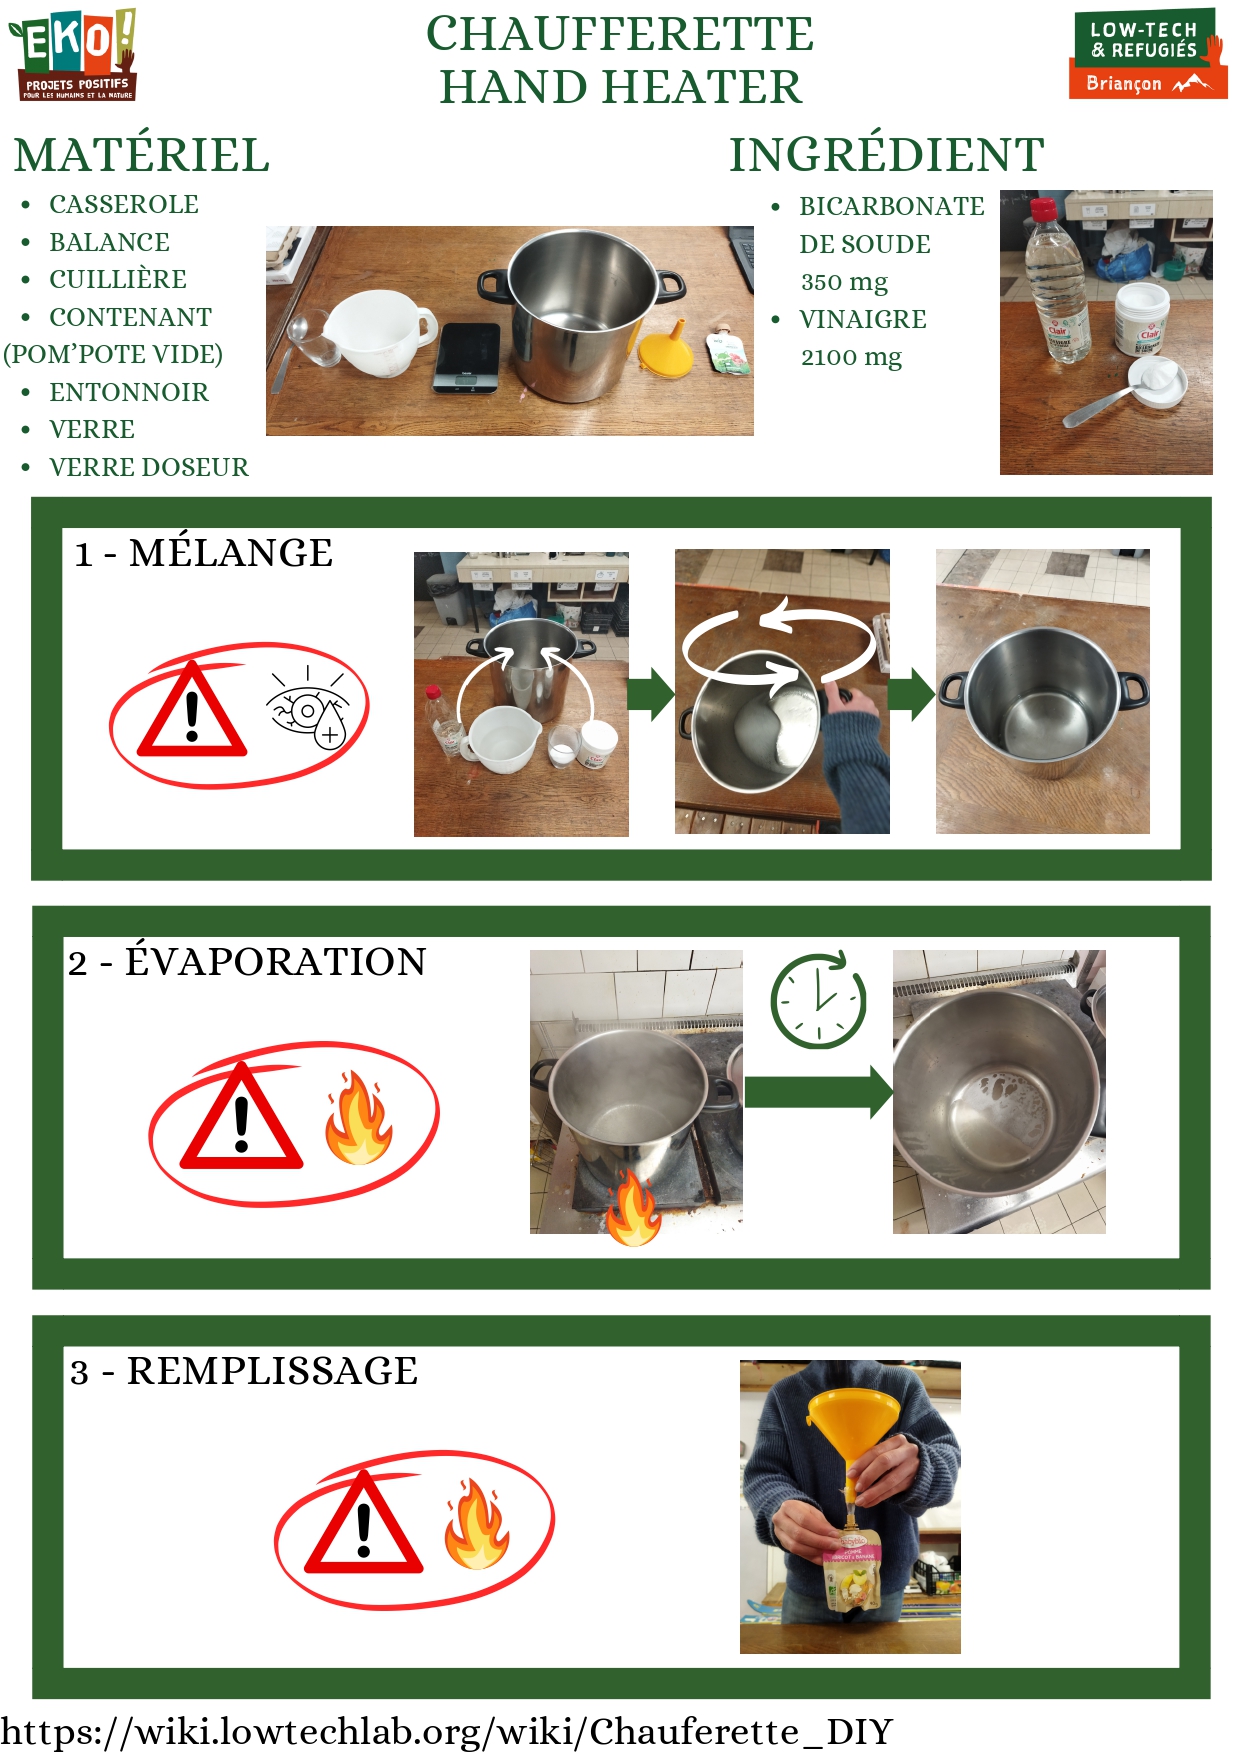
|Step_Picture_00=Chaufferette_Protocole_1__page-0001.jpg | |Step_Picture_00=Chaufferette_Protocole_1__page-0001.jpg | ||
| − | |Material=* | + | |Material=*Sodium bicarbonate (baking soda) |
| − | * | + | *Vinegar |
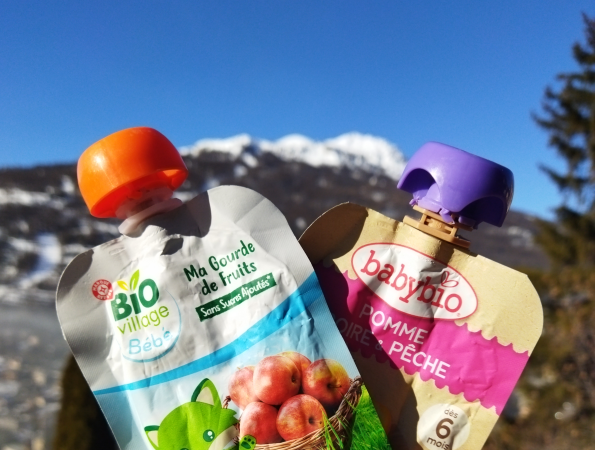
| − | * | + | *Container for warmers (here empty compotes to take away) |
| − | + | The quantities will be discussed in the tutorial as they depend on the concentration of the vinegar. | |
| − | |Tools=* | + | |Tools=* Saucepan |
| − | * | + | * Scales |
| − | * | + | * Spoon |
| − | * | + | * Funnel |
| − | * | + | * Glass |
| − | * | + | * Measuring glass |
}} | }} | ||
{{Tuto Step | {{Tuto Step | ||
| − | |Step_Title= | + | |Step_Title=Calculating quantities |
| − | |Step_Content= | + | |Step_Content=Here are the quantities for one warmer ! The mass of vinegar depends on its concentration. |
===Quantité pour une chaufferette=== | ===Quantité pour une chaufferette=== | ||
| − | 35g | + | |
| + | <div class="mw-translate-fuzzy"> | ||
| + | ===Quantity for one warmer=== | ||
| + | 35g baking soda | ||
{| | {| | ||
| − | |+ | + | |+Table showing the quantities of vinegar according to its concentration |
| − | |Concentration | + | |Concentration of vinegar [%] [g |
| − | | | + | |Mass of vinegar [g] |
| − | | | + | |Approximate volume of vinegar [mL |
|- | |- | ||
|6 | |6 | ||
| Ligne 74 : | Ligne 79 : | ||
|155 | |155 | ||
|} | |} | ||
| − | + | These values are approximate. You can find out how to calculate them in the theoretical sections. | |
| − | + | </div> | |
| − | NB : | + | NB: The density of vinegar is very close to that of water, 1kg for 1L. |
}} | }} | ||
{{Tuto Step | {{Tuto Step | ||
| − | |Step_Title= | + | |Step_Title=Cleaning equipment |
| − | |Step_Content= | + | |Step_Content=<div class="mw-translate-fuzzy"> |
| + | Making warmers involves doing chemistry, and chemistry doesn't take kindly to impurities. We strongly advise you to clean all utensils properly with soap and water. Particularly the containers of the warmers, as there's a risk of a little compote remaining in them if you choose the same ones as us! | ||
| + | </div> | ||
}} | }} | ||
{{Tuto Step | {{Tuto Step | ||
| − | |Step_Title= | + | |Step_Title=Mixing reagents |
| − | |Step_Content=''' | + | |Step_Content='''Safety''' |
| − | * | + | <div class="mw-translate-fuzzy"> |
| + | *Vinegar is irritating to the skin and very irritating to the eyes. Do not hesitate to wear safety goggles when mixing. Otherwise, watch out for splashes. | ||
| + | </div> | ||
| − | + | <div class="mw-translate-fuzzy"> | |
| + | The first step consists of mixing the vinegar and bicarbonate of soda. To do this, start by pouring the right amount of vinegar into the pan. Then add the bicarbonate of soda "slowly". Stir until there is no more foam. This indicates that the chemical reaction is complete. | ||
| + | </div> | ||
| − | '''Point | + | '''Point of vigilance''' |
| − | * | + | <div class="mw-translate-fuzzy"> |
| − | * | + | *Pour in the bicarbonate of soda slowly, as the reaction produces CO2 gas, causing the solution to foam. |
| − | * | + | *This stage takes time, but it's best to get to the end so that all the vinegar reacts. If there is any vinegar left over, be prepared to smell its nauseating odour during the next stage! |
| + | *The more warmers you make, the longer the reaction will take. For 5 warmers, you can expect about 20 minutes of mixing. | ||
| + | </div> | ||
|Step_Picture_00=Chaufferette_1707561564307.jpg | |Step_Picture_00=Chaufferette_1707561564307.jpg | ||
|Step_Picture_01=Chaufferette_1707561564296.jpg | |Step_Picture_01=Chaufferette_1707561564296.jpg | ||
| Ligne 101 : | Ligne 114 : | ||
}} | }} | ||
{{Tuto Step | {{Tuto Step | ||
| − | |Step_Title= | + | |Step_Title=Heating, evaporation |
| − | |Step_Content=''' | + | |Step_Content='''Safety''' |
| − | |||
| − | |||
| − | |||
| − | + | <div class="mw-translate-fuzzy"> | |
| + | *The substance obtained from the reaction of vinegar and sodium bicarbonate is sodium ethanoate. This substance is irritating, so don't hesitate to wear safety goggles. Otherwise, be careful not to get any in your eyes. | ||
| + | *Slight risk of burns, possible small splashes if large quantities are used on a high-powered hob. | ||
| + | </div> | ||
| + | <div class="mw-translate-fuzzy"> | ||
| + | When the first stage is complete, we can put our saucepan on a high heat, the aim being to evaporate all the excess water. I say too much, because we'll need a little more water to get the right substance. When a very light film begins to appear on the surface, then the substance is ready, you need to stop heating. | ||
| + | </div> | ||
| − | '''Point | + | '''Point of vigilance''' |
| − | * | + | <div class="mw-translate-fuzzy"> |
| − | * | + | *There's a lot of water to evaporate, so this stage takes a while (again, the more warmers you use, the longer it takes to evaporate). |
| − | * | + | *During this stage, nothing happens for a long time, but in the end everything happens very quickly. You need to be very careful as soon as the liquid becomes slightly cloudy and yellow. |
| − | * | + | *Generally, crystals will appear on the edges of the pan towards the end. |
| − | * | + | *If you inadvertently leave the liquid to heat for too long, it will solidify completely. In this case, turn off the heat and add water quickly (not too much, just enough to see all the solid become liquid again). You can then put it back on the heat, stirring to help the last crystals liquefy. Don't worry, the warmers will still work! |
| + | *Towards the end, a smell similar to that of a baked cake should appear. It's not unpleasant, but avoid sniffing it too much! It's best to be careful when playing chemist's apprentice! Even when you're handling substances that aren't very dangerous :) | ||
| + | </div> | ||
|Step_Picture_00=Chaufferette_1707570183991.jpg | |Step_Picture_00=Chaufferette_1707570183991.jpg | ||
|Step_Picture_01=Chaufferette_1707570183986.jpg | |Step_Picture_01=Chaufferette_1707570183986.jpg | ||
}} | }} | ||
{{Tuto Step | {{Tuto Step | ||
| − | |Step_Title= | + | |Step_Title=Filling |
| − | |Step_Content=''' | + | |Step_Content='''Safety''' |
| − | * | + | *Risk of burns, as the liquid to be poured into the warmer containers is very hot (around 100°C at first). |
| − | * | + | *If the liquid comes into contact with the skin at less than 60°C, it will solidify and heat up. It's very impressive because the solid sticks to the skin. Don't panic, a little water and it will go away on its own. However, don't take too long to rinse off with water to avoid burning yourself. |
| − | + | The aim of this step is to fill the containers of our warmers with the substance obtained in step 4. | |
| − | |||
| − | |||
| − | + | <div class="mw-translate-fuzzy"> | |
| + | Two people are needed for this stage, as it is difficult to hold the containers and pour at the same time. | ||
| + | </div> | ||
| − | + | <div class="mw-translate-fuzzy"> | |
| + | The person holding the container can wear gloves to limit the risk of burns. | ||
| + | </div> | ||
| + | At this stage, a funnel is inserted into the containers and the contents of the saucepan are poured in gently. | ||
| − | '''Point | + | '''Point of vigilance''' |
| − | * | + | <div class="mw-translate-fuzzy"> |
| − | * | + | *Leave a small air space in the warmer when pouring in the liquid. Be careful not to completely block the hole with the funnel, as this could cause the liquid to overflow and burn :( |
| − | * | + | *Between each warmers, stir the pan to mix the liquid and prevent the surface from solidifying. |
| − | * | + | *The liquid solidifies at around 58°C, so pour it in before it reaches this temperature, otherwise the funnel will be blocked. However, don't pour too quickly or you could get burnt. If the substance starts to cool too much, simply add a little water and repeat step 4. |
| + | *If the funnel is completely blocked, you can pour in some hot water and the solid will quickly become liquid and flow! | ||
| + | </div> | ||
|Step_Picture_00=Chaufferette_1707570183965.jpg | |Step_Picture_00=Chaufferette_1707570183965.jpg | ||
}} | }} | ||
{{Tuto Step | {{Tuto Step | ||
| − | |Step_Title= | + | |Step_Title=Reloading warmers |
| − | |Step_Content= | + | |Step_Content=<div class="mw-translate-fuzzy"> |
| − | + | The warmers are now ready to be loaded! | |
| + | </div> | ||
| − | + | To charge the warmers with heat, place it in boiling water for 10-15 minutes. Then leave them to cool, without stirring them too much, until they reach room temperature. | |
| − | + | <div class="mw-translate-fuzzy"> | |
| + | They're now full of energy and ready for use in the mountains or anywhere else! | ||
| + | </div> | ||
<br /> | <br /> | ||
}} | }} | ||
{{Tuto Step | {{Tuto Step | ||
| − | |Step_Title= | + | |Step_Title=Use of warmers |
| − | |Step_Content= | + | |Step_Content=Once you're out in the mountains in the cold, you can activate them by following the instructions. |
| − | |||
| − | |||
| − | |||
| − | + | <div class="mw-translate-fuzzy"> | |
| + | It then heats up to around 50°C. To keep the heat created, it is advisable to isolate them from the outside air by putting them in your gloves and/or pockets. | ||
| + | </div> | ||
| − | + | '''Safety''' | |
| − | |||
| − | |||
| + | Warning: it is '''strongly inadvisable to heat up a frostbite suddenly'''. The use of warmers is ''preventive'', to prevent a strong sensation of cold and not to heat an area in critical condition. | ||
| + | Then, it is not advisable to alternate between hot and cold for frostbite. It's better to wear dry clothes and wait for a bath thermostated at 37°C once you're in a safe place. | ||
<br /> | <br /> | ||
| Ligne 174 : | Ligne 199 : | ||
}} | }} | ||
{{Tuto Step | {{Tuto Step | ||
| − | |Step_Title= | + | |Step_Title=The theory of warmers |
| − | |Step_Content= | + | |Step_Content=<div class="mw-translate-fuzzy"> |
| + | It's been very interesting for me to experiment and improve a process following personal observations! I share with you my discoveries from my experiences and my readings. | ||
| + | </div> | ||
===Fabrication de l'éthanoate de sodium, réaction chimique=== | ===Fabrication de l'éthanoate de sodium, réaction chimique=== | ||
| − | + | ||
| + | <div class="mw-translate-fuzzy"> | ||
| + | ===Manufacture of sodium ethanoate, chemical reaction=== | ||
| + | Sodium ethanoate is a product of the reaction between ethanoic acid and sodium bicarbonate. | ||
| + | </div> | ||
Cette réaction produit aussi de l'eau est du CO2. | Cette réaction produit aussi de l'eau est du CO2. | ||
====Calcule des quantités==== | ====Calcule des quantités==== | ||
| − | |||
| − | + | <div class="mw-translate-fuzzy"> | |
| + | This reaction also produces water and CO2. | ||
| + | ====Calculating quantities==== | ||
| + | This part isn't much fun, so skip it if you're not a big fan of chemistry calculations! But it is necessary if you want to recalculate everything yourself! | ||
| + | </div> | ||
| − | + | <div class="mw-translate-fuzzy"> | |
| + | To determine the quantities of ethanoic acid and sodium bicarbonate to mix, we assume that the reaction is complete. So, in order to optimise everything, we need to mix the reagents in what are known as stoichiometric quantities. When you add exactly these quantities, all the reagents are consumed and all that's left at the end of the reaction is the product! | ||
| + | </div> | ||
| − | + | In our case, one molecule of ethanoic acid reacts with one molecule of sodium bicarbonate. The same number of "quantities of matter" (moles) of each of the two reagents must therefore be added in order to reach the stoichiometric quantities. | |
| − | + | Knowing this, calculate the quantity of material corresponding to 35g of bicarbonate (for 1 warmer). | |
| − | + | Next, calculate the mass of acetic acid needed to obtain exactly the same quantity of substance (which will depend on its molar mass). | |
| − | + | Finally, knowing that, say, 8% vinegar has 0.08g of ethanoic acid per 100mL, we calculate the volume of vinegar to obtain exactly the right mass of ethanoic acid. | |
| + | If you prefer, you can calculate the mass of vinegar rather than its volume (useful if you don't have a measuring glass). Luckily, vinegar has almost the same density as water, so 1kg of vinegar for 1l of vinegar. | ||
| − | + | <div class="mw-translate-fuzzy"> | |
| + | There are a number of educational resources on basic calculations in solution chemistry on the internet if you're interested. This is a subject that is covered at the beginning of secondary school in France. | ||
| + | </div> | ||
<br /> | <br /> | ||
====Comprendre par ses propres sens==== | ====Comprendre par ses propres sens==== | ||
| − | + | ||
| + | <div class="mw-translate-fuzzy"> | ||
| + | ====Understanding with your own senses==== | ||
| + | This reaction is fun to experiment with because it is very visual: the production of gaseous CO2 produces foam. We can then see whether all our molecules have reacted properly. | ||
<br /> | <br /> | ||
| + | </div> | ||
====Pourquoi la réaction (mélange) est si longue ?==== | ====Pourquoi la réaction (mélange) est si longue ?==== | ||
| − | |||
| − | + | <div class="mw-translate-fuzzy"> | |
| + | ====Why does the reaction (mixing) take so long? ==== | ||
| + | The reaction takes time, and we have to mix! But what happens in the world of molecules to make it take so long! | ||
| + | </div> | ||
| + | |||
| + | In our saucepan, after a few seconds of reaction, we have a lot of water, the reactants and also the few products that have already been created. In order to react, two molecules of reagent must meet. | ||
| − | + | But how do you meet someone in this mess? It's a bit like throwing pollen into a field of flowers, at first it's easy for the pollen to find a single flower, but after a few minutes, when many couples have formed, it's difficult for a small flower and a pollen to find each other. | |
| − | + | In technical terms, we speak of '''reaction kinetics''' to refer to the speed at which the reaction takes place and of '''limiting phenomenon''' to refer to the phenomenon that imposes this speed. | |
| − | + | Here it is the meeting of the molecules that is the slowest, so we speak of ''mass transfer''. <br />. | |
====Vous avez dit cristallisation ?==== | ====Vous avez dit cristallisation ?==== | ||
| − | |||
| − | + | <div class="mw-translate-fuzzy"> | |
| + | ====Did you say crystallisation? ==== | ||
| + | We've already discussed the problem of crystallisation if the liquid is heated for too long. This is a rather counter-intuitive observation. Normally, by increasing the temperature, you go from solid to liquid, not the other way round. | ||
| + | </div> | ||
| + | The phenomenon of crystallisation comes from the dehydration of sodium ethanoate trihydrate to anhydrous sodium ethanoate. In fact, the '''trihydrate''' substance, the one we want for our warmers, liquefies if we heat it above '''58°C'''. On the other hand, the '''anhydrous''' substance only liquefies at '''324°C'''. So when you remove the water from a molecule, PAF! It becomes anhydrous and solidifies instantly, because we're well below 324°C! | ||
| − | + | At the beginning, there's an '''excess of water''', so it's this water that evaporates. But as soon as there is almost no water left, we start to '"dehydrate'" our good old molecule, "'hence the appearance at the end of crystals'", then, progressively '"a solid film'". | |
<br /> | <br /> | ||
====Comprendre pour mieux agir !==== | ====Comprendre pour mieux agir !==== | ||
| − | + | ||
| + | <div class="mw-translate-fuzzy"> | ||
| + | ====Understand to act more effectively!==== | ||
| + | Here, knowing the phenomenon allows you to judge when to stop step 4: when the first crystals appear, you know that the remaining liquid is not water but sodium ethanoate trihydrate, because if there was still liquid water, it would evaporate and no crystals would appear!<br />. | ||
| + | </div> | ||
===Le plus important ! Pourquoi les chaufferettes chauffe !=== | ===Le plus important ! Pourquoi les chaufferettes chauffe !=== | ||
| − | + | ||
| + | <div class="mw-translate-fuzzy"> | ||
| + | ===The most important thing! Why warmers heat up!=== | ||
| + | Warmers work on the basis of the phenomenon of supercooling! To find out more, read this article: | ||
| + | </div> | ||
https://ssaft.com/Blog/dotclear/?pages/Acetate-de-Sodium | https://ssaft.com/Blog/dotclear/?pages/Acetate-de-Sodium | ||
| Ligne 235 : | Ligne 293 : | ||
}} | }} | ||
{{Tuto Step | {{Tuto Step | ||
| − | |Step_Title= | + | |Step_Title=Unresolved issue |
|Step_Content====Des chaufferettes presque réutilisable !=== | |Step_Content====Des chaufferettes presque réutilisable !=== | ||
| − | |||
| + | <div class="mw-translate-fuzzy"> | ||
| + | ===The warmers are almost reusable!=== | ||
| + | In theory, warmers should be reusable. In reality, each time they are used it becomes more difficult to activate them. I haven't been able to solve the mystery of this phenomenon, but maybe you can! | ||
| + | </div> | ||
| − | + | <div class="mw-translate-fuzzy"> | |
| + | They can be reused a number of times, however, if you are prepared to wait a while and go over them several times to activate them. | ||
| + | </div> | ||
| − | + | For the more persistent, inserting a metal rod and kneading it will activate it more effectively, so you'll be able to reuse it for longer with this method. To do this, you can insert the tip of a small screwdriver, a screw or any metal object, knead it for a while and remove it once the heater starts to heat up :) | |
| − | |||
<br /> | <br /> | ||
===Quelques auto-activations imprévues=== | ===Quelques auto-activations imprévues=== | ||
| − | |||
| − | + | <div class="mw-translate-fuzzy"> | |
| + | ===Some unexpected auto-activations=== | ||
| + | Sometimes during recharging, after having warmed them up and once at rest. The warmers may activate by themselves. This can be annoying because you then have to charge them again. | ||
| + | </div> | ||
| + | |||
| + | To be sure that a heater is ready to use, simply check that it is liquid. If it is, you're on the safe side. | ||
}} | }} | ||
{{Notes | {{Notes | ||
Version actuelle datée du 23 novembre 2024 à 12:13
Description
The purpose of this tutorial is to make hand-held warmers. These can be heated up to around 50°C when activated, and can be used in the mountains, for example, to keep warm when hiking.
The purpose of this tutorial is to make hand-held warmers. These can be heated up to around 50°C when activated, and can be used in the mountains, for example, to keep warm when hiking.
Sommaire
Sommaire
- 1 Description
- 2 Sommaire
- 3 Introduction
- 4 Étape 1 - Calculating quantities
- 5 Étape 2 - Cleaning equipment
- 6 Étape 3 - Mixing reagents
- 7 Étape 4 - Heating, evaporation
- 8 Étape 5 - Filling
- 9 Étape 6 - Reloading warmers
- 10 Étape 7 - Use of warmers
- 11 Étape 8 - The theory of warmers
- 11.1 Fabrication de l'éthanoate de sodium, réaction chimique
- 11.2 Manufacture of sodium ethanoate, chemical reaction
- 11.2.1 Calcule des quantités
- 11.2.2 Calculating quantities
- 11.2.3 Comprendre par ses propres sens
- 11.2.4 Understanding with your own senses
- 11.2.5 Pourquoi la réaction (mélange) est si longue ?
- 11.2.6 Why does the reaction (mixing) take so long?
- 11.2.7 Vous avez dit cristallisation ?
- 11.2.8 Did you say crystallisation?
- 11.2.9 Comprendre pour mieux agir !
- 11.2.10 Understand to act more effectively!
- 11.3 Le plus important ! Pourquoi les chaufferettes chauffe !
- 11.4 The most important thing! Why warmers heat up!
- 12 Étape 9 - Unresolved issue
- 13 Notes et références
- 14 Commentaires
Introduction
When we go out in the mountains, we sometimes find ourselves exposed to the cold, particularly on the extremities of the body (hands, feet).
Some people really struggle to keep warm, and ski touring (to avoid the wasteful and environmentally-friendly ski lifts!) can become a real nightmare!
Some sports shops offer hand-warmers for a little extra comfort. These are small plastic containers that warm up to around 50°C when activated.
Some are reusable, for around 20€ a pair, while others are not, for around 15€ for 30.
In a complete low-tech approach, we should first ask ourselves about this need for comfort. But before we get there, and for those who may already have given this in-depth thought but still feel the need to have warmers, it's possible to make reusable (almost! See the discussion on the problems to be solved) and economical ones yourself (see the discussion on the problems to be solved). It's possible to make your own warmers that are reusable (almost! See discussion on the problems to be solved) and economical (that's confirmed!)!Étape 1 - Calculating quantities
Here are the quantities for one warmer ! The mass of vinegar depends on its concentration.
Quantité pour une chaufferette
Quantity for one warmer
35g baking soda
| Concentration of vinegar [%] [g | Mass of vinegar [g] | Approximate volume of vinegar [mL |
| 6 | 415 | 415 |
| 8 | 315 | 315 |
| 10 | 250 | 250 |
| 12 | 210 | 210 |
| 14 | 180 | 180 |
| 16 | 155 | 155 |
These values are approximate. You can find out how to calculate them in the theoretical sections.
NB: The density of vinegar is very close to that of water, 1kg for 1L.
Étape 2 - Cleaning equipment
Making warmers involves doing chemistry, and chemistry doesn't take kindly to impurities. We strongly advise you to clean all utensils properly with soap and water. Particularly the containers of the warmers, as there's a risk of a little compote remaining in them if you choose the same ones as us!
Étape 3 - Mixing reagents
Safety
- Vinegar is irritating to the skin and very irritating to the eyes. Do not hesitate to wear safety goggles when mixing. Otherwise, watch out for splashes.
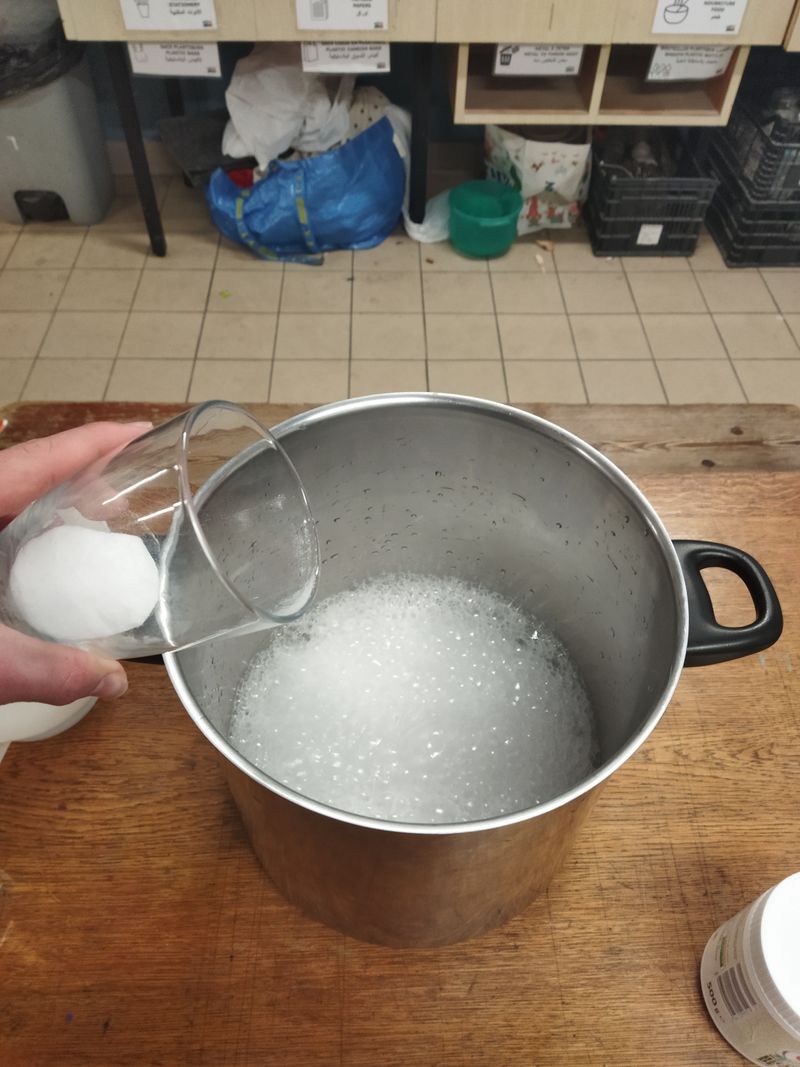
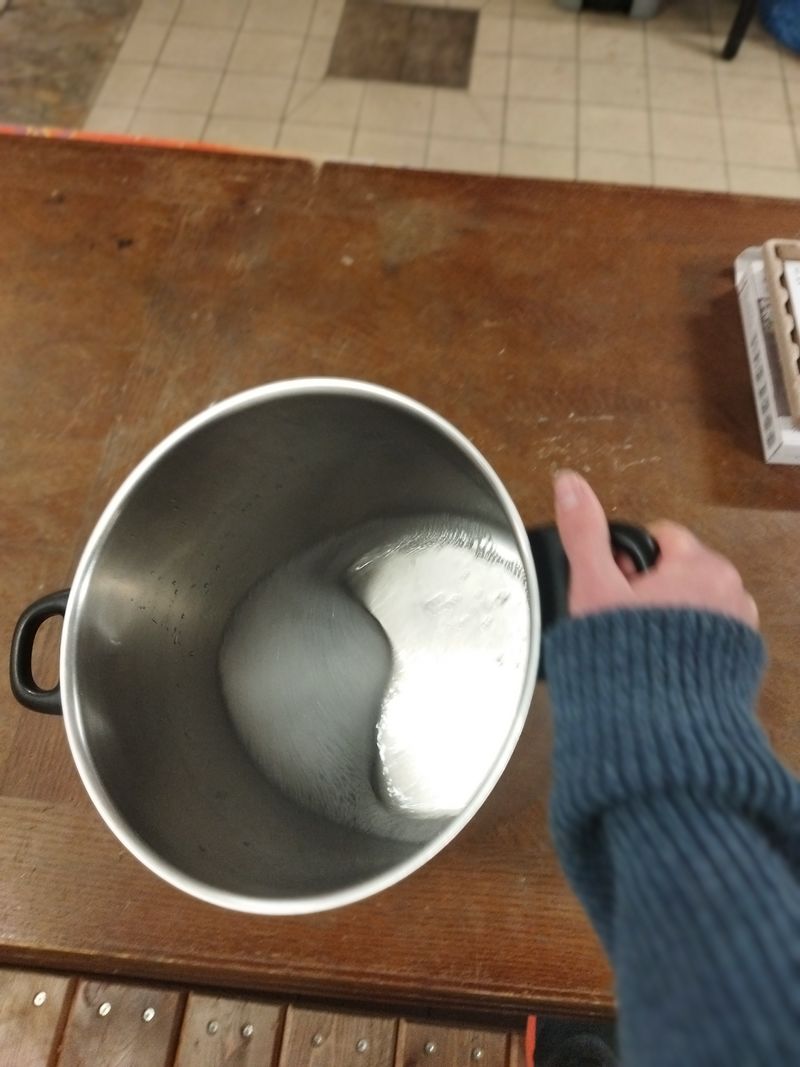
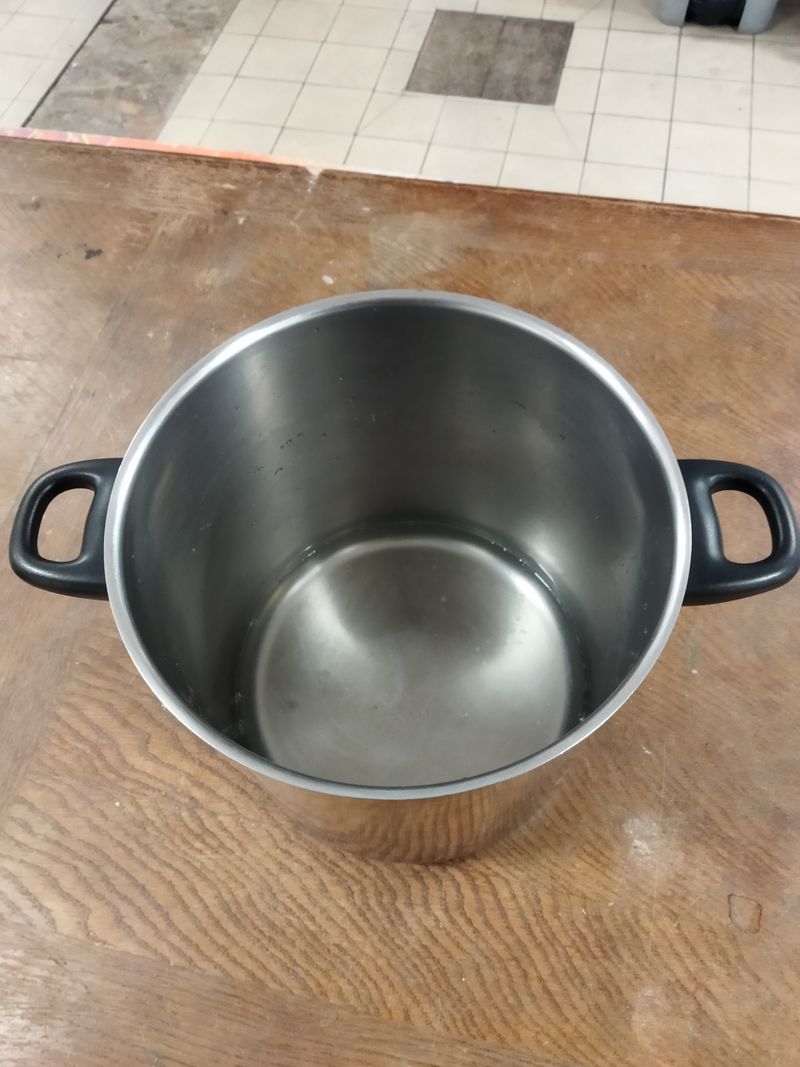
The first step consists of mixing the vinegar and bicarbonate of soda. To do this, start by pouring the right amount of vinegar into the pan. Then add the bicarbonate of soda "slowly". Stir until there is no more foam. This indicates that the chemical reaction is complete.
Point of vigilance
- Pour in the bicarbonate of soda slowly, as the reaction produces CO2 gas, causing the solution to foam.
- This stage takes time, but it's best to get to the end so that all the vinegar reacts. If there is any vinegar left over, be prepared to smell its nauseating odour during the next stage!
- The more warmers you make, the longer the reaction will take. For 5 warmers, you can expect about 20 minutes of mixing.
Étape 4 - Heating, evaporation
Safety
- The substance obtained from the reaction of vinegar and sodium bicarbonate is sodium ethanoate. This substance is irritating, so don't hesitate to wear safety goggles. Otherwise, be careful not to get any in your eyes.
- Slight risk of burns, possible small splashes if large quantities are used on a high-powered hob.
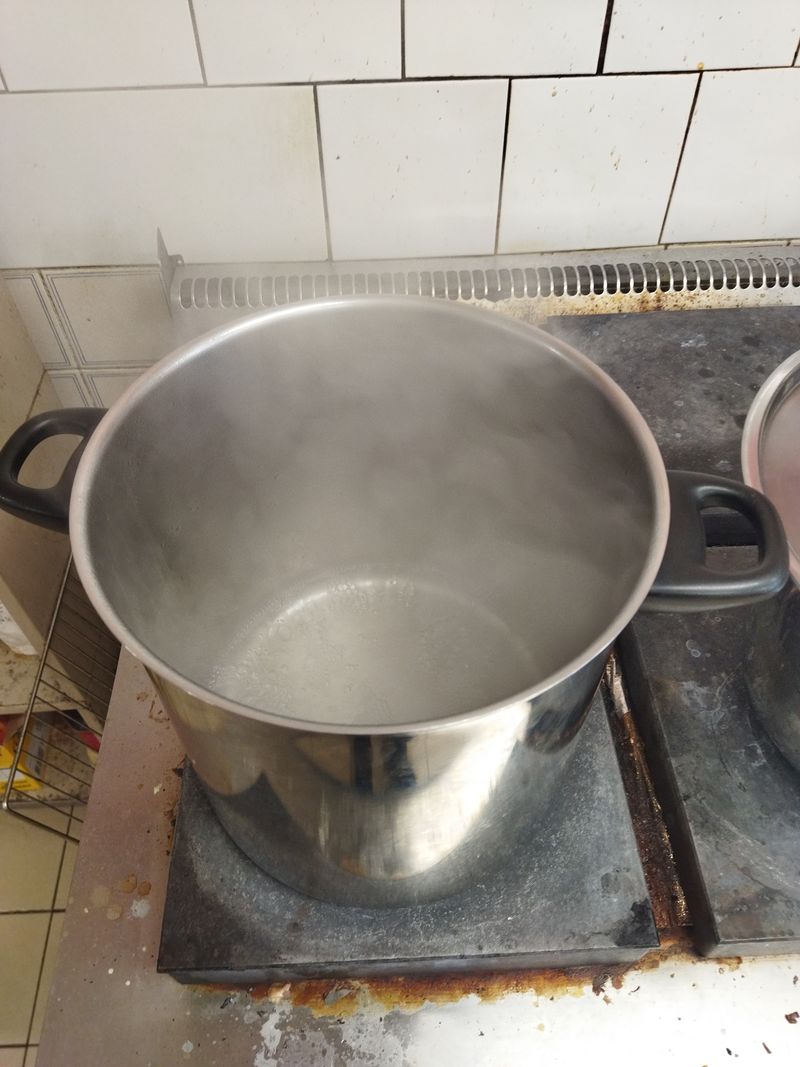
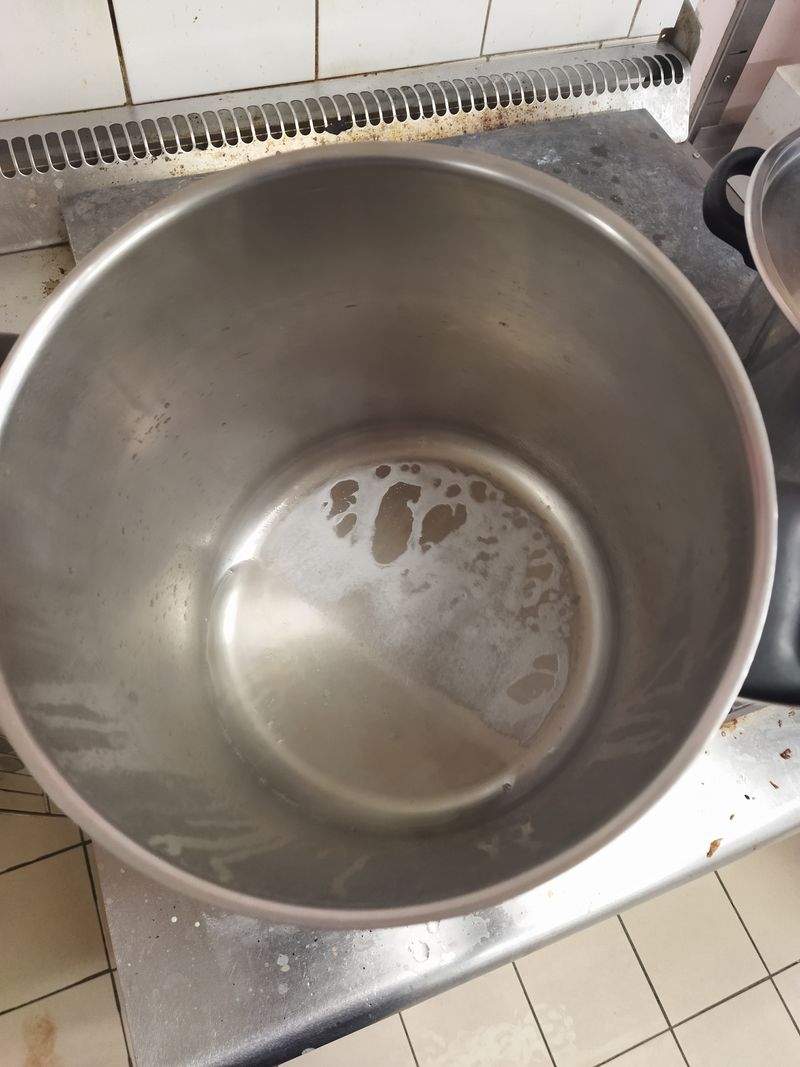
When the first stage is complete, we can put our saucepan on a high heat, the aim being to evaporate all the excess water. I say too much, because we'll need a little more water to get the right substance. When a very light film begins to appear on the surface, then the substance is ready, you need to stop heating.
Point of vigilance
- There's a lot of water to evaporate, so this stage takes a while (again, the more warmers you use, the longer it takes to evaporate).
- During this stage, nothing happens for a long time, but in the end everything happens very quickly. You need to be very careful as soon as the liquid becomes slightly cloudy and yellow.
- Generally, crystals will appear on the edges of the pan towards the end.
- If you inadvertently leave the liquid to heat for too long, it will solidify completely. In this case, turn off the heat and add water quickly (not too much, just enough to see all the solid become liquid again). You can then put it back on the heat, stirring to help the last crystals liquefy. Don't worry, the warmers will still work!
- Towards the end, a smell similar to that of a baked cake should appear. It's not unpleasant, but avoid sniffing it too much! It's best to be careful when playing chemist's apprentice! Even when you're handling substances that aren't very dangerous :)
Étape 5 - Filling
Safety
- Risk of burns, as the liquid to be poured into the warmer containers is very hot (around 100°C at first).
- If the liquid comes into contact with the skin at less than 60°C, it will solidify and heat up. It's very impressive because the solid sticks to the skin. Don't panic, a little water and it will go away on its own. However, don't take too long to rinse off with water to avoid burning yourself.
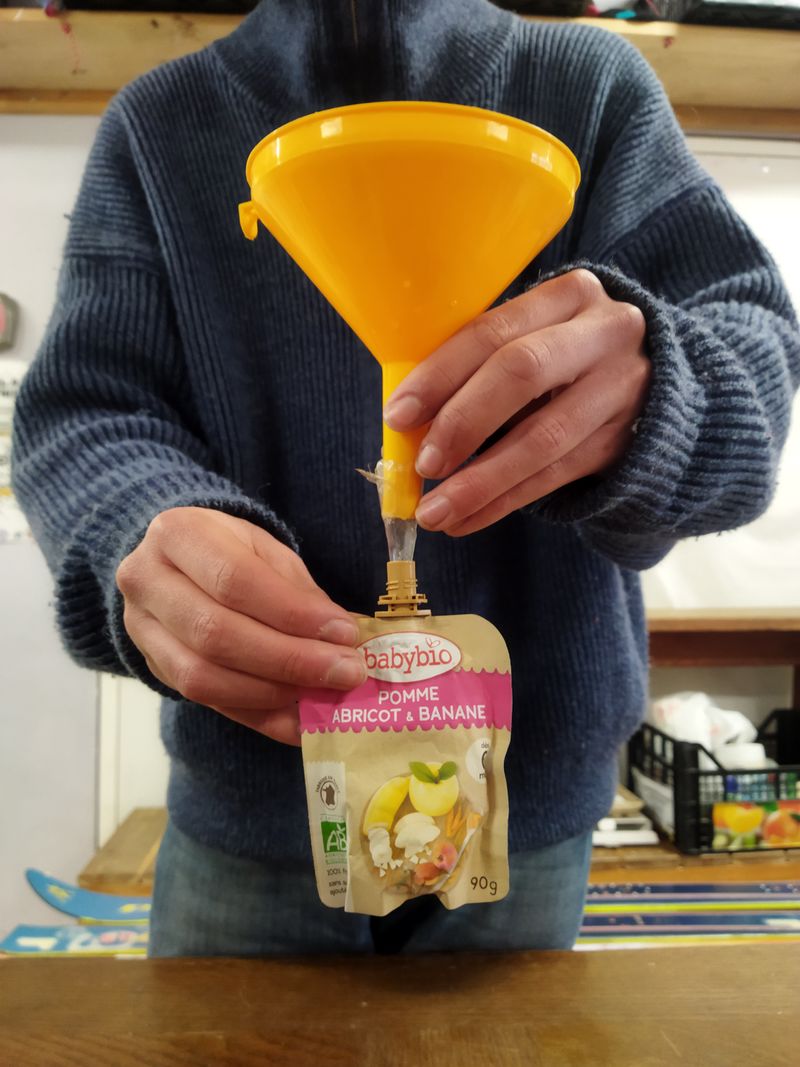
The aim of this step is to fill the containers of our warmers with the substance obtained in step 4.
Two people are needed for this stage, as it is difficult to hold the containers and pour at the same time.
The person holding the container can wear gloves to limit the risk of burns.
At this stage, a funnel is inserted into the containers and the contents of the saucepan are poured in gently.
Point of vigilance
- Leave a small air space in the warmer when pouring in the liquid. Be careful not to completely block the hole with the funnel, as this could cause the liquid to overflow and burn :(
- Between each warmers, stir the pan to mix the liquid and prevent the surface from solidifying.
- The liquid solidifies at around 58°C, so pour it in before it reaches this temperature, otherwise the funnel will be blocked. However, don't pour too quickly or you could get burnt. If the substance starts to cool too much, simply add a little water and repeat step 4.
- If the funnel is completely blocked, you can pour in some hot water and the solid will quickly become liquid and flow!
Étape 6 - Reloading warmers
The warmers are now ready to be loaded!
To charge the warmers with heat, place it in boiling water for 10-15 minutes. Then leave them to cool, without stirring them too much, until they reach room temperature.
They're now full of energy and ready for use in the mountains or anywhere else!
Étape 7 - Use of warmers
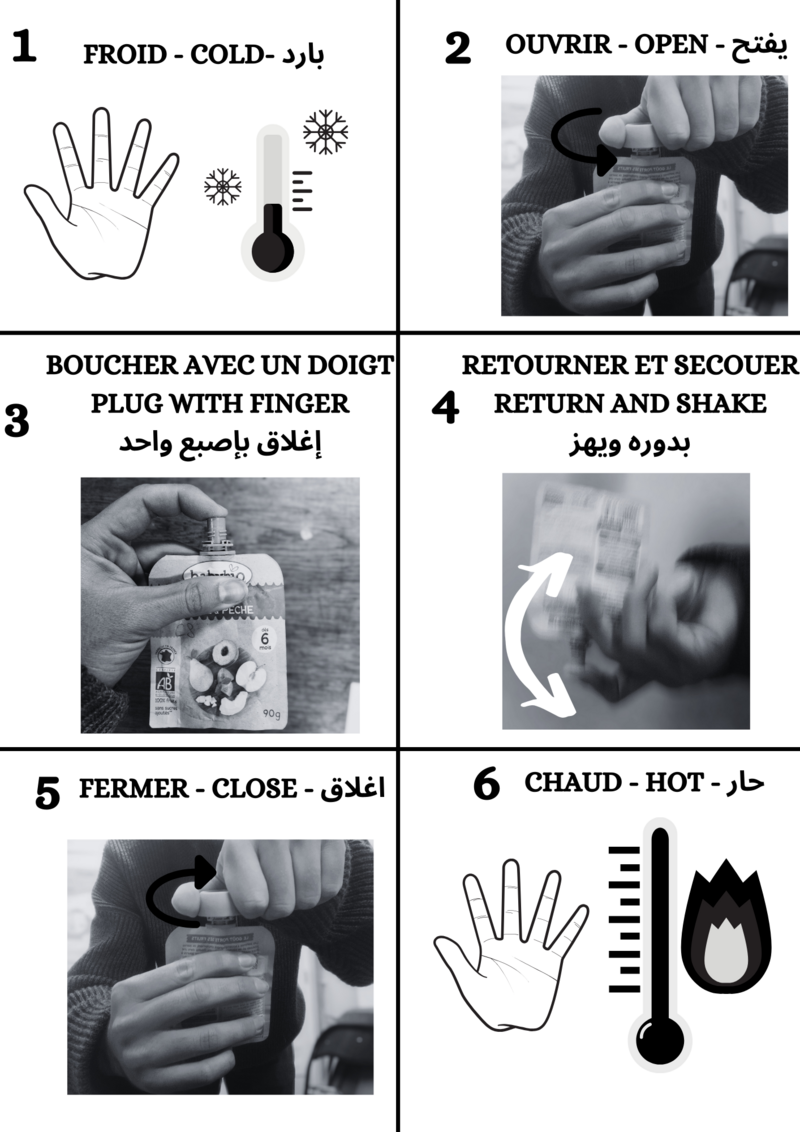
Once you're out in the mountains in the cold, you can activate them by following the instructions.
It then heats up to around 50°C. To keep the heat created, it is advisable to isolate them from the outside air by putting them in your gloves and/or pockets.
Safety
Warning: it is strongly inadvisable to heat up a frostbite suddenly. The use of warmers is preventive, to prevent a strong sensation of cold and not to heat an area in critical condition.
Then, it is not advisable to alternate between hot and cold for frostbite. It's better to wear dry clothes and wait for a bath thermostated at 37°C once you're in a safe place.
Étape 8 - The theory of warmers
It's been very interesting for me to experiment and improve a process following personal observations! I share with you my discoveries from my experiences and my readings.
Fabrication de l'éthanoate de sodium, réaction chimique
Manufacture of sodium ethanoate, chemical reaction
Sodium ethanoate is a product of the reaction between ethanoic acid and sodium bicarbonate.
Cette réaction produit aussi de l'eau est du CO2.
Calcule des quantités
This reaction also produces water and CO2.
Calculating quantities
This part isn't much fun, so skip it if you're not a big fan of chemistry calculations! But it is necessary if you want to recalculate everything yourself!
To determine the quantities of ethanoic acid and sodium bicarbonate to mix, we assume that the reaction is complete. So, in order to optimise everything, we need to mix the reagents in what are known as stoichiometric quantities. When you add exactly these quantities, all the reagents are consumed and all that's left at the end of the reaction is the product!
In our case, one molecule of ethanoic acid reacts with one molecule of sodium bicarbonate. The same number of "quantities of matter" (moles) of each of the two reagents must therefore be added in order to reach the stoichiometric quantities.
Knowing this, calculate the quantity of material corresponding to 35g of bicarbonate (for 1 warmer).
Next, calculate the mass of acetic acid needed to obtain exactly the same quantity of substance (which will depend on its molar mass).
Finally, knowing that, say, 8% vinegar has 0.08g of ethanoic acid per 100mL, we calculate the volume of vinegar to obtain exactly the right mass of ethanoic acid.
If you prefer, you can calculate the mass of vinegar rather than its volume (useful if you don't have a measuring glass). Luckily, vinegar has almost the same density as water, so 1kg of vinegar for 1l of vinegar.
There are a number of educational resources on basic calculations in solution chemistry on the internet if you're interested. This is a subject that is covered at the beginning of secondary school in France.
Comprendre par ses propres sens
Understanding with your own senses
This reaction is fun to experiment with because it is very visual: the production of gaseous CO2 produces foam. We can then see whether all our molecules have reacted properly.
Pourquoi la réaction (mélange) est si longue ?
Why does the reaction (mixing) take so long?
The reaction takes time, and we have to mix! But what happens in the world of molecules to make it take so long!
In our saucepan, after a few seconds of reaction, we have a lot of water, the reactants and also the few products that have already been created. In order to react, two molecules of reagent must meet.
But how do you meet someone in this mess? It's a bit like throwing pollen into a field of flowers, at first it's easy for the pollen to find a single flower, but after a few minutes, when many couples have formed, it's difficult for a small flower and a pollen to find each other.
In technical terms, we speak of reaction kinetics to refer to the speed at which the reaction takes place and of limiting phenomenon to refer to the phenomenon that imposes this speed.
Here it is the meeting of the molecules that is the slowest, so we speak of mass transfer.
.
Vous avez dit cristallisation ?
Did you say crystallisation?
We've already discussed the problem of crystallisation if the liquid is heated for too long. This is a rather counter-intuitive observation. Normally, by increasing the temperature, you go from solid to liquid, not the other way round.
The phenomenon of crystallisation comes from the dehydration of sodium ethanoate trihydrate to anhydrous sodium ethanoate. In fact, the trihydrate substance, the one we want for our warmers, liquefies if we heat it above 58°C. On the other hand, the anhydrous substance only liquefies at 324°C. So when you remove the water from a molecule, PAF! It becomes anhydrous and solidifies instantly, because we're well below 324°C!
At the beginning, there's an excess of water, so it's this water that evaporates. But as soon as there is almost no water left, we start to '"dehydrate'" our good old molecule, "'hence the appearance at the end of crystals'", then, progressively '"a solid film'".
Comprendre pour mieux agir !
Understand to act more effectively!
Here, knowing the phenomenon allows you to judge when to stop step 4: when the first crystals appear, you know that the remaining liquid is not water but sodium ethanoate trihydrate, because if there was still liquid water, it would evaporate and no crystals would appear!
.
Le plus important ! Pourquoi les chaufferettes chauffe !
The most important thing! Why warmers heat up!
Warmers work on the basis of the phenomenon of supercooling! To find out more, read this article:
Étape 9 - Unresolved issue
Des chaufferettes presque réutilisable !
The warmers are almost reusable!
In theory, warmers should be reusable. In reality, each time they are used it becomes more difficult to activate them. I haven't been able to solve the mystery of this phenomenon, but maybe you can!
They can be reused a number of times, however, if you are prepared to wait a while and go over them several times to activate them.
For the more persistent, inserting a metal rod and kneading it will activate it more effectively, so you'll be able to reuse it for longer with this method. To do this, you can insert the tip of a small screwdriver, a screw or any metal object, knead it for a while and remove it once the heater starts to heat up :)
Quelques auto-activations imprévues
Some unexpected auto-activations
Sometimes during recharging, after having warmed them up and once at rest. The warmers may activate by themselves. This can be annoying because you then have to charge them again.
To be sure that a heater is ready to use, simply check that it is liquid. If it is, you're on the safe side.
Notes et références
Noé Beaupere. PILOTAGE DE LA LIBÉRATION DE CHALEUR ET ÉTUDE DU VIEILLISSEMENT DE MATÉRIAUX À CHANGEMENT DE PHASE. Sciences de l’ingénieur [physics]. Université d’Artois, 2019. Français. https://theses.hal.science/tel-03160528
Published
 Français
 English
 Deutsch
 Español
 Italiano
 Português