(Page créée avec « Doesn't include the bowl on top ») |
(Page créée avec « - Top air holes: 15 x 8mm holes ») |
||
| (9 révisions intermédiaires par le même utilisateur non affichées) | |||
| Ligne 49 : | Ligne 49 : | ||
Doesn't include the bowl on top | Doesn't include the bowl on top | ||
| − | |Tools= | + | |Tools=Grinder, sheet metal shears, drill and screwdriver |
|Tuto_Attachments={{Tuto Attachments}} | |Tuto_Attachments={{Tuto Attachments}} | ||
|ExternalAttachmentsLinks={{ExternalAttachmentsLinks | |ExternalAttachmentsLinks={{ExternalAttachmentsLinks | ||
| Ligne 56 : | Ligne 56 : | ||
}} | }} | ||
{{Tuto Step | {{Tuto Step | ||
| − | |Step_Title= | + | |Step_Title=Sheet metal cutting |
| − | |Step_Content=* | + | |Step_Content=*Cut out or have cut out by a boilermaker the 4 sheets according to the attached drawings: [https://03eba152-2ce7-474d-a49a-d8b50e4284c2.filesusr.com/ugd/a8a7bb_99d74147060b46e4a1615000427327f0.pdf 1], [https://03eba152-2ce7-474d-a49a-d8b50e4284c2.filesusr.com/ugd/a8a7bb_691de51542a941baa177b7351f47d910.pdf 2], [https://03eba152-2ce7-474d-a49a-d8b50e4284c2.filesusr.com/ugd/a8a7bb_3ddf2e16ce5e4c99b504f21101aa5f90.pdf 3] (refer to the link at the bottom of the page if the plans are not opened) |
| − | * | + | *Screw the feet on |
|Step_Picture_00=Cuiseur___pellets_Capture_4.JPG | |Step_Picture_00=Cuiseur___pellets_Capture_4.JPG | ||
|Step_Picture_01=Cuiseur___pellets_Capture_5.JPG | |Step_Picture_01=Cuiseur___pellets_Capture_5.JPG | ||
| Ligne 67 : | Ligne 67 : | ||
}} | }} | ||
{{Tuto Step | {{Tuto Step | ||
| − | |Step_Title= | + | |Step_Title=Gastronorm cutting |
| − | |Step_Content=* | + | |Step_Content=* Cut out the gastronorms using sheet metal shears (duct hole: just over 125mm and tank hole: just over 150mm). |
|Step_Picture_00=Cuiseur_pellets_20200111_161235.jpg | |Step_Picture_00=Cuiseur_pellets_20200111_161235.jpg | ||
}} | }} | ||
{{Tuto Step | {{Tuto Step | ||
| − | |Step_Title= | + | |Step_Title=Tank construction |
| − | |Step_Content=* | + | |Step_Content=*Assemble the large pellet tank using the self-drilling tools, cut the collar using the sheet metal shears and then drill the small and large tanks as follows: |
| − | - | + | - Lower air holes: 30 x 8mm holes |
| − | - | + | - Top air holes: 15 x 8mm holes |
|Step_Picture_00=Cuiseur_pellets_bruleur_granules_2eme_generation_DECOMPOSE.png | |Step_Picture_00=Cuiseur_pellets_bruleur_granules_2eme_generation_DECOMPOSE.png | ||
}} | }} | ||
Version actuelle datée du 27 juin 2024 à 16:27
Difficulté
Moyen
Durée
4 heure(s)
Coût
250 EUR (€)
Description
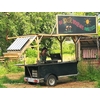
Cooker using pellets, walnut shells and probably other types of bulk material, with a 3-hour autonomy.
Introduction
Cooker for community, event or fairground catering using pellets, wood or certain bulk materials
Because of our geographical location, we use walnut shells to make it work. We still need to do measurements with RCW (large cross-section, otherwise the fire will burn too quickly) and fruit pits (olives, cherries, etc.).
Unlike traditional pellet stoves fed by an endless screw, the pellets are poured into a reservoir and lit from above using a fire starter: this principle requires no electronics or electricity.
The large tank provides 3 hours of autonomy, the small tank 1 hour.
You can build in a 1/1 gastronorm (28L, for cooking inside or as a bain-marie), or place a ceramic hob (plancha or crêpe pan) or a vat (2/1 48L gastronorm, used for pasteurisation, sterilisation and bain-marie) on top.
You can also replace the support plates with a metal garden table into which you fit the fireplace.
After several years in existence, the model presented on this site has evolved into a version without the purchase of materials, as the latter were a hindrance to the creation of this cooker. A TUTO is available to present the new version.
Modifications have been made to this model: the 4cm gastronorm shown in the photos and diagrams below has been replaced by a 15cm gastronorm, bringing the bowl closer to the fire and increasing power.


Matériaux
- 1 gastronorme 1/1 20cm
- 1 gastronorme 1/1 15cm
- 1 90° elbow 125mm
- 1 alumina tube 500X125mm
- 4 sheets 2MM
- 1 community can 150mm
- 1 tube 330X150mm
- 4 square tubes 15X15X600MM
- 1 pin
- Self-drilling screws
Doesn't include the bowl on top
Outils
Grinder, sheet metal shears, drill and screwdriver
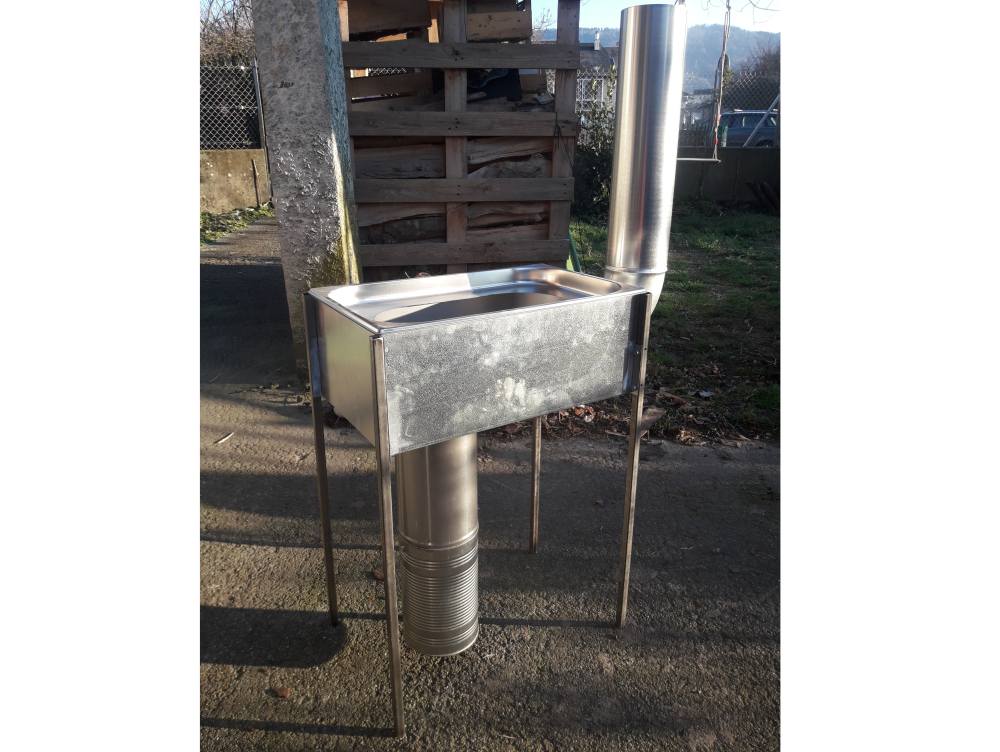
Étape 1 - Sheet metal cutting
- Cut out or have cut out by a boilermaker the 4 sheets according to the attached drawings: 1, 2, 3 (refer to the link at the bottom of the page if the plans are not opened)
- Screw the feet on


Étape 2 - Gastronorm cutting
- Cut out the gastronorms using sheet metal shears (duct hole: just over 125mm and tank hole: just over 150mm).

Étape 3 - Tank construction
- Assemble the large pellet tank using the self-drilling tools, cut the collar using the sheet metal shears and then drill the small and large tanks as follows:
- Lower air holes: 30 x 8mm holes
- Top air holes: 15 x 8mm holes
Published
 Français
 English
 Deutsch
 Español
 Italiano
 Português