(Page créée avec « There are other versions (especially in Senegal) made of a can surrounded by jute fabric and stuffed with 2 cm of fabric scraps. ») |
|||
| Ligne 55 : | Ligne 55 : | ||
{{Tuto Step | {{Tuto Step | ||
|Step_Title=Other version for water | |Step_Title=Other version for water | ||
| − | |Step_Content= | + | |Step_Content=There are other versions (especially in Senegal) made of a can surrounded by jute fabric and stuffed with 2 cm of fabric scraps. |
On vient mouiller la couche extérieure pour rafraichir l'eau contenue à l'intérieur. | On vient mouiller la couche extérieure pour rafraichir l'eau contenue à l'intérieur. | ||
Version du 11 juillet 2024 à 11:30
Description
A traditional zeerpot (or desert fridge) made with terra cotta pots quickly becomes heavy and difficult to carry around. The version presented here is a lighter and less expensive variant, feasible with materials that can be more easily found. The envelope is made out of fabric. The container can be in plastic, metal or any other sand-proof material. This container can be closed with a plug/cover or a fabric.
Matériaux
- Can of the desired size, made of plastic or any other sand-proof material
- Fabric with a thin stitch
- Board, either in wood or in any other material
- Little plastic hose with a tap
- Bottle of 5 or 6 litters
- Sand
Outils
- Scissors
- Sewing needle
- Thread
Étape 1 - External envelope
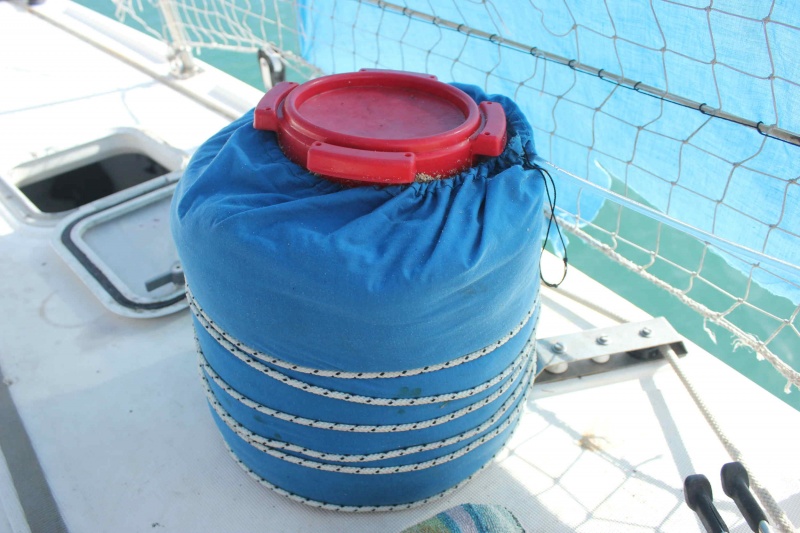
Making (or finding) a cylindrical bag allowing the introduction of the container surrounded by 5 centimetres of sand under it and around it. Providing a slide and enough fabric height to be able to close the bag around the container.
Étape 2 - Sand filling
Reinforcing the bottom of the bag with a board previously cutted in circle. Laying 5 centimetres of sand. Laying the can. Filling the sand on the side by pressing it. Filling the sand as high as possible. Once the sand has been filled and pressed, a string or a wire can surround the bag from the outside in order to strengthen the setting.
Étape 3 - Dripping
Drilling the hose with a needle to make some holes inside. Providing a tap in order to siphon the water supply. Having the pierced hose curved around the can, in order the water to be evenly spread in the sand during using. Providing a tap in order to be able to adjust the water flow.
Étape 4 - Using
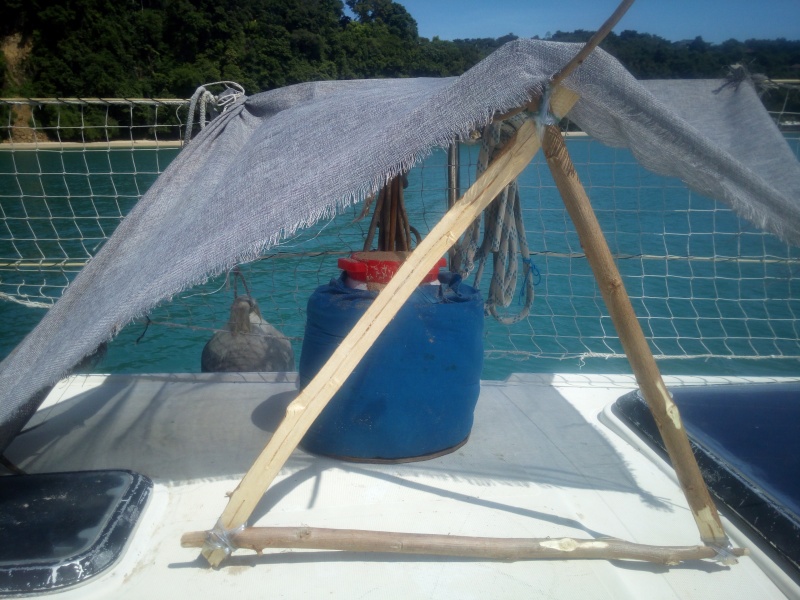
Hanging a water reserve over the can. Siphoning it. Adjusting the water flow as you want it, and depending on the wind and the temperature. The content of the can will be kept cool! The zeerpot has to be sheltered from the sun and placed in a windy place.
Étape 5 - On-going tests
This zeerpot model is being tested on the boat of Nomade des Mers. It is tested :
- the dropping intensity
- the internal and external temperatures measurement
- the inertia
Étape 6 - Other version for water
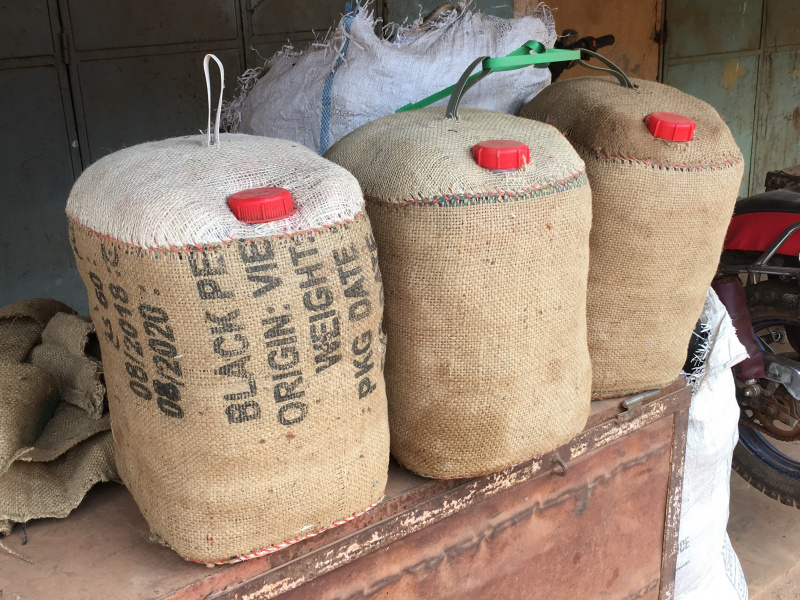
There are other versions (especially in Senegal) made of a can surrounded by jute fabric and stuffed with 2 cm of fabric scraps.
On vient mouiller la couche extérieure pour rafraichir l'eau contenue à l'intérieur.
Cette version peut être adaptée à d'autres bidons avec une ouverture plus large et contenir des aliments.
Notes et références
- Made by Thomas Piboum and Karel Janik for Nomade des Mers
Published


 Français
 English
 Deutsch
 Español
 Italiano
 Português