
Dernière modification le 16/08/2024
Difficulté
Facile
Durée
30 minute(s)
Coût
2 EUR (€)
Description
Making a washing machine by hand.
Sommaire
Sommaire
- 1 Description
- 2 Sommaire
- 3 Introduction
- 4 Étape 1 - Step 1 - Sawing the buckets/barrels.
- 5 Étape 2 - Step 2 - Drill holes in the inner bucket - or bucket 1
- 6 Étape 3 - Step 3 - Drilling holes in the suction cup
- 7 Étape 4 - Step 4 - Waterproofing the washing machine
- 8 Étape 5 - Step 5 - Cut a circle in the centre of the lid of the bucket.
- 9 Étape 6 - Step 6 - Adding rope to bucket 1
- 10 Étape 7 - Step 7 - Use
- 11 Commentaires
Introduction
THE NEED
L'accès à une machine à laver répond à un besoin d‘ordre hygiénique et sanitaire. C’est un outil rare dans les camps tant certains individus possèdent peu de vêtements ou de sous-vêtements, et peut aussi particulièrement profiter à certaines populations (enfants en bas âge, bambins...).
Cette machine simple et efficace peut faciliter le nettoyage du linge dans des espaces où il est parfois très difficile d‘avoir accès à cette commodité.
ACCESSIBILY
Making this washing machine is affordable financially, technically and materially. It requires very few materials, and most of them can be recycled materials (buckets, rope, plastic bottles, used inner tubes).
The purchase of these materials, if they are not recycled, is also fairly low.
THE RESPECT
The manual washing machine is very environmentally friendly, as it needs no electricity to operate, emits no CO2 and requires very little water - potable or non-potable - to function. As for its manufacture, the use of recycled materials helps to reduce environmental waste. What's more, you can limit the ecological impact of its use by making natural detergents from ash, for example.
Matériaux
2 Buckets
1 suction cup
Outils
1 drill
1 saw
1 stapler
Étape 1 - Step 1 - Sawing the buckets/barrels.
Saw off the top of the bucket/barrel that will make up bucket n1 (black): the washing machine drum.
Saw off the second bucket/barrel (Bucket 2 - Yellow) to allow the drum to fit inside the second seal.
For a better finish, sand the cut ends.


Étape 2 - Step 2 - Drill holes in the inner bucket - or bucket 1
Drill holes in one of the buckets (bucket 1 - which will hold the washing). On the sides and bottom of the bucket.
This will improve laundry cleaning by facilitating the movement of water and soap, and will make spin-drying easier.

Étape 3 - Step 3 - Drilling holes in the suction cup
Use the drill to make holes in the suction cup. This will improve the cleaning of the laundry.

Étape 4 - Step 4 - Waterproofing the washing machine
Cover the outer bucket with a used inner tube, cut lengthways. You can use staples or glue it in place.
It's important to stretch the inner tube tightly along the lid of the washing machine.
This will ensure a better seal and prevent splashes.

Étape 5 - Step 5 - Cut a circle in the centre of the lid of the bucket.
Cut a circle in the centre of the lid of the outer bucket (bucket 2). The circle should be wide enough to allow the suction cup handle to move freely.


Étape 6 - Step 6 - Adding rope to bucket 1
Add a rope to bucket 1. This will make it easier to hold and spin.

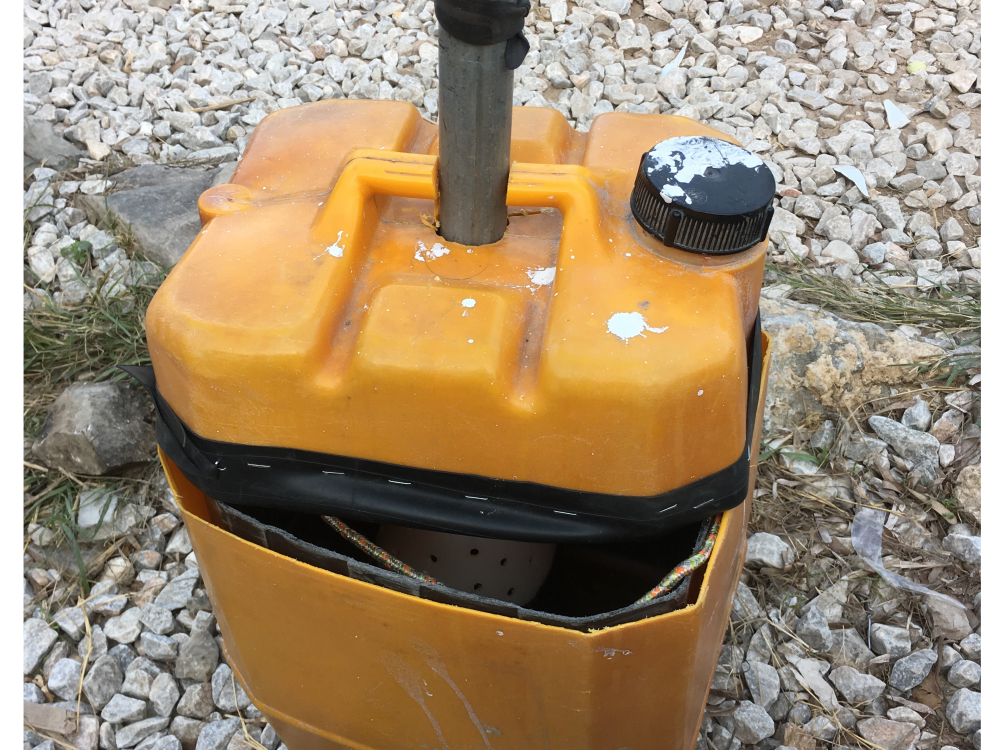
Étape 7 - Step 7 - Use
Pour utiliser la machine à laver, remplissez le sceau n°1 (noir) de vos vêtements à laver puis ajouter de l'eau et de la lessive (si possible de la lessive écologique : à la cendre par exemple), insérer la ventouse avant de refermer le couvercle. Rabattre la chambre à air sur le bac et pomper à l'aide de la ventouse pendant quelques minutes.
Après avoir pompé pour laver les vêtements, sortir le bac n°1 (noir) contenant les vêtements et vider l'eau du bac n°2 (jaune). Remettre le bac n°1 contenant les vêtements et mettre de l'eau propre. Faire le même procédé.
Pour essorer les vêtements sortir le bac n°1 (noir) et accrocher la corde à un crochet. Faire tourner sur lui même le bac pour évacuer l'eau.
Published
 Français
 English
 Deutsch
 Español
 Italiano
 Português