(Mise à jour pour être en accord avec la nouvelle version de la source de la page) |
(Page créée avec « You will see different step occurring during the roasting process: The fermented coffee grains would first dehydrate. Then they will turn into light brown and will fina... ») |
||
| Ligne 120 : | Ligne 120 : | ||
}} | }} | ||
{{ {{tntn|Notes}} | {{ {{tntn|Notes}} | ||
| − | |Notes= | + | |Notes=You will see different step occurring during the roasting process: |
| − | + | ||
| + | The fermented coffee grains would first dehydrate. Then they will turn into light brown and will finally make some noise (crack). | ||
* Coloration marron clair à environ 200°C | * Coloration marron clair à environ 200°C | ||
Version du 5 décembre 2018 à 02:35
Description
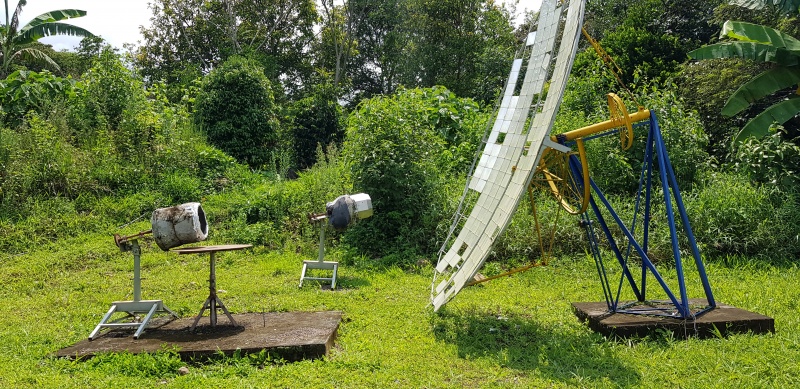
Solar coffee roaster made using a cement mixer
Introduction
Several steps need to be considered in order to turn the coffee grain growing on its tree into the steaming hot drink waking you up every morning.
After being picked from the tree, the fruit must soak into the water and its husk must be peeled. The grain should then ferment and being roasted before being grinded. This roasting is giving the grain all its flavour.
Coffee is one of the main exported product of Peru. At the Granja Ecologica in Huyro, Peru, students and professors from the PUCP University have developed different low tech tools. In this region where coffee is being grown, they created a coffee solar roaster using a cement mixer.
Here is how to built such a machine. Our goal is to inspired and encourage the construction of machines using salvage materials. You can adapt this device to your needs, the material and tools you have at your disposal!
We are two French students exploring low technologies in South America. Do not hesitate to follow our adventure here : https://www.facebook.com/LAtelierLowTech/
Matériaux
Roaster:
- Cement mixer,
- Black painting,
- Aluminum sheets,
- Isolating material (fiberglass, rock wool, foam,..)
Parabola:
- Stainless steel or aluminum bars,
- Metal frame, sheets of metal,
- Wires
Mechanical par:
- Belt or chain,
- Gears (toothed wheels),
- Handle or motor or water wheel
Outils
- Paint brush,
- Wire cutter,
- Flat-nose pliers,
- Spanner,
- (welding material),
- (drill- screw-gun)
Étape 1 - The solar coffee roaster
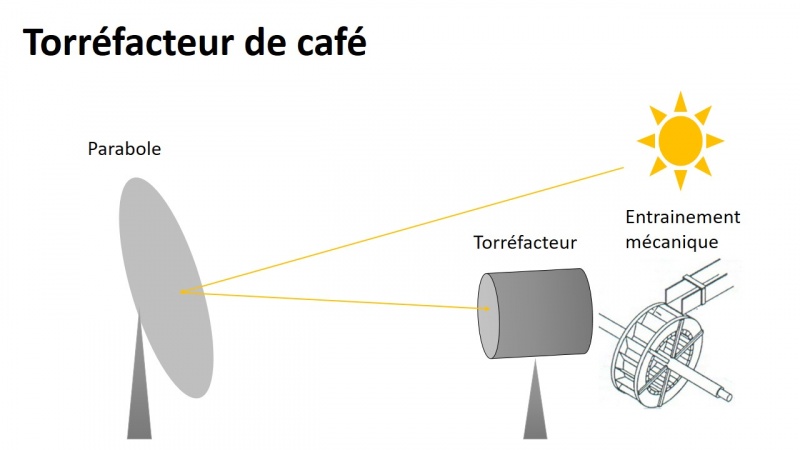
The roaster is made of 3 different parts :
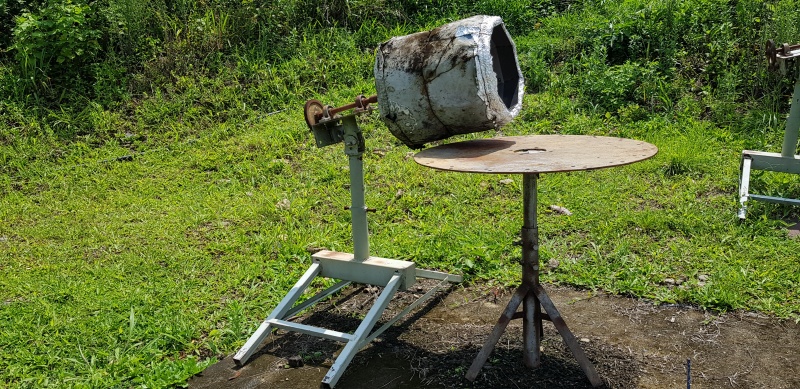
- The roaster itself, using a salvage cement mixer
- The solar parabola, which concentrates solar energy into the roaster
- A mechanical part, which makes the roaster turn
Étape 2 - The roaster
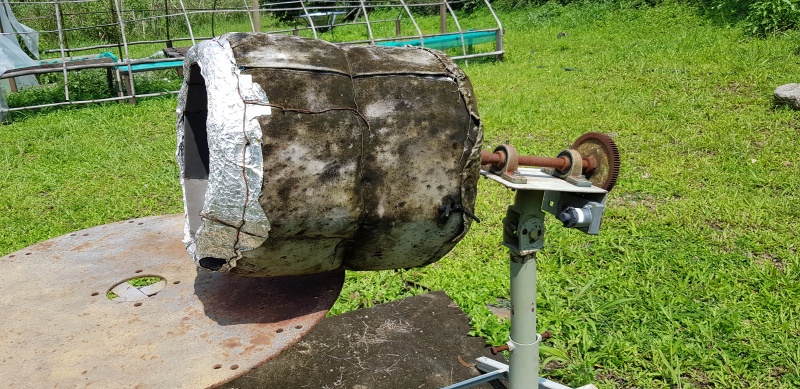
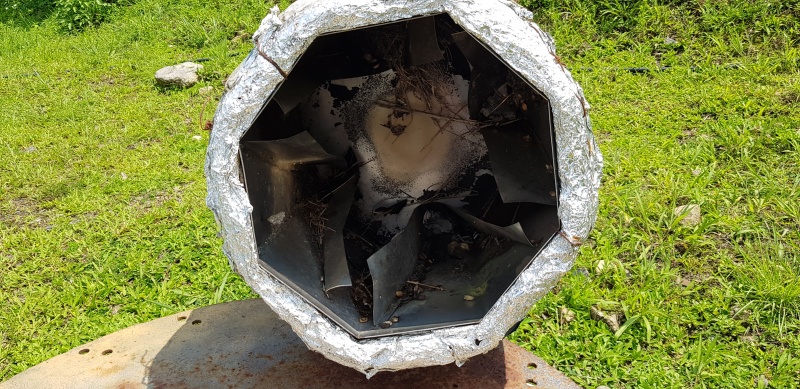
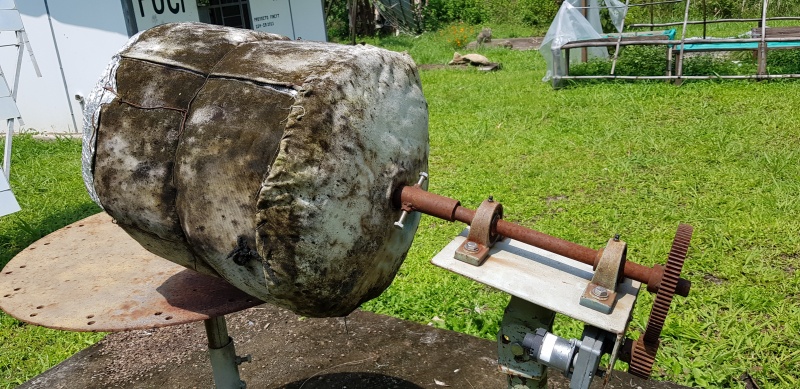
The roaster is built using a small cement mixer, whose inside walls are painted in black in order to convert the solar energy into thermal energy.
The cement mixers outside walls are isolated using an aluminum coating and a thick coat of isolating material (depending on the materials you have at your command: fiberglass, rock wool, isolating foam). The goal is to keep the heat inside the cement mixer so that it does not escape through the walls.
Étape 3 - The Scheffler parabola
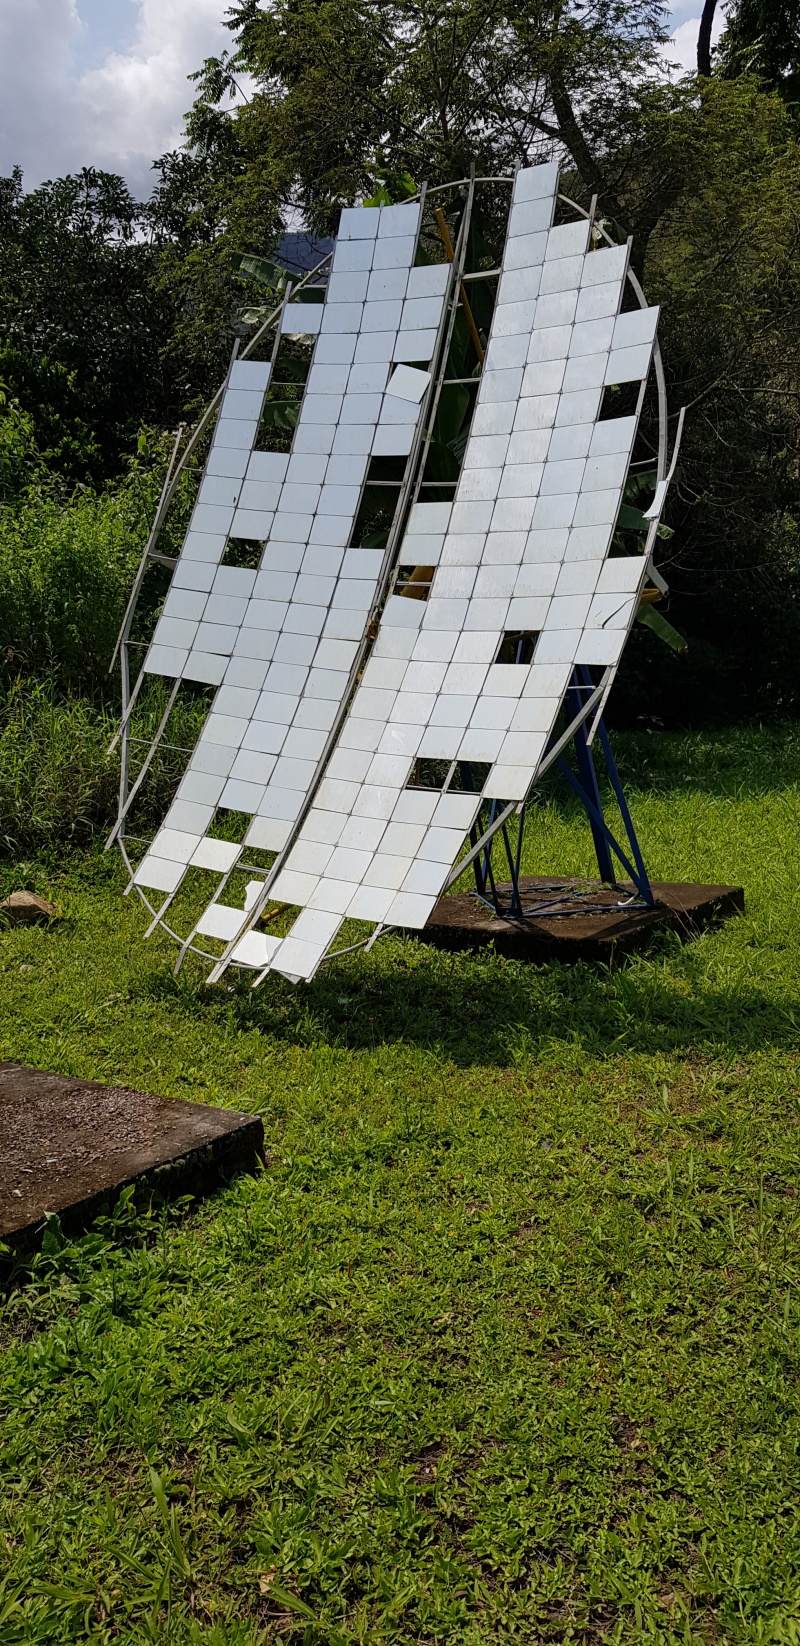
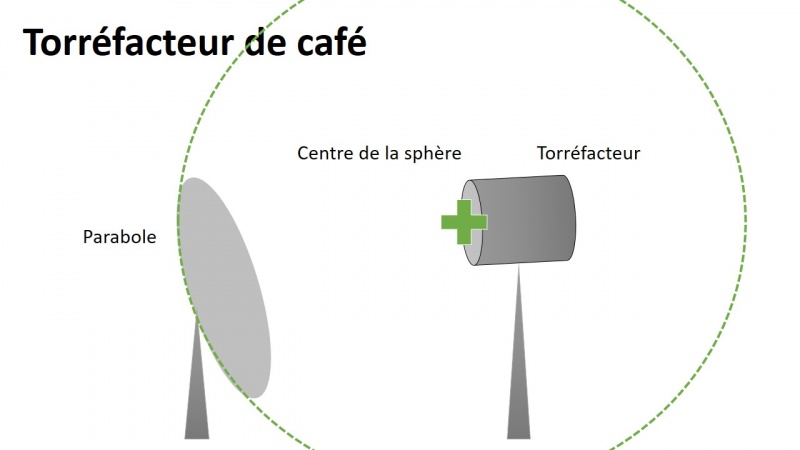
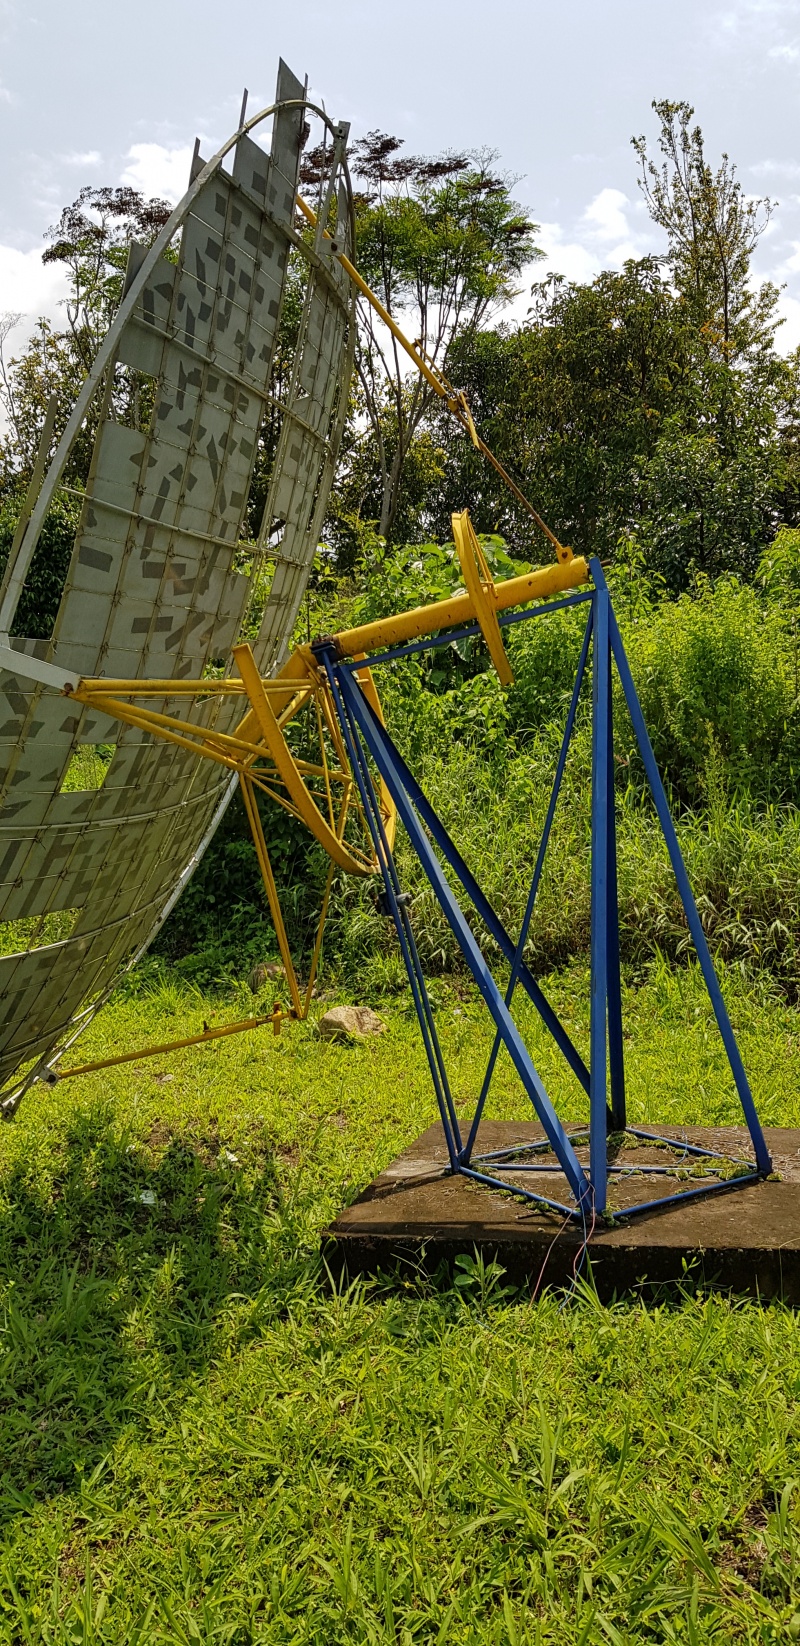
The Scheffler parabola is a piece of sphere covered by sheets of metal, which concentrate the solar beams at its center. The cement mixer should be placed in the middle of this sphere.
The size of the parabola depends on the quality of the materials available and the quantity of heat you need, knowing that a bigger parabola will provide more heat.
The roasting process is generally undertaking around 200°C.
The stainless steel or aluminium frame is built on a foot which allows it to rotate in order to face the sun.
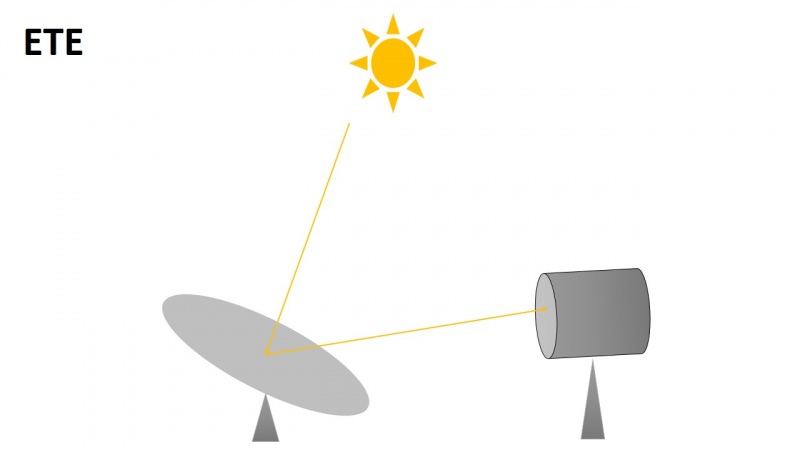
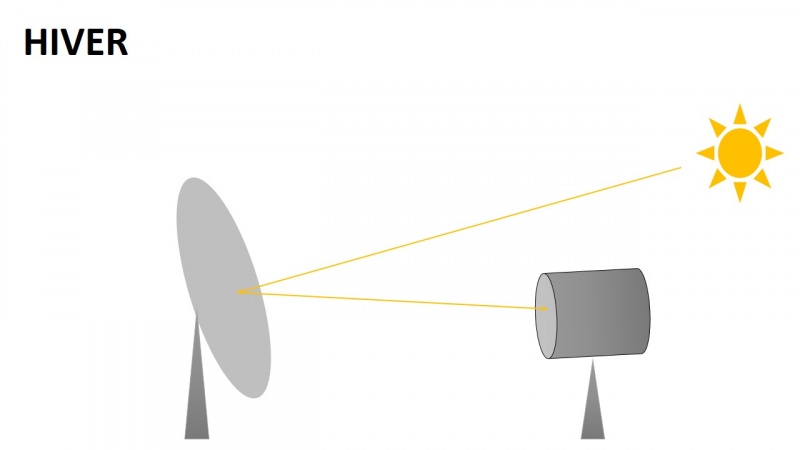
To reflect the maximum amount of solar beams, it is important that the beams come perpendicularly to the surface of the parabola. In summer, when the sun is high in the sky, the parabola should be placed horizontally whereas during the winter, when the sun is low, it should be placed vertically.
According to the materials you have, they could be assembled using a welder, screws or wires.
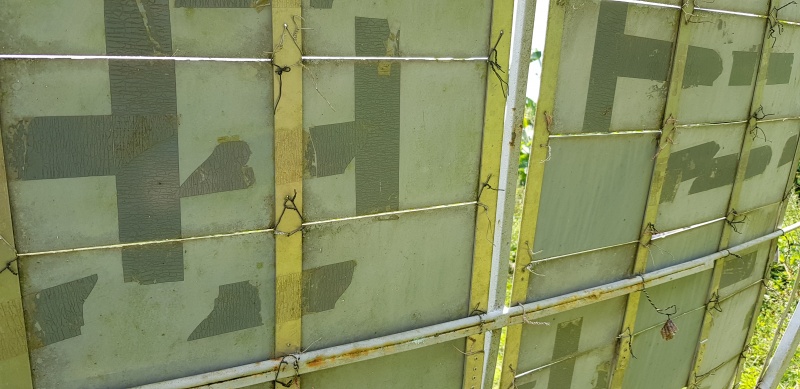
A grid-patterned structure is then added to the frame using a metal support.
Pierce the sheets of metal at their extremities
Fix the sheets of metal on the metal frame using wires
Étape 4 - The mechanical transmitting part
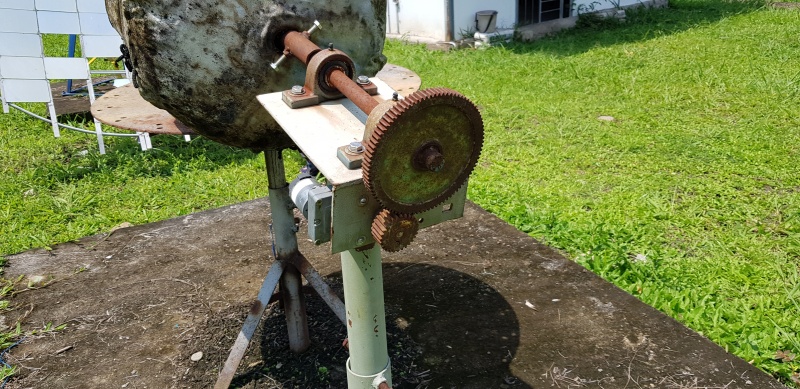
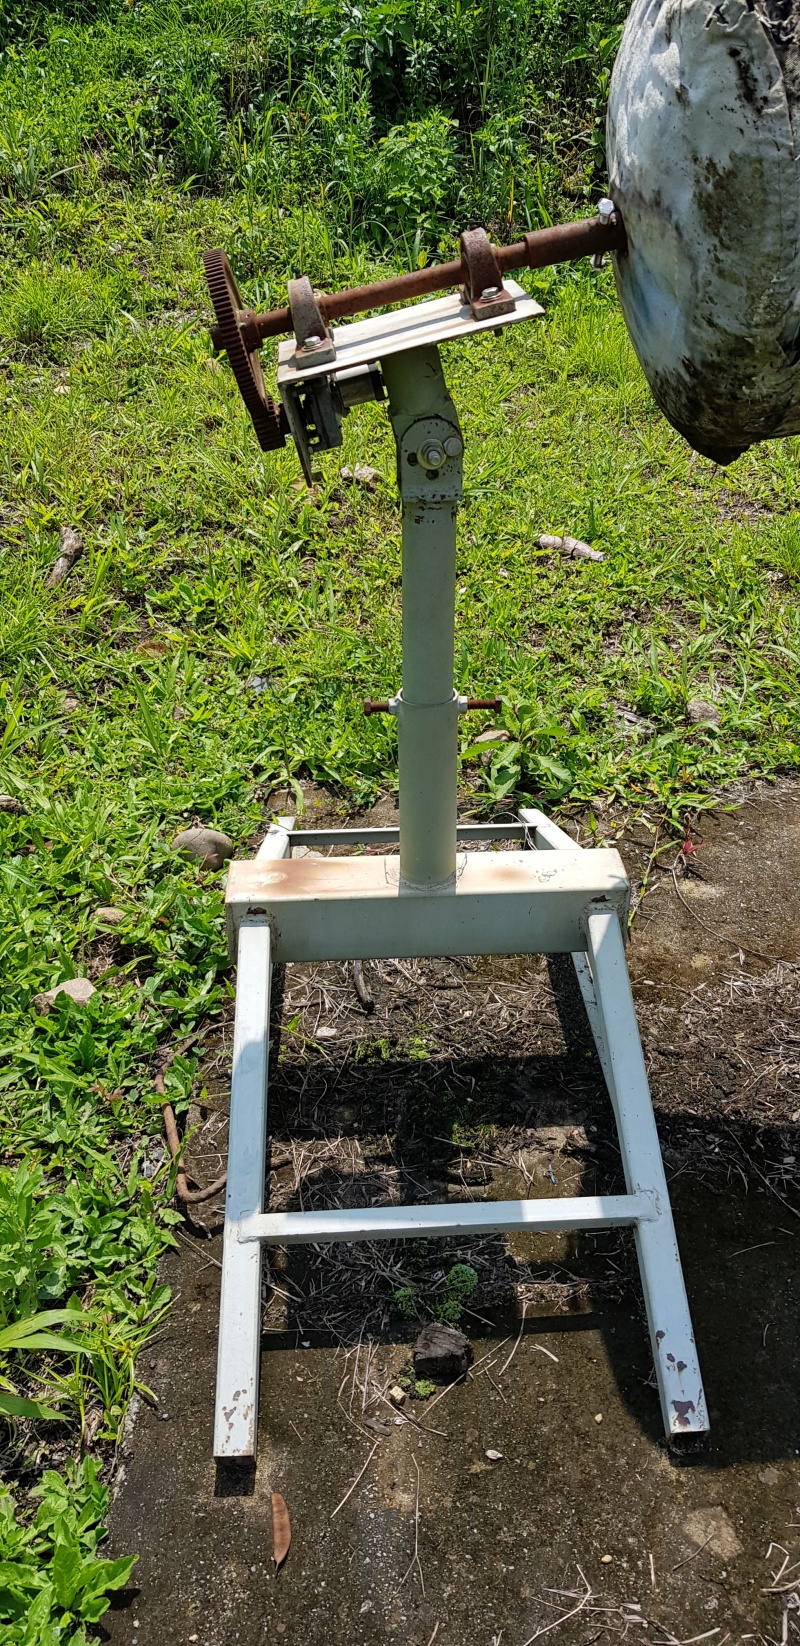
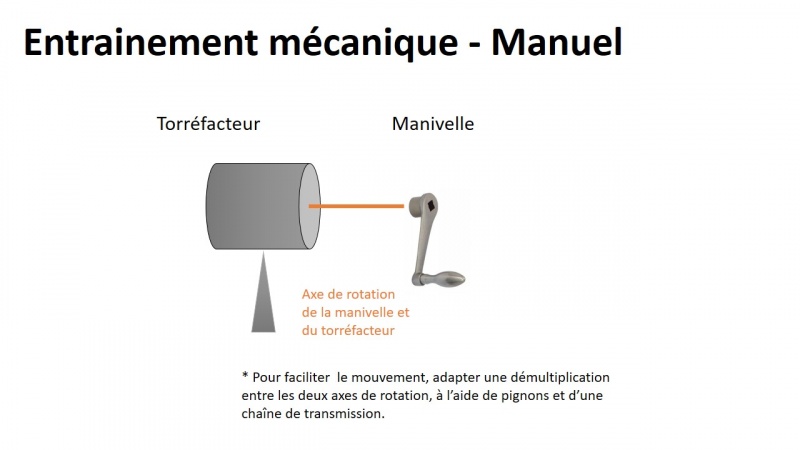
The mechanical gears which are already part of the cement mixer can be used. However , if the feet disturb the transmission, it could be better to modify the feet, as we had to do.
The blades inside the cement mixer are turning in order to continuously mix the coffee grains and obtain a homogeneous roasting, without burning the grains. The roasting process takes about 20 minutes.
The rotating movement could be done in several ways:
- Using the hands : a handle could be directly fixed to the cement mixer's gears. Undertaking the roasting process manually for 20 min could however be tiring.
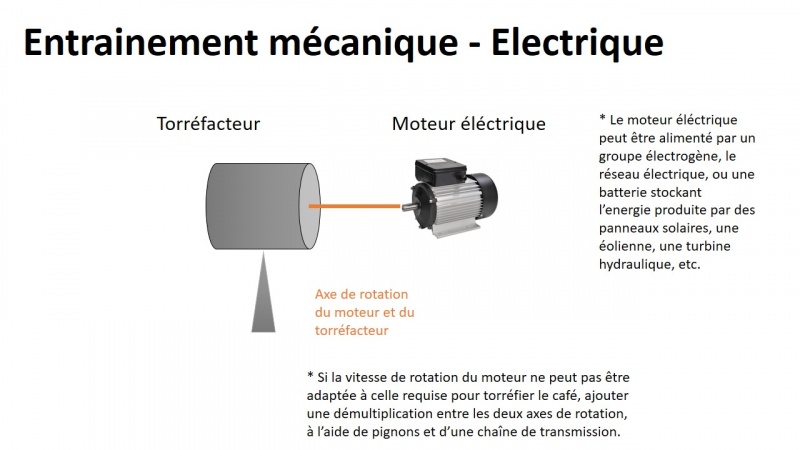
- Using a generator: the toothed wheels of the cement mixer's gears could be linked to the rotation axis of a motor, using a belt or a chain. This motor could be fed thanks to a generator, the electrical network or batteries which would store the energy from solar panels, wind or water turbines. In this way, the motor will make the roaster rotate.
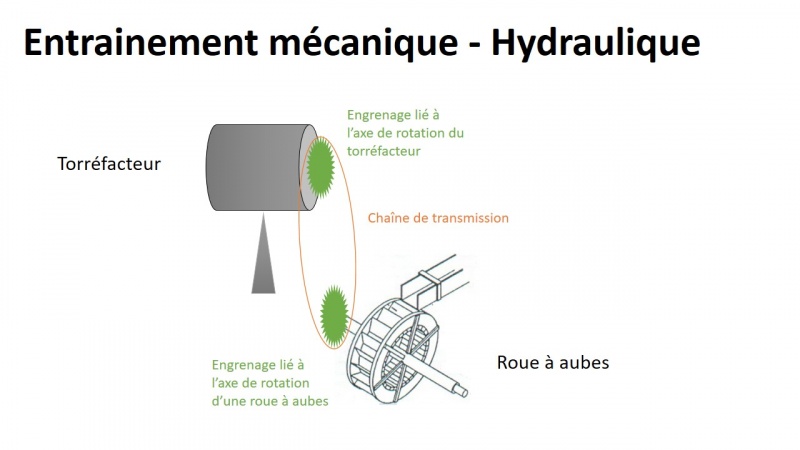
- Using a water turbine: if there is a stream in the area, the toothed wheels of the cement mixer and the rotation axis of a water wheel could be linked together using a belt of a chain. The water wheel will then transmit its rotation movement to the roaster.
Notes et références
You will see different step occurring during the roasting process:
The fermented coffee grains would first dehydrate. Then they will turn into light brown and will finally make some noise (crack).
- Coloration marron clair à environ 200°C
- Explosion des grains (petits bruits cracs)
- Puis une phase de refroidissement est nécessaire avant le conditionnement.
Merci à Diana Figueroa et Hassan Hadzich de nous avoir rencontrées et accueillies au sein de la Granja Ecológica.
PUCP est la Pontificia Universidad Católica del Perú, université privée de Lima.
Le Grupo de Apoyo al Sector Rural est un collectif d'étudiants et de professeurs de l'Université PUCP, créé il y a 25 ans, menant divers projets Low Tech et travaillant sur les énergies renouvelables.
http://gruporural.pucp.edu.pe/listado-proyectos/
Published
 Français
 English
 Deutsch
 Español
 Italiano
 Português