(Page créée avec « /!/ Make sure the ball is on the right side! ») |
(Page créée avec « The setting up ») |
||
| Ligne 99 : | Ligne 99 : | ||
|Step_Picture_00=Pompe_manuelle_verticale_fixation.jpg | |Step_Picture_00=Pompe_manuelle_verticale_fixation.jpg | ||
|Step_Picture_01=Pompe_manuelle__verticale__DSC00133.JPG | |Step_Picture_01=Pompe_manuelle__verticale__DSC00133.JPG | ||
| − | |Step_Title= | + | |Step_Title=The setting up |
|Step_Content=Pour une efficacité maximum, l'idéal est de sceller les tuyaux. Au SERTA, la partie non mobile est coulée dans le béton qui constitue le couvercle du réservoir. | |Step_Content=Pour une efficacité maximum, l'idéal est de sceller les tuyaux. Au SERTA, la partie non mobile est coulée dans le béton qui constitue le couvercle du réservoir. | ||
Version du 14 juin 2018 à 18:16
Description
The objective is to make a manual pump to draw water from a tank for exemple.
Introduction
Matériaux
All these pieces are here in PVC for the pump : - 3 adapter 50mm-25mm - 2 couplings 50mm - 1 T 50mm-25mm
- 1 or 2 25mm elbows (depending on water outlet requirements)
- between 1 and 2 metres of 25mm tube (depending on water outlet requirements) - between 1 and 2 meters of 50mm tube - two balls over 25mm in diameter (glass balls) - 2 screws at least 50 mm long
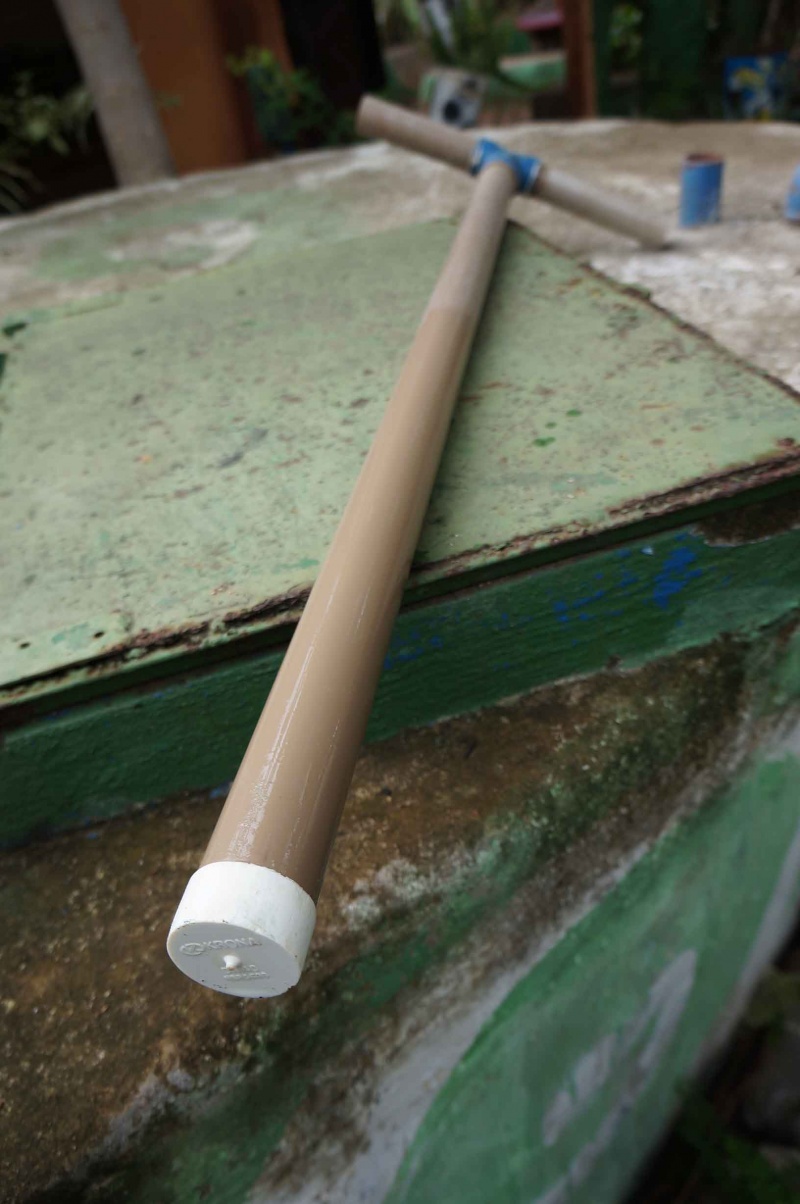
for the piston : - between 1 and 2 meters of 40mm tube - 1 T XXmm-40mm - 1 tube cap of 40mm, if possible a little wider
paint stripper (acetone type)
Outils
- Saw - Drilling machine - Screwdriver - Pvc glue - Sandpaper (glasspaper) - a cloth
Étape 1 - The principle
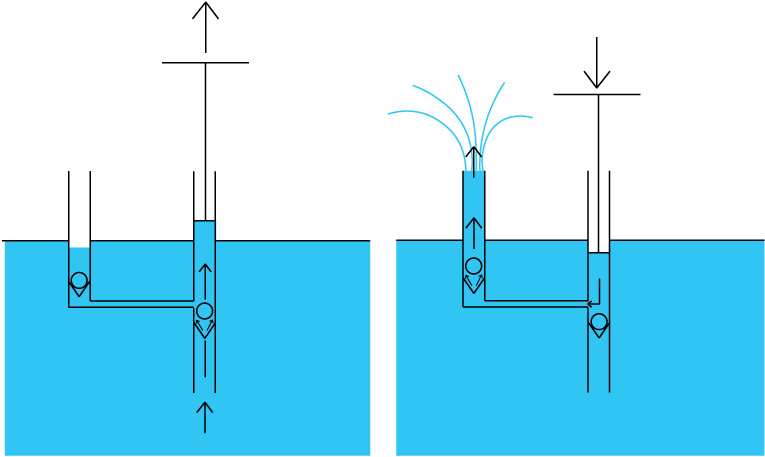
The principle of operation of this pump is very simple.
When the piston is raised, a vacuum is created. It will attract water from the pool through the anti return system from below. The other valve is in the other direction, the water from the outlet is not sucked in.
When the piston is lowered, an overpressure is created, which will close the bottom check valve, and open the other valve. The water can then come out.
This type of pump is called a "delivery pump".
Étape 2 - The preparation :
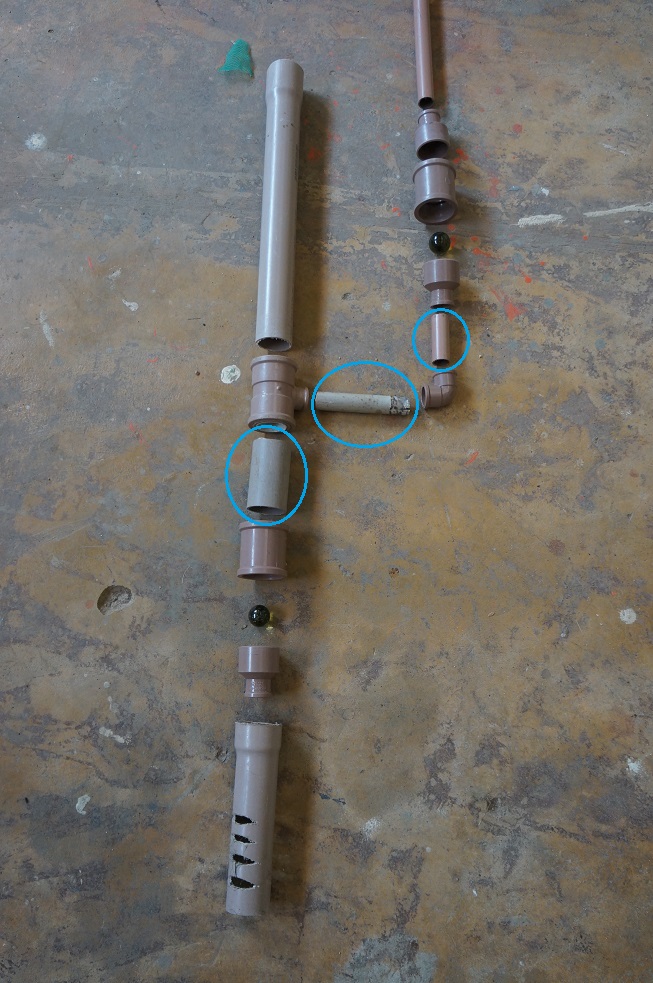
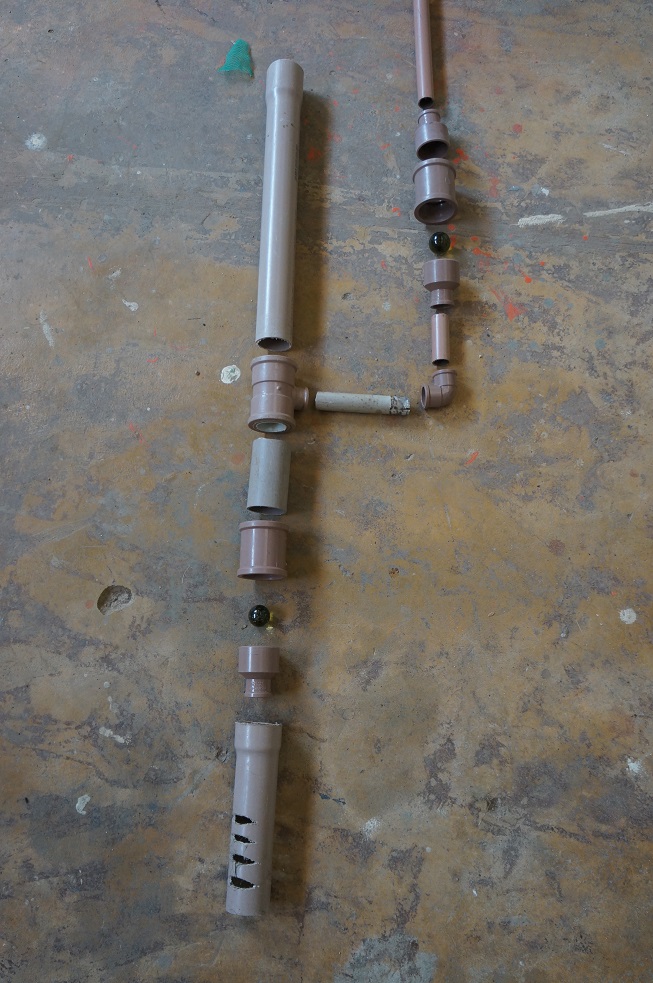
Without sticking the pieces, the purpose of this step is to check the material.
Nest the elements as shown in the following diagram:
You can even test the operation.
To optimize : areas surrounded in blue should be as short as possible.
Étape 3 - The assembling of the handle
Once the verification is done, the assembly can begin.
You simply have to glue the elements with PVC glue and check the sealing at the end.
How to glue ? - Grind with fine sandpaper the parts to be assembled - Clean with a cloth soaked in paint stripper. - Apply the glue at the inlet of the female part and on the entire male part. - Immediately engage fully, without twisting. - Wipe off glue burrs.
The drying time is about 1h, but if the water is to be consumed, it is advisable to wait between 12h and 24h for the toxic solvents to disperse.
Étape 4 - The pump casing assembly
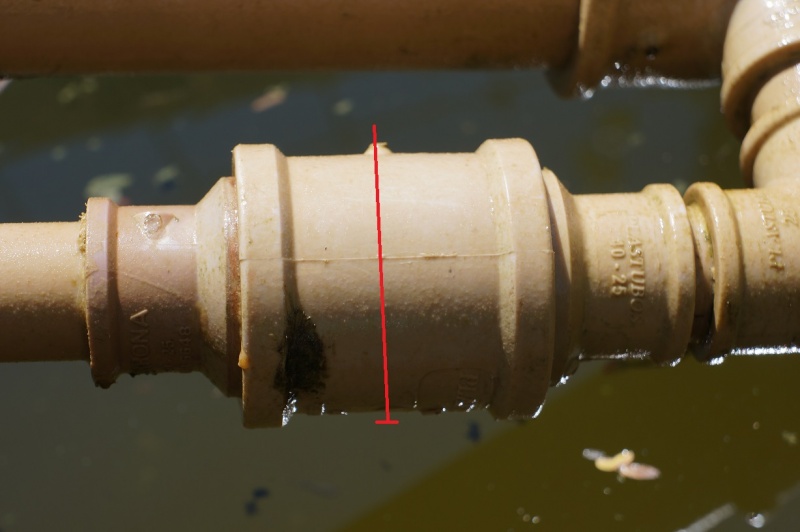
Glue all the pieces then once dry, drill and screw in the middle of the 50mm-50mm coupling.
You can also nail (see picture) very well by drilling with a smaller diameter.
This allows the ball to lift sufficiently to allow water to pass through, while preventing it from clogging the other end.
/!/ Make sure the ball is on the right side!
Étape 5 - The setting up
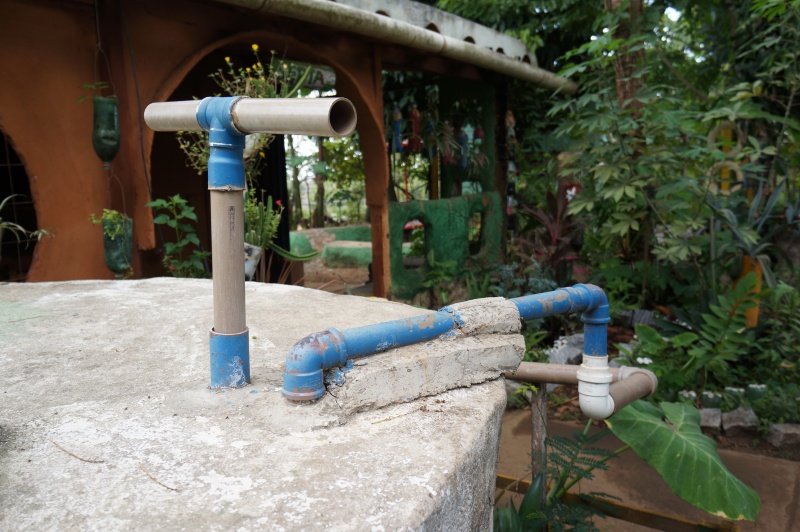
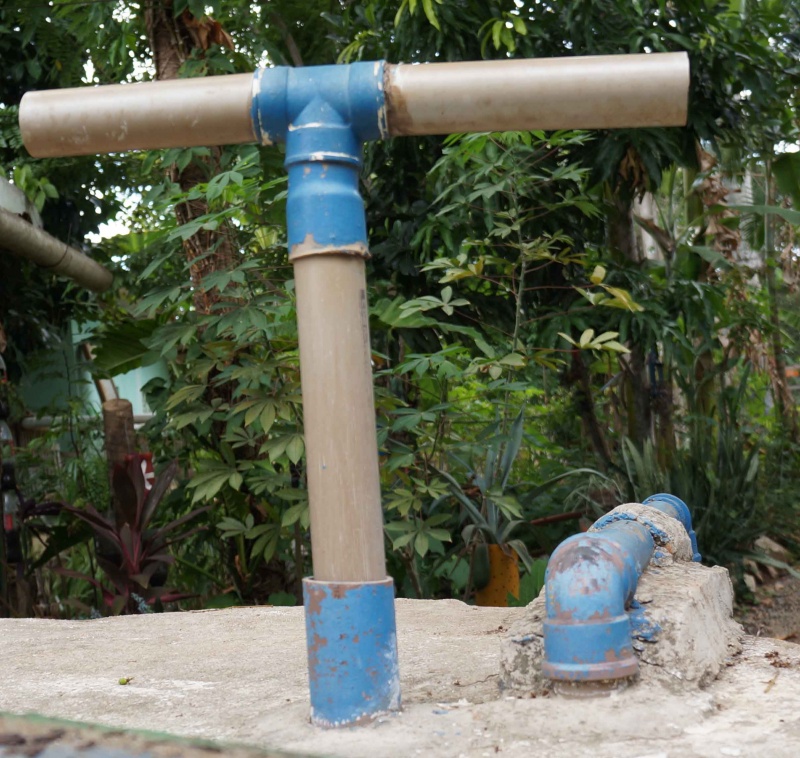
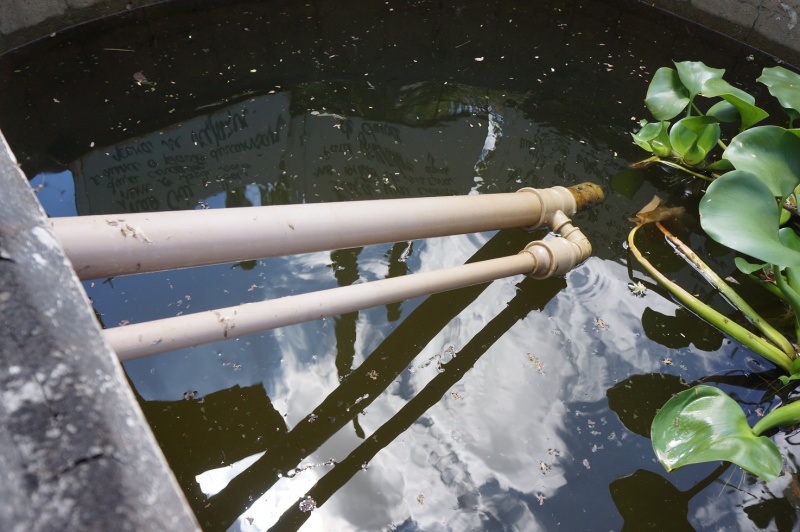
Pour une efficacité maximum, l'idéal est de sceller les tuyaux. Au SERTA, la partie non mobile est coulée dans le béton qui constitue le couvercle du réservoir.
L'important est que l'allonge, par où l'eau entrera dans le circuit, ne touche pas le fond du réservoir, mais en soit cependant assez proche pour pouvoir puiser au plus profond du bassin, et que l'ensemble du système soit assez rigide pour faciliter le pompage.
Il est conseillé de positionner l'ensemble du système avant de le fixer.
Notes et références
Système installé au SERTA (Serviço de Tecnologia Alternativa) au Brésil
Améliorations : lier la pompe à une éolienne pour un pompage continu, à un vélo pour une grosse quantité.
Yes
 Français
 English
 Deutsch
 Español
 Italiano
 Português