(Page créée avec « Finally, attach the mosquito net to the Velcro hook and you're done! ») |
(Mise à jour pour être en accord avec la nouvelle version de la source de la page) |
||
| Ligne 12 : | Ligne 12 : | ||
}} | }} | ||
{{Introduction | {{Introduction | ||
| − | |Introduction=Mosquitoes are present mainly in summer, and prefer '''hot, humid climates'''. | + | |Introduction=Mosquitoes are present mainly in summer, and prefer '''hot, humid climates'''. |
Different species of mosquitoes appear depending on the region, and the most famous: the tiger mosquito, is present almost everywhere in the world. It's hard to avoid, because '''they are attracted by everything our bodies emit''': the CO2 from our breath, our heat, and our body odours (sweat, breath, etc.). | Different species of mosquitoes appear depending on the region, and the most famous: the tiger mosquito, is present almost everywhere in the world. It's hard to avoid, because '''they are attracted by everything our bodies emit''': the CO2 from our breath, our heat, and our body odours (sweat, breath, etc.). | ||
| − | |||
If we recommend protecting ourselves against them, it's because '''mosquitoes can be extremely dangerous''' as vectors of diseases, some serious, others fatal (yellow fever, chikungunya, dengue fever, etc.). | If we recommend protecting ourselves against them, it's because '''mosquitoes can be extremely dangerous''' as vectors of diseases, some serious, others fatal (yellow fever, chikungunya, dengue fever, etc.). | ||
| Ligne 23 : | Ligne 22 : | ||
}} | }} | ||
{{Materials | {{Materials | ||
| + | |Step_Picture_00=Moustiquaire_sur_mesure_456313627_2032285423836300_3723448980690281926_n.jpg | ||
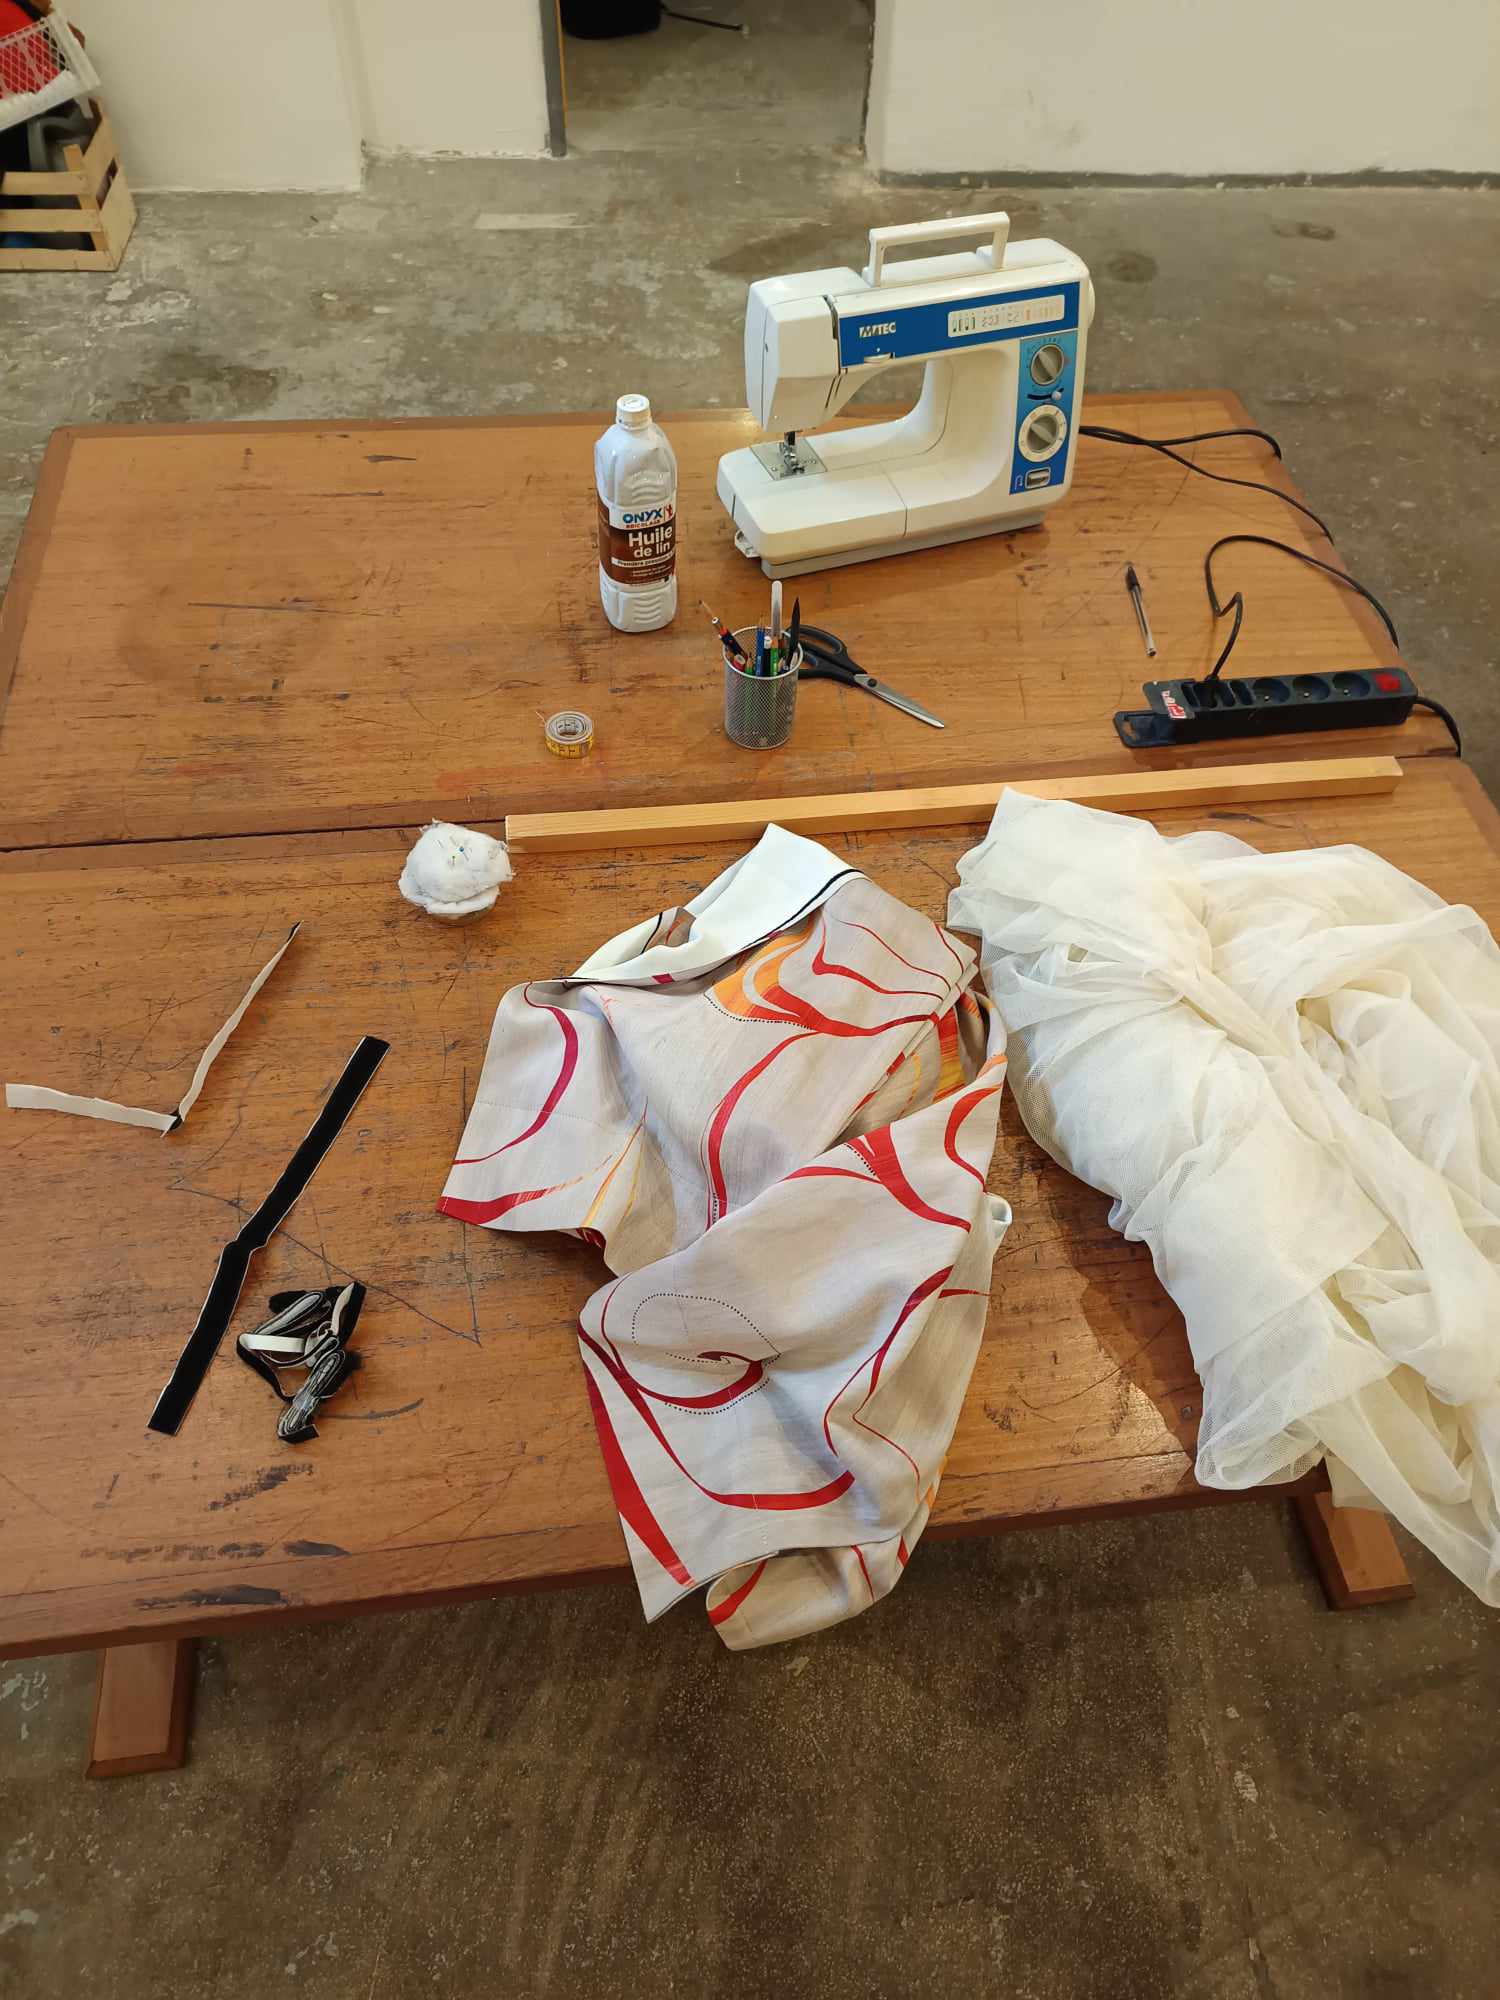
|Material=* Mosquito netting tulle (1m x 1.5m) | |Material=* Mosquito netting tulle (1m x 1.5m) | ||
* Fabric (6m x 8cm) | * Fabric (6m x 8cm) | ||
| Ligne 42 : | Ligne 42 : | ||
<br />{{Warning|Measuring your window is the essential step in the tutorial, without it you won't be able to make a mosquito net}}<br /> | <br />{{Warning|Measuring your window is the essential step in the tutorial, without it you won't be able to make a mosquito net}}<br /> | ||
| + | |Step_Picture_00=Moustiquaire_sur_mesure_455143737_1243028826726223_4071092853536476425_n.jpg | ||
| + | |Step_Picture_01=Moustiquaire_sur_mesure_455161681_486378317437871_7685080139071815501_n.jpg | ||
}} | }} | ||
{{Tuto Step | {{Tuto Step | ||
| Ligne 50 : | Ligne 52 : | ||
- Length = Window length/height + 7 cm | - Length = Window length/height + 7 cm | ||
| − | |||
Cut out the rectangle using the scissors. | Cut out the rectangle using the scissors. | ||
| + | |Step_Picture_00=Moustiquaire_sur_mesure_455143737_1243028826726223_4071092853536476425_n.jpg | ||
| + | |Step_Picture_01=Moustiquaire_sur_mesure_455175794_1024662745553823_7942100617537708716_n.jpg | ||
| + | |Step_Picture_02=Moustiquaire_sur_mesure_455167446_373146635658880_5196824279540418783_n.jpg | ||
| + | |Step_Picture_03=Moustiquaire_sur_mesure_454719528_1183535162975722_7186721601632785050_n.jpg | ||
| + | |Step_Picture_04=Moustiquaire_sur_mesure_455784898_1036201334790689_3577158377383595398_n.jpg | ||
}} | }} | ||
{{Tuto Step | {{Tuto Step | ||
| Ligne 75 : | Ligne 81 : | ||
<br />{{Warning|Pay close attention to the measurements. To do this, take your time and reread this step several times}}<br /> | <br />{{Warning|Pay close attention to the measurements. To do this, take your time and reread this step several times}}<br /> | ||
| + | |Step_Picture_00=Moustiquaire_sur_mesure_454690684_1212877599757354_7926384541807680282_n.jpg | ||
| + | |Step_Picture_01=Moustiquaire_sur_mesure_455014527_501753379480100_2424426412290296398_n.jpg | ||
| + | |Step_Picture_02=Moustiquaire_sur_mesure_455189364_472206342391103_8791673643146550774_n.jpg | ||
| + | |Step_Picture_03=Moustiquaire_sur_mesure_454656875_990902409442596_3184715343362375124_n.jpg | ||
| + | |Step_Picture_04=Moustiquaire_sur_mesure_455695077_469420135964123_708189822641931389_n.jpg | ||
| + | |Step_Picture_05=Moustiquaire_sur_mesure_456474442_2185876278446434_6213346019006730727_n.jpg | ||
}} | }} | ||
{{Tuto Step | {{Tuto Step | ||
|Step_Title=Cutting: Velcro | |Step_Title=Cutting: Velcro | ||
|Step_Content=Cut each strip of Velcro (soft and hooked) into '''7 pieces of 14 cm'''. | |Step_Content=Cut each strip of Velcro (soft and hooked) into '''7 pieces of 14 cm'''. | ||
| − | |||
They will be glued in strategic places so that the mosquito net is taut. | They will be glued in strategic places so that the mosquito net is taut. | ||
| + | |Step_Picture_00=Moustiquaire_sur_mesure_455159824_1552816008636007_7067784957776559499_n.jpg | ||
}} | }} | ||
{{Tuto Step | {{Tuto Step | ||
|Step_Title=The sewing | |Step_Title=The sewing | ||
| − | |Step_Content======<u>Tulle + Fabrics </u>===== | + | |Step_Content======<u>Tulle + Tissus </u>===== |
| + | |||
| + | <div class="mw-translate-fuzzy"> | ||
| + | =====<u>Tulle + Fabrics </u>===== | ||
Start by pinning the tulle and fabric strips together. To do this, hem each side of the mosquito netting tulle with the fabric, folding the strip over to make a pretty hem. | Start by pinning the tulle and fabric strips together. To do this, hem each side of the mosquito netting tulle with the fabric, folding the strip over to make a pretty hem. | ||
{{Info|The fabric is there to ensure that our mosquito net will be strong, even after several uses.}} | {{Info|The fabric is there to ensure that our mosquito net will be strong, even after several uses.}} | ||
All you have to do is sew the tulle to the fabric, along 2 lines, to secure the whole thing.<br /> | All you have to do is sew the tulle to the fabric, along 2 lines, to secure the whole thing.<br /> | ||
| + | </div> | ||
| + | =====<u>Tulle/Tissus + Velcro </u>===== | ||
| + | |||
| + | <div class="mw-translate-fuzzy"> | ||
=====<u>Tulle/Fabric + Velcro </u>===== | =====<u>Tulle/Fabric + Velcro </u>===== | ||
The Velcro is then placed on the side opposite the hem (see diagram). | The Velcro is then placed on the side opposite the hem (see diagram). | ||
| + | </div> | ||
It should be placed on the 4 corners of the screen and in the centre of the left, right and top sides. | It should be placed on the 4 corners of the screen and in the centre of the left, right and top sides. | ||
| − | |||
You can then sew the Velcro along 2 lines to secure it. | You can then sew the Velcro along 2 lines to secure it. | ||
| + | |Step_Picture_00=Moustiquaire_sur_mesure_456500641_1250377262804632_6123191919979779816_n.jpg | ||
| + | |Step_Picture_01=Moustiquaire_sur_mesure_455143748_805478718107550_7053289184546656720_n.jpg | ||
| + | |Step_Picture_02=Moustiquaire_sur_mesure_455777504_876618044331673_9217341811862132390_n.jpg | ||
| + | |Step_Picture_03=Moustiquaire_sur_mesure_455694687_1056427562815951_1649225696682251503_n.jpg | ||
}} | }} | ||
{{Tuto Step | {{Tuto Step | ||
|Step_Title=Stapling the wooden strip | |Step_Title=Stapling the wooden strip | ||
|Step_Content={{Info|This step is not compulsory, but the wooden strip will make the mosquito net more taut and will be useful for storing it (simply wrap the mosquito net around it)}} | |Step_Content={{Info|This step is not compulsory, but the wooden strip will make the mosquito net more taut and will be useful for storing it (simply wrap the mosquito net around it)}} | ||
| − | |||
| − | |||
Place the wooden strip on the side that represents the bottom of your mosquito net (the one without the Velcro in the centre). It should be flush with the fabric. | Place the wooden strip on the side that represents the bottom of your mosquito net (the one without the Velcro in the centre). It should be flush with the fabric. | ||
<br />{{Warning|The wooden strip must be on the side opposite the velcro}} | <br />{{Warning|The wooden strip must be on the side opposite the velcro}} | ||
| − | |||
You can then use the wall stapler to fix this strip along the entire length of the bottom of the screen (1 staple every 10 cm is sufficient). | You can then use the wall stapler to fix this strip along the entire length of the bottom of the screen (1 staple every 10 cm is sufficient). | ||
| + | |Step_Picture_00=Moustiquaire_sur_mesure_455714280_855339556189705_4439874881269963925_n.jpg | ||
}} | }} | ||
{{Tuto Step | {{Tuto Step | ||
|Step_Title=The set up | |Step_Title=The set up | ||
|Step_Content=First, wipe the outside edge of your window with a sponge (it needs to be clean so that the Velcro hooks stick well). | |Step_Content=First, wipe the outside edge of your window with a sponge (it needs to be clean so that the Velcro hooks stick well). | ||
| − | |||
Next, stick the Velcro hook onto the outer edge of the window (see diagram). To do this, peel off the protective tape from the Velcro and stick it on. | Next, stick the Velcro hook onto the outer edge of the window (see diagram). To do this, peel off the protective tape from the Velcro and stick it on. | ||
{{Info|You could also glue the mosquito net to the inside sill, but then you won't be able to open the window when the mosquito net is in place}}. | {{Info|You could also glue the mosquito net to the inside sill, but then you won't be able to open the window when the mosquito net is in place}}. | ||
| − | |||
Position the cut strips as shown in the photo, so that they face the soft Velcro strips once the mosquito net is in place.<br />{{Info|When you position the Velcro hook strips on the windowsill, remember to space them slightly apart so that the mosquito net is taut and flattened at the edges.}} | Position the cut strips as shown in the photo, so that they face the soft Velcro strips once the mosquito net is in place.<br />{{Info|When you position the Velcro hook strips on the windowsill, remember to space them slightly apart so that the mosquito net is taut and flattened at the edges.}} | ||
Finally, attach the mosquito net to the Velcro hook and you're done! | Finally, attach the mosquito net to the Velcro hook and you're done! | ||
| + | |Step_Picture_00=Moustiquaire_sur_mesure_455150632_372011355775422_5277661059931917720_n.jpg | ||
}} | }} | ||
{{Notes | {{Notes | ||
Version du 21 août 2024 à 16:22
Description
Had enough of mosquitoes? We'll show you step-by-step how to make a mosquito net to fit your window size and keep them out. It's easy to use and can be assembled and dismantled in less than 30 seconds.
Sommaire
Introduction
Mosquitoes are present mainly in summer, and prefer hot, humid climates.
Different species of mosquitoes appear depending on the region, and the most famous: the tiger mosquito, is present almost everywhere in the world. It's hard to avoid, because they are attracted by everything our bodies emit: the CO2 from our breath, our heat, and our body odours (sweat, breath, etc.).
If we recommend protecting ourselves against them, it's because mosquitoes can be extremely dangerous as vectors of diseases, some serious, others fatal (yellow fever, chikungunya, dengue fever, etc.).
They are most common in warm countries close to the hemisphere: Africa, Central and South America and South Asia.
.
Étape 1 - Window measurements
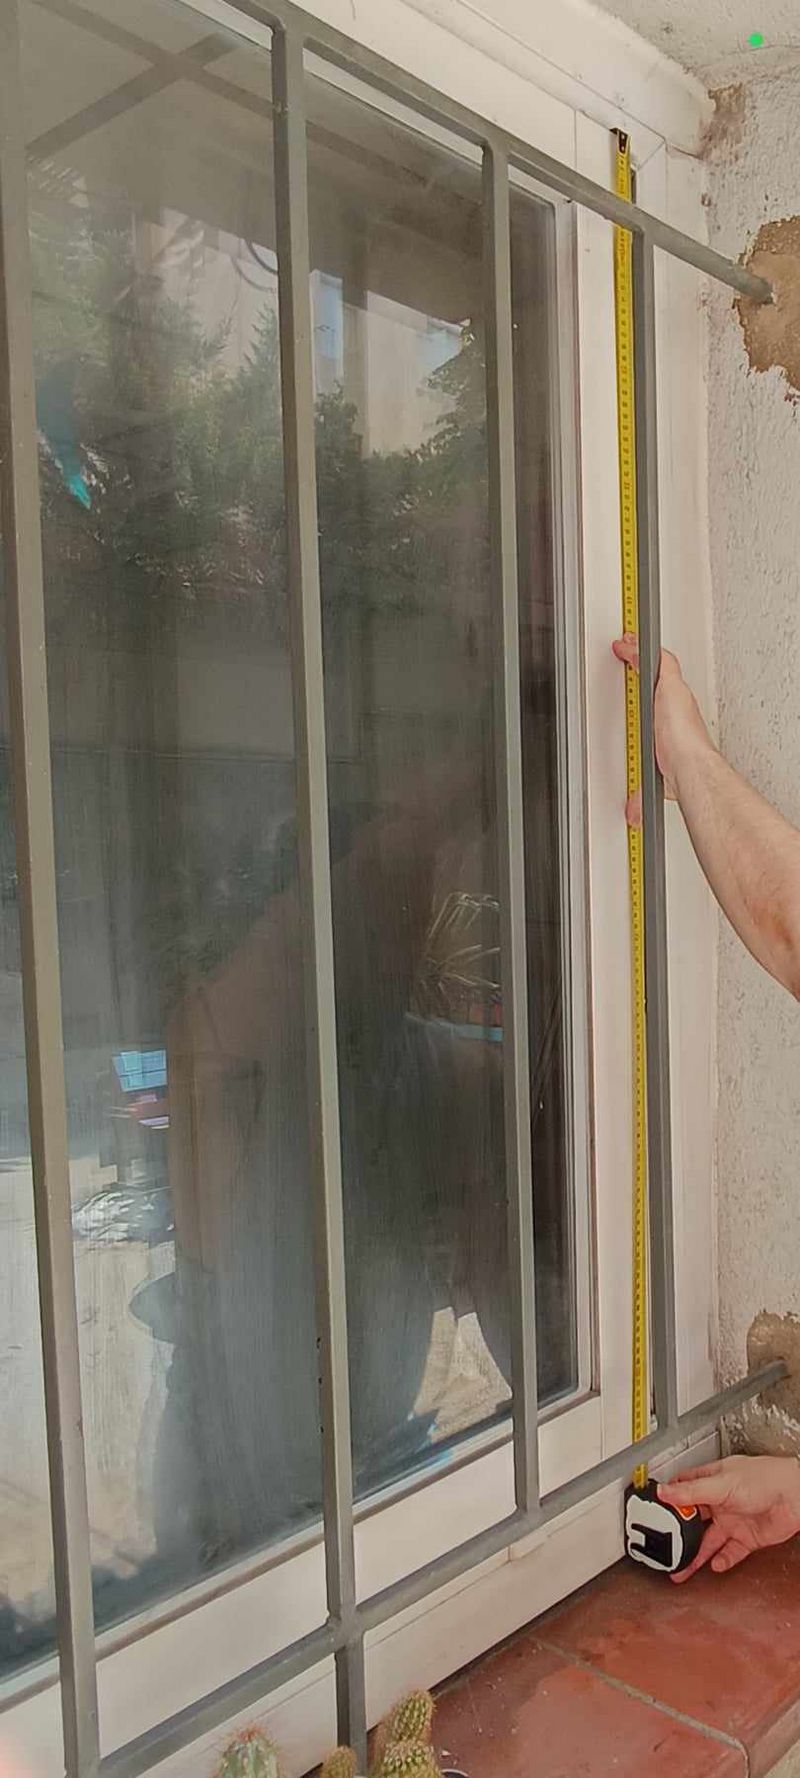
First of all, you need to measure the size of your window. You need to measure the empty space, i.e. the smallest opening, where you can put your hand.
To do this, use a tape measure to measure the height/length and width of the window, as shown in the diagram.
Étape 2 - The cut-out: Mosquito netting tulle
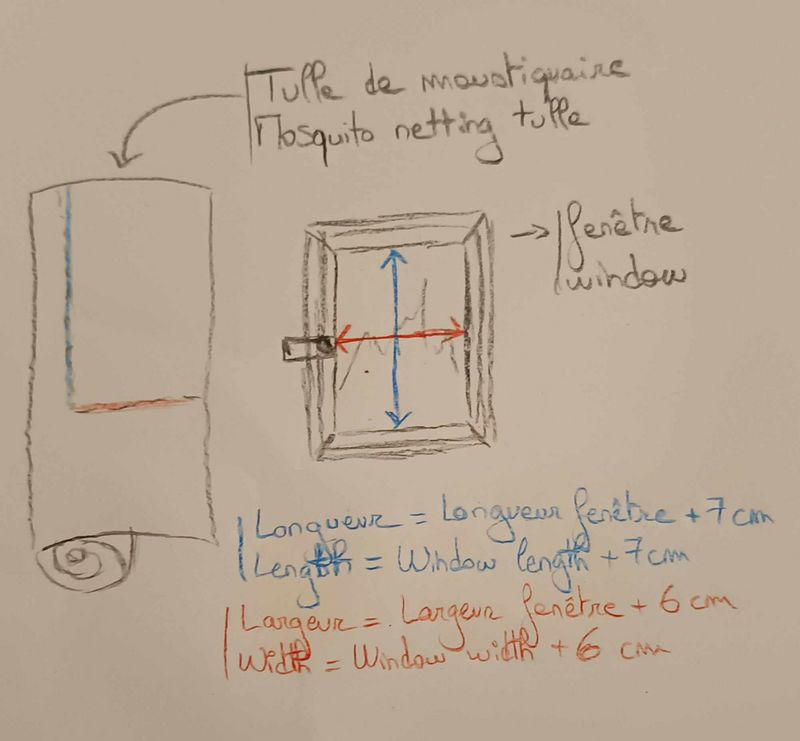
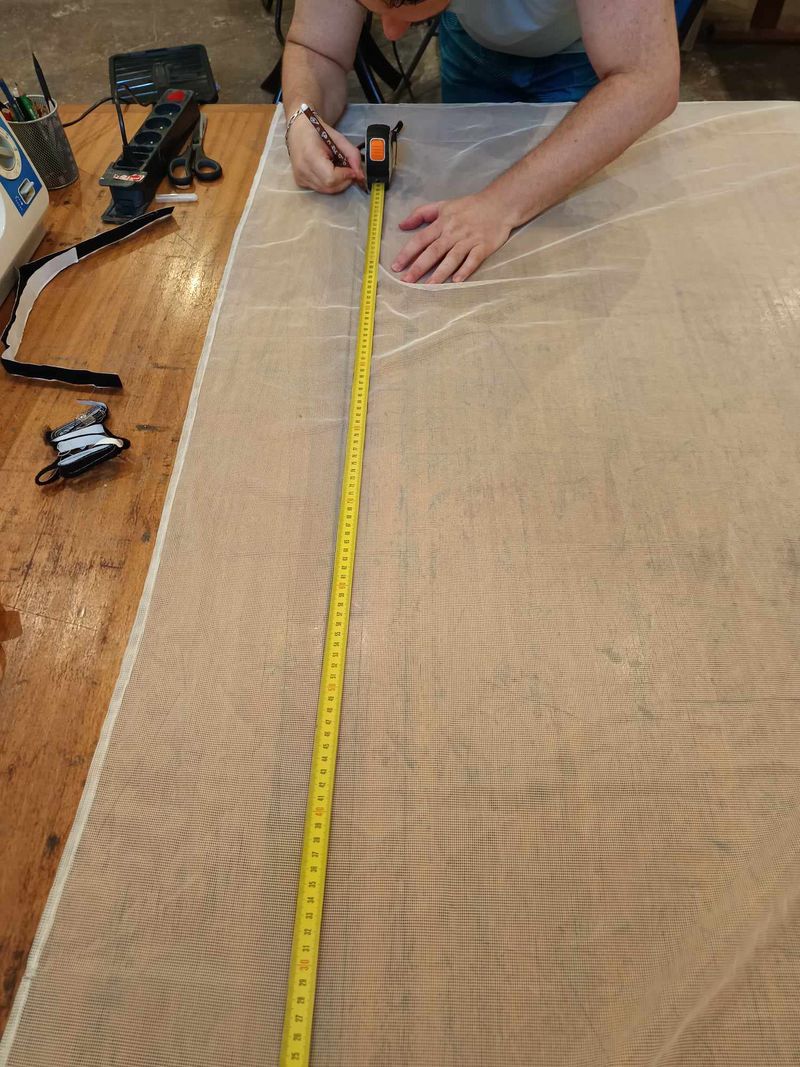
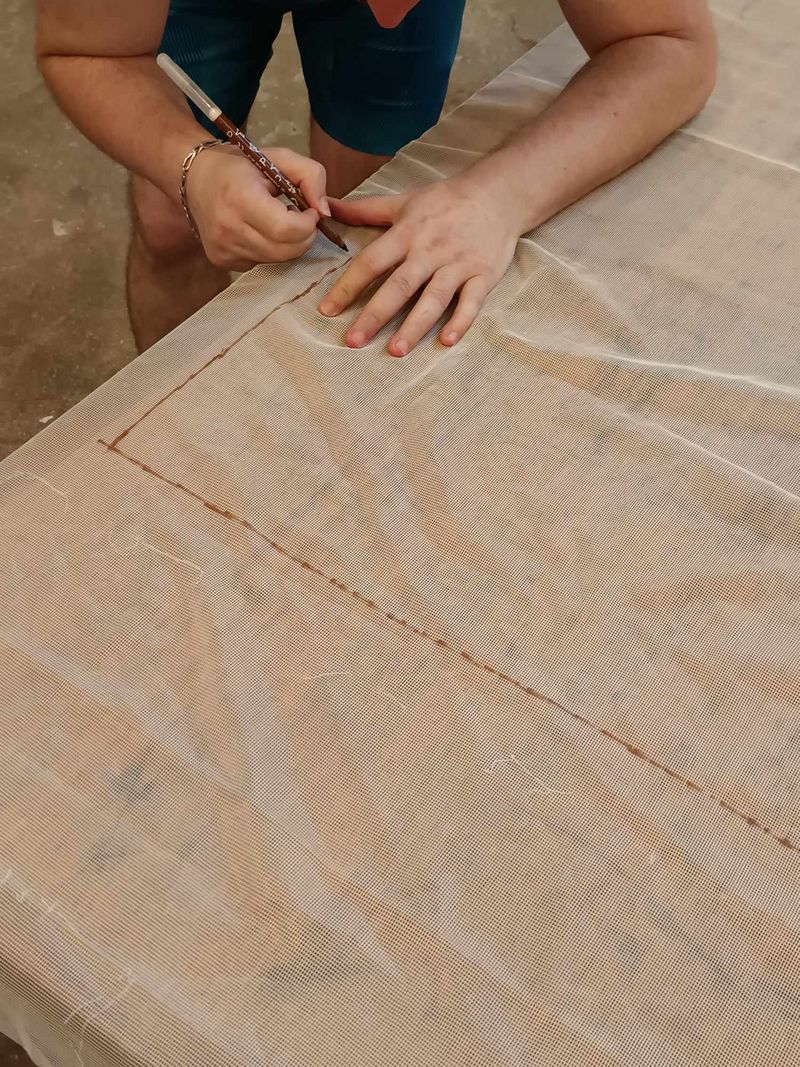
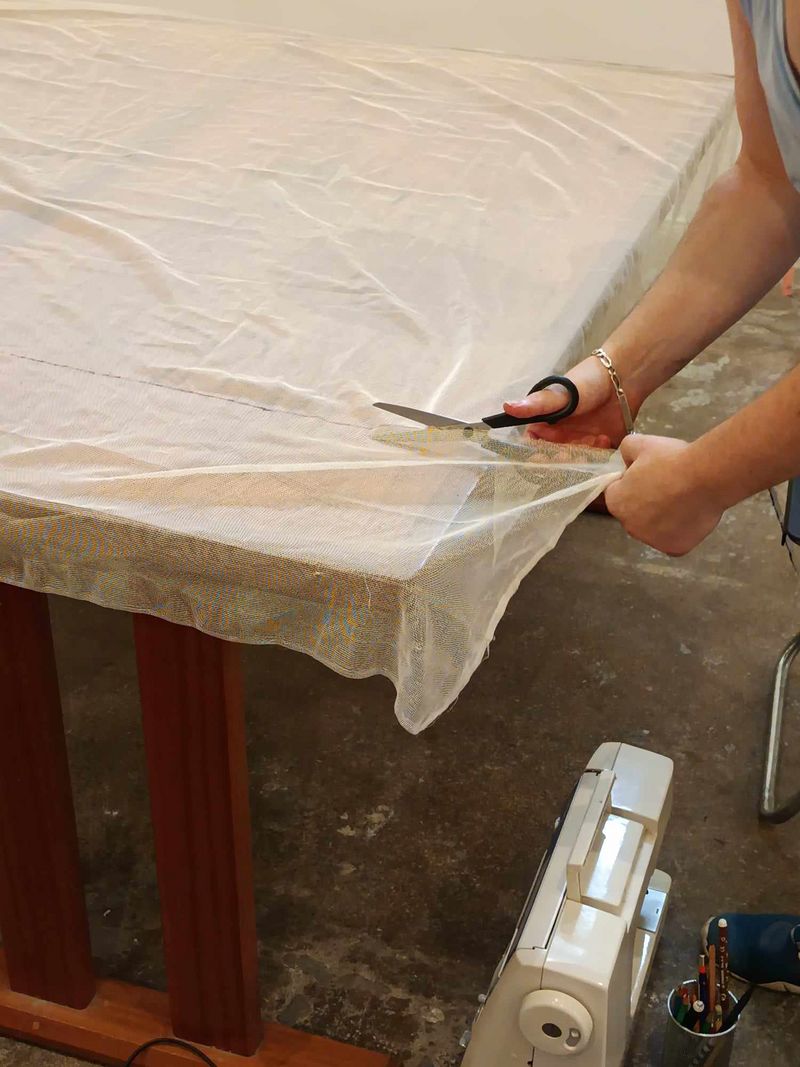
Using a pencil and a ruler/metre, trace a rectangle on the tulle as follows:
- Width = Width of window + 6 cm
- Length = Window length/height + 7 cm
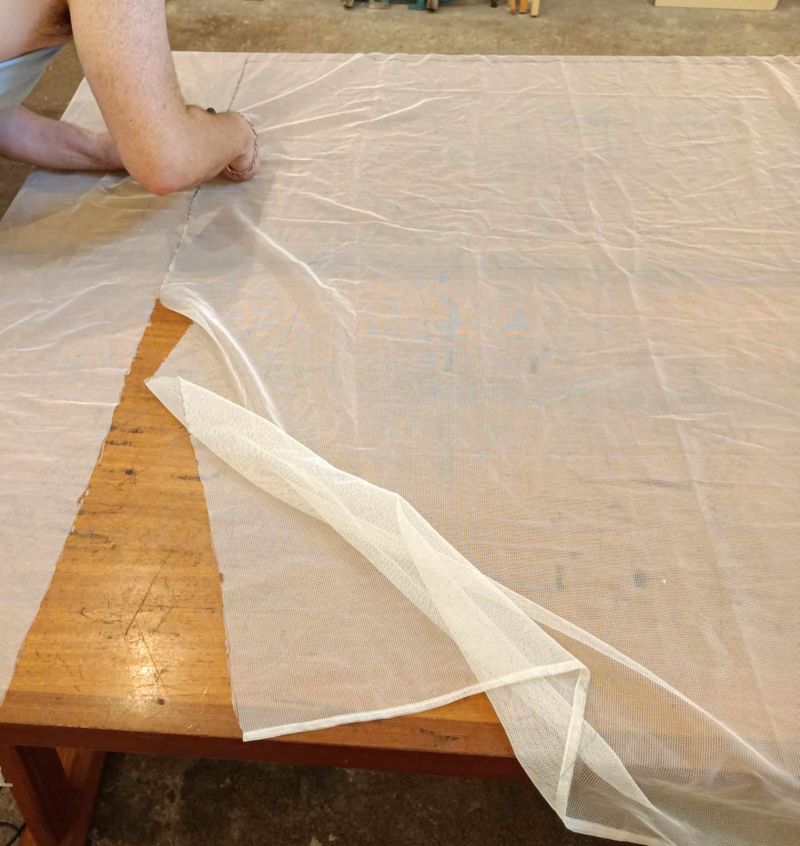
Cut out the rectangle using the scissors.
Étape 3 - Cutting: Fabric strips
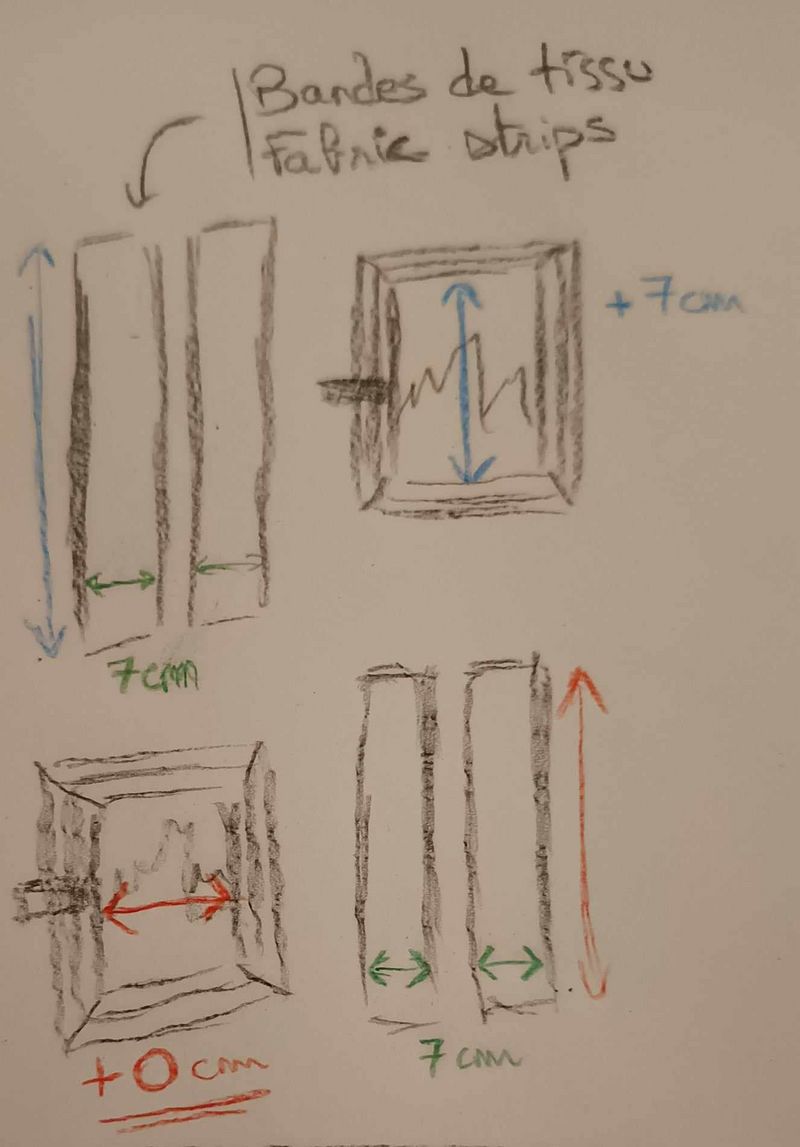
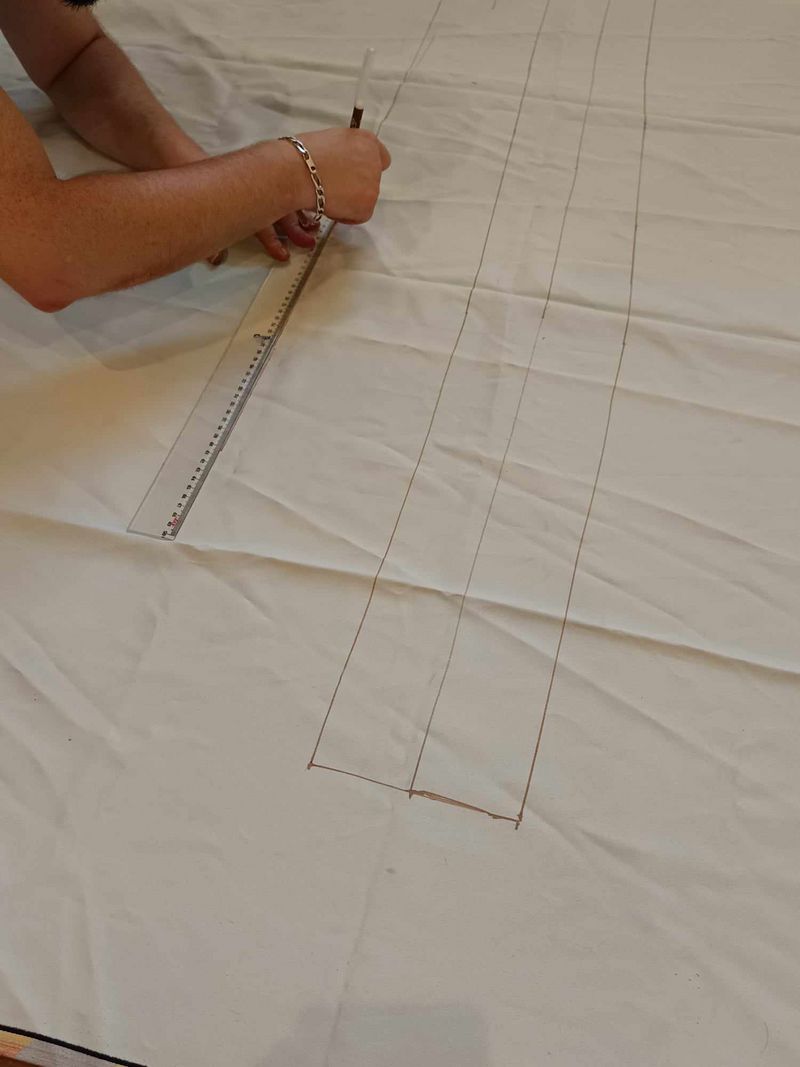
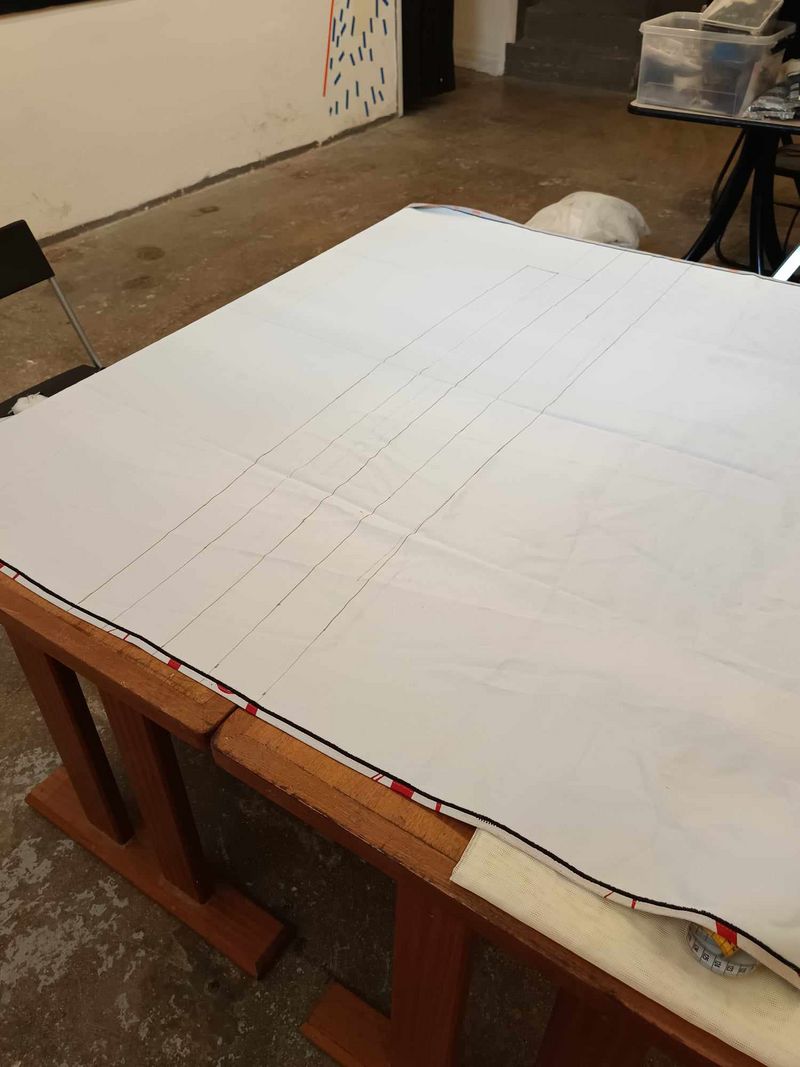
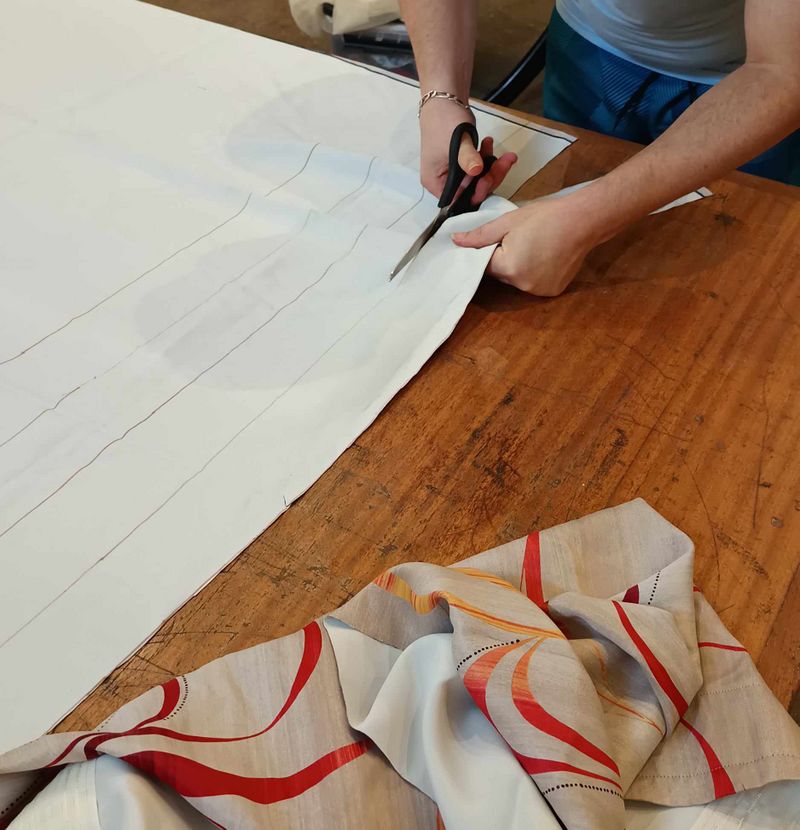
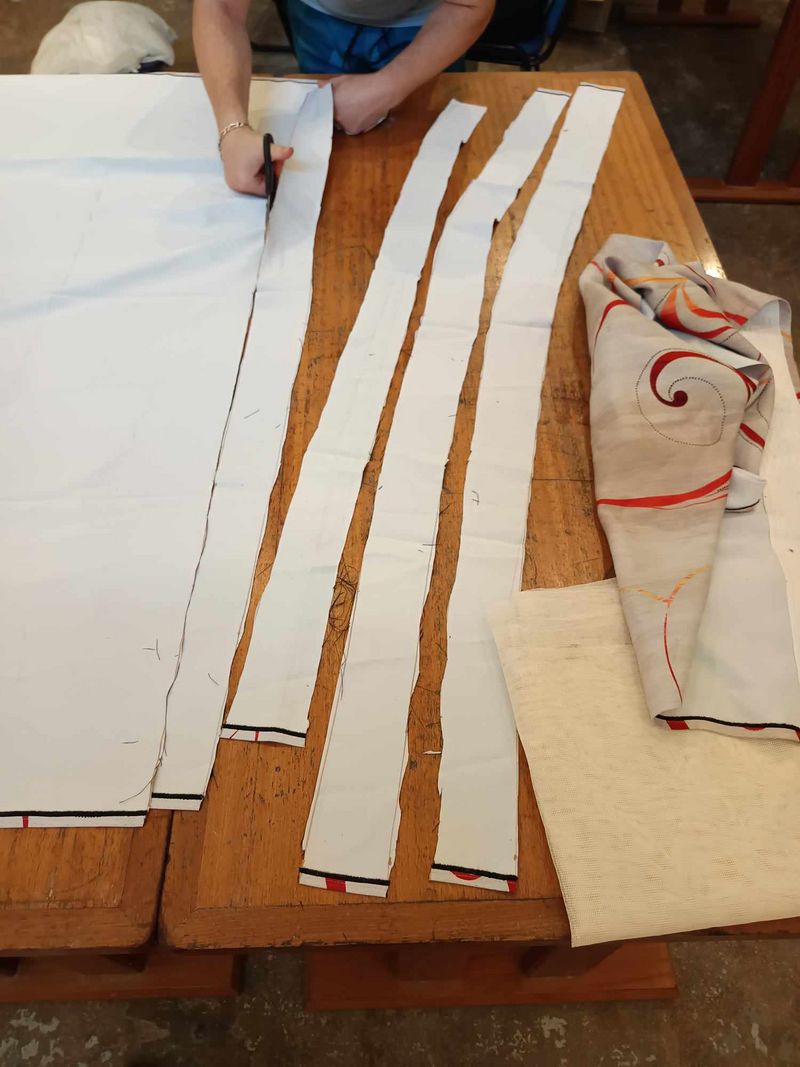
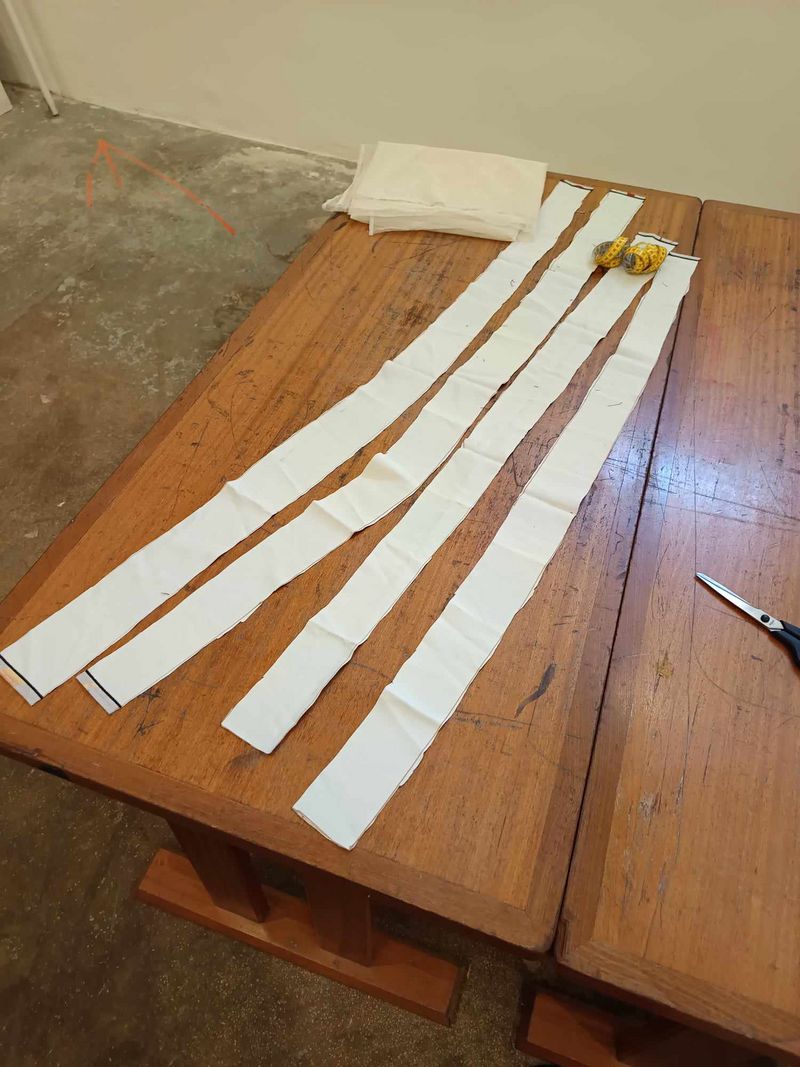
Using the pencil and ruler/metre, trace 4 strips in the fabric:
- 2 strips for the height of the window:
- Width = 7 cm
- Length = Window length/height + 7 cm
- 2 strips for the width of the window:
- Width = 7 cm
- Length = Width of window
Étape 4 - Cutting: Velcro
Cut each strip of Velcro (soft and hooked) into 7 pieces of 14 cm.
They will be glued in strategic places so that the mosquito net is taut.
Étape 5 - The sewing
Tulle + Tissus
Tulle + Fabrics
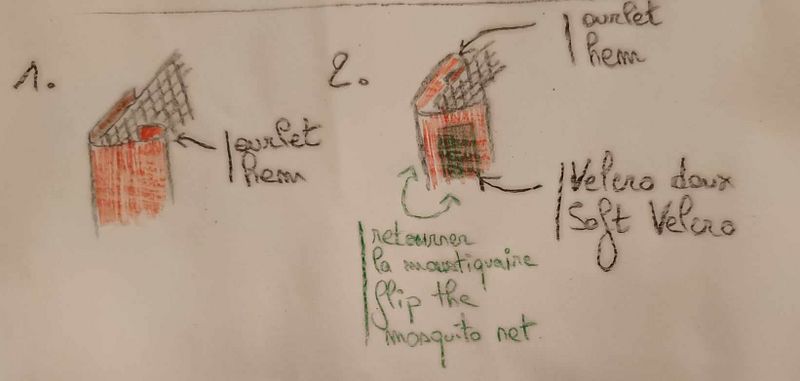
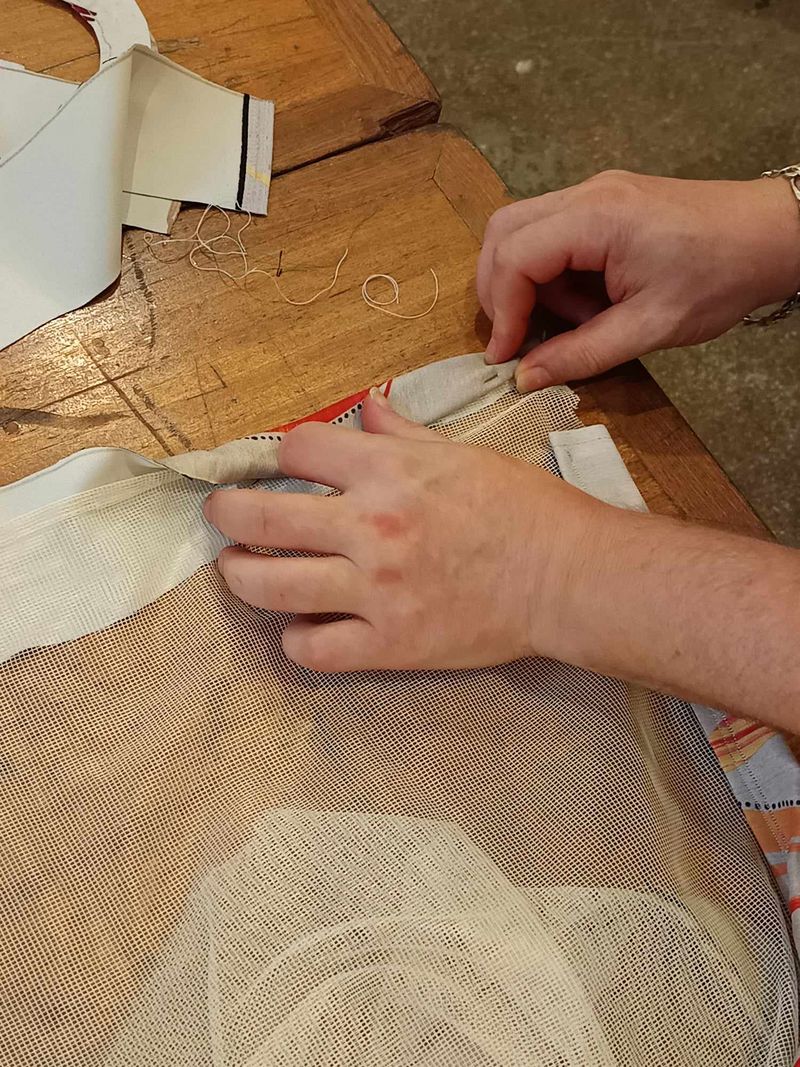
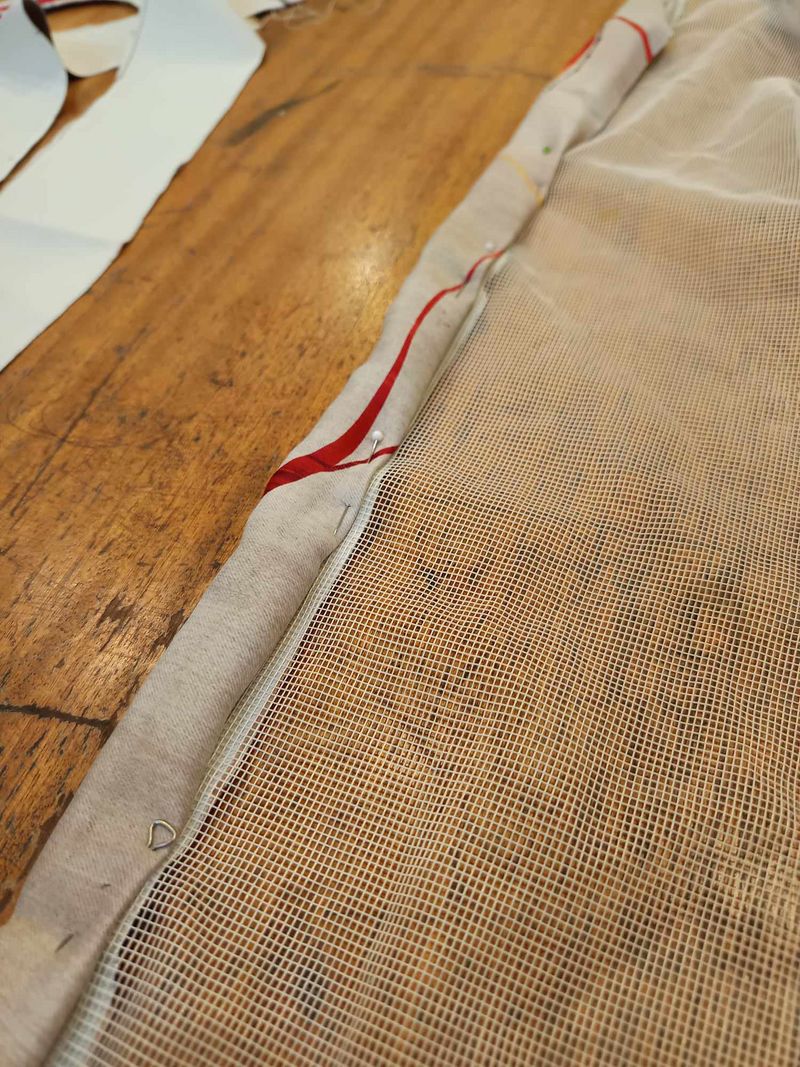
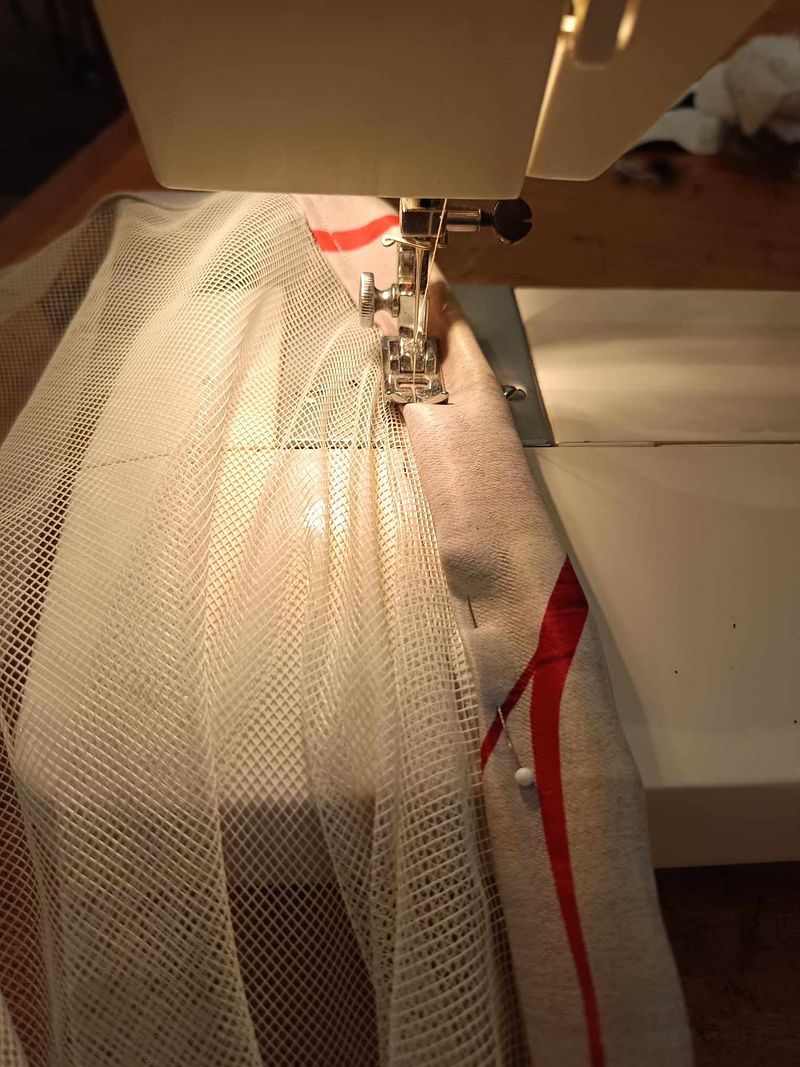
Start by pinning the tulle and fabric strips together. To do this, hem each side of the mosquito netting tulle with the fabric, folding the strip over to make a pretty hem.
All you have to do is sew the tulle to the fabric, along 2 lines, to secure the whole thing.
Tulle/Tissus + Velcro
Tulle/Fabric + Velcro
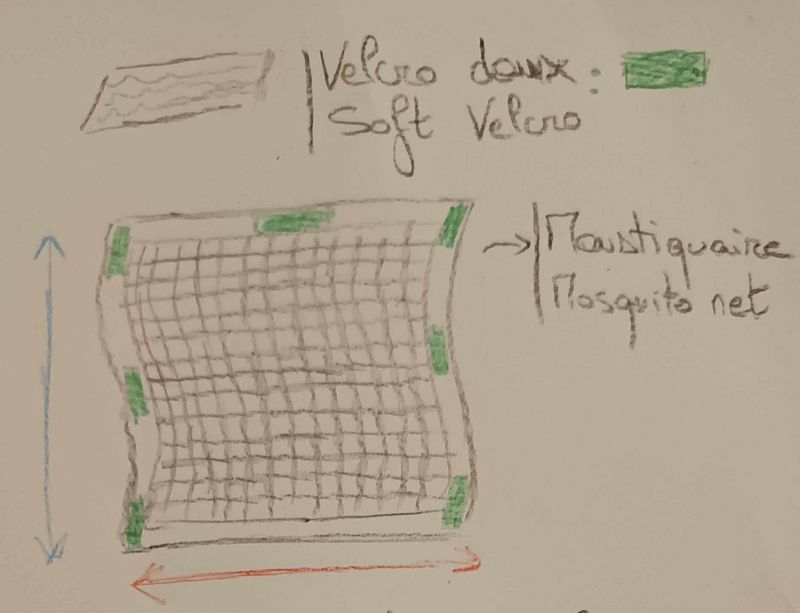
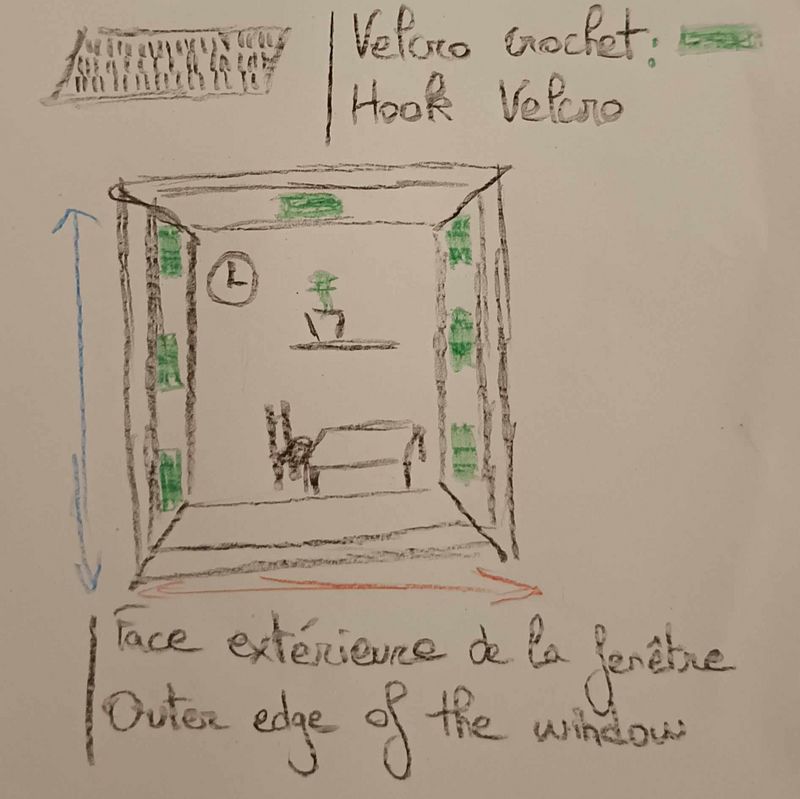
The Velcro is then placed on the side opposite the hem (see diagram).
It should be placed on the 4 corners of the screen and in the centre of the left, right and top sides.
You can then sew the Velcro along 2 lines to secure it.
Étape 6 - Stapling the wooden strip
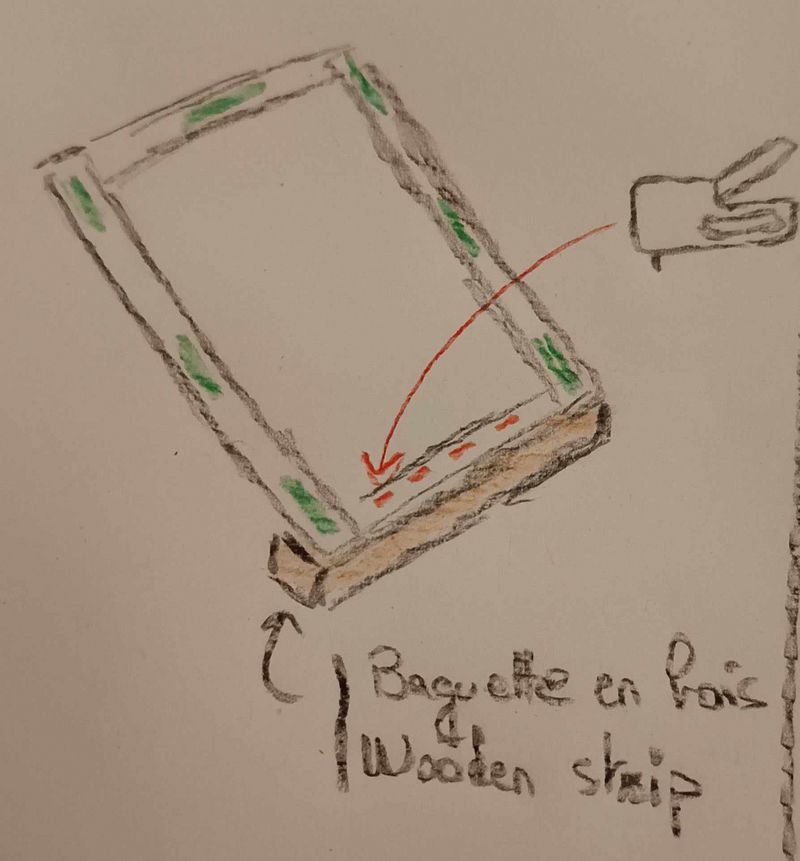
Place the wooden strip on the side that represents the bottom of your mosquito net (the one without the Velcro in the centre). It should be flush with the fabric.
You can then use the wall stapler to fix this strip along the entire length of the bottom of the screen (1 staple every 10 cm is sufficient).
Étape 7 - The set up
First, wipe the outside edge of your window with a sponge (it needs to be clean so that the Velcro hooks stick well).
Next, stick the Velcro hook onto the outer edge of the window (see diagram). To do this, peel off the protective tape from the Velcro and stick it on.
. Position the cut strips as shown in the photo, so that they face the soft Velcro strips once the mosquito net is in place.Finally, attach the mosquito net to the Velcro hook and you're done!
Published

 Français
 English
 Deutsch
 Español
 Italiano
 Português