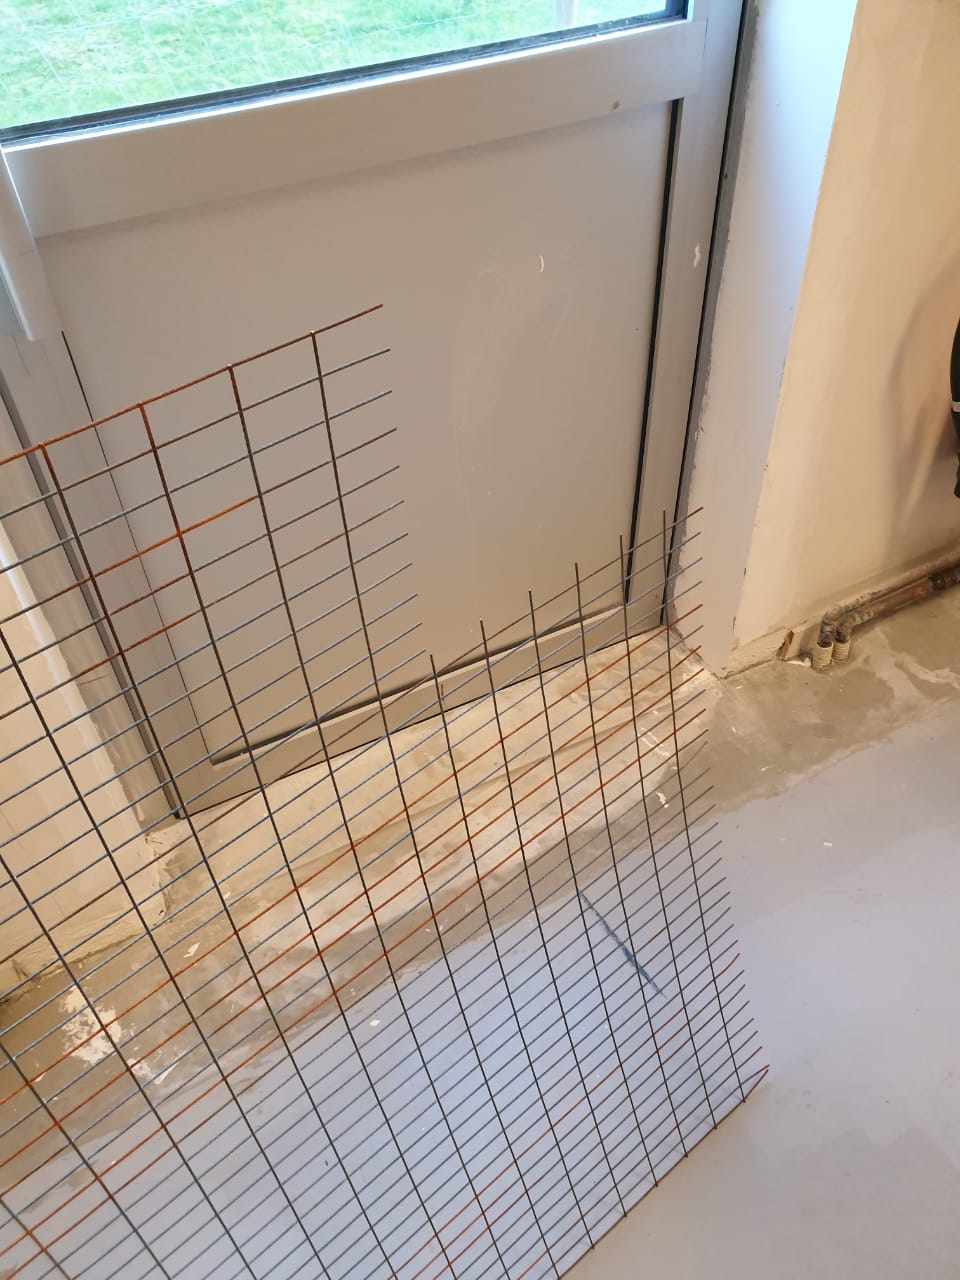
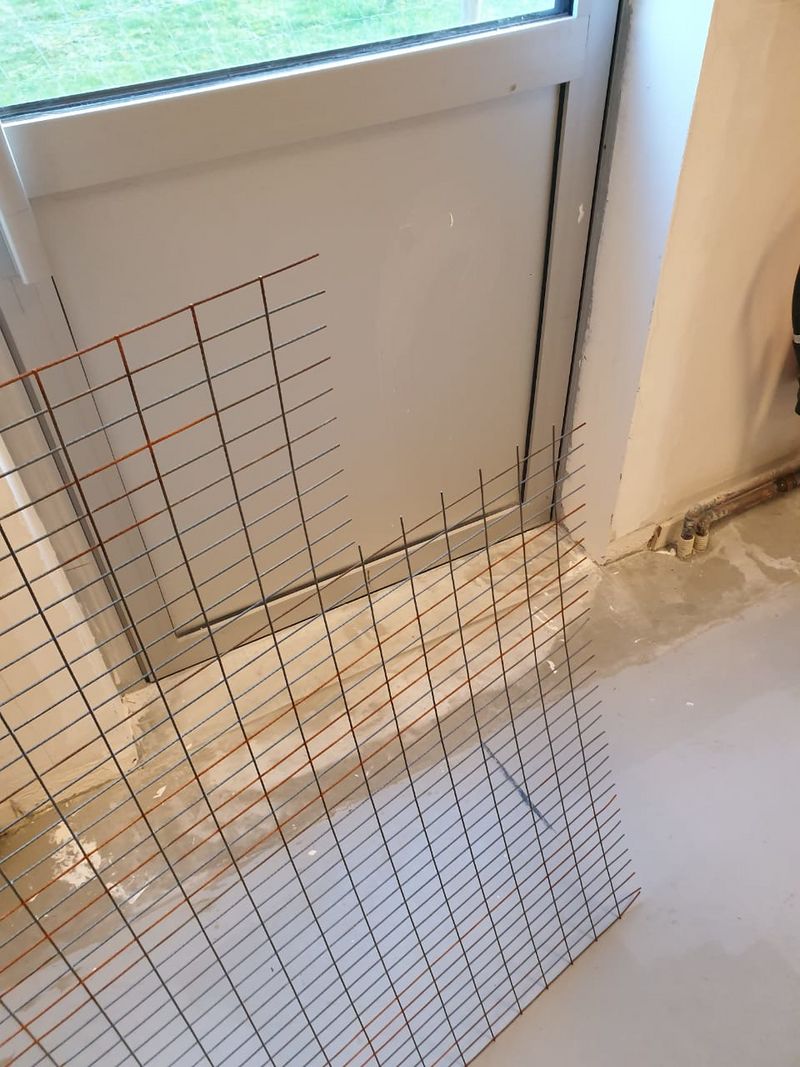
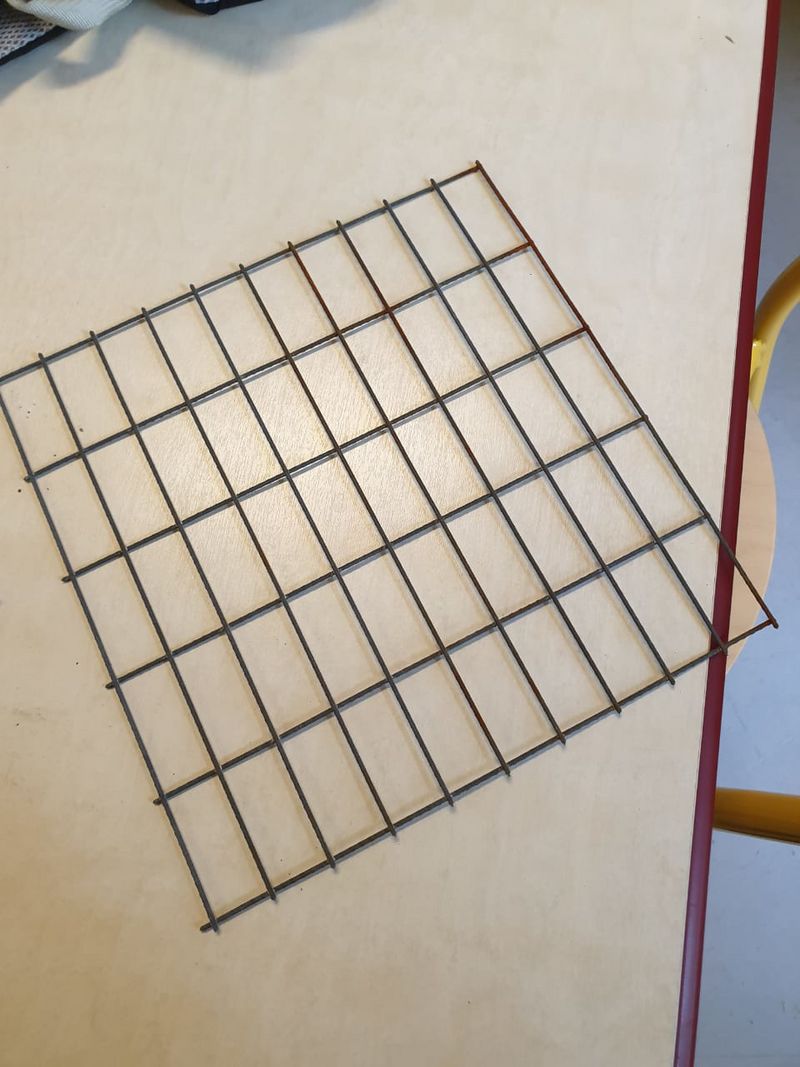
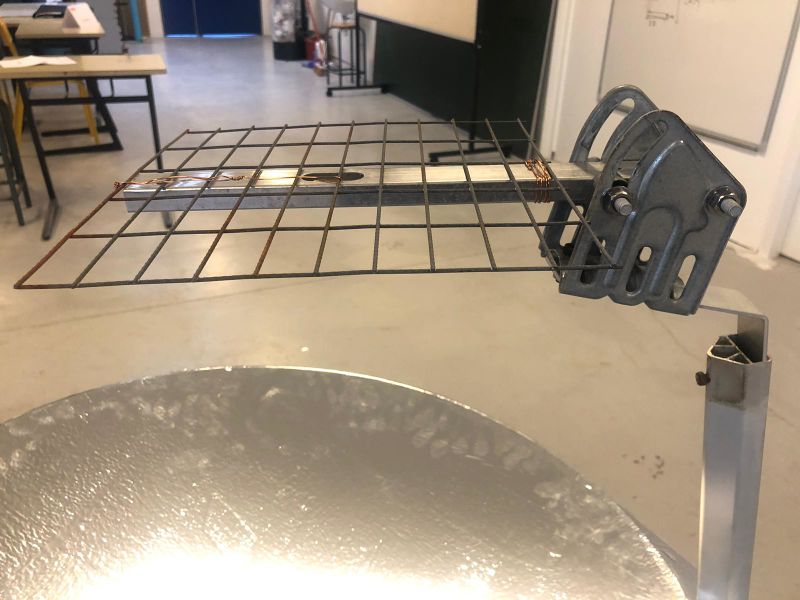
(Page créée avec « Cut the grid to the desired size and secure it using copper wires. ») |
(Mise à jour pour être en accord avec la nouvelle version de la source de la page) |
||
| (25 révisions intermédiaires par 2 utilisateurs non affichées) | |||
| Ligne 15 : | Ligne 15 : | ||
{{Introduction | {{Introduction | ||
|Introduction=The solar concentrated oven is a device that uses a mirror-effect surface to concentrate solar light onto a very narrow focal point. This focal point can reach extremely high temperatures, up to several thousand degrees Celsius, making it a very powerful tool for producing thermal energy. | |Introduction=The solar concentrated oven is a device that uses a mirror-effect surface to concentrate solar light onto a very narrow focal point. This focal point can reach extremely high temperatures, up to several thousand degrees Celsius, making it a very powerful tool for producing thermal energy. | ||
| − | |||
Concentrated solar ovens are considered a clean and sustainable energy source that can replace conventional energy sources such as fossil fuels. | Concentrated solar ovens are considered a clean and sustainable energy source that can replace conventional energy sources such as fossil fuels. | ||
| − | < | + | <br /> |
| − | |||
| − | |||
| − | |||
}} | }} | ||
{{Materials | {{Materials | ||
| Ligne 31 : | Ligne 27 : | ||
|Step_Picture_05=Four_parabolique_903463bbf2de0d22846b282f8939f87e4ea1b3c4.jpg | |Step_Picture_05=Four_parabolique_903463bbf2de0d22846b282f8939f87e4ea1b3c4.jpg | ||
|Step_Picture_05_annotation={"version":"3.5.0","objects":[{"type":"image","version":"3.5.0","originX":"left","originY":"top","left":0,"top":79,"width":360,"height":800,"fill":"rgb(0,0,0)","stroke":null,"strokeWidth":0,"strokeDashArray":null,"strokeLineCap":"butt","strokeDashOffset":0,"strokeLineJoin":"miter","strokeMiterLimit":4,"scaleX":1.67,"scaleY":1.67,"angle":0,"flipX":false,"flipY":false,"opacity":1,"shadow":null,"visible":true,"clipTo":null,"backgroundColor":"","fillRule":"nonzero","paintFirst":"fill","globalCompositeOperation":"source-over","transformMatrix":null,"skewX":0,"skewY":0,"crossOrigin":"","cropX":0,"cropY":0,"src":"https://wiki.lowtechlab.org/images/0/0a/Four_parabolique_903463bbf2de0d22846b282f8939f87e4ea1b3c4.jpg","filters":[]}],"height":1332,"width":600} | |Step_Picture_05_annotation={"version":"3.5.0","objects":[{"type":"image","version":"3.5.0","originX":"left","originY":"top","left":0,"top":79,"width":360,"height":800,"fill":"rgb(0,0,0)","stroke":null,"strokeWidth":0,"strokeDashArray":null,"strokeLineCap":"butt","strokeDashOffset":0,"strokeLineJoin":"miter","strokeMiterLimit":4,"scaleX":1.67,"scaleY":1.67,"angle":0,"flipX":false,"flipY":false,"opacity":1,"shadow":null,"visible":true,"clipTo":null,"backgroundColor":"","fillRule":"nonzero","paintFirst":"fill","globalCompositeOperation":"source-over","transformMatrix":null,"skewX":0,"skewY":0,"crossOrigin":"","cropX":0,"cropY":0,"src":"https://wiki.lowtechlab.org/images/0/0a/Four_parabolique_903463bbf2de0d22846b282f8939f87e4ea1b3c4.jpg","filters":[]}],"height":1332,"width":600} | ||
| − | |Material= | + | |Material=<br /> |
| − | |||
| − | |||
| − | |||
| − | |||
| − | |||
| − | |||
*Two parabolic reflectors with support | *Two parabolic reflectors with support | ||
| Ligne 44 : | Ligne 34 : | ||
*Screws | *Screws | ||
*A mirror effect film | *A mirror effect film | ||
| − | |Tools= | + | |Tools=<br /> |
| − | |||
| − | |||
| − | |||
| − | |||
| − | |||
| − | |||
| − | |||
| − | |||
| − | |||
*Wireless drill | *Wireless drill | ||
*Scissors | *Scissors | ||
| Ligne 68 : | Ligne 49 : | ||
|Step_Title= Preparation of the rolling stand | |Step_Title= Preparation of the rolling stand | ||
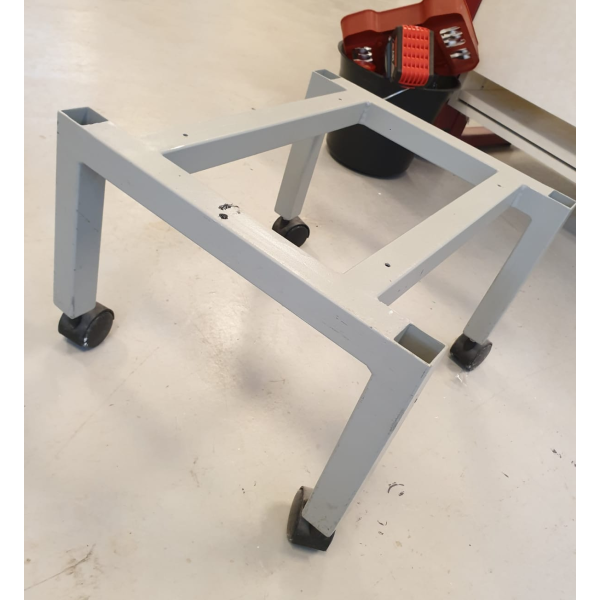
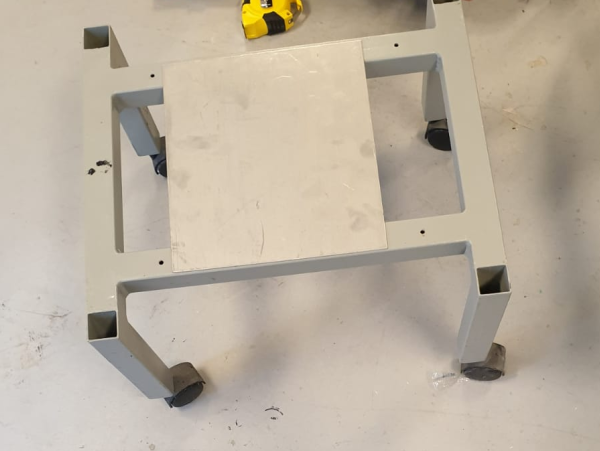
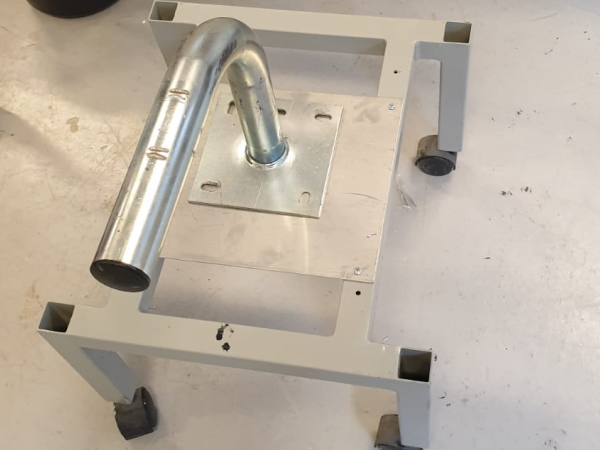
|Step_Content=Use a rolling table, with a rectangular sheet that needs to be fixed with a drill and screws on the stand to place the tube that will support the parabolic dish later. | |Step_Content=Use a rolling table, with a rectangular sheet that needs to be fixed with a drill and screws on the stand to place the tube that will support the parabolic dish later. | ||
| − | |||
| − | |||
| − | |||
| − | |||
|Step_Picture_00=Four_parabolique_WhatsApp_Image_2023-01-26_at_12.17.07.jpeg | |Step_Picture_00=Four_parabolique_WhatsApp_Image_2023-01-26_at_12.17.07.jpeg | ||
|Step_Picture_00_annotation={"version":"3.5.0","objects":[{"type":"image","version":"3.5.0","originX":"left","originY":"top","left":24,"top":-60,"width":1200,"height":1600,"fill":"rgb(0,0,0)","stroke":null,"strokeWidth":0,"strokeDashArray":null,"strokeLineCap":"butt","strokeDashOffset":0,"strokeLineJoin":"miter","strokeMiterLimit":4,"scaleX":0.46,"scaleY":0.46,"angle":0,"flipX":false,"flipY":false,"opacity":1,"shadow":null,"visible":true,"clipTo":null,"backgroundColor":"","fillRule":"nonzero","paintFirst":"fill","globalCompositeOperation":"source-over","transformMatrix":null,"skewX":0,"skewY":0,"crossOrigin":"","cropX":0,"cropY":0,"src":"https://wiki.lowtechlab.org/images/1/17/Four_parabolique_WhatsApp_Image_2023-01-26_at_12.17.07.jpeg","filters":[]}],"height":600,"width":600} | |Step_Picture_00_annotation={"version":"3.5.0","objects":[{"type":"image","version":"3.5.0","originX":"left","originY":"top","left":24,"top":-60,"width":1200,"height":1600,"fill":"rgb(0,0,0)","stroke":null,"strokeWidth":0,"strokeDashArray":null,"strokeLineCap":"butt","strokeDashOffset":0,"strokeLineJoin":"miter","strokeMiterLimit":4,"scaleX":0.46,"scaleY":0.46,"angle":0,"flipX":false,"flipY":false,"opacity":1,"shadow":null,"visible":true,"clipTo":null,"backgroundColor":"","fillRule":"nonzero","paintFirst":"fill","globalCompositeOperation":"source-over","transformMatrix":null,"skewX":0,"skewY":0,"crossOrigin":"","cropX":0,"cropY":0,"src":"https://wiki.lowtechlab.org/images/1/17/Four_parabolique_WhatsApp_Image_2023-01-26_at_12.17.07.jpeg","filters":[]}],"height":600,"width":600} | ||
| Ligne 82 : | Ligne 59 : | ||
|Step_Title=Placement of the mirror film on the parabolic dish | |Step_Title=Placement of the mirror film on the parabolic dish | ||
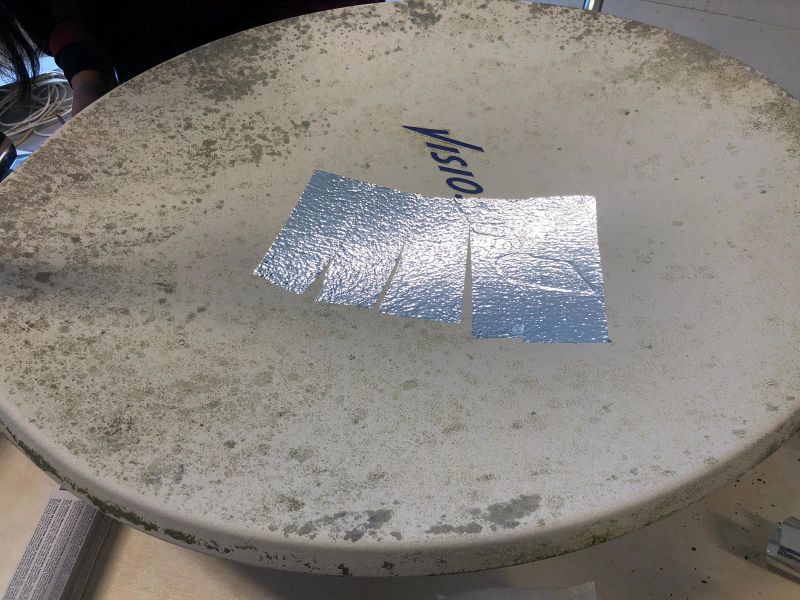
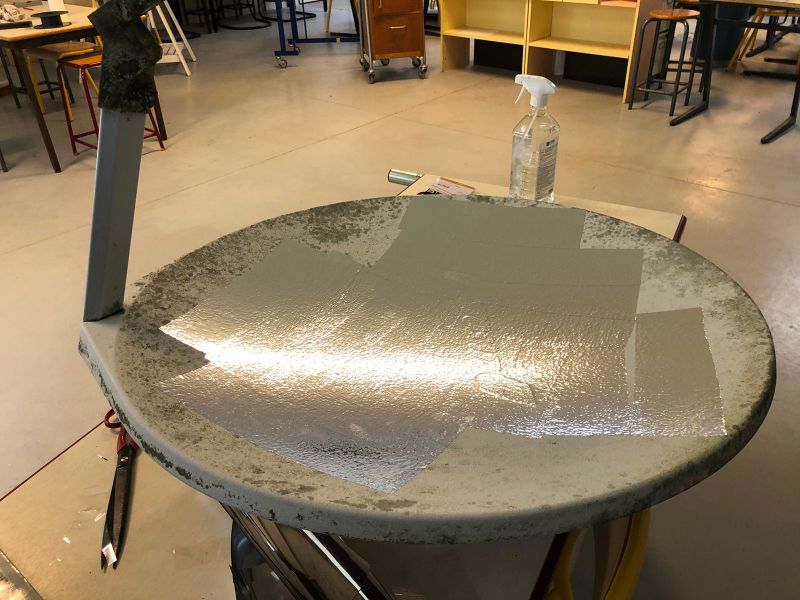
|Step_Content=Stick the mirror film onto the entire surface of the parabolic dish by cutting it into small pieces to prevent bubbles from forming. | |Step_Content=Stick the mirror film onto the entire surface of the parabolic dish by cutting it into small pieces to prevent bubbles from forming. | ||
| − | |||
| − | |||
| − | |||
| − | |||
|Step_Picture_00=Four_parabolique_WhatsApp_Image_2023-01-26_at_11.37.56_2_.jpeg | |Step_Picture_00=Four_parabolique_WhatsApp_Image_2023-01-26_at_11.37.56_2_.jpeg | ||
|Step_Picture_01=Four_parabolique_WhatsApp_Image_2023-01-26_at_11.37.57.jpeg | |Step_Picture_01=Four_parabolique_WhatsApp_Image_2023-01-26_at_11.37.57.jpeg | ||
| Ligne 92 : | Ligne 65 : | ||
{{Tuto Step | {{Tuto Step | ||
|Step_Title=Attachment of the parabolic dish to the stand | |Step_Title=Attachment of the parabolic dish to the stand | ||
| − | |Step_Content= Attach the parabolic dish to the stand using the wrenches | + | |Step_Content= Attach the parabolic dish to the stand using the wrenches |
| − | + | <br /> | |
| − | < | ||
| − | |||
|Step_Picture_00=Four_parabolique_WhatsApp_Image_2023-01-26_at_11.37.59.jpeg | |Step_Picture_00=Four_parabolique_WhatsApp_Image_2023-01-26_at_11.37.59.jpeg | ||
|Step_Picture_01=Four_parabolique_WhatsApp_Image_2023-01-26_at_12.36.05.jpeg | |Step_Picture_01=Four_parabolique_WhatsApp_Image_2023-01-26_at_12.36.05.jpeg | ||
| Ligne 102 : | Ligne 73 : | ||
{{Tuto Step | {{Tuto Step | ||
|Step_Title=Preparation of the plate support | |Step_Title=Preparation of the plate support | ||
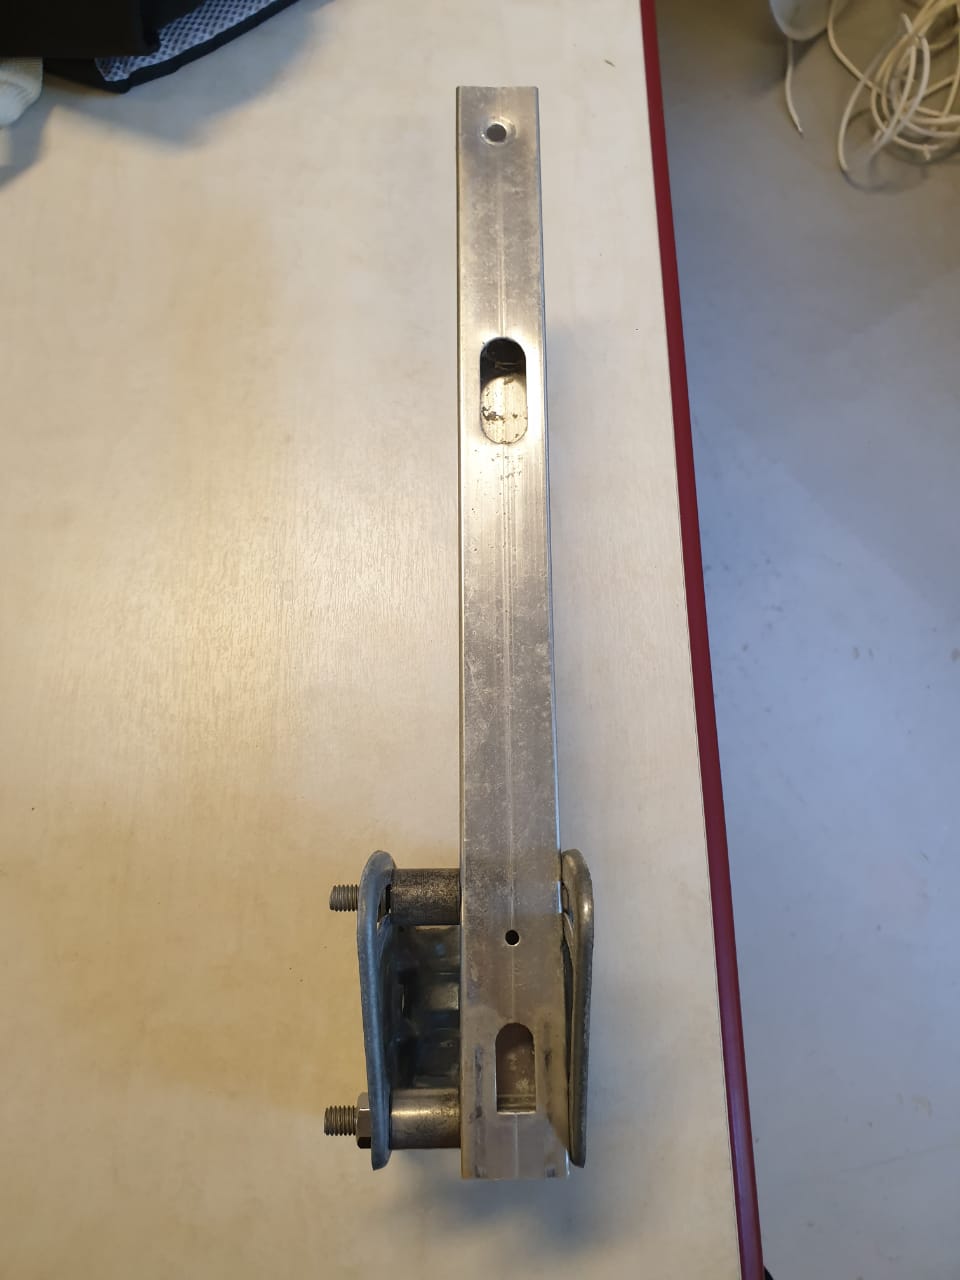
| − | |Step_Content= | + | |Step_Content=Use the metal part of the parabolic dish that allows you to adjust the angle to align the plate's orientation with that of the parabolic dish by aiming at the focal point that will allow us to cook. |
| − | |||
| − | |||
| − | |||
| − | Use the metal part of the parabolic dish that allows you to adjust the angle to align the plate's orientation with that of the parabolic dish by aiming at the focal point that will allow us to cook. | ||
We needed two spacers to tighten the bar against the stand in order to change the angle of inclination of the plate and adjust it with the angle of the parabolic surface stand. | We needed two spacers to tighten the bar against the stand in order to change the angle of inclination of the plate and adjust it with the angle of the parabolic surface stand. | ||
A bent metal sheet (using a vise) was also used to secure the bar on the parabolic dish. | A bent metal sheet (using a vise) was also used to secure the bar on the parabolic dish. | ||
| + | |||
| + | <br /> | ||
|Step_Picture_00=Four_parabolique_WhatsApp_Image_2023-01-26_at_11.49.16.jpeg | |Step_Picture_00=Four_parabolique_WhatsApp_Image_2023-01-26_at_11.49.16.jpeg | ||
|Step_Picture_01=Four_parabolique_WhatsApp_Image_2023-01-26_at_11.49.16_4_.jpeg | |Step_Picture_01=Four_parabolique_WhatsApp_Image_2023-01-26_at_11.49.16_4_.jpeg | ||
|Step_Picture_02=Four_parabolique_WhatsApp_Image_2023-01-26_at_11.49.16_5_.jpeg | |Step_Picture_02=Four_parabolique_WhatsApp_Image_2023-01-26_at_11.49.16_5_.jpeg | ||
|Step_Picture_03=Four_parabolique_WhatsApp_Image_2023-01-26_at_12.43.53.jpeg | |Step_Picture_03=Four_parabolique_WhatsApp_Image_2023-01-26_at_12.43.53.jpeg | ||
| + | |Step_Picture_04=Cuiseur_solaire_parabolique_WhatsApp_Image_2023-02-07_at_16.48.59.jpeg | ||
| + | |Step_Picture_05=Cuiseur_solaire_parabolique_WhatsApp_Image_2023-02-07_at_16.49.00.jpeg | ||
}} | }} | ||
{{Tuto Step | {{Tuto Step | ||
| Ligne 118 : | Ligne 89 : | ||
|Step_Content= Cut the grid to the desired size and secure it using copper wires. | |Step_Content= Cut the grid to the desired size and secure it using copper wires. | ||
| − | + | <br /> | |
| − | < | ||
| − | |||
|Step_Picture_00=Four_parabolique_WhatsApp_Image_2023-01-26_at_11.49.16_2_.jpeg | |Step_Picture_00=Four_parabolique_WhatsApp_Image_2023-01-26_at_11.49.16_2_.jpeg | ||
|Step_Picture_01=Four_parabolique_WhatsApp_Image_2023-01-26_at_11.49.16_3_.jpeg | |Step_Picture_01=Four_parabolique_WhatsApp_Image_2023-01-26_at_11.49.16_3_.jpeg | ||
|Step_Picture_02=Four_parabolique_WhatsApp_Image_2023-01-26_at_11.38.04.jpeg | |Step_Picture_02=Four_parabolique_WhatsApp_Image_2023-01-26_at_11.38.04.jpeg | ||
|Step_Picture_03=Four_parabolique_WhatsApp_Image_2023-01-26_at_11.38.04.jpeg | |Step_Picture_03=Four_parabolique_WhatsApp_Image_2023-01-26_at_11.38.04.jpeg | ||
| + | |Step_Picture_04=Cuiseur_solaire_parabolique_WhatsApp_Image_2023-02-06_at_17.22.05.jpeg | ||
| + | |Step_Picture_04_annotation={"version":"3.5.0","objects":[{"type":"image","version":"3.5.0","originX":"left","originY":"top","left":-322,"top":-278,"width":720,"height":1280,"fill":"rgb(0,0,0)","stroke":null,"strokeWidth":0,"strokeDashArray":null,"strokeLineCap":"butt","strokeDashOffset":0,"strokeLineJoin":"miter","strokeMiterLimit":4,"scaleX":2.16,"scaleY":2.16,"angle":0,"flipX":false,"flipY":false,"opacity":1,"shadow":null,"visible":true,"clipTo":null,"backgroundColor":"","fillRule":"nonzero","paintFirst":"fill","globalCompositeOperation":"source-over","transformMatrix":null,"skewX":0,"skewY":0,"crossOrigin":"","cropX":0,"cropY":0,"src":"https://wiki.lowtechlab.org/images/9/92/Cuiseur_solaire_parabolique_WhatsApp_Image_2023-02-06_at_17.22.05.jpeg","filters":[]}],"height":1066.1157024793388,"width":600} | ||
}} | }} | ||
{{Notes | {{Notes | ||
| − | |Notes= | + | |Notes=Safety Precautions when using a Solar Concentrated Oven |
| − | |||
| − | |||
| − | |||
| − | |||
| − | + | *Intense Radiation: The concentrated solar light can produce dangerous levels of ultraviolet and infrared radiation, so it is important to take protective measures for the eyes and skin, such as protective glasses and protective clothing. | |
| − | + | *Equipment: The equipment used to concentrate solar light, such as mirror effect films, must be regularly inspected to ensure that they are in good condition and functioning properly. | |
| − | |||
| − | * Intense Radiation: The concentrated solar light can produce dangerous levels of ultraviolet and infrared radiation, so it is important to take protective measures for the eyes and skin, such as protective glasses and protective clothing. | ||
| − | * Equipment: The equipment used to concentrate solar light, such as mirror effect films, must be regularly inspected to ensure that they are in good condition and functioning properly. | ||
}} | }} | ||
{{PageLang | {{PageLang | ||
Version actuelle datée du 7 février 2023 à 16:51
Description
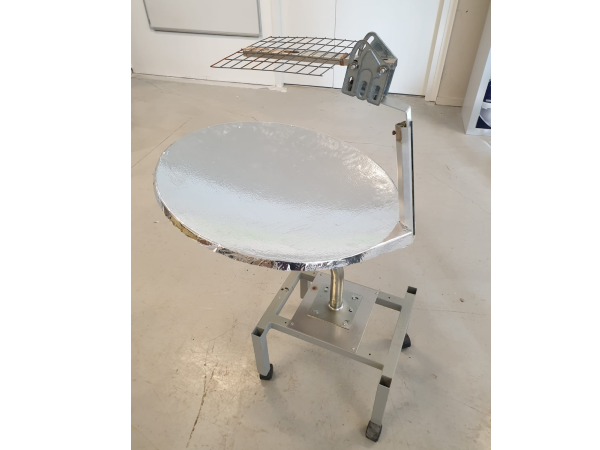
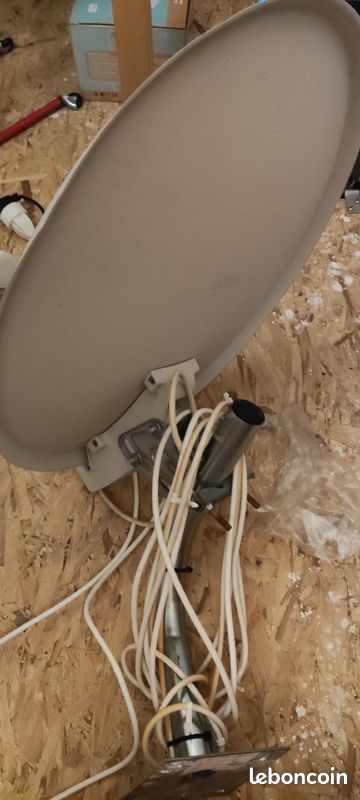
The parabolic or concentrated oven consists of a parabolic-shaped reflector. Its shiny mirror-effect surface captures the sun's rays, concentrates them, and then reflects them onto the cooking surface located on the grid.
Sommaire
Sommaire
- 1 Description
- 2 Sommaire
- 3 Introduction
- 4 Étape 1 - Preparation of the rolling stand
- 5 Étape 2 - Placement of the mirror film on the parabolic dish
- 6 Étape 3 - Attachment of the parabolic dish to the stand
- 7 Étape 4 - Preparation of the plate support
- 8 Étape 5 - Grid attachment
- 9 Notes et références
- 10 Commentaires
Introduction
The solar concentrated oven is a device that uses a mirror-effect surface to concentrate solar light onto a very narrow focal point. This focal point can reach extremely high temperatures, up to several thousand degrees Celsius, making it a very powerful tool for producing thermal energy. Concentrated solar ovens are considered a clean and sustainable energy source that can replace conventional energy sources such as fossil fuels.
Étape 1 - Preparation of the rolling stand
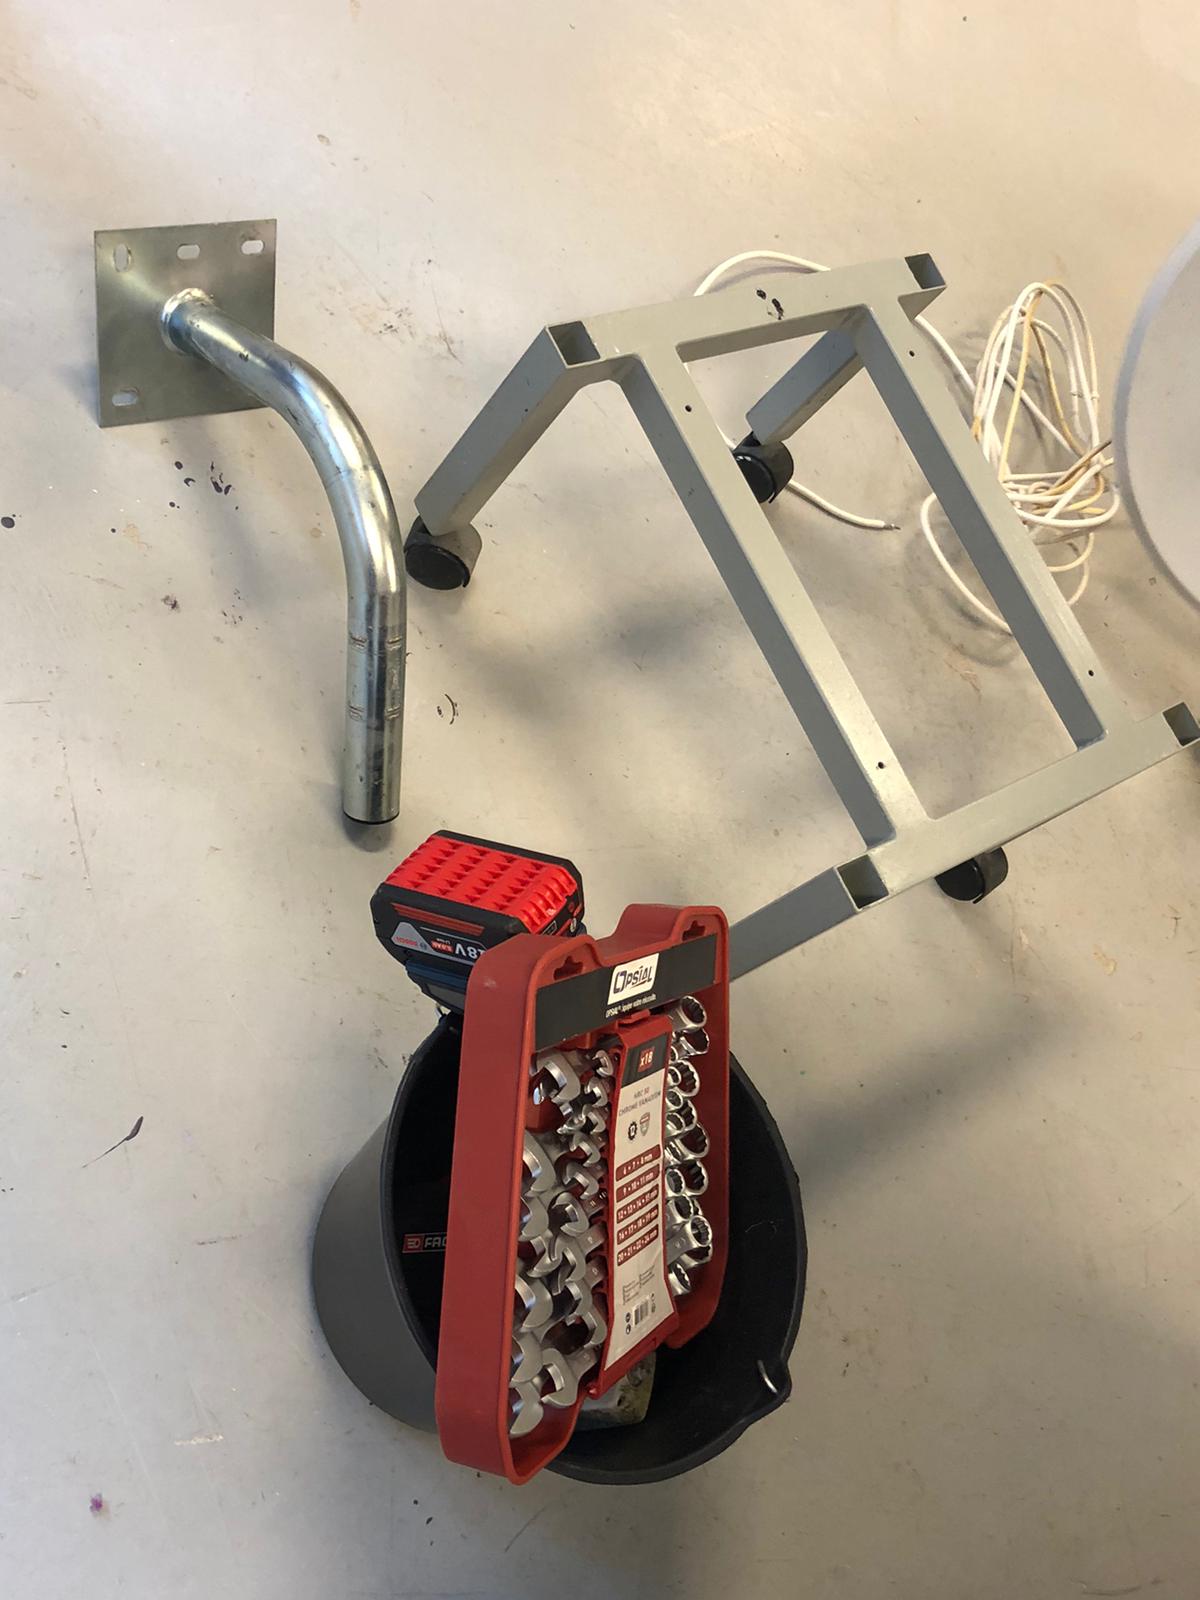
Use a rolling table, with a rectangular sheet that needs to be fixed with a drill and screws on the stand to place the tube that will support the parabolic dish later.
Étape 2 - Placement of the mirror film on the parabolic dish
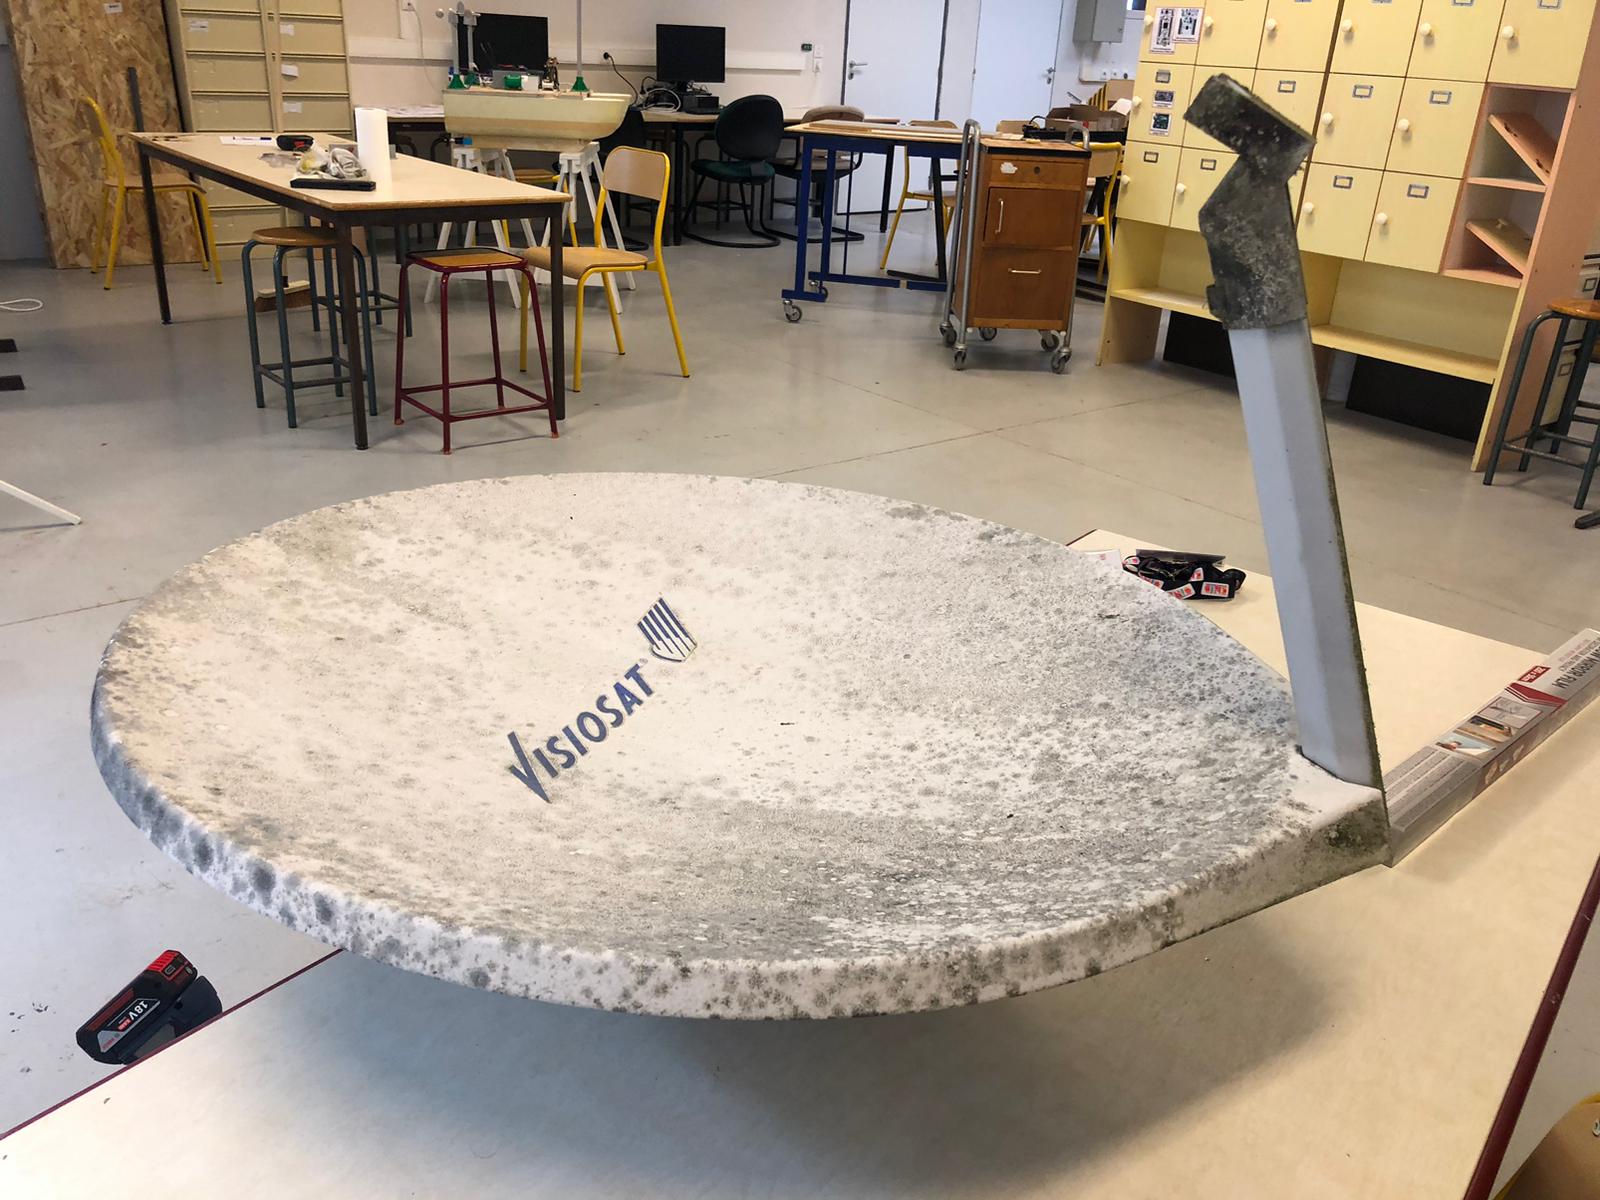
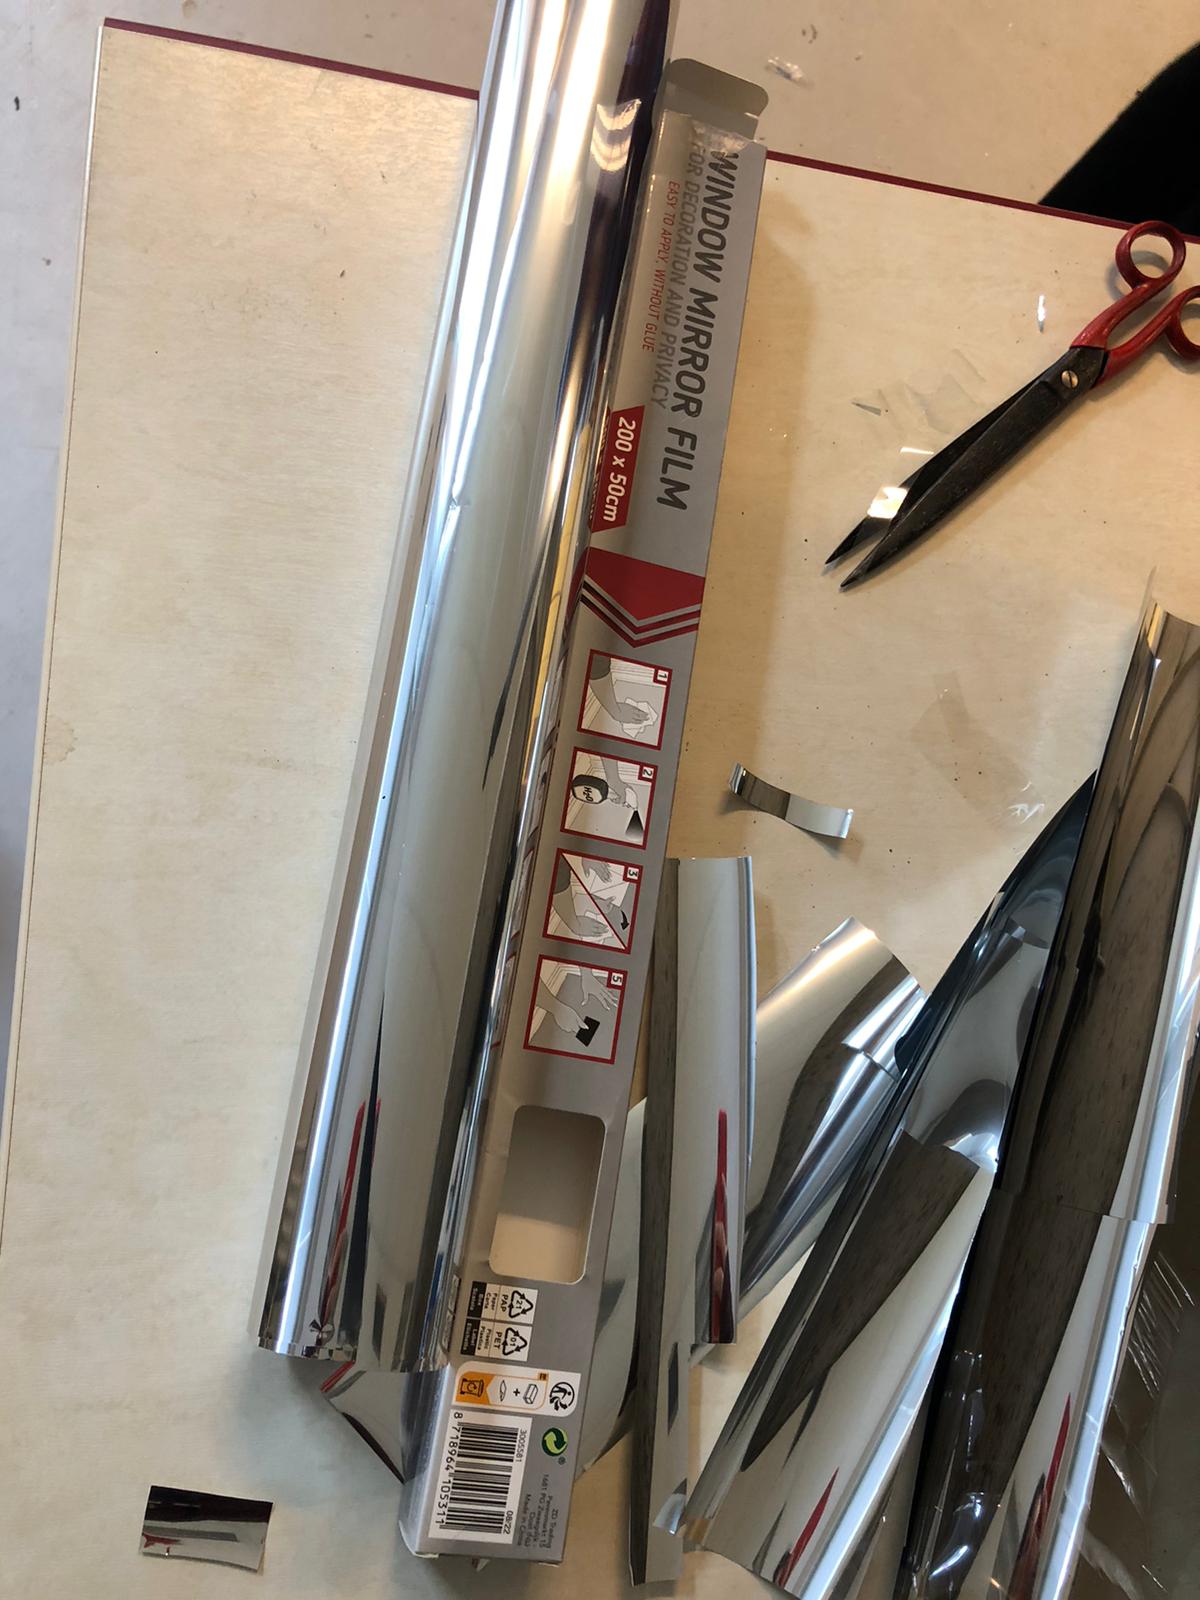
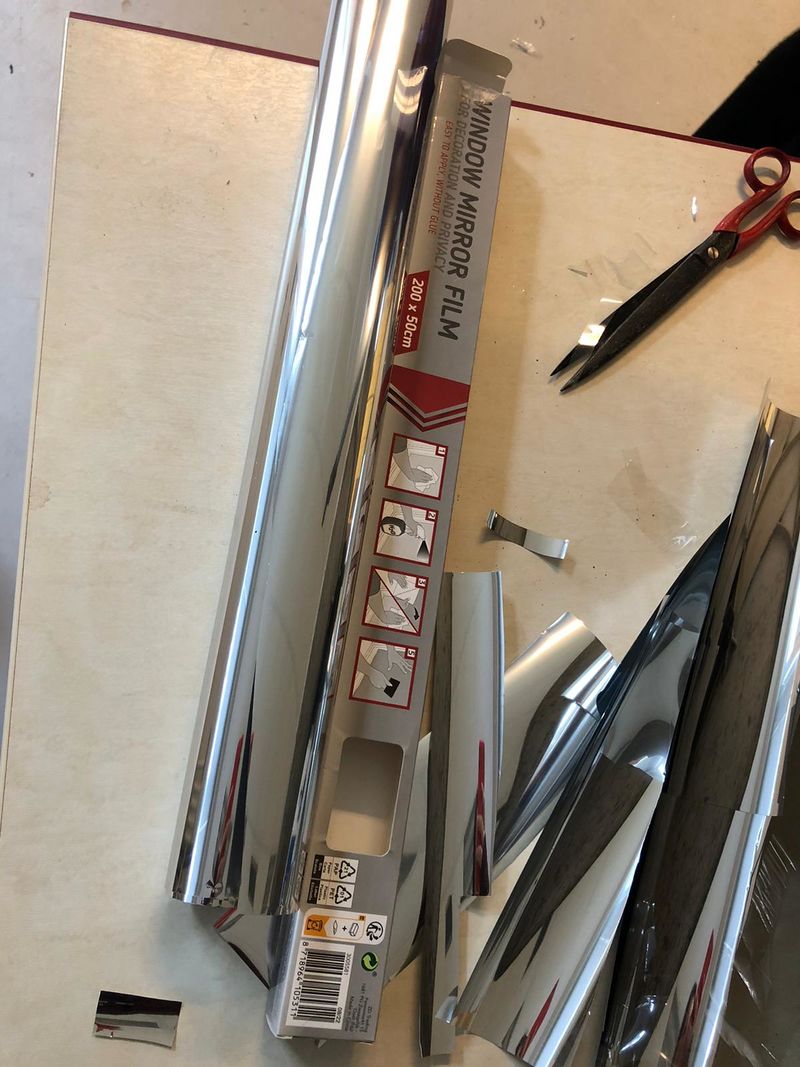
Stick the mirror film onto the entire surface of the parabolic dish by cutting it into small pieces to prevent bubbles from forming.
Étape 3 - Attachment of the parabolic dish to the stand
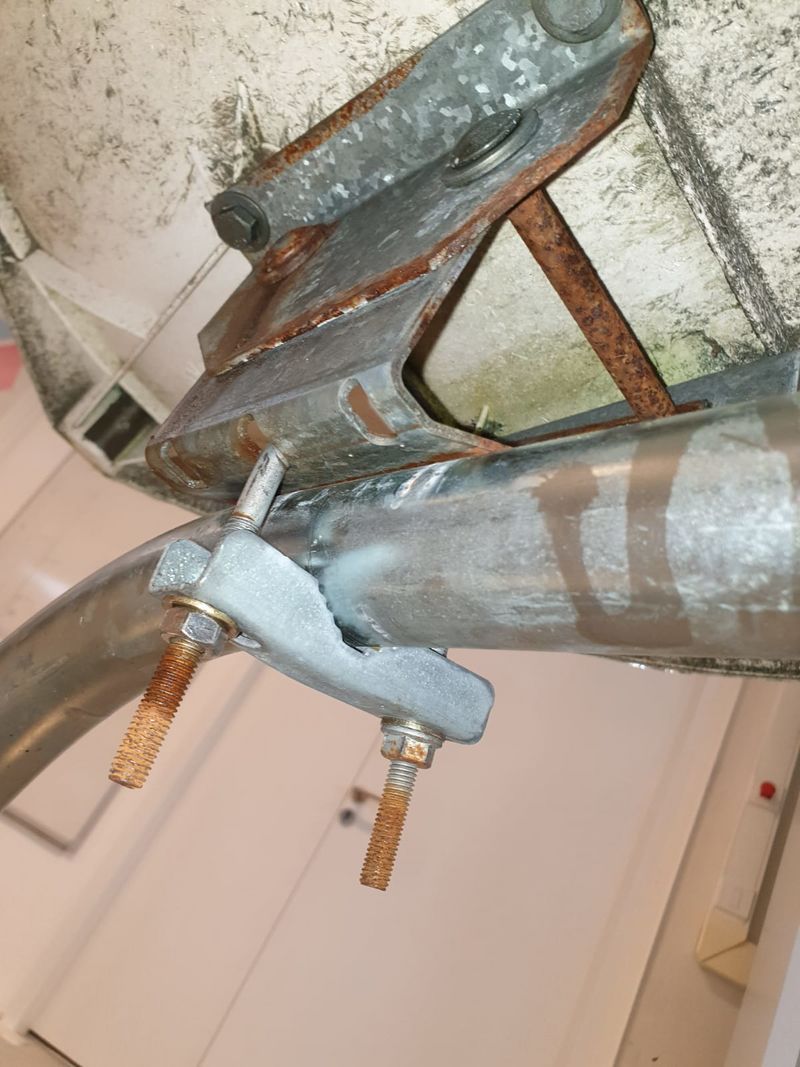
Attach the parabolic dish to the stand using the wrenches
Étape 4 - Preparation of the plate support
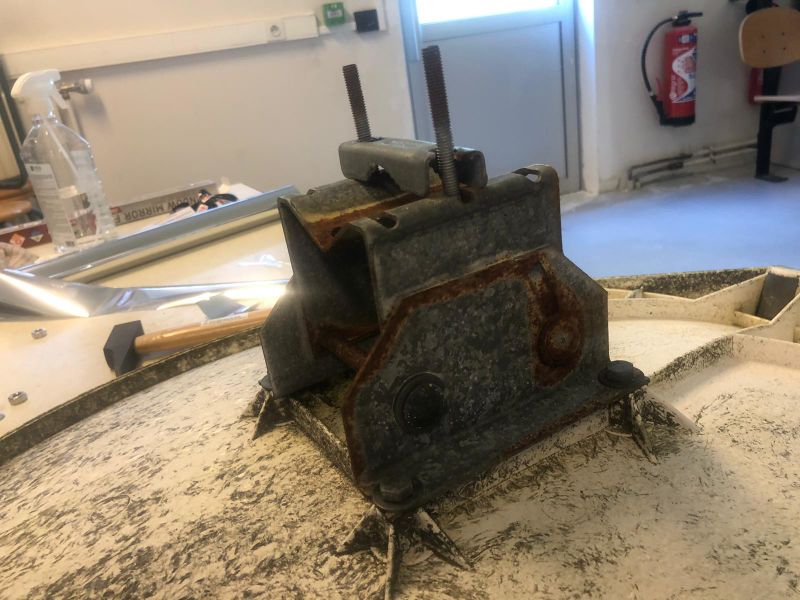
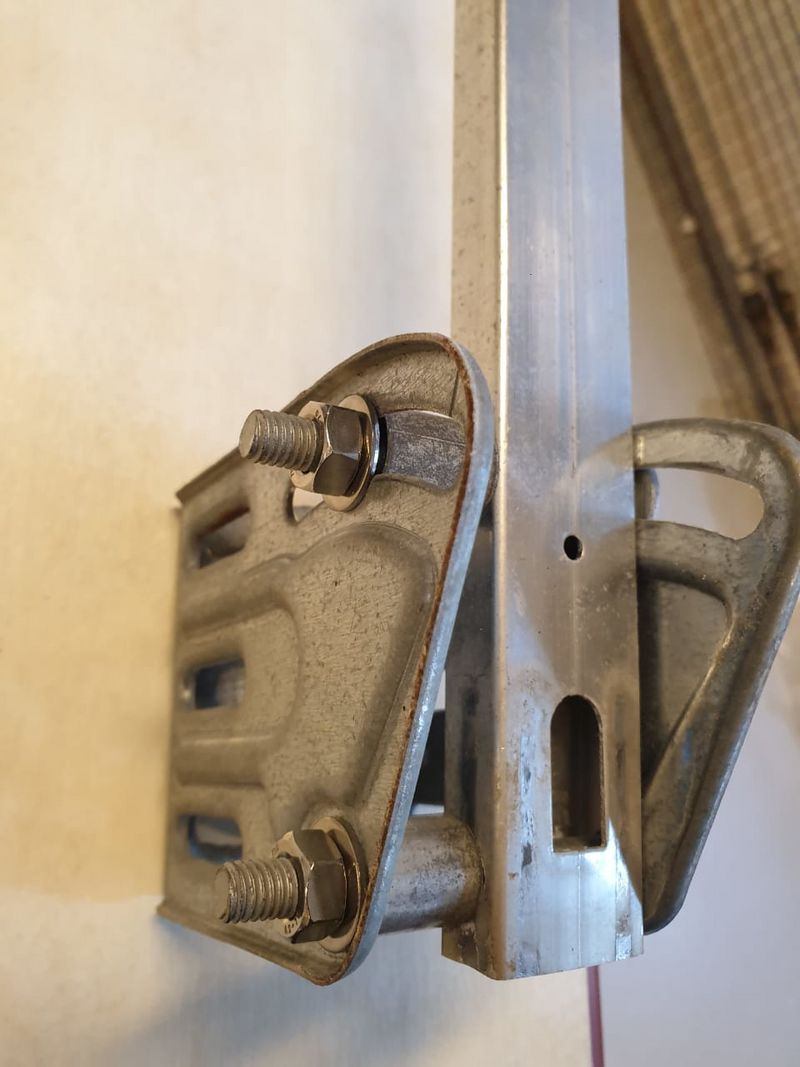
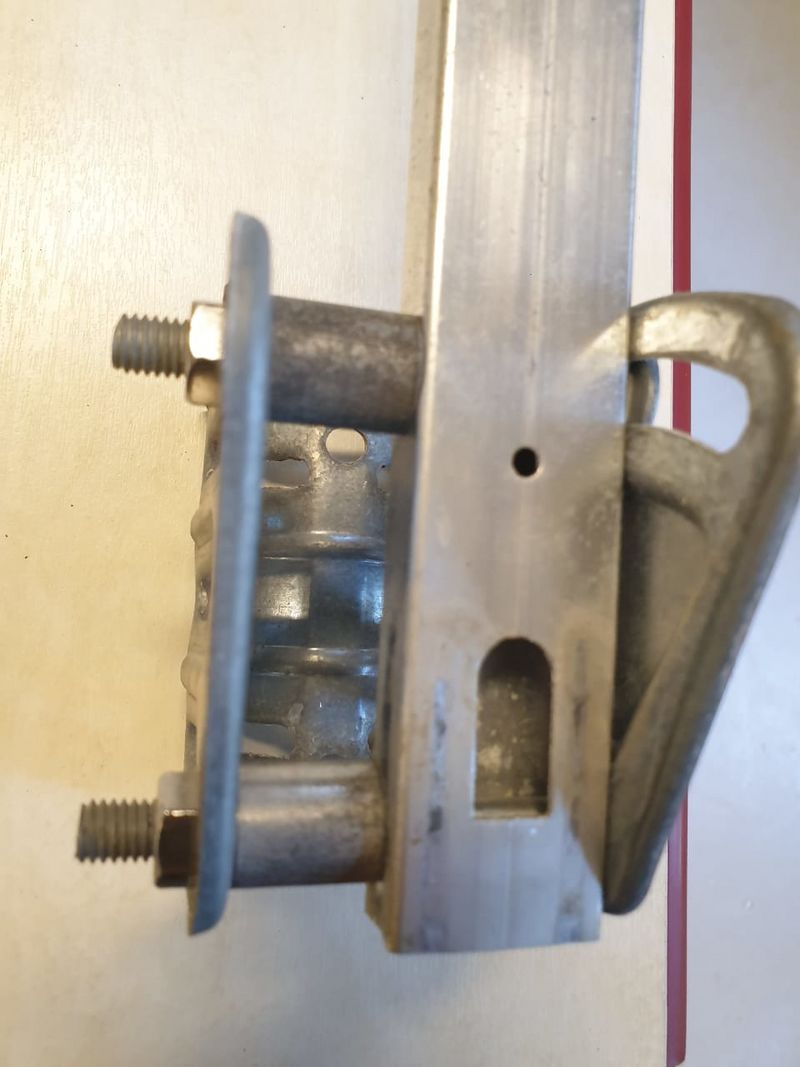
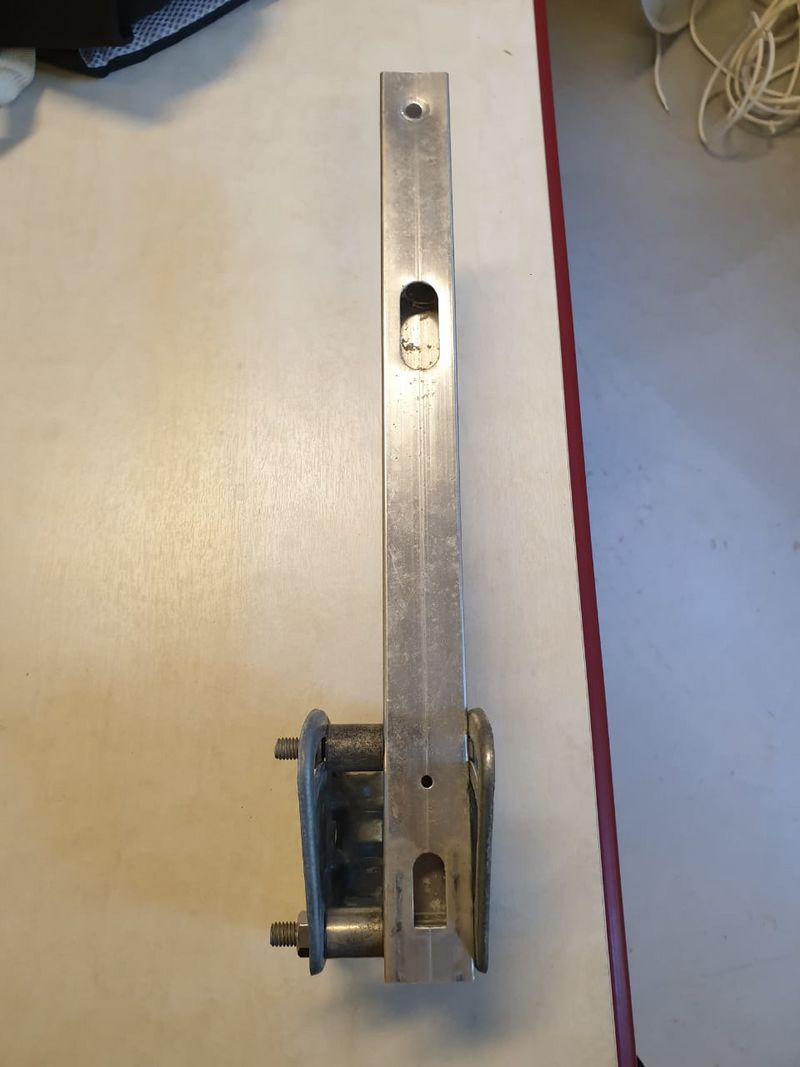
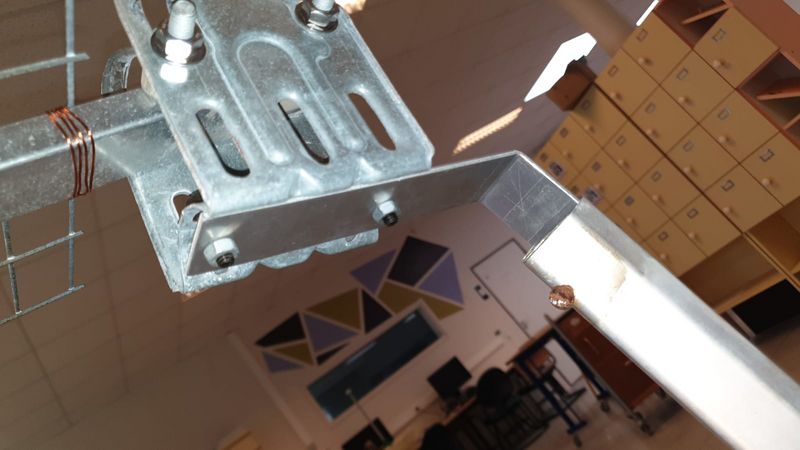
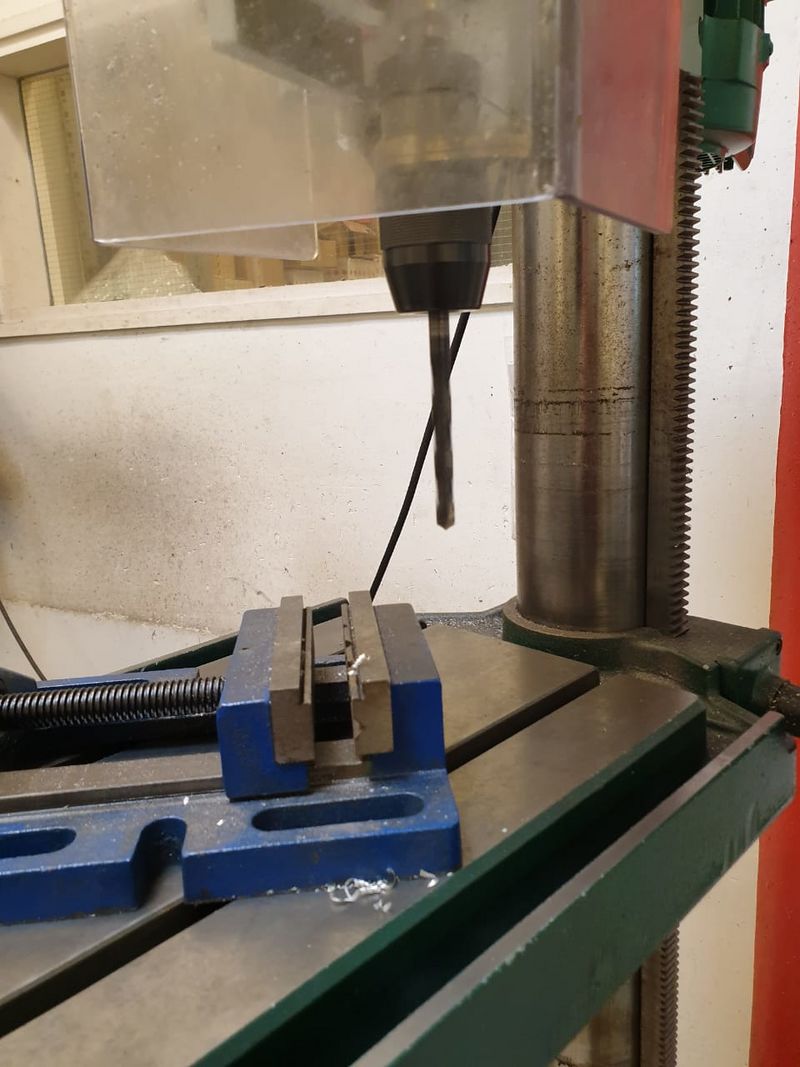
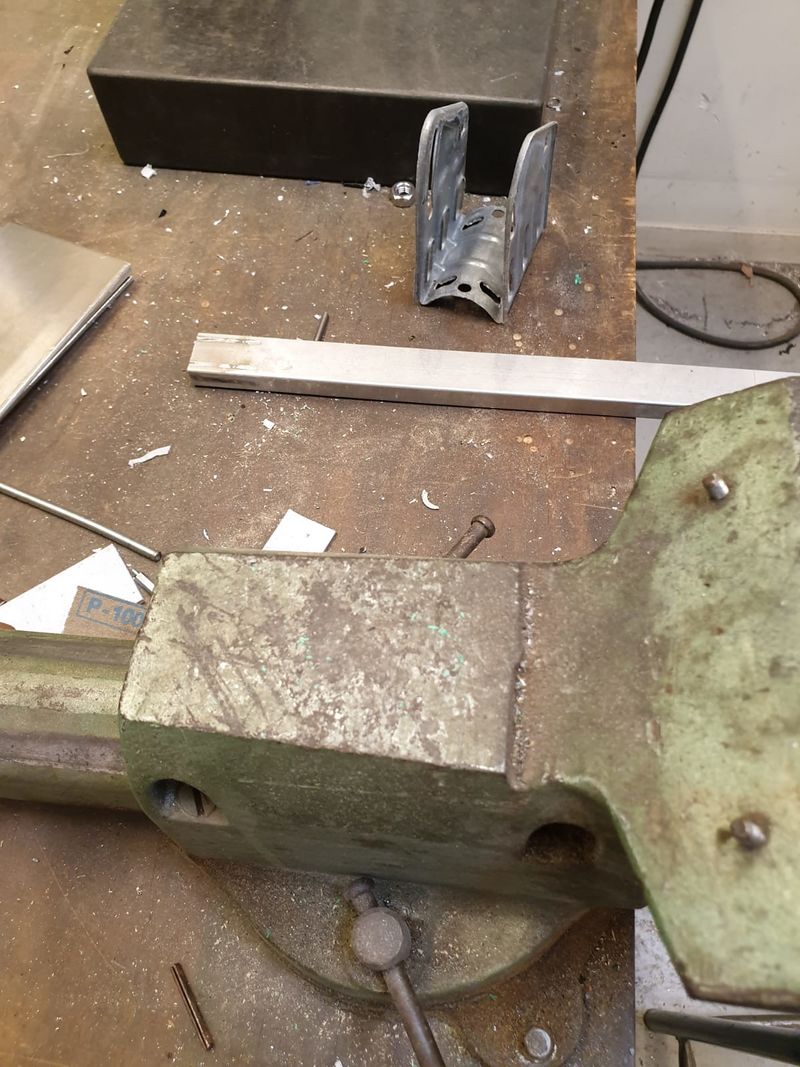
Use the metal part of the parabolic dish that allows you to adjust the angle to align the plate's orientation with that of the parabolic dish by aiming at the focal point that will allow us to cook. We needed two spacers to tighten the bar against the stand in order to change the angle of inclination of the plate and adjust it with the angle of the parabolic surface stand. A bent metal sheet (using a vise) was also used to secure the bar on the parabolic dish.
Notes et références
Safety Precautions when using a Solar Concentrated Oven
- Intense Radiation: The concentrated solar light can produce dangerous levels of ultraviolet and infrared radiation, so it is important to take protective measures for the eyes and skin, such as protective glasses and protective clothing.
- Equipment: The equipment used to concentrate solar light, such as mirror effect films, must be regularly inspected to ensure that they are in good condition and functioning properly.
Published
 Français
 English
 Deutsch
 Español
 Italiano
 Português