(update property name) |
|||
| Ligne 2 : | Ligne 2 : | ||
|Main_Picture=Worm_Compost_Bins_1.jpg | |Main_Picture=Worm_Compost_Bins_1.jpg | ||
|Licences=Attribution (CC BY) | |Licences=Attribution (CC BY) | ||
| − | |Description=<translate><!--T:1--> Closed worm compost in barrel</translate> | + | |Description=<translate><!--T:1--> |
| + | Closed worm compost in barrel</translate> | ||
|Area=Food | |Area=Food | ||
|Type=Tutorial | |Type=Tutorial | ||
|Difficulty=Easy | |Difficulty=Easy | ||
| − | |Duration=1 | + | |Duration=1 |
|Duration-type=hour(s) | |Duration-type=hour(s) | ||
|Cost=50 | |Cost=50 | ||
| Ligne 13 : | Ligne 14 : | ||
{{Introduction | {{Introduction | ||
|Introduction=<translate><!--T:2--> | |Introduction=<translate><!--T:2--> | ||
| − | Earthworms are one of the hardest working creatures on earth, they are constantly producing new, fertile soil and we can use them as composters to help us create nutrient rich compost from our organic waste..and fast! | + | Earthworms are one of the hardest working creatures on earth, they are constantly producing new, fertile soil and we can use them as composters to help us create nutrient rich compost from our organic waste..and fast! |
<!--T:3--> | <!--T:3--> | ||
| Ligne 70 : | Ligne 71 : | ||
}} | }} | ||
{{Tuto Step | {{Tuto Step | ||
| − | |Step_Title=<translate><!--T:21--> Insert tap at the bottom of the barrel.</translate> | + | |Step_Title=<translate><!--T:21--> |
| + | Insert tap at the bottom of the barrel.</translate> | ||
|Step_Content=<translate><!--T:22--> | |Step_Content=<translate><!--T:22--> | ||
Drill with drill bit to make the hole for the valve tap and fit the stainless ball or butterfly valvetap (1/2” inch or 3/4” inch) with hydraulic fittings. | Drill with drill bit to make the hole for the valve tap and fit the stainless ball or butterfly valvetap (1/2” inch or 3/4” inch) with hydraulic fittings. | ||
| Ligne 79 : | Ligne 81 : | ||
}} | }} | ||
{{Tuto Step | {{Tuto Step | ||
| − | |Step_Title=<translate><!--T:24--> Add ventilation.</translate> | + | |Step_Title=<translate><!--T:24--> |
| + | Add ventilation.</translate> | ||
|Step_Content=<translate><!--T:25--> | |Step_Content=<translate><!--T:25--> | ||
Aeration is important as the system is aerobic, but it must also be covered from rain and have screens against insects and rodents. | Aeration is important as the system is aerobic, but it must also be covered from rain and have screens against insects and rodents. | ||
<!--T:26--> | <!--T:26--> | ||
| − | Use a large drill bit (hole saw) for making large hole for the ventilation filters. Insert the ventilation filters and fit using silicon. | + | Use a large drill bit (hole saw) for making large hole for the ventilation filters. Insert the ventilation filters and fit using silicon. |
<!--T:27--> | <!--T:27--> | ||
| − | The number of ventilation filters depend on the dimension of the container and temperature outside. | + | The number of ventilation filters depend on the dimension of the container and temperature outside. |
<!--T:28--> | <!--T:28--> | ||
| Ligne 99 : | Ligne 102 : | ||
}} | }} | ||
{{Tuto Step | {{Tuto Step | ||
| − | |Step_Title=<translate><!--T:31--> Create the rock/sand layered filter</translate> | + | |Step_Title=<translate><!--T:31--> |
| + | Create the rock/sand layered filter</translate> | ||
|Step_Content=<translate><!--T:32--> | |Step_Content=<translate><!--T:32--> | ||
| − | The filter is made of inert material such as: rocks, pebbles, broken tiles, etc., gravel and sand. | + | The filter is made of inert material such as: rocks, pebbles, broken tiles, etc., gravel and sand. |
<!--T:33--> | <!--T:33--> | ||
| − | Start to fill the container from the bottom with the material of large dimensions first, consequently adding material of smaller dimensions and finishing with sand on the top. | + | Start to fill the container from the bottom with the material of large dimensions first, consequently adding material of smaller dimensions and finishing with sand on the top. |
<!--T:34--> | <!--T:34--> | ||
| Ligne 120 : | Ligne 124 : | ||
}} | }} | ||
{{Tuto Step | {{Tuto Step | ||
| − | |Step_Title=<translate><!--T:38--> Wash out the filter.</translate> | + | |Step_Title=<translate><!--T:38--> |
| − | |Step_Content=<translate><!--T:39--> Wash out any dirt/sand that might come loose by pouring water into the barrel. Keep the tap open and let water follow through the sand/gravel layers to settle the filter unit before adding soil.</translate> | + | Wash out the filter.</translate> |
| + | |Step_Content=<translate><!--T:39--> | ||
| + | Wash out any dirt/sand that might come loose by pouring water into the barrel. Keep the tap open and let water follow through the sand/gravel layers to settle the filter unit before adding soil.</translate> | ||
|Step_Picture_00=Worm_Compost_Bins_60346808_355480278411654_7888758005284470784_n.jpg | |Step_Picture_00=Worm_Compost_Bins_60346808_355480278411654_7888758005284470784_n.jpg | ||
}} | }} | ||
{{Tuto Step | {{Tuto Step | ||
| − | |Step_Title=<translate><!--T:40--> Add layers and worms</translate> | + | |Step_Title=<translate><!--T:40--> |
| + | Add layers and worms</translate> | ||
|Step_Content=<translate><!--T:41--> | |Step_Content=<translate><!--T:41--> | ||
On top of the sand filter add 30-40cm of good, moist, loamy soil with as many worms as possible ( at least 100). | On top of the sand filter add 30-40cm of good, moist, loamy soil with as many worms as possible ( at least 100). | ||
| Ligne 137 : | Ligne 144 : | ||
}} | }} | ||
{{Tuto Step | {{Tuto Step | ||
| − | |Step_Title=<translate><!--T:44--> Wait 10 days - then you can start adding kitchen waste!</translate> | + | |Step_Title=<translate><!--T:44--> |
| + | Wait 10 days - then you can start adding kitchen waste!</translate> | ||
|Step_Content=<translate><!--T:45--> | |Step_Content=<translate><!--T:45--> | ||
| − | After 10 days wait you can start adding your kitchen waste under the hay layer. | + | After 10 days wait you can start adding your kitchen waste under the hay layer. |
<!--T:46--> | <!--T:46--> | ||
| − | Best is uncooked food. | + | Best is uncooked food. |
<!--T:47--> | <!--T:47--> | ||
| Ligne 155 : | Ligne 163 : | ||
}} | }} | ||
{{Tuto Step | {{Tuto Step | ||
| − | |Step_Title=<translate><!--T:50--> Harvesting your finished worm compost</translate> | + | |Step_Title=<translate><!--T:50--> |
| + | Harvesting your finished worm compost</translate> | ||
|Step_Content=<translate><!--T:51--> | |Step_Content=<translate><!--T:51--> | ||
| − | 1.Empty the bin on a tarpaulin sheet, forming a cone of finished compost. | + | 1.Empty the bin on a tarpaulin sheet, forming a cone of finished compost. |
<!--T:52--> | <!--T:52--> | ||
| Ligne 163 : | Ligne 172 : | ||
<!--T:53--> | <!--T:53--> | ||
| − | 3.Worms 'migrate' away from light to the bottom of the cone. | + | 3.Worms 'migrate' away from light to the bottom of the cone. |
<!--T:54--> | <!--T:54--> | ||
| − | 4. Scrape all of the worm-free compost on outside of heap (can be used in garden etc) and reform the cone. | + | 4. Scrape all of the worm-free compost on outside of heap (can be used in garden etc) and reform the cone. |
<!--T:55--> | <!--T:55--> | ||
| Ligne 172 : | Ligne 181 : | ||
}} | }} | ||
{{Tuto Step | {{Tuto Step | ||
| − | |Step_Title=<translate><!--T:56--> Harvesting your Vermiwash</translate> | + | |Step_Title=<translate><!--T:56--> |
| − | |Step_Content=<translate><!--T:57--> Vermiwash is a potent plant fertiliser and can be collected whenever from the tap. To use for plants it should be diluted with water 6-10: 1</translate> | + | Harvesting your Vermiwash</translate> |
| + | |Step_Content=<translate><!--T:57--> | ||
| + | Vermiwash is a potent plant fertiliser and can be collected whenever from the tap. To use for plants it should be diluted with water 6-10: 1</translate> | ||
}} | }} | ||
{{Notes | {{Notes | ||
|Notes=<translate></translate> | |Notes=<translate></translate> | ||
| + | }} | ||
| + | {{PageLang | ||
| + | |SourceLanguage=none | ||
| + | |Language=en | ||
| + | |IsTranslation=0 | ||
}} | }} | ||
{{Tuto Status | {{Tuto Status | ||
|Complete=Published | |Complete=Published | ||
}} | }} | ||
Version actuelle datée du 31 octobre 2019 à 10:06
Description
Closed worm compost in barrel
Sommaire
Sommaire
- 1 Description
- 2 Sommaire
- 3 Introduction
- 4 Étape 1 - Insert tap at the bottom of the barrel.
- 5 Étape 2 - Add ventilation.
- 6 Étape 3 - Create the rock/sand layered filter
- 7 Étape 4 - Wash out the filter.
- 8 Étape 5 - Add layers and worms
- 9 Étape 6 - Wait 10 days - then you can start adding kitchen waste!
- 10 Étape 7 - Harvesting your finished worm compost
- 11 Étape 8 - Harvesting your Vermiwash
- 12 Commentaires
Introduction
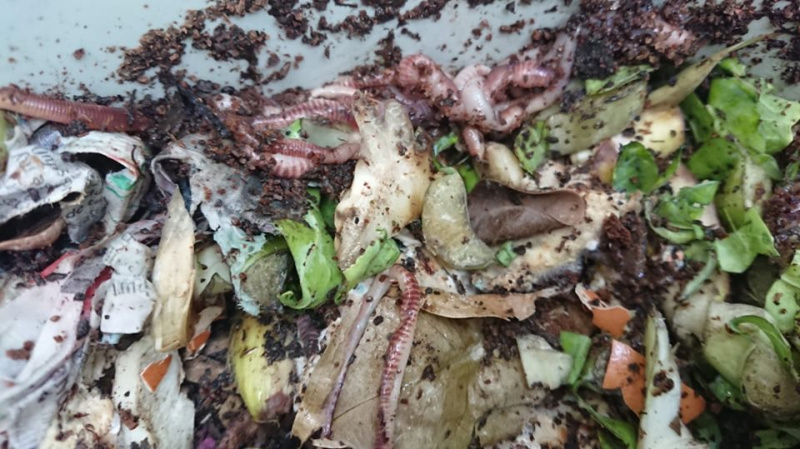
Earthworms are one of the hardest working creatures on earth, they are constantly producing new, fertile soil and we can use them as composters to help us create nutrient rich compost from our organic waste..and fast!
They can be grown in many different types of containers, here we describe the 'worm bin' method which we use for small-scale household waste situations. It is a compost bin to which we add worms in order to speed up the composting process, avoid smells, gain nutrient rich compost, worm 'juice' fertiliser and help propagate more worms into the environment!
Matériaux
Large plastic or iron container with lid, 100 – 200 l
Stainless ball or butterfly valvetap (1/2” inch or 3/4” inch) with hydraulic fittings
Teflon
Rocks, peppels, gravel, or expanded clay balls
Sand. Not salty sand from sea!
Good loamy soil to 30/40 cm height
Cow or horses manure, several big handfuls, broken up
Kitchen wastes, a bit. To be added to the system after 10 days
Worms (100/ 200, depending on the dimension of the barrel). Better the red worm, they are more active and efficient, even if not local!
Dry leaves or straw
2/3 ventilation filter in plastic of 10/12 cm diameter [ Mosquito net can be used instead of the ventilation filters.]
silicon
Bricks or other material
2 old big T-shit
Non-woven blanket
Outils
Drill with drill bit
2 scissors
Étape 1 - Insert tap at the bottom of the barrel.
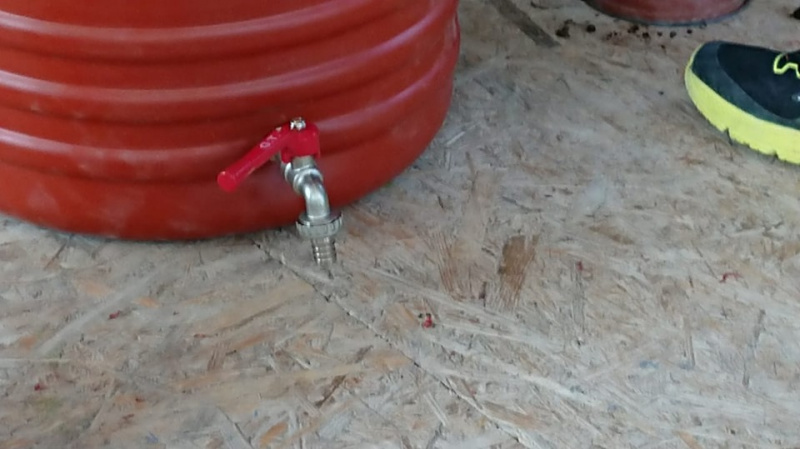
Drill with drill bit to make the hole for the valve tap and fit the stainless ball or butterfly valvetap (1/2” inch or 3/4” inch) with hydraulic fittings.
The tap should be approximately 5-10cm from the bottom of the barrel.
Étape 2 - Add ventilation.
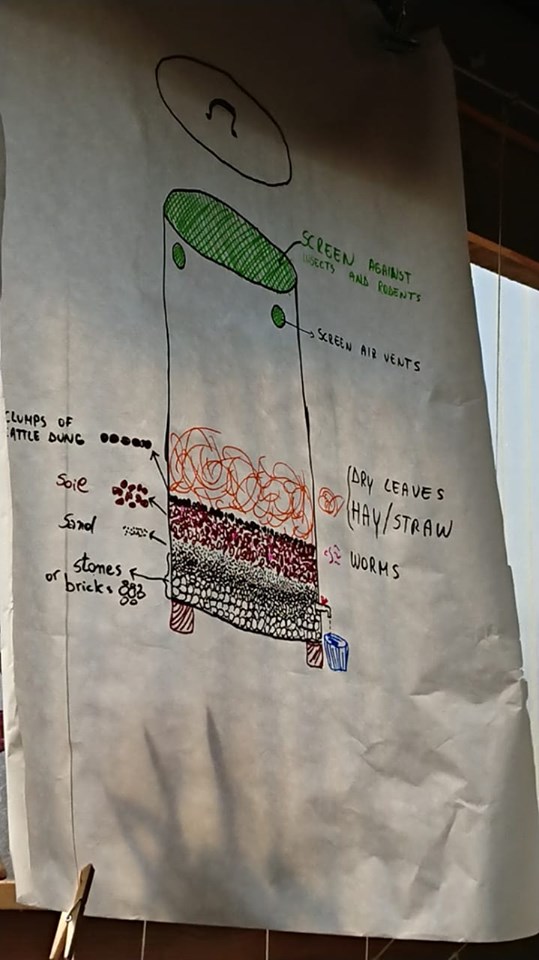
Aeration is important as the system is aerobic, but it must also be covered from rain and have screens against insects and rodents.
Use a large drill bit (hole saw) for making large hole for the ventilation filters. Insert the ventilation filters and fit using silicon.
The number of ventilation filters depend on the dimension of the container and temperature outside.
If it is not possible to find ventilation filters:
Option b) Insect netting to cover and to protect the holes for air circulation in the wall’s bin. E.g. A mosquito net can be used instead of the ventilation filters.
Option c) Close the barrel with a large textile material (like an old T-shirt) or a mosquito net. In this case it’ll be necessary to tight the textile or net, with a string to the top of the barrel. Then use 2 sticks to keep ventilated and finally put the lid and above it, put a brick/stone, to keep the lid steady (can be a problem in the case of strong winds). This last case is not the perfect one, but it’ll do and it’s easier and cheaper.
Étape 3 - Create the rock/sand layered filter
The filter is made of inert material such as: rocks, pebbles, broken tiles, etc., gravel and sand.
Start to fill the container from the bottom with the material of large dimensions first, consequently adding material of smaller dimensions and finishing with sand on the top.
It’s also possible to use only lighter inert material such as expanded clay balls instead of the bricks/stones/gravels, etc., and then finish with a layer of sand. [If used expanded clay, the barrel will be lighter to move.]
The quantities of the materials for the filter it depend on the dimension of the barrel, in general:
Total thickness: 25/35 cm. 1stlayer of stones/broken bricks/gravel/expanded clay balls/ = 15/20 cm; 2ndlayer of sand = 10/15 cm.
It’s always recommended to place a non-woven blanket (for some fabric such as a T-shirt) between the gravel and the sand. To stop the sand from being washed away.
Étape 4 - Wash out the filter.
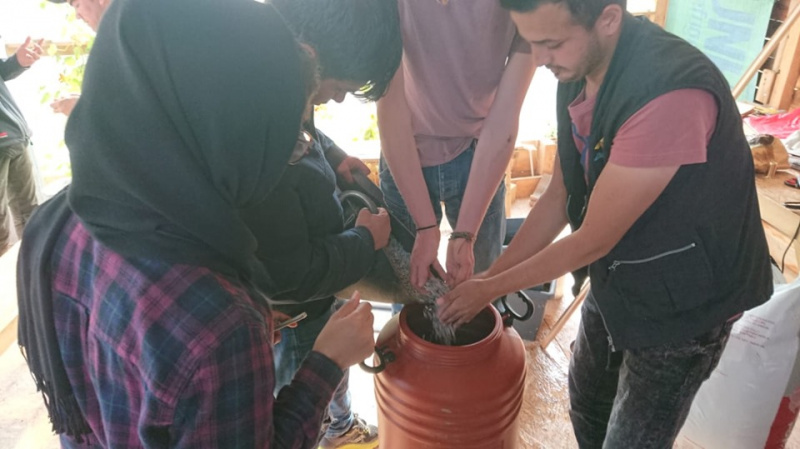
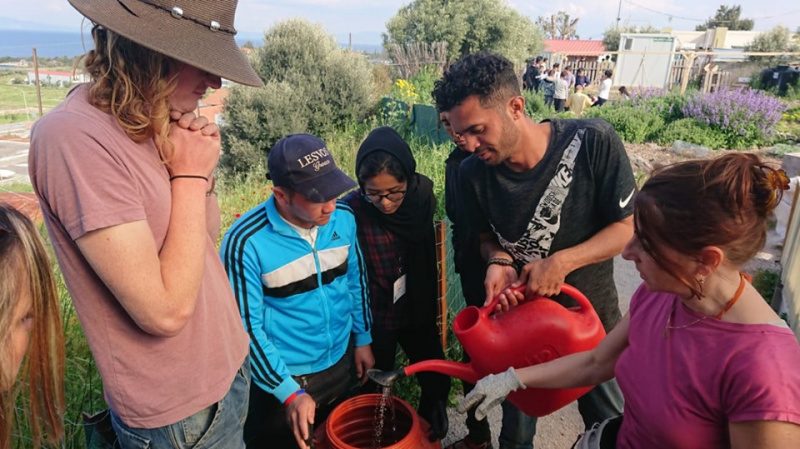
Wash out any dirt/sand that might come loose by pouring water into the barrel. Keep the tap open and let water follow through the sand/gravel layers to settle the filter unit before adding soil.
Étape 5 - Add layers and worms
On top of the sand filter add 30-40cm of good, moist, loamy soil with as many worms as possible ( at least 100).
The add clumps of cattle dung (cow/sheep dung will also do)
Finally add hay.
Étape 6 - Wait 10 days - then you can start adding kitchen waste!
After 10 days wait you can start adding your kitchen waste under the hay layer.
Best is uncooked food.
Avoid: citrus, onions, meat or oily cooked foods.
Dung and hay can be replaced periodically.
Your compost material should be humid, not wet or dry.
Étape 7 - Harvesting your finished worm compost
1.Empty the bin on a tarpaulin sheet, forming a cone of finished compost.
2.leave the cone for several daylight hours.
3.Worms 'migrate' away from light to the bottom of the cone.
4. Scrape all of the worm-free compost on outside of heap (can be used in garden etc) and reform the cone.
5. Repeat the process until all but the lower 5cm of worm compost are left. the remaining compost can be used to start a new compost system.
Étape 8 - Harvesting your Vermiwash
Vermiwash is a potent plant fertiliser and can be collected whenever from the tap. To use for plants it should be diluted with water 6-10: 1
Published
 Français
 English
 Deutsch
 Español
 Italiano
 Português