(Page créée avec « Assembly of components. ») |
(update property name) |
||
| (13 révisions intermédiaires par 3 utilisateurs non affichées) | |||
| Ligne 1 : | Ligne 1 : | ||
| − | {{ | + | {{Tuto Details |
| − | | | + | |Main_Picture=Powerbank_simple_couverture.jpg |
| − | | | + | |Licences=Attribution-ShareAlike (CC BY-SA) |
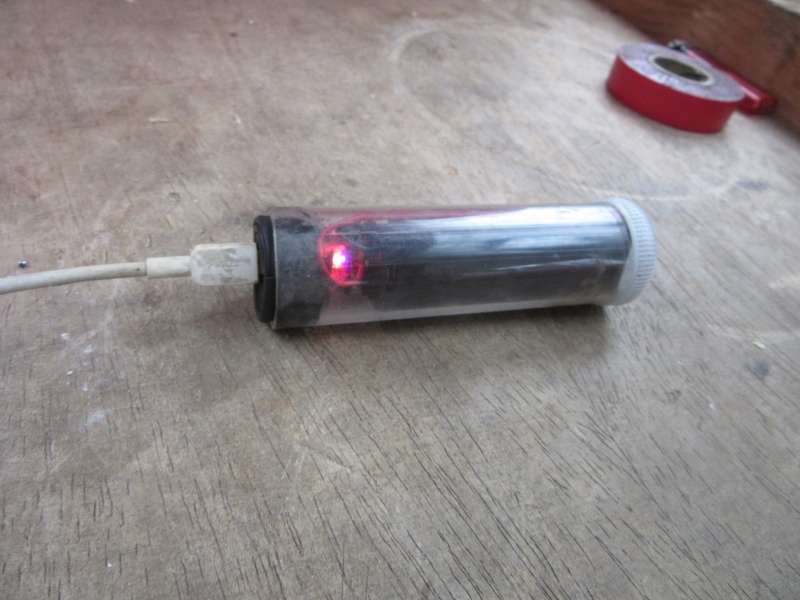
| − | | | + | |Description=Powerbank / single external battery for small independent lighting or smartphone charging. |
| + | |Area=Energy | ||
|Type=Prototype | |Type=Prototype | ||
| − | |||
| − | |||
| − | |||
|Difficulty=Easy | |Difficulty=Easy | ||
| + | |Duration=1 | ||
| + | |Duration-type=hour(s) | ||
|Cost=5 | |Cost=5 | ||
|Currency=EUR (€) | |Currency=EUR (€) | ||
| − | | | + | |Tags=powerbank, batterie, portable, lithium, ion, NomadeDesMers, LT4Refugees, Agami |
| − | |||
| − | |||
| − | |||
|SourceLanguage=fr | |SourceLanguage=fr | ||
|Language=en | |Language=en | ||
|IsTranslation=1 | |IsTranslation=1 | ||
}} | }} | ||
| − | {{ | + | {{Introduction |
|Introduction=This tutorial presents the manufacture of a very simple powerbank allowing the feeding of a small lighting or the charging of a smartphone via a USB socket. | |Introduction=This tutorial presents the manufacture of a very simple powerbank allowing the feeding of a small lighting or the charging of a smartphone via a USB socket. | ||
It is made from lithium-ion cells recovered from used laptop batteries. | It is made from lithium-ion cells recovered from used laptop batteries. | ||
| Ligne 47 : | Ligne 44 : | ||
The second option is to couple several cells together according to their load capacity. This requires more complex manipulation available [http://lab.lowtechlab.org/index.php?title=R%C3%A9cup%C3%A9ration_de_batteries ici]. | The second option is to couple several cells together according to their load capacity. This requires more complex manipulation available [http://lab.lowtechlab.org/index.php?title=R%C3%A9cup%C3%A9ration_de_batteries ici]. | ||
}} | }} | ||
| − | {{ | + | {{Materials |
|Material=* A used laptop battery. | |Material=* A used laptop battery. | ||
* A "[http://www.conrad.fr/ce/fr/product/651027/Support-pile-1x-18650-Keystone-1043-montage-THT-L-x-l-x-h-77-x-2065-x-1486-mm lithium-ion battery holder]", if possible with wire. | * A "[http://www.conrad.fr/ce/fr/product/651027/Support-pile-1x-18650-Keystone-1043-montage-THT-L-x-l-x-h-77-x-2065-x-1486-mm lithium-ion battery holder]", if possible with wire. | ||
| Ligne 60 : | Ligne 57 : | ||
'''Note''': Safety equipment is to be worn throughout the realization. | '''Note''': Safety equipment is to be worn throughout the realization. | ||
}} | }} | ||
| − | {{ | + | {{Tuto Step |
| − | |||
| − | |||
| − | |||
| − | |||
| − | |||
|Step_Title=Selection of lithium-ion cells | |Step_Title=Selection of lithium-ion cells | ||
|Step_Content=* Open the computer battery, possibly using the chisel and hammer, while remaining delicate so as not to damage the cells. | |Step_Content=* Open the computer battery, possibly using the chisel and hammer, while remaining delicate so as not to damage the cells. | ||
| Ligne 79 : | Ligne 71 : | ||
1) The '''+''' of the cell is located on the side of the groove on the cell. | 1) The '''+''' of the cell is located on the side of the groove on the cell. | ||
| − | 2) | + | 2) The minimum voltage reached by a discharged lithium-ion cell is 2.5V. If the voltage is lower, it can go to recycling. |
| + | |Step_Picture_00=Powerbank_simple_demontage_2.jpg | ||
| + | |Step_Picture_01=Powerbank_simple_IMG_0952.JPG | ||
| + | |Step_Picture_02=Powerbank_simple_IMG_0953.JPG | ||
| + | |Step_Picture_03=Powerbank_simple_tuto_powerbank.jpg | ||
}} | }} | ||
| − | {{ | + | {{Tuto Step |
| − | |||
|Step_Title=Assembly of components. | |Step_Title=Assembly of components. | ||
| − | |Step_Content=* | + | |Step_Content=* Weld the '''-''' of lithium-ion battery holder to '''+''' of the charge / discharge module. |
| − | * | + | * Proceed in the same way for the '''-'''. |
| − | * | + | * Insert the cell in the "lithium-ion battery holder", respecting the '+' and '-' polarity (at risk of explosion of the cell). |
| − | * | + | * Test the charge and discharge of the cell via usb / mini USB cables: a color code of blue LED (charged) and red (discharged) on the load module allows to know the state of the cell. |
| + | |Step_Picture_00=Powerbank_simple_IMG_0949.JPG | ||
}} | }} | ||
| − | {{ | + | {{Tuto Step |
| + | |Step_Title=Put in the container. | ||
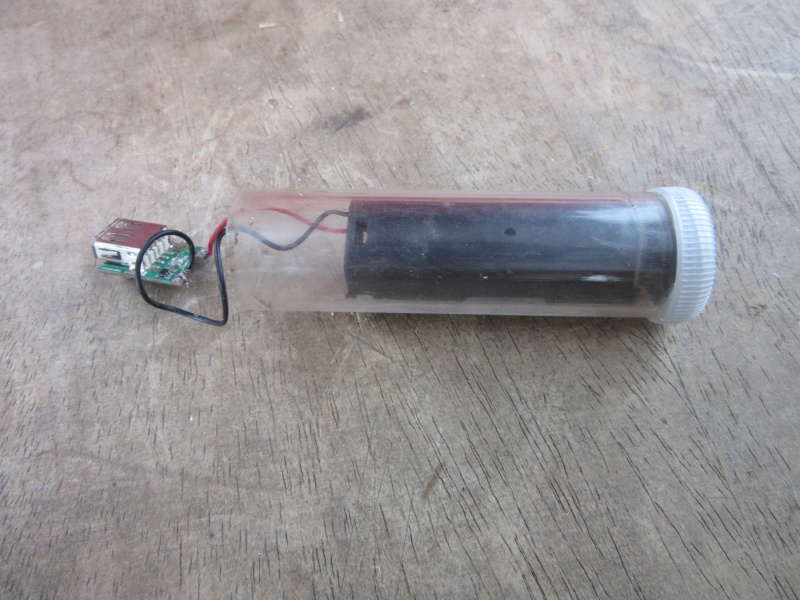
| + | |Step_Content=* Insert the assembly into the chosen container. | ||
|Step_Picture_00=Powerbank_simple_IMG_0955.JPG | |Step_Picture_00=Powerbank_simple_IMG_0955.JPG | ||
|Step_Picture_01=Powerbank_simple_IMG_0956.JPG | |Step_Picture_01=Powerbank_simple_IMG_0956.JPG | ||
|Step_Picture_02=Powerbank_simple_IMG_0957.JPG | |Step_Picture_02=Powerbank_simple_IMG_0957.JPG | ||
| − | |||
| − | |||
}} | }} | ||
| − | {{ | + | {{Tuto Step |
| + | |Step_Title=Use | ||
| + | |Step_Content=* The powerbank can be used in addition to a smartphone battery to double the battery life. | ||
| + | |||
| + | * It can also be used for autonomous lighting. A test carried out with a bulb LED lamp allowed a lighting during 7h. (Power of the lamp to come). | ||
|Step_Picture_00=Powerbank_simple_couverture.jpg | |Step_Picture_00=Powerbank_simple_couverture.jpg | ||
| − | |||
| − | |||
| − | |||
| − | |||
}} | }} | ||
| − | {{ | + | {{Notes |
| − | |Notes=* | + | |Notes=* Tutorial directed by Arnaud Mayaux and Pierre-Alain Lévêque for Nomade des Mers, November 2017. |
* [https://fr.wikipedia.org/wiki/Accumulateur_lithium-ion Lithium-ion, wikipedia] | * [https://fr.wikipedia.org/wiki/Accumulateur_lithium-ion Lithium-ion, wikipedia] | ||
| − | * [https://fr.wikipedia.org/wiki/Recyclage_des_batteries | + | * [https://fr.wikipedia.org/wiki/Recyclage_des_batteries Recycling battery, wikipedia] |
| − | * [http://future.arte.tv/fr/le-lithium-source-dinegalite-et-de-pollution ARTE Future | + | * [http://future.arte.tv/fr/le-lithium-source-dinegalite-et-de-pollution ARTE Future on lithium] |
| − | * [http://www.frandroid.com/actualites-generales/204259_tout-savoir-batteries-mythes-astuces-avenir Informations | + | * [http://www.frandroid.com/actualites-generales/204259_tout-savoir-batteries-mythes-astuces-avenir Informations on lithium-ion cells, frandroid] |
| − | * [https://www.puissanceled.com/Accus_Li-ion | + | * [https://www.puissanceled.com/Accus_Li-ion Caractéristics of lithium-ion cells, puissanceled] |
}} | }} | ||
| − | {{ | + | {{Tuto Status |
| − | |Complete= | + | |Complete=Published |
}} | }} | ||
| + | {{Separator}} | ||
Version actuelle datée du 22 octobre 2019 à 15:08
Description
Powerbank / single external battery for small independent lighting or smartphone charging.
Introduction
This tutorial presents the manufacture of a very simple powerbank allowing the feeding of a small lighting or the charging of a smartphone via a USB socket. It is made from lithium-ion cells recovered from used laptop batteries.
Safety :
Lithium-ion batteries can be particularly dangerous. Their charges and discharges must be protected with a suitable electronic circuit. In addition, short circuiting a cell can cause it to explode: It is therefore imperative to handle them with care: gloves and goggles.
Laptop batteries:
Removable computer batteries are mostly made up of lithium-ion cells in series or parallel with an input charge / discharge regulator. When a battery is faulty, it is very likely that only one of the cells or even just the regulator fails. It is still possible to reuse the others.
Why reuse this type of cells / batteries?
- Storage: This type of technology is currently one of the lightest compared to the amount of energy it can store.
- Environment: 1300T of accumulators are thrown away each year with a forecast at 14000T for 2020. Depending on the country, they end up either in nature, rejecting toxic substances, or part of them for energy-consuming recycling. However, many of the cells are potentially usable as is for a new life.
- Economy: Small local economies can arise from the reuse of lithium-ion cells still usable, for the production of lamps, powerbanks, etc.
Technical data :
The realization of a powerbank from lithium-ion cells requires cell recovery as well as the acquisition of an electronic module charge / discharge. 2 options are available later:
The simplest option (explained in this tutorial) is the use of a single lithium-ion cell. This option requires only to validate the proper functioning of the cell by a voltage test.
The second option is to couple several cells together according to their load capacity. This requires more complex manipulation available ici.
Matériaux
- A used laptop battery.
- A "lithium-ion battery holder", if possible with wire.
- A load / unload module.
- Tin wire.
- A container for the components: here plastic tube / inner tube and bottle cap.
Outils
- Gloves and goggles.
- Chisel / hammer
- Wire stripper.
- Soldering iron.
Note: Safety equipment is to be worn throughout the realization.
Étape 1 - Selection of lithium-ion cells
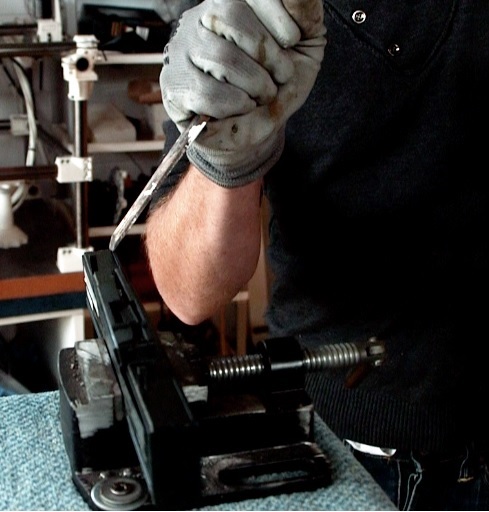
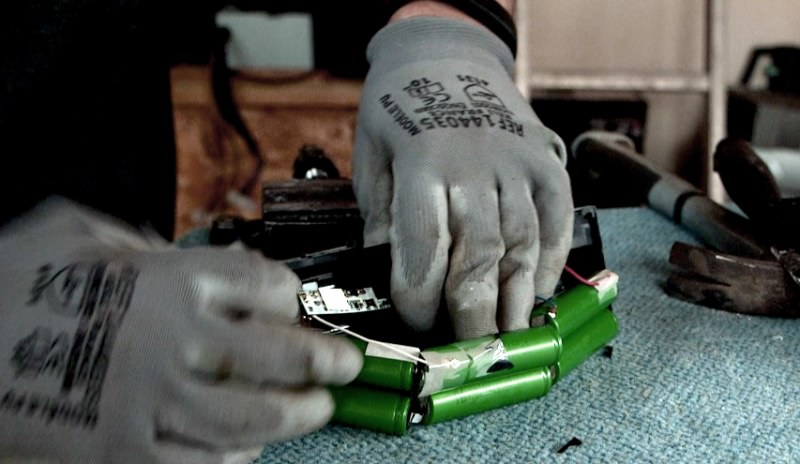
- Open the computer battery, possibly using the chisel and hammer, while remaining delicate so as not to damage the cells.
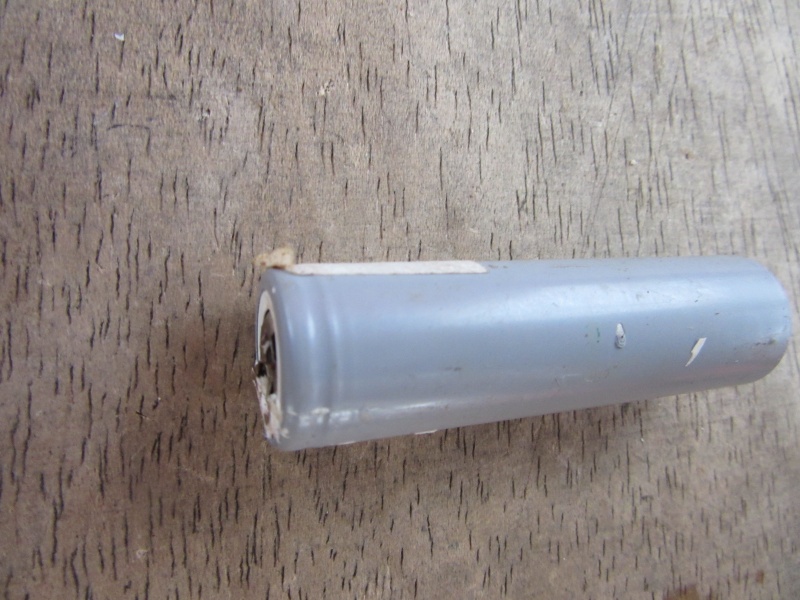
- Separate the cells.
Note: As a safety measure, pay particular attention to the fact that the "+" and -" of cells never come into contact.
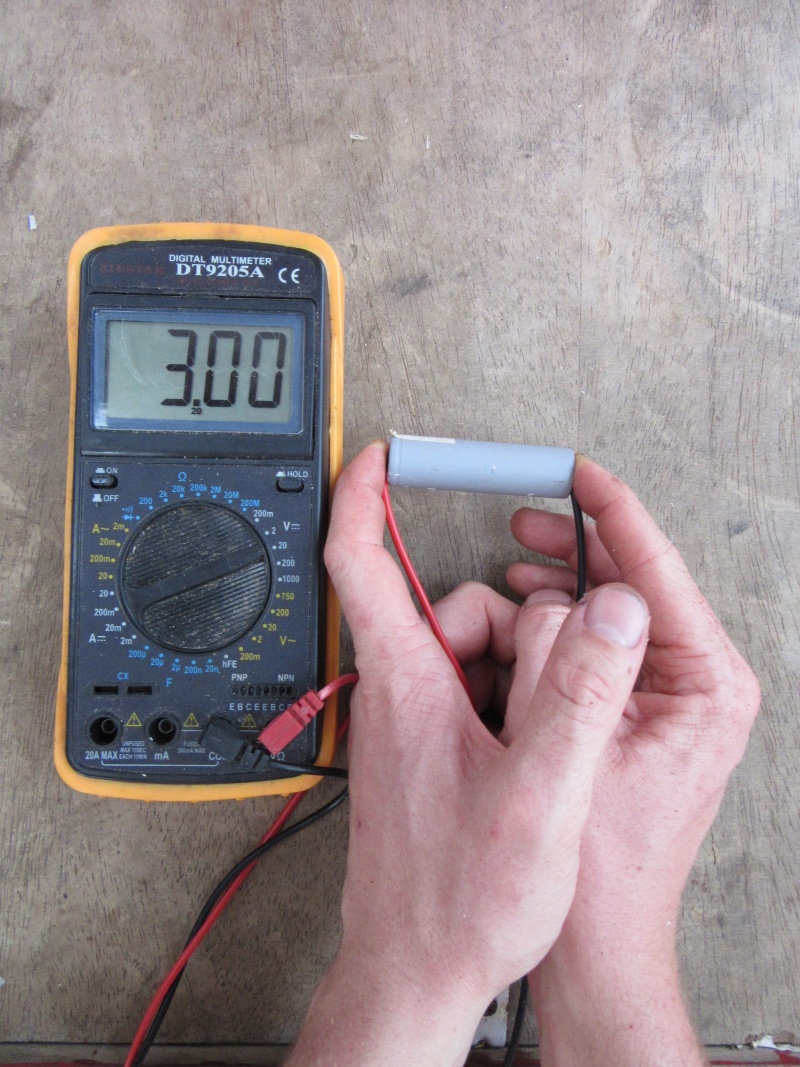
- Using a voltmeter measure the voltage across each cell and keep only those above 2.5V.
Notes:
1) The + of the cell is located on the side of the groove on the cell.
2) The minimum voltage reached by a discharged lithium-ion cell is 2.5V. If the voltage is lower, it can go to recycling.
Étape 2 - Assembly of components.
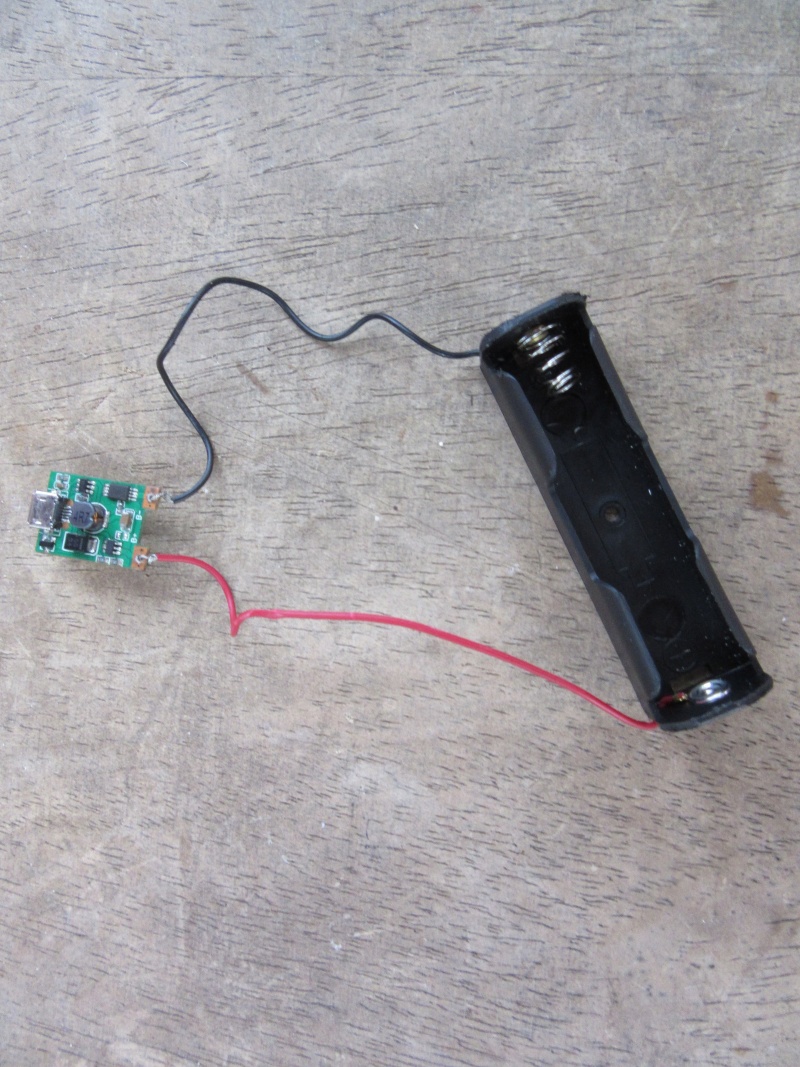
- Weld the - of lithium-ion battery holder to + of the charge / discharge module.
- Proceed in the same way for the -.
- Insert the cell in the "lithium-ion battery holder", respecting the '+' and '-' polarity (at risk of explosion of the cell).
- Test the charge and discharge of the cell via usb / mini USB cables: a color code of blue LED (charged) and red (discharged) on the load module allows to know the state of the cell.
Étape 4 - Use
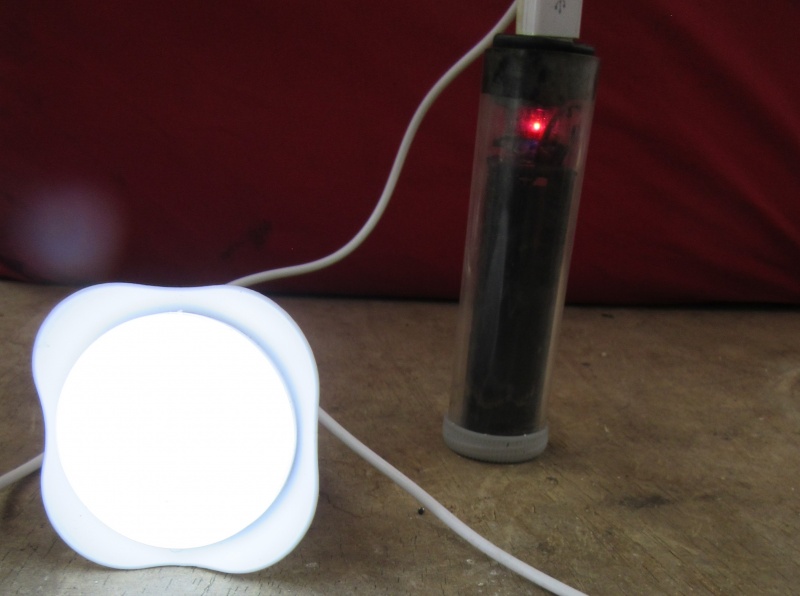
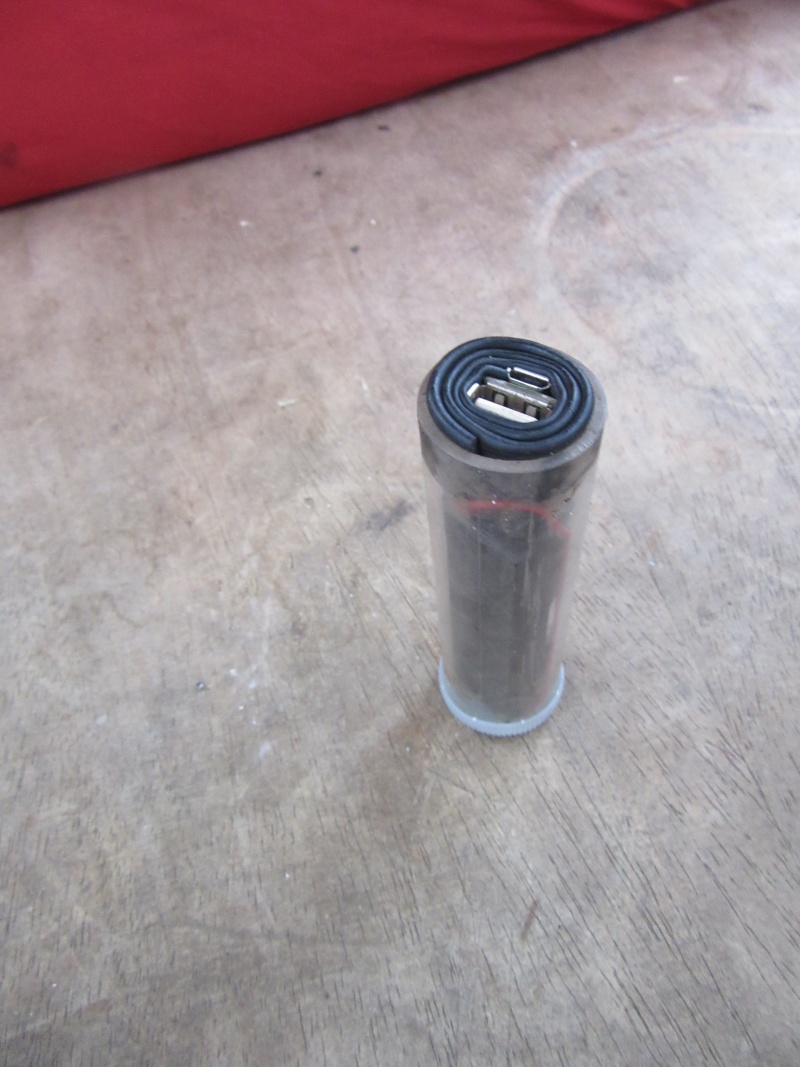
- The powerbank can be used in addition to a smartphone battery to double the battery life.
- It can also be used for autonomous lighting. A test carried out with a bulb LED lamp allowed a lighting during 7h. (Power of the lamp to come).
Notes et références
- Tutorial directed by Arnaud Mayaux and Pierre-Alain Lévêque for Nomade des Mers, November 2017.
- Lithium-ion, wikipedia
- Recycling battery, wikipedia
- ARTE Future on lithium
- Informations on lithium-ion cells, frandroid
- Caractéristics of lithium-ion cells, puissanceled
Published
 Français
 English
 Deutsch
 Español
 Italiano
 Português