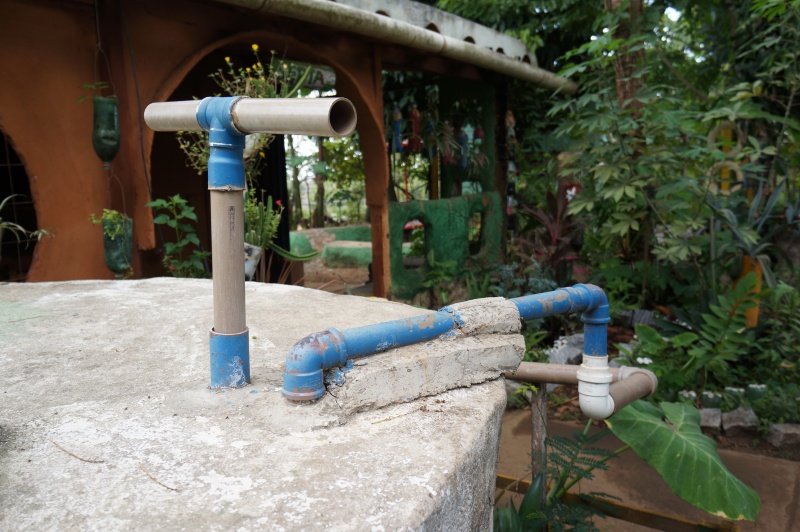
(Page créée avec « Ideally, seal the tubes for maximum efficiency. At SERTA we have set the static part in concrete which forms the cover to the tank. ») |
(Page créée avec « The important things to take into consideration are that the extension tube, where the water goes into the system, should not actually touch the bottom but needs to be wit... ») |
||
| Ligne 102 : | Ligne 102 : | ||
|Step_Content=Ideally, seal the tubes for maximum efficiency. At SERTA we have set the static part in concrete which forms the cover to the tank. | |Step_Content=Ideally, seal the tubes for maximum efficiency. At SERTA we have set the static part in concrete which forms the cover to the tank. | ||
| − | + | The important things to take into consideration are that the extension tube, where the water goes into the system, should not actually touch the bottom but needs to be within sufficient proximity to allow the water at the very bottom to be sucked up and that the whole of the system is fairly rigid to allow a pumping action. | |
Il est conseillé de positionner l'ensemble du système avant de le fixer. | Il est conseillé de positionner l'ensemble du système avant de le fixer. | ||
Version du 24 juillet 2018 à 19:41
Description
The objective of this tutorial is to make a manual pump which can be used for getting water out of a tank.
Introduction
Matériaux
- The parts for the pump mentioned here are all made of PVC:
- 3 adapters 50mm-25mm
- 2 couplings 50mm diameter
- 1 tee 50mm-25mm
- 1 or 2 elbows 25mm (in accordance with requirements for water outlet)
- 1 - 2 metres of 25mm diameter tubing (in accordance with requirements for water outlet)
- 1 - 2 metres tubing 50mm diameter
- 2 (glass) marbles with a diameter greater than 25mm,
- 2 screws 50mm long (minimum)
For the piston:
- 1 - 2 metres of tubing 40mm,
- 1 Tee XXmm-40mm
- 1 x tube cap 40mm (or preferably slightly larger)
- acetone (or similar solvent)
Outils
- Saw
- Electric Drill
- Screwdriver
- PVC glue
- Sandpaper
- Cloth
Étape 1 - Concept
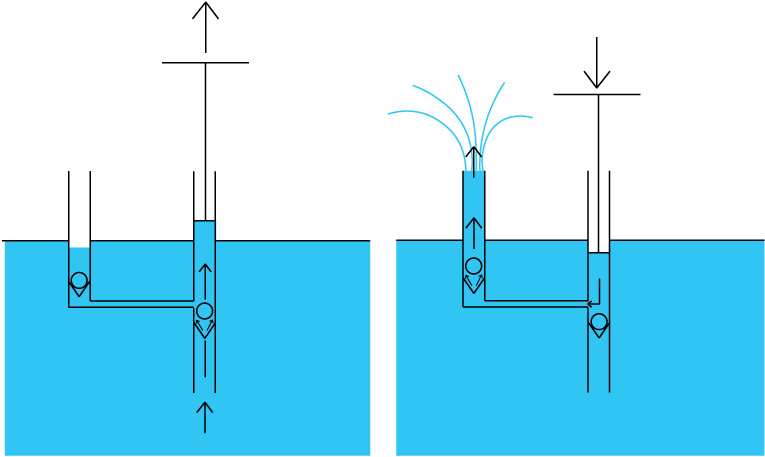
The pump works on a very simple concept.
A vacuum is created when the piston is raised.The other valve is the opposite way round so the water from the outlet is not sucked in.
Pressure is created when the piston is lowered which then closes the non-return valve at the bottom and opens up the other valve. This allows the water is to flow out.
This type of pump is called a ‘displacement pump’.
Étape 2 - Preparation
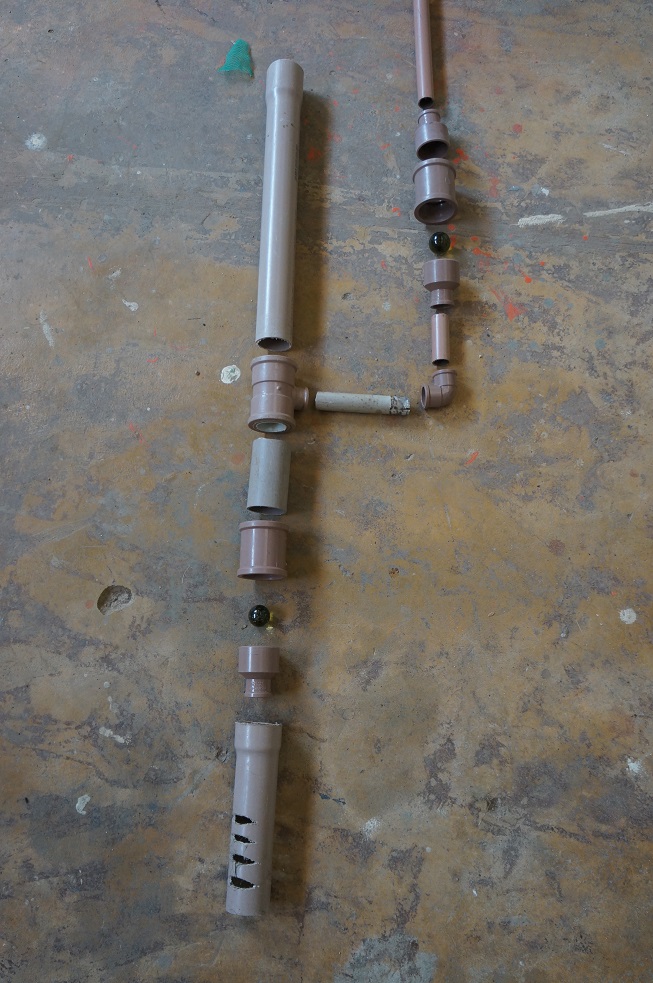
The aim of this step is to check the equipment is in order without gluing the components together.
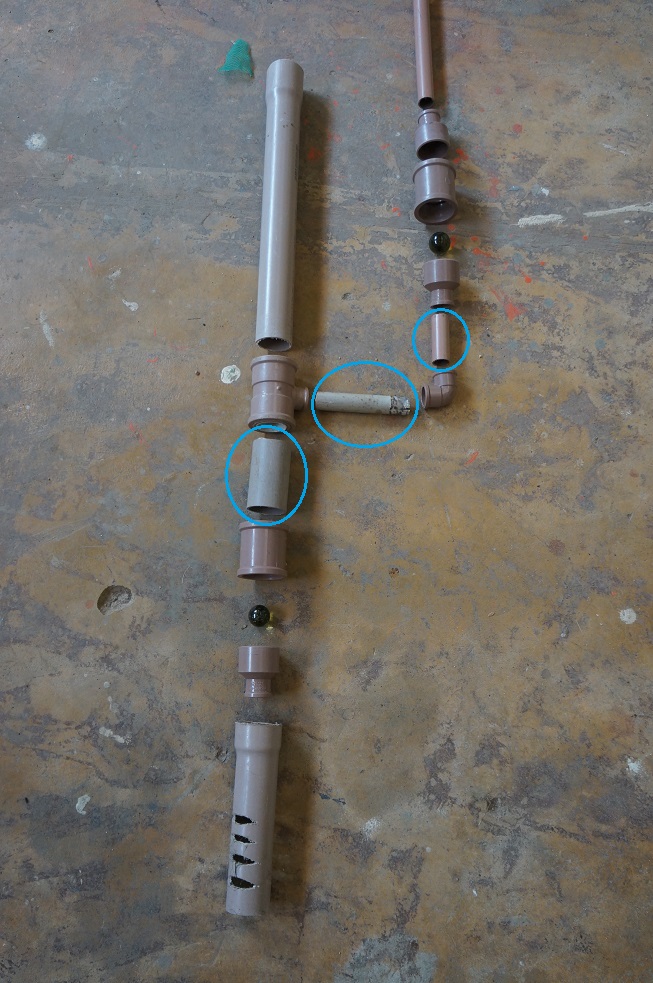
Slot the components together as per the following diagram:
You can even check if it is working or not.
For best results: the areas circled in blue must be as short as possible.
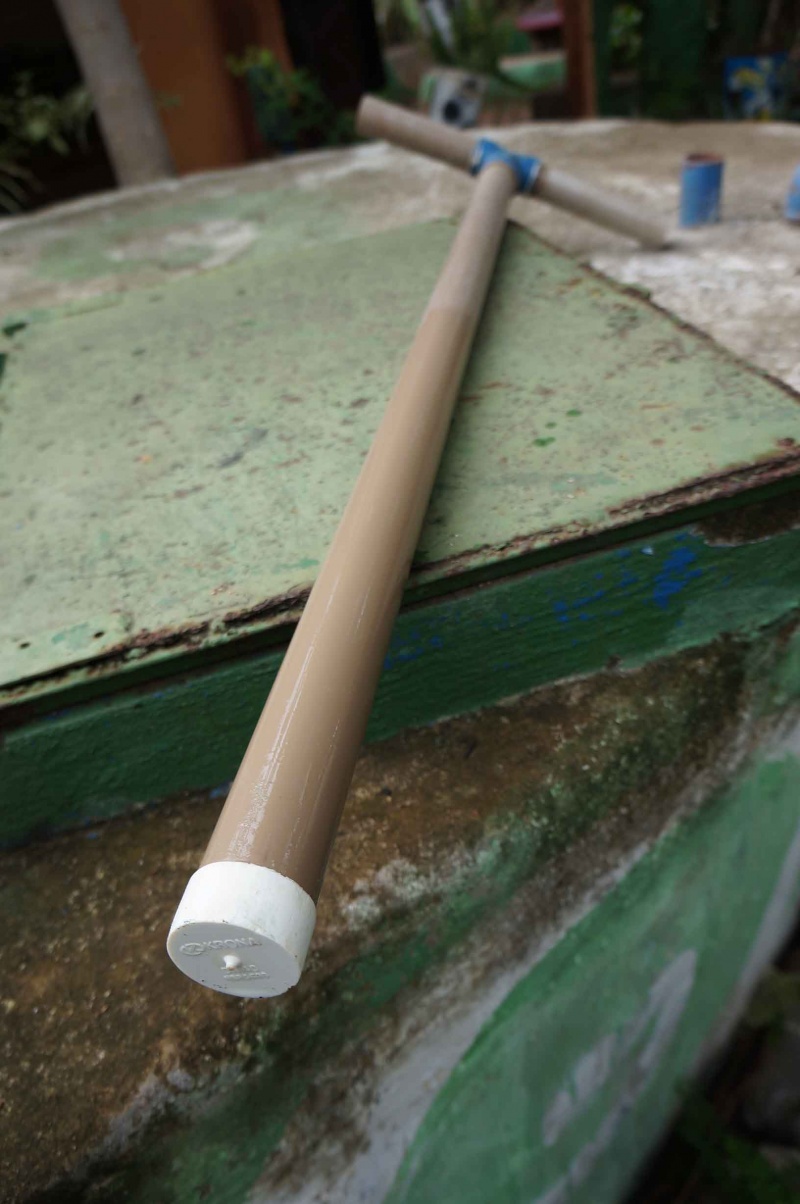
Étape 3 - Assembling the Handle
Once all checks have been completed, you can now start to assemble the components.
All that needs to be done is to glue the parts together using PVC glue and to check if the connections are watertight .
- Gluing instructions:
- Using fine sandpaper, rub down the connecting areas.
- Wipe with cloth soaked in the solvent to clean the area.
- Apply the glue inside of the opening of the female part and all over the male part.
- Immediately slot the two parts into each other without twisting.
- Wipe off any excess glue.
It will take about 1 hour to dry. However, if the water is intended for consumption, it is then advised to wait between 12 and 24 hours for any toxic solvents to disperse.
Étape 4 - Assembling the Pump Body
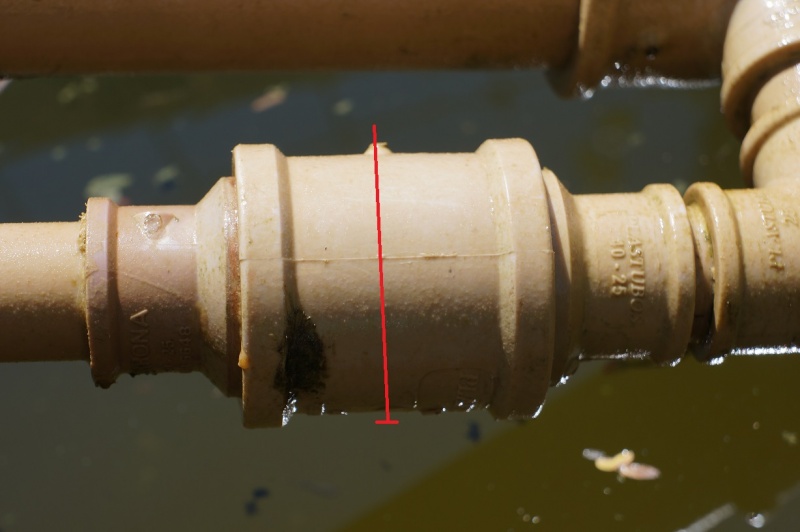
Glue all the parts together and once they have dried, drill a hole in the middle of the 50mm-50mm coupling.
A nail could also be used (see image) by drilling a hole of a smaller diameter.
This allows the marble to be sufficiently elevated to allow the water to flow freely, preventing any obstruction at the other end.
/!\ Take care to ensure that the marble is at the right end!
Étape 5 - Implementation
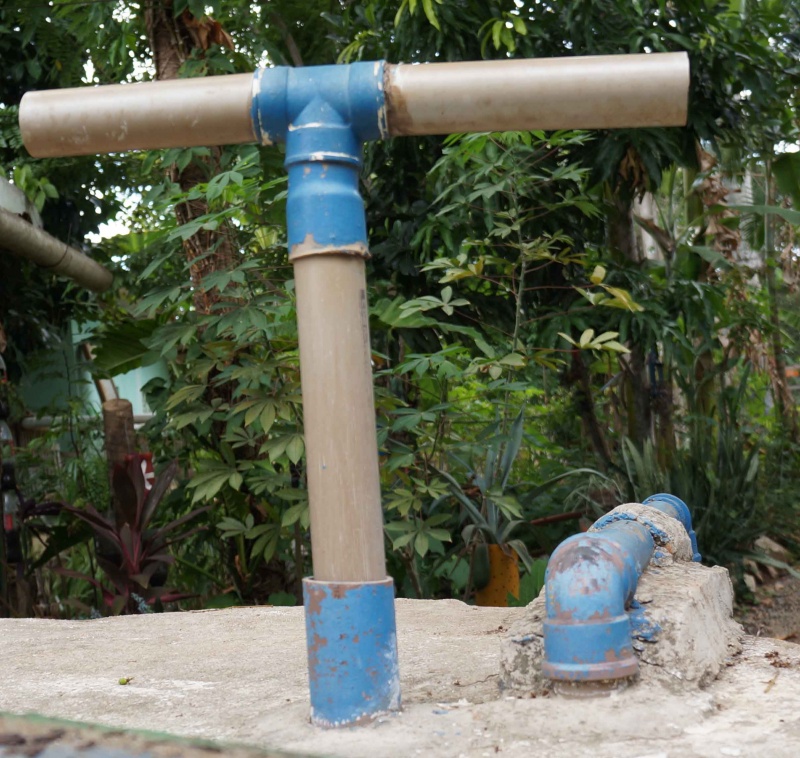
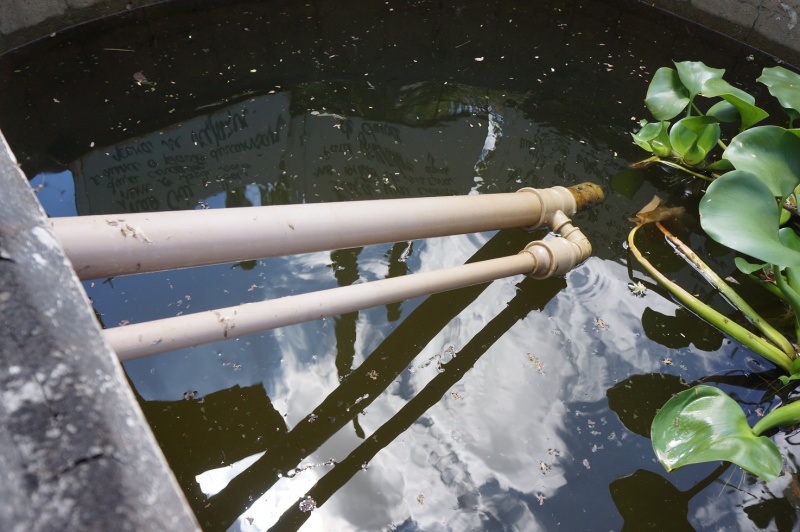
Ideally, seal the tubes for maximum efficiency. At SERTA we have set the static part in concrete which forms the cover to the tank.
The important things to take into consideration are that the extension tube, where the water goes into the system, should not actually touch the bottom but needs to be within sufficient proximity to allow the water at the very bottom to be sucked up and that the whole of the system is fairly rigid to allow a pumping action.
Il est conseillé de positionner l'ensemble du système avant de le fixer.
Notes et références
Système installé au SERTA (Serviço de Tecnologia Alternativa) au Brésil
Améliorations : lier la pompe à une éolienne pour un pompage continu, à un vélo pour une grosse quantité.
Yes
 Français
 English
 Deutsch
 Español
 Italiano
 Português