(Mise à jour pour être en accord avec la nouvelle version de la source de la page) |
(Mise à jour pour être en accord avec la nouvelle version de la source de la page) |
||
| (128 révisions intermédiaires par 2 utilisateurs non affichées) | |||
| Ligne 1 : | Ligne 1 : | ||
{{Tuto Details | {{Tuto Details | ||
|Main_Picture=Conserves_lactofermentées_6.jpg | |Main_Picture=Conserves_lactofermentées_6.jpg | ||
| − | |Licences=Attribution (CC BY) | + | |Licences=Attribution-ShareAlike (CC BY-SA) |
|Description=Preserve your raw vegetables for months with this lacto-fermentation technique. | |Description=Preserve your raw vegetables for months with this lacto-fermentation technique. | ||
|Area=Food, Health | |Area=Food, Health | ||
| Ligne 10 : | Ligne 10 : | ||
|Cost=0 | |Cost=0 | ||
|Currency=EUR (€) | |Currency=EUR (€) | ||
| − | |Tags=lactique, fermenté, conserve, lactofermentation, conservation, fruit, légume, acide, bocaux, bocal, Low-tech Tour France, NomadeDesMers | + | |Tags=lactique, fermenté, conserve, lactofermentation, conservation, fruit, légume, acide, bocaux, bocal, Low-tech Tour France, NomadeDesMers, probiotique |
|SourceLanguage=fr | |SourceLanguage=fr | ||
|Language=en | |Language=en | ||
| Ligne 20 : | Ligne 20 : | ||
The aim is to easily preserve surplus vegetables for long-term storage, whether from your vegetable patch (in Summer for example), or because you have bought more vegetables than you needed. | The aim is to easily preserve surplus vegetables for long-term storage, whether from your vegetable patch (in Summer for example), or because you have bought more vegetables than you needed. | ||
| − | Key facts on food wastage | + | '''Key facts on food wastage''' |
* 1/3 of food produced around the world goes off or is wasted | * 1/3 of food produced around the world goes off or is wasted | ||
| Ligne 27 : | Ligne 27 : | ||
* 19 % of fruit and 31% of vegetables are wasted, making these the produce we waste the most | * 19 % of fruit and 31% of vegetables are wasted, making these the produce we waste the most | ||
| − | What is lacto-fermentation, or lactic acid fermentation? | + | '''What is lacto-fermentation, or lactic acid fermentation?''' |
Lacto-fermentation is the conversion of sugars into lactic acid by lactic acid bacteria (naturally present specific microorganisms). | Lacto-fermentation is the conversion of sugars into lactic acid by lactic acid bacteria (naturally present specific microorganisms). | ||
| Ligne 86 : | Ligne 86 : | ||
|Tuto_Attachments={{Tuto Attachments | |Tuto_Attachments={{Tuto Attachments | ||
|Attachment=Conserves_lactoferment_es_7_ForumClimat_Lacto-fermentation_VF_2_.pdf | |Attachment=Conserves_lactoferment_es_7_ForumClimat_Lacto-fermentation_VF_2_.pdf | ||
| − | |||
| − | |||
}} | }} | ||
|ExternalAttachmentsLinks={{ExternalAttachmentsLinks}} | |ExternalAttachmentsLinks={{ExternalAttachmentsLinks}} | ||
| Ligne 93 : | Ligne 91 : | ||
{{Tuto Step | {{Tuto Step | ||
|Step_Title=Preparing the vegetables: | |Step_Title=Preparing the vegetables: | ||
| − | |Step_Content=* Peel and wash the vegetables carefully | + | |Step_Content=<div class="mw-translate-fuzzy"> |
| + | * Peel and wash the vegetables carefully | ||
* Depending on preference, grate or cut them into dice or strips. | * Depending on preference, grate or cut them into dice or strips. | ||
* Leave those vegetables which are usually left whole as they are, following washing (e.g green beans). | * Leave those vegetables which are usually left whole as they are, following washing (e.g green beans). | ||
| + | </div> | ||
|Step_Picture_00=Conserves_lactofermentées_1.JPG | |Step_Picture_00=Conserves_lactofermentées_1.JPG | ||
|Step_Picture_01=Conserves_lactofermentées_2.JPG | |Step_Picture_01=Conserves_lactofermentées_2.JPG | ||
| Ligne 103 : | Ligne 103 : | ||
|Step_Title=Preparing the jars: | |Step_Title=Preparing the jars: | ||
|Step_Content=* Clean the jars carefully | |Step_Content=* Clean the jars carefully | ||
| + | * Carefully select and wash the weight that will be used to hold the vegetables under the liquid. | ||
| + | |||
| + | Here's an article to help you choose your weights: https://academiefermentation.com/les-meilleurs-poids-pour-les-fermentations/ | ||
|Step_Picture_00=Conserves_lactofermentées_bocaux.jpg | |Step_Picture_00=Conserves_lactofermentées_bocaux.jpg | ||
}} | }} | ||
{{Tuto Step | {{Tuto Step | ||
|Step_Title=Preserving grated or cut up vegetables: | |Step_Title=Preserving grated or cut up vegetables: | ||
| − | |Step_Content= | + | |Step_Content=* Ensure your hands are clean |
| − | * Ensure your hands are clean | ||
* Place a first layer of vegetables at the bottom of the jar (2cm) | * Place a first layer of vegetables at the bottom of the jar (2cm) | ||
| − | * Sprinkle with a pinch of salt | + | * Sprinkle with a pinch of salt (The principle being 1-2% of the weight of the vegetables in salt) |
| + | *If you make a brine (salted water), the principle is 3% salt in the water. For vegetables this varies from 15g/50cl to 25g/50cl (more salt for vegetables that naturally contain more water). | ||
* Press the layer of vegetables down with your hands | * Press the layer of vegetables down with your hands | ||
| + | |||
Note: Pressing down allows for the salt to penetrate the vegetables so as to encourage the extraction of juices and get rid of air | Note: Pressing down allows for the salt to penetrate the vegetables so as to encourage the extraction of juices and get rid of air | ||
| − | |||
| − | |||
| − | |||
| − | |||
| − | |||
| − | |||
| − | |||
| − | |||
| − | |||
| − | * | + | *Repeat the procedure until the jar is full |
| − | * | + | *Leave a gap of 1 to 2 cm between the last layer of vegetables and the lid, as fermentation produces gas and the juices may overflow if the jar is too full |
| − | * | + | *Make sure that all the vegetables are covered with their juice up to the top of the jar: it is this juice that guarantees anaerobiosis, the absence of oxygen. If necessary, you can add a weight (made of glass, a plastic bag filled with water, or a cabbage leaf or carrot stick) to keep the vegetables under the liquid. |
| − | * | + | *Close the jar and place on a plate (the gas may cause some of the liquid to overflow). |
| − | * | + | *Leave in the house for 3 days to allow the naturally-occurring lactic ferments to start fermenting. Depending on the vegetables and their size (the smaller the pieces, the faster the fermentation), it is recommended that you leave to ferment for between 7 days and a month. |
| − | * | + | *We recommend that you leave the jars to ferment and then store them in a cool, dark place. They can be kept for over a year as long as the jar is not opened. |
|Step_Picture_00=Conserves_lactofermentées_4.JPG | |Step_Picture_00=Conserves_lactofermentées_4.JPG | ||
|Step_Picture_01=Conserves_lactofermentées_5.JPG | |Step_Picture_01=Conserves_lactofermentées_5.JPG | ||
}} | }} | ||
{{Tuto Step | {{Tuto Step | ||
| − | |Step_Title= | + | |Step_Title=Canning whole vegetables |
| − | |Step_Content= | + | |Step_Content=*Fill the jar with as many vegetables as possible. |
| − | * Fill the jar with as many vegetables as possible | + | *Add salted water (3% of the weight in water, i.e. between 15g/50cl and 25g/50cl depending on the amount of water naturally present in the vegetable). |
| − | * Add | + | *Make sure that all the vegetables are covered with water right to the top of the jar. It is the water that guarantees anaerobiosis, the absence of oxygen. If necessary, you can add a weight (in glass, a plastic bag filled with water, or a cabbage leaf or carrot stick) to keep the vegetables under the liquid. |
| − | * | + | *Close and place a plate in case any liquid escapes with a little gas. |
| − | * Close | + | *Leave for 3 days in the house to allow the naturally-occurring lactic ferments to start fermenting. Depending on the vegetables and their size (the smaller the pieces, the faster the fermentation), it is recommended that you leave to ferment for between 7 days and a month. |
| − | * Leave | + | *We recommend that you leave the jars to ferment and then store them in a cool, dark place. They can be kept for over a year as long as the jar is not opened. |
| − | |||
}} | }} | ||
{{Tuto Step | {{Tuto Step | ||
| − | |Step_Title=< | + | |Step_Title=Guide to cured meats and fermentation times |
| − | + | |Step_Content=<br />{{#annotatedImageLight:Fichier:Conserves lactofermentees Guide.png|0=897px|hash=|jsondata=|mediaClass=Image|type=frameless|align=center|src=https://wiki.lowtechlab.org/images/d/d8/Conserves_lactofermentees_Guide.png|href=./Fichier:Conserves lactofermentees Guide.png|resource=./Fichier:Conserves lactofermentees Guide.png|caption=|size=897px}}And NiCruNiCuit's recipe for olives : https://nicrunicuit.com/faire/fermenter/comment-faire-ses-olives-en-saumure/ | |
| − | + | ||
| − | | | + | And finally, ''confit'' garlic, lacto-fermented: https://nicrunicuit.com/faire/fermenter/comment-faire-de-lail-confit-en-saumure-alias-ail-lacto-fermente/ |
| − | + | ||
| − | + | Some ideas for associations : | |
| − | |||
| − | * | + | *Beetroot, garlic, carrots and celery |
| − | * | + | *Turnip and wild garlic |
| − | * | + | *Spinach and pepper |
| − | * | + | *Tabasco pepper sauce |
| − | *Aubergine, | + | *Aubergine, garlic, sesame and thyme -> NiCruNiCuit's famous fermented aubergine caviar! |
| − | + | You can also '''preserve vegetables in [https://nicrunicuit.com/aide/conseils/legumes-au-sel-ou-legumes-en-saumure-telle-est-la-question/ salt directly]''' (fermenting lemons and cabbage in this way) or in '''oil'''. But be careful with the latter: if the vegetables have not been dehydrated or fermented beforehand, there is a very real risk of poisoning, and even death from botulism! https://nicrunicuit.com/sante/le-danger-des-legumes-mis-directement-dans-lhuile/ | |
}} | }} | ||
{{Tuto Step | {{Tuto Step | ||
| − | |Step_Title=Consumption | + | |Step_Title=Consumption |
| − | |Step_Content= | + | |Step_Content=*A jar can be opened and eaten over several days without any problem, although it's a good idea to size the jars according to the number of people in the household. |
| − | * A jar | + | *Use lacto-fermented vegetables a little every day to get the most out of them (see intro). |
| − | * | + | *To avoid contamination, it is advisable to remove the fermented vegetables with a clean lid and not to empty the juice (this helps with preservation). Once opened, the jar does not have to be placed in the fridge. |
| − | ( | + | |
| − | + | Here's an article from NiCruNiCuit about lacto-fermented vegetable juices. Either juice your lacto-fermented vegetables or follow these tips: https://nicrunicuit.com/faire/fermenter/jus-de-legumes-lacto-fermentes/ | |
}} | }} | ||
{{Tuto Step | {{Tuto Step | ||
| − | |Step_Title= | + | |Step_Title=Milk fermentation of Jerusalem artichokes |
| − | |Step_Content= | + | |Step_Content=How do you eat this sometimes difficult-to-digest vegetable? By lacto-fermenting it! Jerusalem artichokes are delicious when lacto-fermented (3 months). It has the particularity of becoming very soft, and can almost become mushy if not handled with care. |
| + | It is 85% inulin. Inulin is a polysaccharide, or "complex sugar", meaning several simple sugars agglomerated together (fructose specifically, unlike starch, found in potatoes for example, which is made up of glucose). | ||
| − | + | These polysaccharides are called fibres, and they are essential to our health. The problem is that we can't digest them! | |
| − | + | In fact, when we eat fibre, we're not feeding ourselves directly, we're feeding the bacteria in our intestines, which will break down these complex sugars into simple sugars that we can easily digest, and into ‘short-chain’ fatty acids, which are excellent for our health, especially for regulating our immune system. Quite simply, they protect us from infections and disease in general. | |
| + | These fibre-loving intestinal bacteria (known as ‘firmicutes’) are good for us, creating a balance that keeps us happy and healthy. When we don't eat enough fibre and instead eat a diet high in saturated fats and refined sugar, we starve them, and feed another type of bacteria, the ‘bacteroidetes’, which are associated with just about every chronic disease we have today: obesity, diabetes, depression, Alzheimer's, hypertension, etc. | ||
| − | + | When you ferment Jerusalem artichokes, you create the same process, but in the jar: you avoid flatulence and you enjoy your meal. | |
| − | + | But if you ferment them for too long (1 year in this case), they become too acidic. [https://www.instagram.com/luna_kyung_/ @luna_kyung_] gives us the solution on her blog with her recipe for lacto-fermented Jerusalem artichoke with seaweed and toasted sesame, which you can find by typing ‘diogenic Jerusalem artichoke’ into Google. The use of a little sugar (acidity corrector) and sesame oil restores the balance for a delicious result! | |
| − | + | }} | |
| − | + | {{Tuto Step | |
| + | |Step_Title=Lacto-fermented fruit and vegetable leathers | ||
| + | |Step_Content=One idea for using lacto-fermented fruit and vegetables is to eat them in small quantities to flavour a salad, soup, pasta, etc. You can also dehydrate them into crisps if they're fine enough, or puree them and then dehydrate them into "leather", i.e. a thin layer that can be rolled into sticks, lollipops, cut up and assembled to make surprising shapes or containers. This dehydrated form concentrates the flavours and gives a material that is easy to transport, particularly for snacks. | ||
| + | Here's an extract from the book Délices déshydratés by Linda Louis, which contains several recipes for (non-fermented) leathers to give you some ideas. If you don't have a dehydrator, you can make leathers in the oven. Linda Louis is the author of several reference books on organic, local and wild cuisine, and has several books on fermentations. Don't hesitate to read her books! | ||
| − | + | https://www.laplage.fr/produit/377/9782383381334/delices-deshydratees | |
| − | + | |Step_Picture_00=Conserves_lactoferment_es_20220826_145332.jpg | |
| − | + | |Step_Picture_01=Conserves_lactoferment_es_20220826_145533.jpg | |
| − | | | + | |Step_Picture_02=Conserves_lactoferment_es_20220826_145558.jpg |
| − | | | ||
| − | | | ||
}} | }} | ||
{{Tuto Step | {{Tuto Step | ||
|Step_Title=Kimchi recipe | |Step_Title=Kimchi recipe | ||
| − | |Step_Content= | + | |Step_Content=Kimchi is a traditional Korean recipe. It is based on the lacto-fermentation of cabbage and spices. |
| − | * 2 kg | + | * 2 kg Chinese cabbage |
| − | * 2 | + | * 2 leeks |
| − | * 1/2 | + | * 1/2 long turnip |
| − | * 3 | + | * 3 cloves garlic, chopped |
| − | * 2 | + | * 2 teaspoons finely grated fresh ginger |
| − | * 1 | + | * 1 or 2 teaspoons fish sauce (optional) |
| − | * 1 | + | * 1 tablespoon chopped chilli pepper |
| − | * 1 | + | * 1 tbsp toasted sesame seeds |
| − | * 1 | + | * 1 tablespoon sugar |
| − | * 100 | + | * 100 to 160g coarse salt |
| − | # | + | # Cut the cabbage lengthways into strips and place in a bowl of warm salted water. Sprinkle the cabbage with coarse salt (put it between each leaf). Leave to rest and drain overnight. |
| − | # | + | # The next day, rinse the cabbage strips in water and drain. In a separate bowl: Cut the turnip and leeks into thin strips about 5 cm long. |
| − | # | + | # Mix the ingredients for the spice paste: ginger, chilli pepper, garlic, sugar and fish sauce. Everything must be peeled or grated to make the paste. Spread the paste between the cabbage leaves. Place the cabbage pieces in a large bowl. Sprinkle with a little toasted sesame seeds. |
| − | # | + | # Place a lid or plate on the container, or close it tightly. Wait 4 to 5 days for the kimchi to ferment. It should be eaten within a few days of opening the jar and can be kept for around three weeks in the fridge. |
|Step_Picture_00=Conserves_lactofermentées_kimchi_4.jpg | |Step_Picture_00=Conserves_lactofermentées_kimchi_4.jpg | ||
|Step_Picture_01=Conserves_lactofermentées_Kimchi1.jpg | |Step_Picture_01=Conserves_lactofermentées_Kimchi1.jpg | ||
}} | }} | ||
{{Tuto Step | {{Tuto Step | ||
| − | |Step_Title= | + | |Step_Title=Recipe for Nukazuké |
| − | |Step_Content= | + | |Step_Content=Vegetables fermented in a rice bran paste (but in Europe it's easier to do it with wheat bran). This product works in a similar way to sourdough, so you need to take care of it every day over the long term. |
| − | <u> | + | <u>For 2 people: </u> |
| − | * | + | * The equivalent of 100g of sliced vegetables (e.g. aubergines, carrots, turnips, cucumber, radishes, courgettes, onions, etc.) |
| − | * 130-140g | + | * 130-140g salt (13-14% of the weight in rice bran) |
| − | * 1L | + | * 1L water (weight of rice bran equals weight of water) |
| − | * 1kg | + | * 1kg white rice |
| − | + | Before starting, rinse the vegetables well and thoroughly clean the inside of the containers, removing any white film (mycoderma). Pour the water, salt and bran into a wooden tub or large stoneware pot. Mix thoroughly until you obtain a paste with a barely fluid consistency. Rub the vegetables with the salt (pressing hard) and then immerse them in the paste for 2-3 days. After 12 hours, the vegetables will already have developed a slight flavour. Depending on the temperature, the vegetables will be ready in 1-2 days (especially in summer). The vegetables should be slightly soft to the touch. Rinse them of the paste and cut them before eating. The paste remains active for a very long time as long as you stir it every day once the vegetables have been taken out. During fermentation, the vegetables lose some of their water to the paste, but you may need to add a little bran and salt (or even a little water in summer) to maintain the optimum consistency. If the bran has been obtained from an old grind, remember to heat it dry in a pan without toasting it, to destroy any germs that may be developing. | |
|Step_Picture_00=Conserves_lactoferment_es_Nukazuke.jpg | |Step_Picture_00=Conserves_lactoferment_es_Nukazuke.jpg | ||
}} | }} | ||
{{Tuto Step | {{Tuto Step | ||
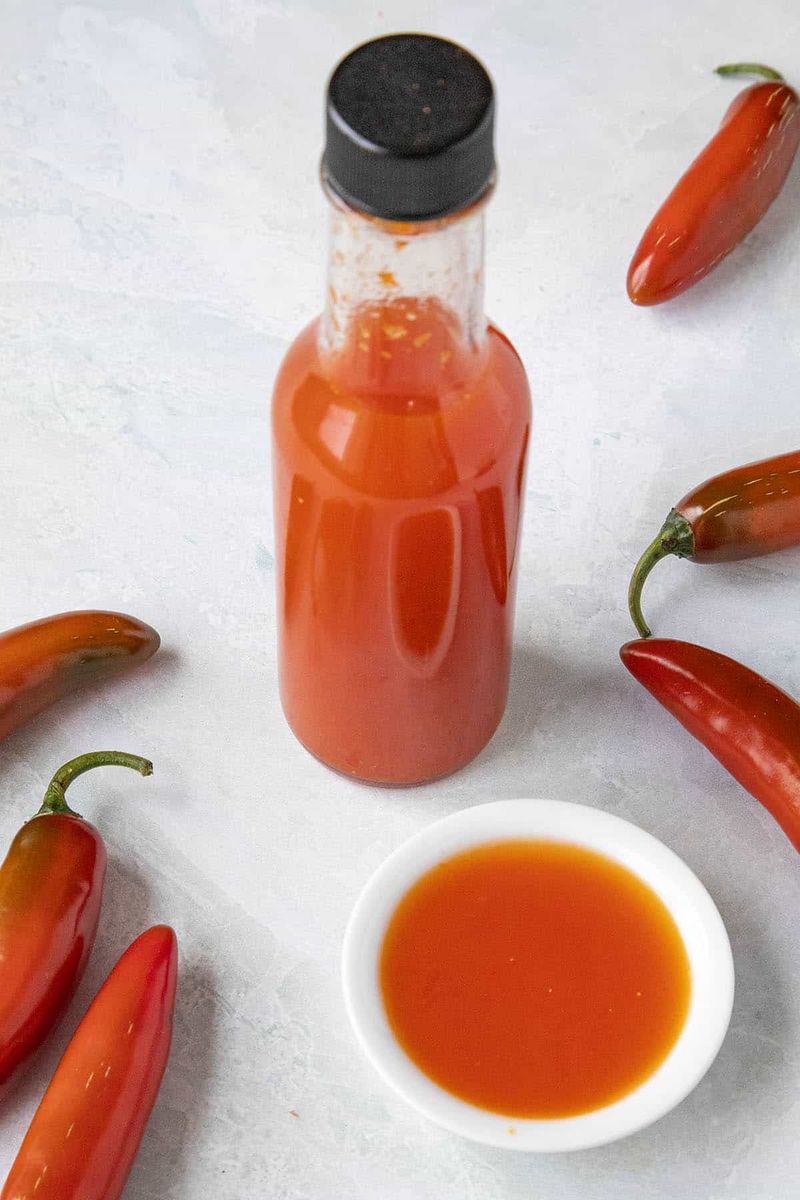
| − | |Step_Title= | + | |Step_Title=Tabasco-type lacto-fermented hot sauce |
| − | |Step_Content= | + | |Step_Content=Ingredients: |
| − | *500g | + | *500g jalapenos |
| − | *2cm | + | *2cm fresh ginger root |
| − | *5 | + | *5 cloves garlic |
| − | *( | + | *(optional: peppers or aubergines for sweetness and flavour) |
| − | *( | + | *(optional: onions) |
| − | *( | + | *(optional: citrus fruits for sweet and sour) |
| − | * | + | *Brine 10g/50cl |
| − | + | Wash and seed the chillies (watch out for the chemical burn on your fingers!). If you want a very hot sauce, leave a few seeds. Chop the other ingredients finely and place in a jar. Cover with brine, keep the vegetables under the liquid with a weight and leave to ferment for 1 to 2 weeks. Once fermented, blend and bottle. | |
| − | + | It can be stored at room temperature or in the fridge for several months. | |
|Step_Picture_00=Conserves_lactoferment_es_hot_sauce.jpg | |Step_Picture_00=Conserves_lactoferment_es_hot_sauce.jpg | ||
}} | }} | ||
{{Tuto Step | {{Tuto Step | ||
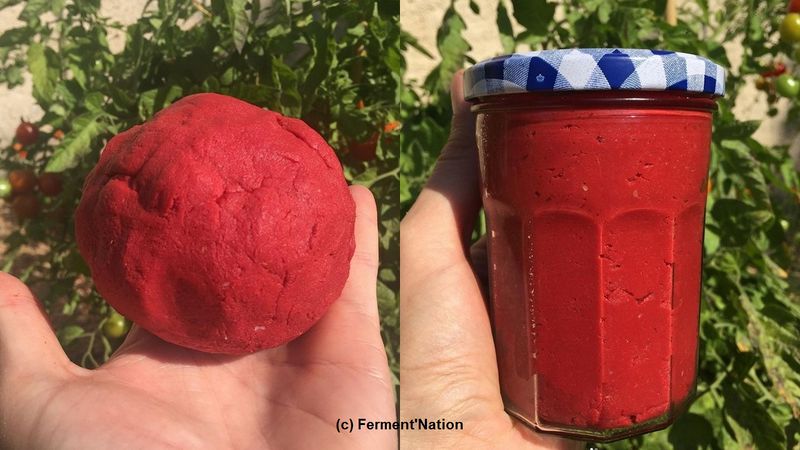
| − | |Step_Title= | + | |Step_Title=Lacto-fermented tomato concentrate |
| − | |Step_Content=[https://www.instagram.com/p/B2rFUvZioKQ/ | + | |Step_Content=[https://www.instagram.com/p/B2rFUvZioKQ/ Traditional Italian recipe by Ferment'Nation] |
| − | 7kg | + | 7kg of tomatoes in this small 400g jar, and no cooking. A great way to preserve tomatoes, with all their vitamins and probiotics, for the winter, and without refrigeration. |
| − | + | Just the tip of a knife is all it takes to flavour a dish! | |
| − | ''' | + | '''Recipe:''' |
| − | * | + | *Fill a large bowl with tomatoes (leave some room, the mixture will swell a little) and crush them with your hands. |
| − | * | + | *Cover with a cloth and stir twice a day, submerging the floating parts (if there's a little white mould, it's not a problem), for 4 to 5 days, until the mixture no longer bubbles. |
| − | * | + | *Collect the solid parts (which will have separated from the water and floated to the surface) and grind them (with small holes) to remove the seeds and skin. |
| − | * | + | *Put the pulp in a cloth, close it like a bag with a string and hang it up for a day to let the juice run off. Then place the bag (still closed) between two boards with a weight on top to extract the remaining water for a few days, removing the water every day until no more runs out. |
| − | * | + | *Place the dough in a bowl and add 25% of its weight in salt. After a few hours, knead the ball again and it's ready! |
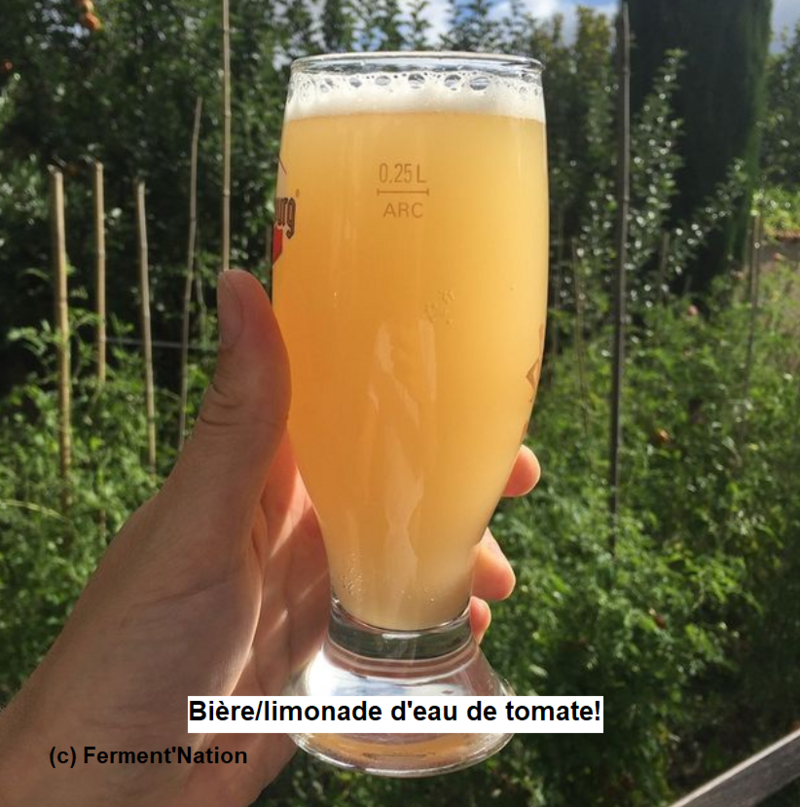
| − | + | Tomato water has a very strong taste, but you can drink it without any problem, as it's a concentrate of probiotics. Some people even add kefir to develop more bubbles. It can be sweet or savoury. --> [https://www.instagram.com/p/CEMrLT5IttV/ Here's an example of Ferment'Nation's ‘tomato water beer/lemonade’ (photo)] | |
| − | + | You can find out more about this recipe in Sandor Katz's excellent book Fermentations! | |
| − | |Step_Picture_00= | + | |Step_Picture_00=Concentr_de_tomate_lactoferment_.jpg |
| + | |Step_Picture_01=eau_tomate_ferment_es.png | ||
}} | }} | ||
{{Tuto Step | {{Tuto Step | ||
| − | |Step_Title= | + | |Step_Title=Lacto-fermented Chips |
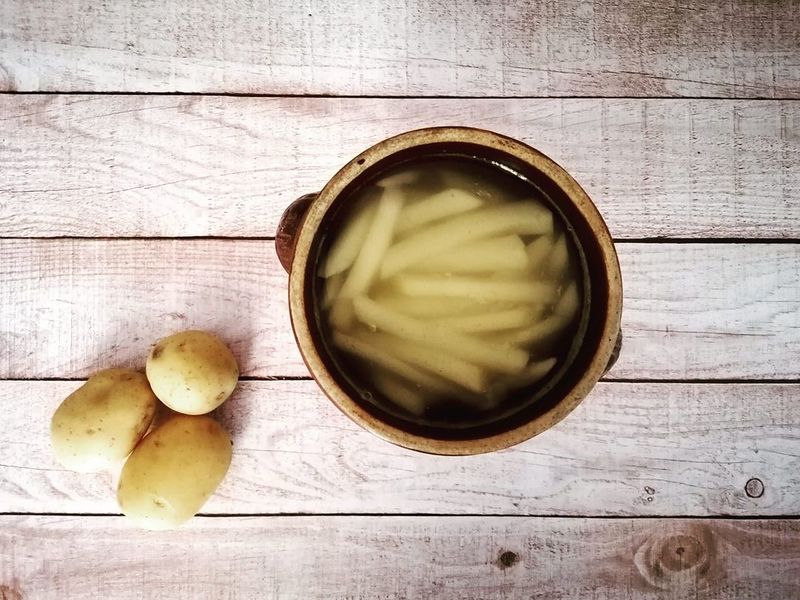
| − | |Step_Content= | + | |Step_Content=It is not normally advisable to ferment potatoes as they tend to ferment alcohol. However, if the fermentation is short, it is quite possible to lacto-ferment them, which gives them a light acidic flavour that is absolutely delicious when cooked. The name of the recipe is ‘chips’, but you can cook them any way you like: mashed, steamed, pan-fried, fried, etc. |
| − | + | Cut the potatoes into chips, removing the skin (to avoid an earthy flavour). | |
| − | + | Add brine at 15g of salt per 50cl or re-use brine from an old lacto-fermentation process. Use a weight to ensure that the pieces are well submerged. | |
| − | + | Leave to ferment for between 24 and 72 hours (48 hours seems ideal according to some feedback). Rinse the chips and cook. | |
| − | + | Ideal with mustard sauce or ketchup (fermented of course!) | |
| − | (c) Photo | + | (c) Photo from Katarzyna Fedorowics |
|Step_Picture_00=Conserves_lactoferment_es_frites_lacto.jpg | |Step_Picture_00=Conserves_lactoferment_es_frites_lacto.jpg | ||
}} | }} | ||
{{Tuto Step | {{Tuto Step | ||
| − | |Step_Title= | + | |Step_Title=Preserving aromatic herbs by lacto-fermentation |
| − | |Step_Content= | + | |Step_Content=It is rarely advisable to preserve aromatic herbs by lacto-fermentation, as their consistency quickly becomes soft. However, if you then want to use them in sauces, this poses no problem. |
| − | + | Roughly chop the aromatic herbs, crush them a little in a mortar with the garlic and a little chilli and salt, then cover them with the fermented vegetable brine (or water with 15g of salt for 50cl). Leave to ferment for 2 weeks at room temperature, then store the jar in a cool place. | |
| − | + | In particular, you can use these lacto-fermented herbs to make a delicious pesto that will keep longer than fresh (unpasteurised) pesto. Here's a sample recipe from myfermentpassion: https://www.instagram.com/p/CQEYrhhspFf/ | |
}} | }} | ||
{{Tuto Step | {{Tuto Step | ||
| − | |Step_Title= | + | |Step_Title=Lacto-fermented ketchup and mustard sauces |
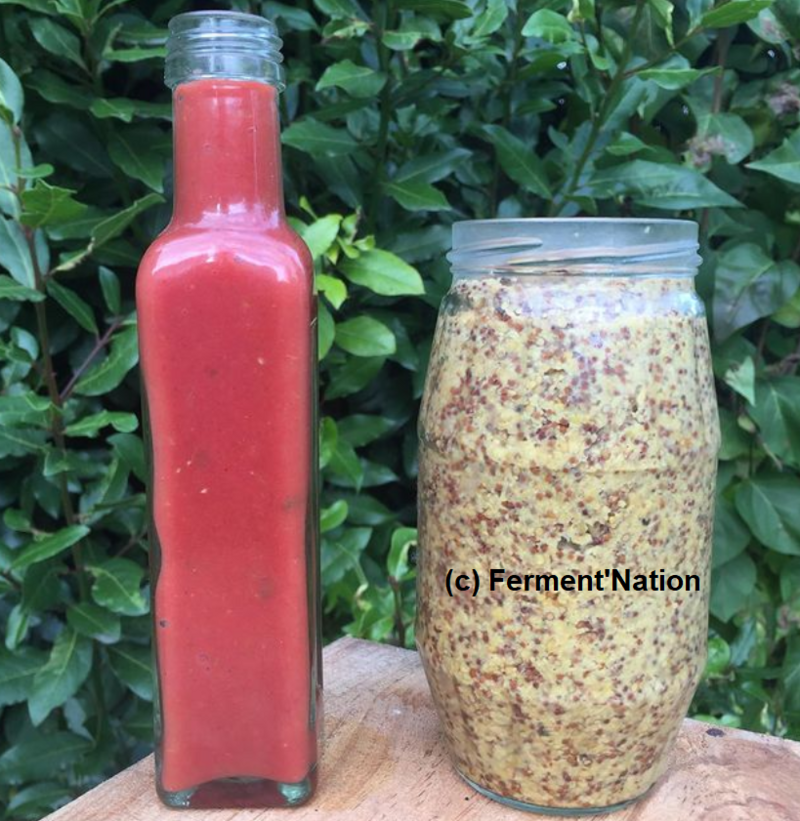
| − | |Step_Content= | + | |Step_Content=Did you know that traditional recipes for ketchup and mustards are fermented? After learning that ketchup is nothing more than tomato paste, a little vinegar and sugar, learn how to make fermented sauces! |
| − | '''Ketchup''' : | + | '''Ketchup''': |
| − | * 200g | + | * 200g fresh tomatoes (or tinned, or ideally lacto-fermented tomatoes) |
| − | * 1 | + | * 1 tablespoon starter, such as lacto-fermented brine or whey |
| − | * 20g | + | * 20g sugar |
| − | * | + | * a pinch of salt |
| − | * | + | * a dash of chilli pepper for those who like it spicy |
| − | + | Blend the tomatoes and, depending on the desired consistency of your ketchup, drain a little. Mix all the ingredients well in a jar, taking care not to fill it completely (the liquid will swell). | |
| − | ''' | + | '''Mustard: ''' |
| − | + | For this recipe, simply mix 60g of yellow mustard seeds, 60g of black Burgundy mustard seeds (sénevé), with verjuice or lacto-fermented brine. | |
| − | + | For flavouring, you could add 6g of green pepper and 10g of fresh turmeric. You can replace the green pepper with pink berries, tarragon, Provençal herbs, etc. | |
| − | + | Traditionally, instead of using vinegar, mustard makers used Verjus. This is a fermentation of green, immature grapes, slightly salted. If you want to make your own verjuice, simply harvest a few green (immature) grapes, squeeze the juice into a bag, then place the liquid in a cloth-covered jar and leave to ferment in the sun for 2-3 days. Then add a pinch of salt to calm the fermentation and limit the yeasts (you don't want too strong an alcoholic fermentation). | |
| − | + | To make mustard, soak mustard seeds (black or brown) in water for 1-2 days, then discard the water. Crush the seeds in a mortar, adding a little verjuice and salt or vinegar or lacto-fermented brine. If you want a fine mustard, crush all the seeds; if you prefer old-fashioned mustard, leave some seeds whole. | |
| − | + | Place in a jar without filling completely. To prevent oxidation and the development of undesirable bacteria, you can add a weight to limit contact between the mustard and the air. | |
| − | + | Leave to ferment for 1 week at room temperature, then place in the fridge. | |
| − | <br />Une fois la fermentation terminée, on rajoute un peu de vinaigre de cidre (ou du verjus si on veut rester plus fidèle à la recette traditionnelle) et on mélange/mixe bien pour ajuster la texture à notre convenance, et s'assurer que le pH soit à un niveau suffisament bas pour une conservation longue (environ pH 3 | + | <br />Une fois la fermentation terminée, on rajoute un peu de vinaigre de cidre (ou du verjus si on veut rester plus fidèle à la recette traditionnelle) et on mélange/mixe bien pour ajuster la texture à notre convenance, et s'assurer que le pH soit à un niveau suffisament bas pour une conservation longue (environ pH 3 ou moins). On peut aussi rajouter une cuillère à soupe de miel, c'est délicieux.<br />Puis on remplit un pot type confiture avec la moutarde (je vous ai donné le dosage pour un pot de moutarde Amora de 440g) qu'on stock au frais. Au fur et à mesure que vous en consommez, transvasez-là dans un pot plus petit pour limiter la quantité d'oxygène qu'il y a dans le pot. |
| − | |Step_Picture_00= | + | |Step_Picture_00=ketchup_et_moutarde_ferment_e.png |
}} | }} | ||
{{Tuto Step | {{Tuto Step | ||
| − | |Step_Title=Babaganoush | + | |Step_Title=Babaganoush or lacto-fermented aubergine caviar |
| − | |Step_Content= | + | |Step_Content=NiCruNiCuit's incredible recipe: https://nicrunicuit.com/faire/cuisiner/caviar-daubergine-sans-cuisson-mais-fermente/ |
| − | + | Take a look at the other tutorials to discover other fermented sauces and side dishes. | |
| − | + | For example, in the tutorial [https://wiki.lowtechlab.org/wiki/Aliments_ferment%C3%A9s_-_dosas,_cr%C3%A8pes_vegan Fermented foods - dosas, vegan pancakes] you'll find hummus-type sauces made from different legumes. | |
| − | + | You can also make delicious hummus-type sauces with squash: here is an example made with butternut by Ferment'Nation: https://www.instagram.com/p/B5YCo8-ijWj/ | |
}} | }} | ||
{{Tuto Step | {{Tuto Step | ||
| − | |Step_Title= | + | |Step_Title=Lacto-fermented vine leaves and Greek dolmas |
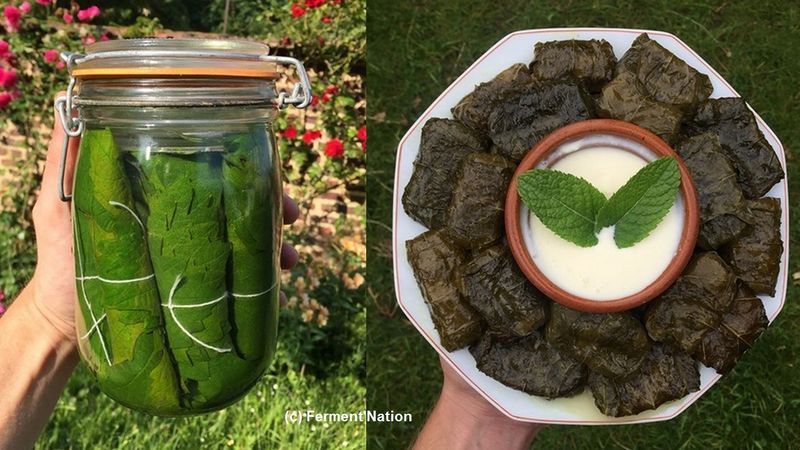
| − | |Step_Content=[https://www.instagram.com/p/CALQbNzIrS1/ | + | |Step_Content=[https://www.instagram.com/p/CALQbNzIrS1/ Recipe] and photos of Ferment'Nation |
| − | + | There are many varieties of vine, with leaves of varying shapes. The fuller leaves are preferable, as they are easier to stuff (take care to use only a few per plant so as not to weaken the plant). | |
| − | + | You can rinse them in clean water if they are dirty, but otherwise you can simply check that there are no traces of disease (spots or blisters). Ideally, the leaves should be no more than 15cm wide, so that they can fit into a 1L jar without being crushed, and they should be very tender (away from the base of the branch, but not too far away so that they're not too small either). You can fit 8 or 9 rolls of 8 in the jar, so 64 or 72 leaves in all (if I can still count!). | |
| − | + | Then remove the stem with scissors, stack them in bundles of 8 and roll them up from the base. You can tie them with string to prevent them from unrolling in the jar. Fill the jar, place a weight on top (to prevent them floating), taking care not to tear them, and top up with 3% brine (30g/litre) to cover them completely. | |
| − | + | They are then left to ferment for 1 week at room temperature, and at least 3 weeks in a cool place (although they can be kept longer to make dolmas all year round, as long as they are always kept submerged). | |
| − | + | After a month of lacto-fermentation, the vine leaves are finally ready! Here's the recipe to make 60 dolmas with them. | |
| − | + | Recipe: | |
| − | + | Chop 4 large yellow onions and fry in a large saucepan with plenty of oil. When they are translucent, add 300g of round rice (this will work with long rice but round rice has more starch and will make the mixture more melting) and mix the two together for 3 minutes over a low heat. | |
| − | + | Add 800ml water and salt, then leave to cook for 5 minutes from boiling. Turn off the heat and chop around ten fresh mint leaves, flat-leaf parsley, a little dill, a handful of pine nuts and the juice of one lemon. Leave to cool a little. | |
| − | + | On a chopping board, carefully unroll your vine leaves (they tear easily) and lay one flat, veins upwards. Using a heaping tablespoon of the rice mixture, form a small sausage in the middle of the leaf, horizontally (depending on the type of vine you use, the less hollow your leaves will be, the more rice you'll be able to use). Fold the two ‘ears’ of the leaf down over the roll, then the sides, making sure that the folding does not exceed the width of the roll, then wrap the roll around the top of the leaf. | |
| − | + | Line the base of a stewpot with vine leaves and place the dolmas on top in a circle. You can make two layers with 30 dolmas per layer. | |
| − | + | Cover with a plate and sprinkle with water to cover the dolmas, then leave to cook over a low heat for 15 minutes. Then wait for them to cool and put them in the fridge. | |
| − | + | Finally, they can be drizzled with lemon juice and served with a mixture of yoghurt and chopped herbs (mint or dill)! | |
| − | |Step_Picture_00= | + | |Step_Picture_00=feuilles vignes LF.jpg |
}} | }} | ||
{{Tuto Step | {{Tuto Step | ||
| − | |Step_Title= | + | |Step_Title=Fermented carrots imitating smoked salmon |
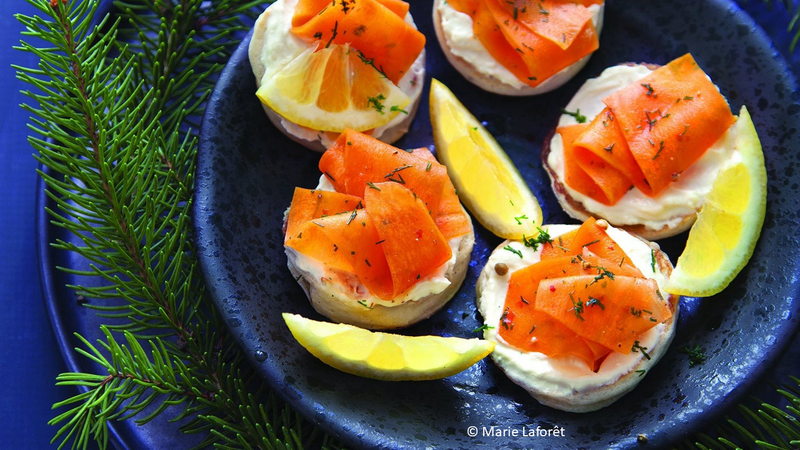
| − | |Step_Content=[https://www.instagram.com/p/CIP4hmfBHwE/ | + | |Step_Content=[https://www.instagram.com/p/CIP4hmfBHwE/ ShiraBio recipe] in 10 minutes (then 48 hours). [https://www.instagram.com/p/CIN7rCUIXvp/ Here's the video of the full Christmas recipe]. |
| − | |||
| − | |||
| − | |||
| − | |||
| − | |||
| − | |||
| − | |||
| − | |||
| − | |||
| − | |||
| − | |||
| − | |||
| − | |||
| − | |||
| − | + | Ingredients: | |
| − | + | *2 large carrots | |
| − | |Step_Picture_00= | + | *1 teaspoon paprika (smoked, it brings out the taste of the salmon even better) |
| + | *1/2 teaspoon garlic powder | ||
| + | *1/2 sheet of nori seaweed (or 2 tablespoons of nori seaweed flakes) | ||
| + | *1-2 tablespoons tamari (2 if no fermented liquid) | ||
| + | *1 tablespoon fermented umeboshi (or lacto-fermented brine or rice vinegar) | ||
| + | *1 tablespoon olive oil | ||
| + | |Step_Picture_00=Aliments_ferment_s_-_alternatives_aux_prot_ines_animales_saumon_fum_vegan.png | ||
}} | }} | ||
{{Tuto Step | {{Tuto Step | ||
| − | |Step_Title= | + | |Step_Title=Educational content to download |
| − | |Step_Content= | + | |Step_Content=<div class="mw-translate-fuzzy"> |
| + | You can download an educational sheet created by the Low-tech Lab for the exhibition "En Quête d'un Habitat Durable" in the "Files" part of the tutorial (tab in the "Outils-Matériaux" section) | ||
| + | </div> | ||
| − | Alice Martin-Demolon | + | In this section, Alice Martin-Demolon also provides you with a collection of information and fermented recipes (preserves, drinks, bread, dairy products, etc.). Feel free to download it. |
|Step_Picture_00=Conserves_lactoferment_es_Lacto.JPG | |Step_Picture_00=Conserves_lactoferment_es_Lacto.JPG | ||
|Step_Picture_01=Conserves_lactoferment_es_Petit_concentr_ferment_.png | |Step_Picture_01=Conserves_lactoferment_es_Petit_concentr_ferment_.png | ||
}} | }} | ||
{{Notes | {{Notes | ||
| − | |Notes= | + | |Notes=*Video tutorial by Camille Duband and written instructions by Pierre-Alain Lévêque for the Low-tech Tour, April 2018. |
| − | * Video tutorial | + | *Knowledge and know-how passed on by Claire Yobé, Keroueze farm. |
| − | * | + | *ARTE, [https://www.arte.tv/player/v3/index.php?json_url=https%3A%2F%2Fapi.arte.tv%2Fapi%2Fplayer%2Fv1%2Fconfig%2Ffr%2F074787-105-A%3Fautostart%3D1%26lifeCycle%3D1&config=arte_nude&lang=fr_FR Food waste in 7 key figures] |
| − | * ARTE, [https://www.arte.tv/player/v3/index.php?json_url=https%3A%2F%2Fapi.arte.tv%2Fapi%2Fplayer%2Fv1%2Fconfig%2Ffr%2F074787-105-A%3Fautostart%3D1%26lifeCycle%3D1&config=arte_nude&lang=fr_FR | + | *National Geographic, [https://www.nationalgeographic.fr/environnement/un-tiers-des-aliments-produits-est-perdu-ou-gaspille A third of all food produced is lost or wasted] |
| − | * National Geographic, [https://www.nationalgeographic.fr/environnement/un-tiers-des-aliments-produits-est-perdu-ou-gaspille | + | *Wikipedia, [https://fr.wikipedia.org/wiki/Fermentation_lactique lacto-fermentation] |
| − | * Wikipedia, [https://fr.wikipedia.org/wiki/Fermentation_lactique | + | *[https://nicrunicuit.com/category/sante/ Blog ni cru ni cuit] |
| − | * [https://nicrunicuit.com/category/sante/ Blog ni cru ni cuit] | + | *Lacto-fermentation cooking video: https://www.youtube.com/watch?v=iiNl0Jv6xTw |
| + | *The summit on fermentations (France, 2020) -> a summary of the speeches and the recipes are in the ‘Files’ tab of this tutorial. | ||
| + | *For more recipe inspiration and fermentation courses, follow ShiraBio: https://www.instagram.com/shirabio/ | ||
| + | *For a wealth of recipes, ferments and tools for fermenting at home, visit the website of Fairment, organisers of the Fermentation Summit: [https://fairment.com/ https://fairment.com] | ||
| + | |||
| + | For more recipe inspiration and fermentation courses, follow [https://www.instagram.com/shirabio/ ShiraBio], [https://www.instagram.com/ferment_nation/ Ferment'Nation] and explore the incredible website (and books) of Marie-Claire Frédéric, anthropologist and chef fascinated by fermentations from around the world: [https://nicrunicuit.com/ Ni cru ni cuit]. | ||
| + | |||
| + | There are several facebook groups for fermentation enthusiasts, and I recommend these | ||
| + | |||
| + | *[https://www.facebook.com/groups/250871642949849 Home fermentation] founded by Ferment'Nation | ||
| + | *[https://www.facebook.com/groups/1115598918561326 Lacto-fermentation and natural preserves], focusing specifically on lacto-fermentation | ||
| + | |||
| + | If you're looking for reference books to learn the art of fermentation, Sébastien aka Ferment'Nation offers [https://www.facebook.com/groups/250871642949849/permalink/656851205685222/ in this post from the Home Fermentation group] an explained compilation of the best books he's tested. There are specific ones (on lacto-fermentation, cheeses) and general ones. Something to inspire you! | ||
| − | + | For a wealth of recipes, ferments and tools for fermenting at home, visit the website of Fairment, organisers of the Fermentation Summit: [https://fairment.com/ https://fairment.com] | |
| − | |||
| − | |||
| − | + | Other essential references can be found in the first few pages of the file attached to this tutorial. | |
| − | + | '''If you would like to see more tutorials on fermentations, please take a look at:''' | |
| − | |||
| − | |||
| − | |||
| − | |||
| − | |||
| − | |||
| − | + | *[https://wiki.lowtechlab.org/wiki/Conserves_lactoferment%C3%A9es Lacto-fermented conserves] | |
| + | *[https://wiki.lowtechlab.org/wiki/Aliments_ferment%C3%A9s_-_fermentations_de_fruits Fermented foods - Fruit fermentations] | ||
| + | *[https://wiki.lowtechlab.org/wiki/Boissons_ferment%C3%A9es_-_Sodas_maison Fermented drinks - Homemade sodas] | ||
| + | *[https://wiki.lowtechlab.org/wiki/Boissons_ferment%C3%A9es_-_Sodas_%C3%A0_base_de_fleurs Fermented drinks - Flower sodas] | ||
| + | *[https://wiki.lowtechlab.org/wiki/Boissons_ferment%C3%A9es_-_K%C3%A9fir,_kombucha_et_vinaigres Fermented drinks - Kefir, kombucha and vinegars] | ||
| + | *[https://wiki.lowtechlab.org/wiki/Boissons_ferment%C3%A9es_-_Hydromels Fermented drinks - Meads] | ||
| + | *[https://wiki.lowtechlab.org/wiki/Aliments_ferment%C3%A9s_-_produits_laitiers_animaux_maison Fermented foods - homemade animal milk products] | ||
| + | *[https://wiki.lowtechlab.org/wiki/Aliments_ferment%C3%A9s_-_k%C3%A9fir_de_laits_v%C3%A9g%C3%A9taux_et_fromages_vegan Fermented foods - Vegetable milk kefir and vegan cheeses] | ||
| + | *[https://wiki.lowtechlab.org/wiki/Aliments_ferment%C3%A9s_-_levains_et_pains Fermented foods - sourdoughs and breads] | ||
| + | *[https://wiki.lowtechlab.org/wiki/Aliments_ferment%C3%A9s_-_fermentations_asiatiques_de_c%C3%A9r%C3%A9ales,_l%C3%A9gumineuses_et_variations Fermented foods - Asian fermentations of cereals, pulses and variations] | ||
| + | *[https://wiki.lowtechlab.org/wiki/Aliments_ferment%C3%A9s_-_festival_de_sauces Fermented foods - festival of sauces] | ||
| + | *[https://wiki.lowtechlab.org/wiki/Aliments_ferment%C3%A9s_-_alternatives_aux_prot%C3%A9ines_animales Fermented foods - alternatives to animal proteins] | ||
}} | }} | ||
{{PageLang | {{PageLang | ||
Version actuelle datée du 6 novembre 2024 à 15:57
Description
Preserve your raw vegetables for months with this lacto-fermentation technique.
Sommaire
Sommaire
- 1 Description
- 2 Sommaire
- 3 Introduction
- 4 Video d'introduction
- 5 Étape 1 - Preparing the vegetables:
- 6 Étape 2 - Preparing the jars:
- 7 Étape 3 - Preserving grated or cut up vegetables:
- 8 Étape 4 - Canning whole vegetables
- 9 Étape 5 - Guide to cured meats and fermentation times
- 10 Étape 6 - Consumption
- 11 Étape 7 - Milk fermentation of Jerusalem artichokes
- 12 Étape 8 - Lacto-fermented fruit and vegetable leathers
- 13 Étape 9 - Kimchi recipe
- 14 Étape 10 - Recipe for Nukazuké
- 15 Étape 11 - Tabasco-type lacto-fermented hot sauce
- 16 Étape 12 - Lacto-fermented tomato concentrate
- 17 Étape 13 - Lacto-fermented Chips
- 18 Étape 14 - Preserving aromatic herbs by lacto-fermentation
- 19 Étape 15 - Lacto-fermented ketchup and mustard sauces
- 20 Étape 16 - Babaganoush or lacto-fermented aubergine caviar
- 21 Étape 17 - Lacto-fermented vine leaves and Greek dolmas
- 22 Étape 18 - Fermented carrots imitating smoked salmon
- 23 Étape 19 - Educational content to download
- 24 Notes et références
- 25 Commentaires
Introduction
This tutorial has been created in collaboration with Claire Yobé, a lacto-fermentation instructor with over thirty years of experience in the field.
The aim is to easily preserve surplus vegetables for long-term storage, whether from your vegetable patch (in Summer for example), or because you have bought more vegetables than you needed.
Key facts on food wastage
- 1/3 of food produced around the world goes off or is wasted
- In France, 50% of waste happens at home
- A person in France wastes 20kg of food per year
- 19 % of fruit and 31% of vegetables are wasted, making these the produce we waste the most
What is lacto-fermentation, or lactic acid fermentation?
Lacto-fermentation is the conversion of sugars into lactic acid by lactic acid bacteria (naturally present specific microorganisms).
This method of fermentation has been used for centuries to preserve milk (e.g yoghurt), vegetables (e.g sauerkraut), meat (e.g. cured sausage) and even fish (e.g fish sauce).
How is it possible to preserve vegetables by means of lactic acid fermentation?
Vegetables carry microorganisms on their surfaces (microscopic fungi, bacteria) which, when left in the open air, cause them to rot. The absence of air (anaerobic conditions) and a small quantity of salt to inhibit other bacteria, encourages the lactic acid bacteria to grow: this is the start of the lacto-fermentation process.
These bacteria grow by feeding off the sugars present in the food, and converting them into lactic acid. The amount of lactic acid gradually increases, and the vegetable juice becomes increasingly acidic.
This acidity neutralises the rotting process. When the medium is acidic enough (approx. pH 4), the lactic acid bacteria are also inhibited. The product becomes stable, which allows for long term storage of up to several months and sometimes even years.
What kind of vegetables can be preserved by lacto-fermentation?
Nearly all vegetables which are eaten raw can be preserved this way. (E.g cabbage, cucumber, carrots, beetroot, etc...)
What are the nutritional and health benefits of lacto-fermented vegetables?
1) They aid digestion and nutrient absorption.
Enzymes in lactic acid bacteria "pre-digest" vegtables, which helps the digestion process as well as the absorption of nutrients and minerals by the body.
2) They are a source of vitamins.
Lacto-fermented vegetables have the same amount of vitamins, and sometimes more, as raw vegetables.
3) They help the intestines and immune system function properly.
Lactic acid bacteria are "pro-biotics" for the gut flora which play an important role as barriers for the immune system.
How can we consume lacto-fermented vegetables?
Lacto-fermented vegetables can be consumed frequently, on a daily basis even, for example as a side dish.
Eating a lot in one go can cause stomach pains due to its elevated acidity levels.
They should be part of a varied and balanced diet.
Are there any risks involved with lacto-fermentation?
Contrary to preservation by means of heat (e.g sterilisation) or freezing, which can in turn cause the growth of, for example, the toxin botulinum, lacto-fermentation is a very safe method.
The acidity of the medium prevents the growth of pathogens.
Nevertheless, if in doubt and bad odours or peculiar colours appear, throw the preserve away.Youtube
Matériaux
- Vegetables which are usually eaten raw
- Table salt
- Water
Outils
- Jar with its respective lid, (if possible a glass lid with seal)
Étape 1 - Preparing the vegetables:
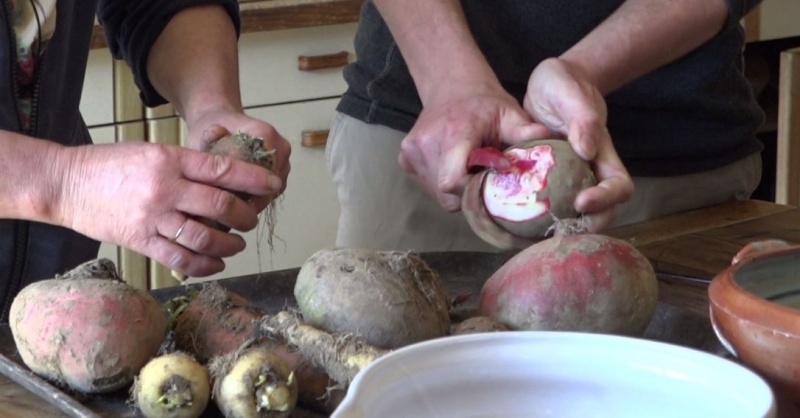
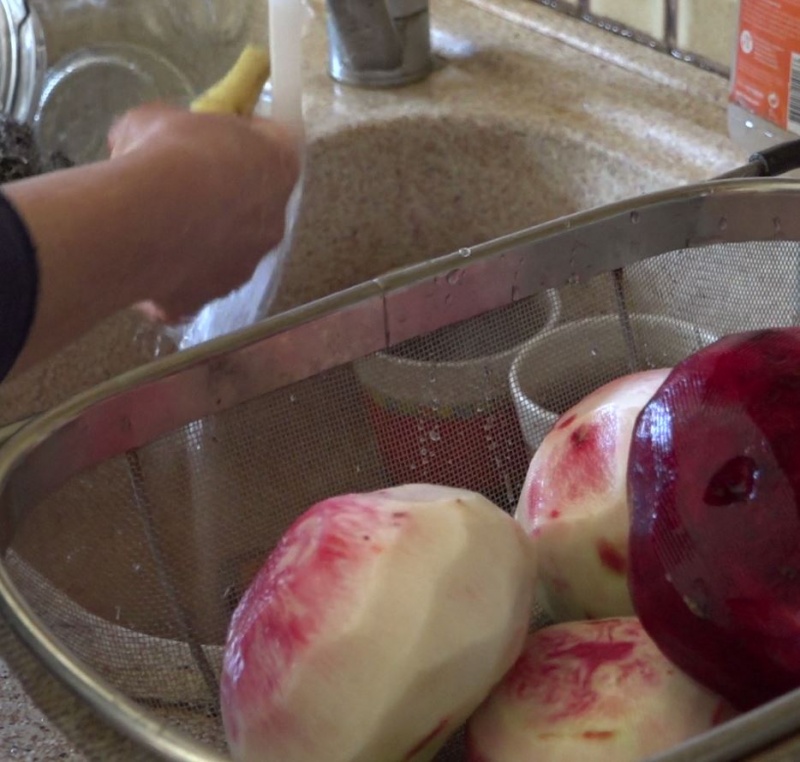
- Peel and wash the vegetables carefully
- Depending on preference, grate or cut them into dice or strips.
- Leave those vegetables which are usually left whole as they are, following washing (e.g green beans).
Étape 2 - Preparing the jars:
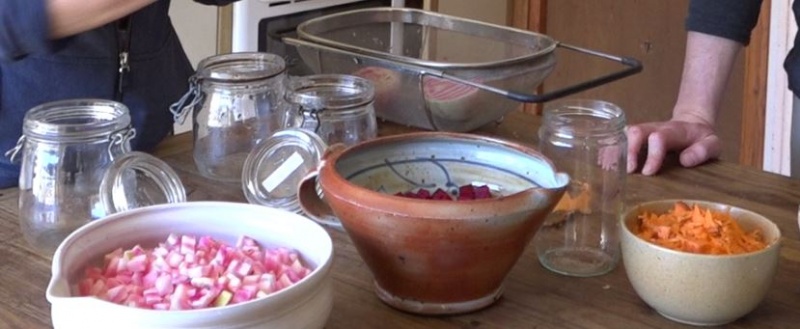
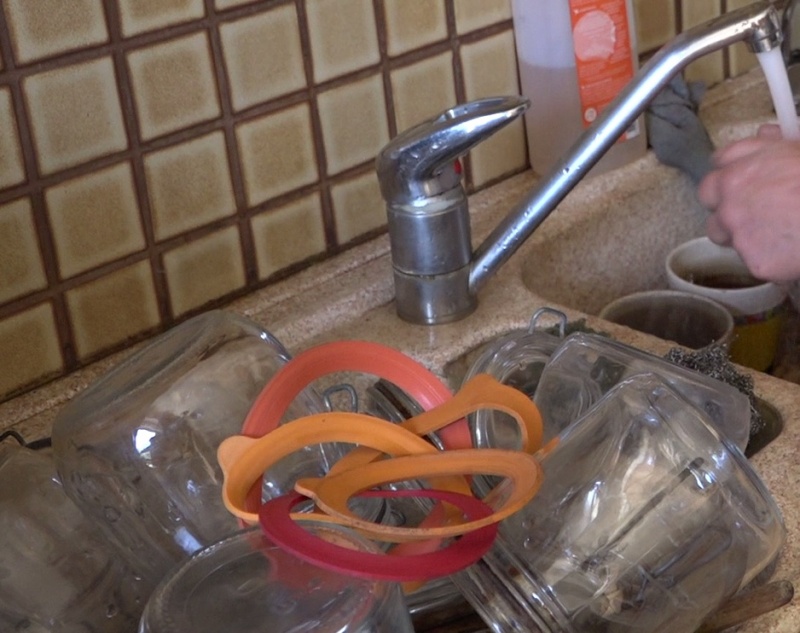
- Clean the jars carefully
- Carefully select and wash the weight that will be used to hold the vegetables under the liquid.
Here's an article to help you choose your weights: https://academiefermentation.com/les-meilleurs-poids-pour-les-fermentations/
Étape 3 - Preserving grated or cut up vegetables:
- Ensure your hands are clean
- Place a first layer of vegetables at the bottom of the jar (2cm)
- Sprinkle with a pinch of salt (The principle being 1-2% of the weight of the vegetables in salt)
- If you make a brine (salted water), the principle is 3% salt in the water. For vegetables this varies from 15g/50cl to 25g/50cl (more salt for vegetables that naturally contain more water).
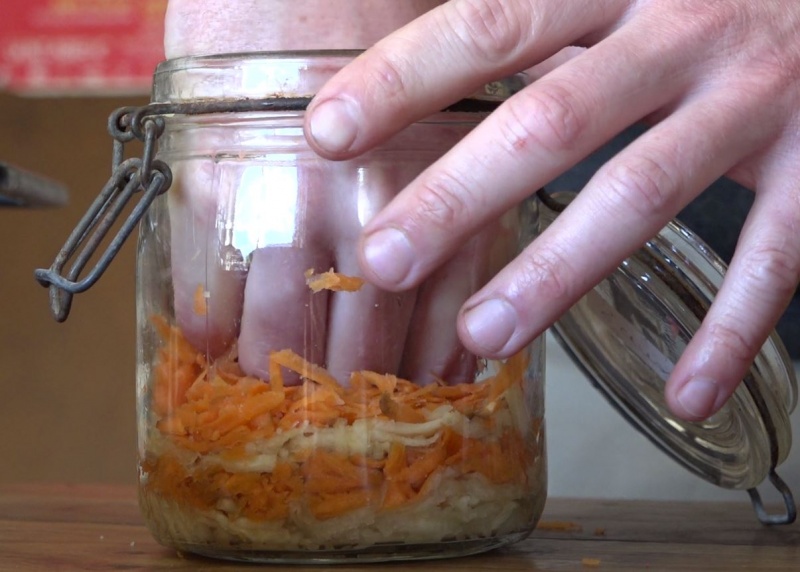
- Press the layer of vegetables down with your hands
Note: Pressing down allows for the salt to penetrate the vegetables so as to encourage the extraction of juices and get rid of air
- Repeat the procedure until the jar is full
- Leave a gap of 1 to 2 cm between the last layer of vegetables and the lid, as fermentation produces gas and the juices may overflow if the jar is too full
- Make sure that all the vegetables are covered with their juice up to the top of the jar: it is this juice that guarantees anaerobiosis, the absence of oxygen. If necessary, you can add a weight (made of glass, a plastic bag filled with water, or a cabbage leaf or carrot stick) to keep the vegetables under the liquid.
- Close the jar and place on a plate (the gas may cause some of the liquid to overflow).
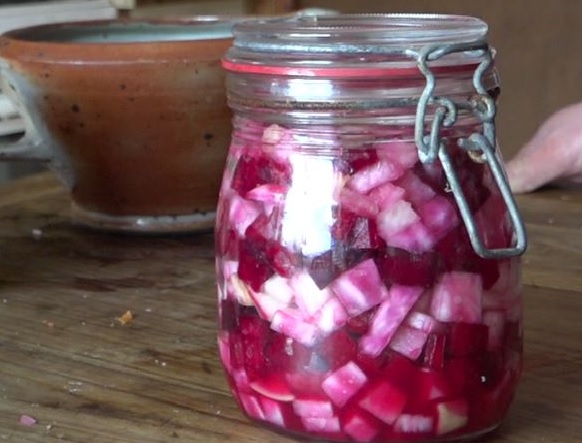
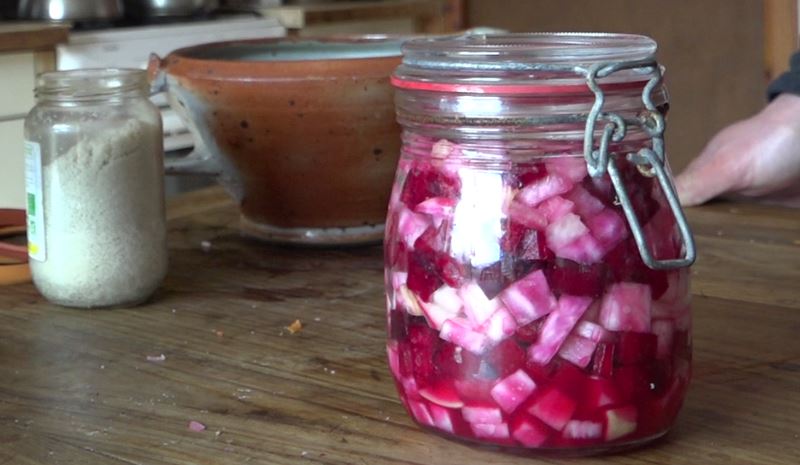
- Leave in the house for 3 days to allow the naturally-occurring lactic ferments to start fermenting. Depending on the vegetables and their size (the smaller the pieces, the faster the fermentation), it is recommended that you leave to ferment for between 7 days and a month.
- We recommend that you leave the jars to ferment and then store them in a cool, dark place. They can be kept for over a year as long as the jar is not opened.
Étape 4 - Canning whole vegetables
- Fill the jar with as many vegetables as possible.
- Add salted water (3% of the weight in water, i.e. between 15g/50cl and 25g/50cl depending on the amount of water naturally present in the vegetable).
- Make sure that all the vegetables are covered with water right to the top of the jar. It is the water that guarantees anaerobiosis, the absence of oxygen. If necessary, you can add a weight (in glass, a plastic bag filled with water, or a cabbage leaf or carrot stick) to keep the vegetables under the liquid.
- Close and place a plate in case any liquid escapes with a little gas.
- Leave for 3 days in the house to allow the naturally-occurring lactic ferments to start fermenting. Depending on the vegetables and their size (the smaller the pieces, the faster the fermentation), it is recommended that you leave to ferment for between 7 days and a month.
- We recommend that you leave the jars to ferment and then store them in a cool, dark place. They can be kept for over a year as long as the jar is not opened.
Étape 5 - Guide to cured meats and fermentation times
And NiCruNiCuit's recipe for olives : https://nicrunicuit.com/faire/fermenter/comment-faire-ses-olives-en-saumure/
And finally, confit garlic, lacto-fermented: https://nicrunicuit.com/faire/fermenter/comment-faire-de-lail-confit-en-saumure-alias-ail-lacto-fermente/
Some ideas for associations :
- Beetroot, garlic, carrots and celery
- Turnip and wild garlic
- Spinach and pepper
- Tabasco pepper sauce
- Aubergine, garlic, sesame and thyme -> NiCruNiCuit's famous fermented aubergine caviar!
You can also preserve vegetables in salt directly (fermenting lemons and cabbage in this way) or in oil. But be careful with the latter: if the vegetables have not been dehydrated or fermented beforehand, there is a very real risk of poisoning, and even death from botulism! https://nicrunicuit.com/sante/le-danger-des-legumes-mis-directement-dans-lhuile/
Étape 6 - Consumption
- A jar can be opened and eaten over several days without any problem, although it's a good idea to size the jars according to the number of people in the household.
- Use lacto-fermented vegetables a little every day to get the most out of them (see intro).
- To avoid contamination, it is advisable to remove the fermented vegetables with a clean lid and not to empty the juice (this helps with preservation). Once opened, the jar does not have to be placed in the fridge.
Here's an article from NiCruNiCuit about lacto-fermented vegetable juices. Either juice your lacto-fermented vegetables or follow these tips: https://nicrunicuit.com/faire/fermenter/jus-de-legumes-lacto-fermentes/
Étape 7 - Milk fermentation of Jerusalem artichokes
How do you eat this sometimes difficult-to-digest vegetable? By lacto-fermenting it! Jerusalem artichokes are delicious when lacto-fermented (3 months). It has the particularity of becoming very soft, and can almost become mushy if not handled with care.
It is 85% inulin. Inulin is a polysaccharide, or "complex sugar", meaning several simple sugars agglomerated together (fructose specifically, unlike starch, found in potatoes for example, which is made up of glucose).
These polysaccharides are called fibres, and they are essential to our health. The problem is that we can't digest them!
In fact, when we eat fibre, we're not feeding ourselves directly, we're feeding the bacteria in our intestines, which will break down these complex sugars into simple sugars that we can easily digest, and into ‘short-chain’ fatty acids, which are excellent for our health, especially for regulating our immune system. Quite simply, they protect us from infections and disease in general.
These fibre-loving intestinal bacteria (known as ‘firmicutes’) are good for us, creating a balance that keeps us happy and healthy. When we don't eat enough fibre and instead eat a diet high in saturated fats and refined sugar, we starve them, and feed another type of bacteria, the ‘bacteroidetes’, which are associated with just about every chronic disease we have today: obesity, diabetes, depression, Alzheimer's, hypertension, etc.
When you ferment Jerusalem artichokes, you create the same process, but in the jar: you avoid flatulence and you enjoy your meal.
But if you ferment them for too long (1 year in this case), they become too acidic. @luna_kyung_ gives us the solution on her blog with her recipe for lacto-fermented Jerusalem artichoke with seaweed and toasted sesame, which you can find by typing ‘diogenic Jerusalem artichoke’ into Google. The use of a little sugar (acidity corrector) and sesame oil restores the balance for a delicious result!
Étape 8 - Lacto-fermented fruit and vegetable leathers
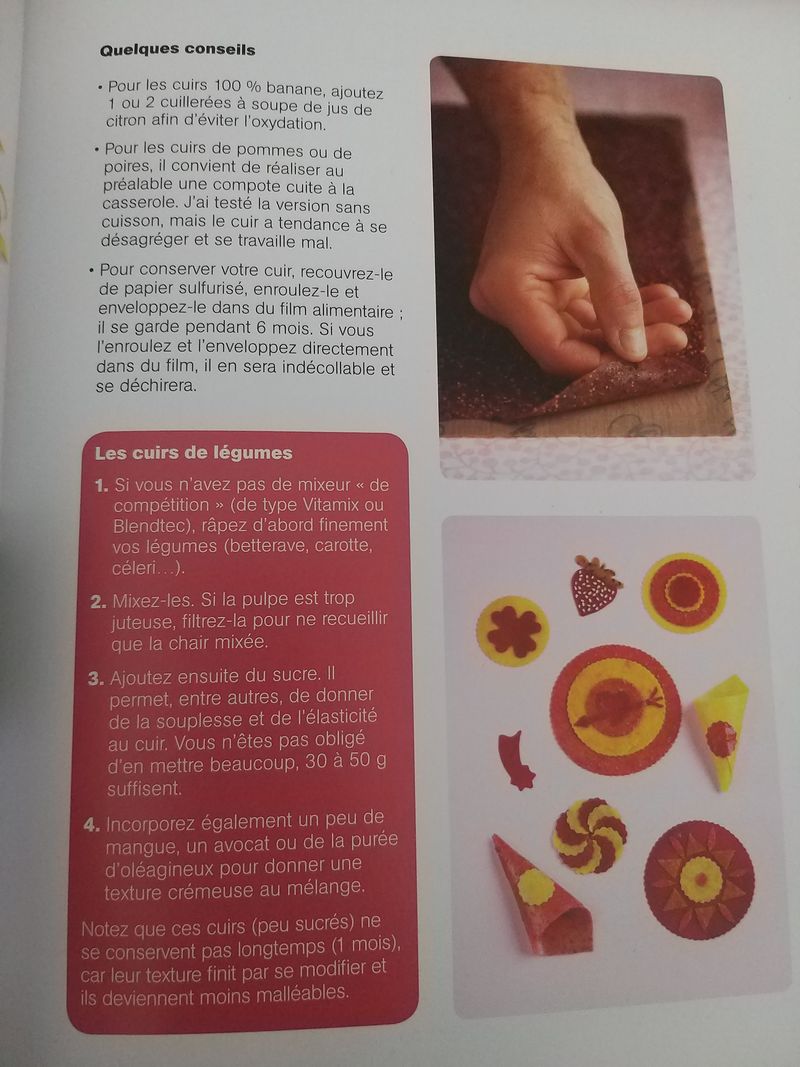
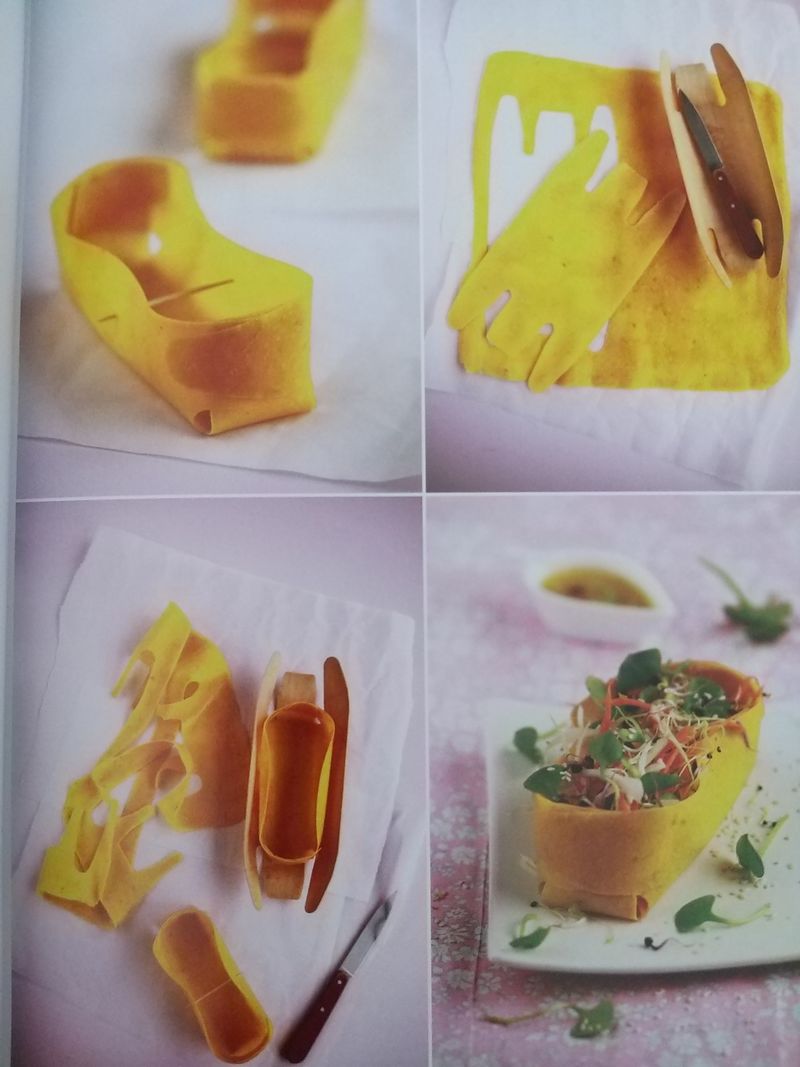
One idea for using lacto-fermented fruit and vegetables is to eat them in small quantities to flavour a salad, soup, pasta, etc. You can also dehydrate them into crisps if they're fine enough, or puree them and then dehydrate them into "leather", i.e. a thin layer that can be rolled into sticks, lollipops, cut up and assembled to make surprising shapes or containers. This dehydrated form concentrates the flavours and gives a material that is easy to transport, particularly for snacks.
Here's an extract from the book Délices déshydratés by Linda Louis, which contains several recipes for (non-fermented) leathers to give you some ideas. If you don't have a dehydrator, you can make leathers in the oven. Linda Louis is the author of several reference books on organic, local and wild cuisine, and has several books on fermentations. Don't hesitate to read her books!
https://www.laplage.fr/produit/377/9782383381334/delices-deshydratees
Étape 9 - Kimchi recipe
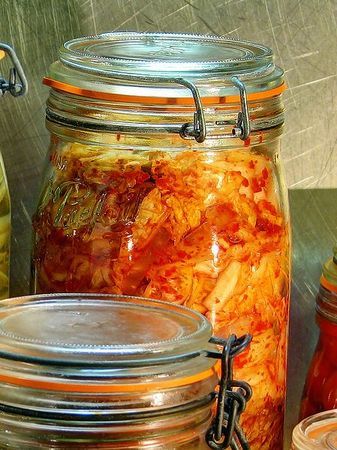
Kimchi is a traditional Korean recipe. It is based on the lacto-fermentation of cabbage and spices.
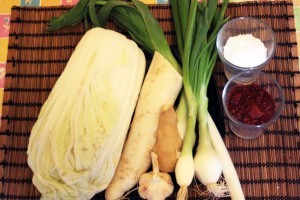
- 2 kg Chinese cabbage
- 2 leeks
- 1/2 long turnip
- 3 cloves garlic, chopped
- 2 teaspoons finely grated fresh ginger
- 1 or 2 teaspoons fish sauce (optional)
- 1 tablespoon chopped chilli pepper
- 1 tbsp toasted sesame seeds
- 1 tablespoon sugar
- 100 to 160g coarse salt
- Cut the cabbage lengthways into strips and place in a bowl of warm salted water. Sprinkle the cabbage with coarse salt (put it between each leaf). Leave to rest and drain overnight.
- The next day, rinse the cabbage strips in water and drain. In a separate bowl: Cut the turnip and leeks into thin strips about 5 cm long.
- Mix the ingredients for the spice paste: ginger, chilli pepper, garlic, sugar and fish sauce. Everything must be peeled or grated to make the paste. Spread the paste between the cabbage leaves. Place the cabbage pieces in a large bowl. Sprinkle with a little toasted sesame seeds.
- Place a lid or plate on the container, or close it tightly. Wait 4 to 5 days for the kimchi to ferment. It should be eaten within a few days of opening the jar and can be kept for around three weeks in the fridge.
Étape 10 - Recipe for Nukazuké
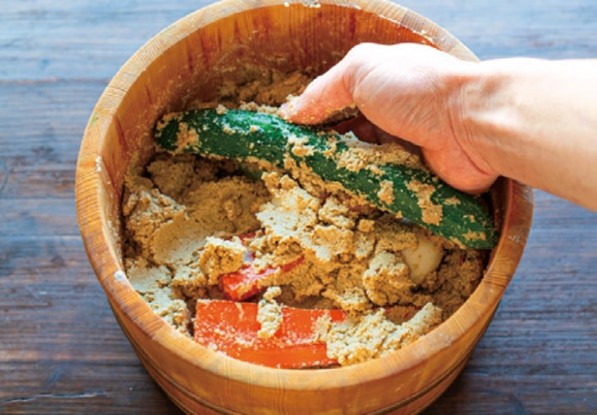
Vegetables fermented in a rice bran paste (but in Europe it's easier to do it with wheat bran). This product works in a similar way to sourdough, so you need to take care of it every day over the long term.
For 2 people:
- The equivalent of 100g of sliced vegetables (e.g. aubergines, carrots, turnips, cucumber, radishes, courgettes, onions, etc.)
- 130-140g salt (13-14% of the weight in rice bran)
- 1L water (weight of rice bran equals weight of water)
- 1kg white rice
Before starting, rinse the vegetables well and thoroughly clean the inside of the containers, removing any white film (mycoderma). Pour the water, salt and bran into a wooden tub or large stoneware pot. Mix thoroughly until you obtain a paste with a barely fluid consistency. Rub the vegetables with the salt (pressing hard) and then immerse them in the paste for 2-3 days. After 12 hours, the vegetables will already have developed a slight flavour. Depending on the temperature, the vegetables will be ready in 1-2 days (especially in summer). The vegetables should be slightly soft to the touch. Rinse them of the paste and cut them before eating. The paste remains active for a very long time as long as you stir it every day once the vegetables have been taken out. During fermentation, the vegetables lose some of their water to the paste, but you may need to add a little bran and salt (or even a little water in summer) to maintain the optimum consistency. If the bran has been obtained from an old grind, remember to heat it dry in a pan without toasting it, to destroy any germs that may be developing.
Étape 11 - Tabasco-type lacto-fermented hot sauce
Ingredients:
- 500g jalapenos
- 2cm fresh ginger root
- 5 cloves garlic
- (optional: peppers or aubergines for sweetness and flavour)
- (optional: onions)
- (optional: citrus fruits for sweet and sour)
- Brine 10g/50cl
Wash and seed the chillies (watch out for the chemical burn on your fingers!). If you want a very hot sauce, leave a few seeds. Chop the other ingredients finely and place in a jar. Cover with brine, keep the vegetables under the liquid with a weight and leave to ferment for 1 to 2 weeks. Once fermented, blend and bottle.
It can be stored at room temperature or in the fridge for several months.
Étape 12 - Lacto-fermented tomato concentrate
Traditional Italian recipe by Ferment'Nation
7kg of tomatoes in this small 400g jar, and no cooking. A great way to preserve tomatoes, with all their vitamins and probiotics, for the winter, and without refrigeration.
Just the tip of a knife is all it takes to flavour a dish!
Recipe:
- Fill a large bowl with tomatoes (leave some room, the mixture will swell a little) and crush them with your hands.
- Cover with a cloth and stir twice a day, submerging the floating parts (if there's a little white mould, it's not a problem), for 4 to 5 days, until the mixture no longer bubbles.
- Collect the solid parts (which will have separated from the water and floated to the surface) and grind them (with small holes) to remove the seeds and skin.
- Put the pulp in a cloth, close it like a bag with a string and hang it up for a day to let the juice run off. Then place the bag (still closed) between two boards with a weight on top to extract the remaining water for a few days, removing the water every day until no more runs out.
- Place the dough in a bowl and add 25% of its weight in salt. After a few hours, knead the ball again and it's ready!
Tomato water has a very strong taste, but you can drink it without any problem, as it's a concentrate of probiotics. Some people even add kefir to develop more bubbles. It can be sweet or savoury. --> Here's an example of Ferment'Nation's ‘tomato water beer/lemonade’ (photo)
You can find out more about this recipe in Sandor Katz's excellent book Fermentations!
Étape 13 - Lacto-fermented Chips
It is not normally advisable to ferment potatoes as they tend to ferment alcohol. However, if the fermentation is short, it is quite possible to lacto-ferment them, which gives them a light acidic flavour that is absolutely delicious when cooked. The name of the recipe is ‘chips’, but you can cook them any way you like: mashed, steamed, pan-fried, fried, etc.
Cut the potatoes into chips, removing the skin (to avoid an earthy flavour).
Add brine at 15g of salt per 50cl or re-use brine from an old lacto-fermentation process. Use a weight to ensure that the pieces are well submerged.
Leave to ferment for between 24 and 72 hours (48 hours seems ideal according to some feedback). Rinse the chips and cook.
Ideal with mustard sauce or ketchup (fermented of course!)
(c) Photo from Katarzyna Fedorowics
Étape 14 - Preserving aromatic herbs by lacto-fermentation
It is rarely advisable to preserve aromatic herbs by lacto-fermentation, as their consistency quickly becomes soft. However, if you then want to use them in sauces, this poses no problem.
Roughly chop the aromatic herbs, crush them a little in a mortar with the garlic and a little chilli and salt, then cover them with the fermented vegetable brine (or water with 15g of salt for 50cl). Leave to ferment for 2 weeks at room temperature, then store the jar in a cool place.
In particular, you can use these lacto-fermented herbs to make a delicious pesto that will keep longer than fresh (unpasteurised) pesto. Here's a sample recipe from myfermentpassion: https://www.instagram.com/p/CQEYrhhspFf/
Étape 15 - Lacto-fermented ketchup and mustard sauces
Did you know that traditional recipes for ketchup and mustards are fermented? After learning that ketchup is nothing more than tomato paste, a little vinegar and sugar, learn how to make fermented sauces!
Ketchup:
- 200g fresh tomatoes (or tinned, or ideally lacto-fermented tomatoes)
- 1 tablespoon starter, such as lacto-fermented brine or whey
- 20g sugar
- a pinch of salt
- a dash of chilli pepper for those who like it spicy
Blend the tomatoes and, depending on the desired consistency of your ketchup, drain a little. Mix all the ingredients well in a jar, taking care not to fill it completely (the liquid will swell).
Mustard:
For this recipe, simply mix 60g of yellow mustard seeds, 60g of black Burgundy mustard seeds (sénevé), with verjuice or lacto-fermented brine.
For flavouring, you could add 6g of green pepper and 10g of fresh turmeric. You can replace the green pepper with pink berries, tarragon, Provençal herbs, etc.
Traditionally, instead of using vinegar, mustard makers used Verjus. This is a fermentation of green, immature grapes, slightly salted. If you want to make your own verjuice, simply harvest a few green (immature) grapes, squeeze the juice into a bag, then place the liquid in a cloth-covered jar and leave to ferment in the sun for 2-3 days. Then add a pinch of salt to calm the fermentation and limit the yeasts (you don't want too strong an alcoholic fermentation).
To make mustard, soak mustard seeds (black or brown) in water for 1-2 days, then discard the water. Crush the seeds in a mortar, adding a little verjuice and salt or vinegar or lacto-fermented brine. If you want a fine mustard, crush all the seeds; if you prefer old-fashioned mustard, leave some seeds whole.
Place in a jar without filling completely. To prevent oxidation and the development of undesirable bacteria, you can add a weight to limit contact between the mustard and the air.
Leave to ferment for 1 week at room temperature, then place in the fridge.
Une fois la fermentation terminée, on rajoute un peu de vinaigre de cidre (ou du verjus si on veut rester plus fidèle à la recette traditionnelle) et on mélange/mixe bien pour ajuster la texture à notre convenance, et s'assurer que le pH soit à un niveau suffisament bas pour une conservation longue (environ pH 3 ou moins). On peut aussi rajouter une cuillère à soupe de miel, c'est délicieux.
Puis on remplit un pot type confiture avec la moutarde (je vous ai donné le dosage pour un pot de moutarde Amora de 440g) qu'on stock au frais. Au fur et à mesure que vous en consommez, transvasez-là dans un pot plus petit pour limiter la quantité d'oxygène qu'il y a dans le pot.
Étape 16 - Babaganoush or lacto-fermented aubergine caviar
NiCruNiCuit's incredible recipe: https://nicrunicuit.com/faire/cuisiner/caviar-daubergine-sans-cuisson-mais-fermente/
Take a look at the other tutorials to discover other fermented sauces and side dishes.
For example, in the tutorial Fermented foods - dosas, vegan pancakes you'll find hummus-type sauces made from different legumes.
You can also make delicious hummus-type sauces with squash: here is an example made with butternut by Ferment'Nation: https://www.instagram.com/p/B5YCo8-ijWj/
Étape 17 - Lacto-fermented vine leaves and Greek dolmas
Recipe and photos of Ferment'Nation
There are many varieties of vine, with leaves of varying shapes. The fuller leaves are preferable, as they are easier to stuff (take care to use only a few per plant so as not to weaken the plant).
You can rinse them in clean water if they are dirty, but otherwise you can simply check that there are no traces of disease (spots or blisters). Ideally, the leaves should be no more than 15cm wide, so that they can fit into a 1L jar without being crushed, and they should be very tender (away from the base of the branch, but not too far away so that they're not too small either). You can fit 8 or 9 rolls of 8 in the jar, so 64 or 72 leaves in all (if I can still count!).
Then remove the stem with scissors, stack them in bundles of 8 and roll them up from the base. You can tie them with string to prevent them from unrolling in the jar. Fill the jar, place a weight on top (to prevent them floating), taking care not to tear them, and top up with 3% brine (30g/litre) to cover them completely.
They are then left to ferment for 1 week at room temperature, and at least 3 weeks in a cool place (although they can be kept longer to make dolmas all year round, as long as they are always kept submerged).
After a month of lacto-fermentation, the vine leaves are finally ready! Here's the recipe to make 60 dolmas with them.
Recipe:
Chop 4 large yellow onions and fry in a large saucepan with plenty of oil. When they are translucent, add 300g of round rice (this will work with long rice but round rice has more starch and will make the mixture more melting) and mix the two together for 3 minutes over a low heat.
Add 800ml water and salt, then leave to cook for 5 minutes from boiling. Turn off the heat and chop around ten fresh mint leaves, flat-leaf parsley, a little dill, a handful of pine nuts and the juice of one lemon. Leave to cool a little.
On a chopping board, carefully unroll your vine leaves (they tear easily) and lay one flat, veins upwards. Using a heaping tablespoon of the rice mixture, form a small sausage in the middle of the leaf, horizontally (depending on the type of vine you use, the less hollow your leaves will be, the more rice you'll be able to use). Fold the two ‘ears’ of the leaf down over the roll, then the sides, making sure that the folding does not exceed the width of the roll, then wrap the roll around the top of the leaf.
Line the base of a stewpot with vine leaves and place the dolmas on top in a circle. You can make two layers with 30 dolmas per layer.
Cover with a plate and sprinkle with water to cover the dolmas, then leave to cook over a low heat for 15 minutes. Then wait for them to cool and put them in the fridge.
Finally, they can be drizzled with lemon juice and served with a mixture of yoghurt and chopped herbs (mint or dill)!
Étape 18 - Fermented carrots imitating smoked salmon
ShiraBio recipe in 10 minutes (then 48 hours). Here's the video of the full Christmas recipe.
Ingredients:
- 2 large carrots
- 1 teaspoon paprika (smoked, it brings out the taste of the salmon even better)
- 1/2 teaspoon garlic powder
- 1/2 sheet of nori seaweed (or 2 tablespoons of nori seaweed flakes)
- 1-2 tablespoons tamari (2 if no fermented liquid)
- 1 tablespoon fermented umeboshi (or lacto-fermented brine or rice vinegar)
- 1 tablespoon olive oil
Étape 19 - Educational content to download
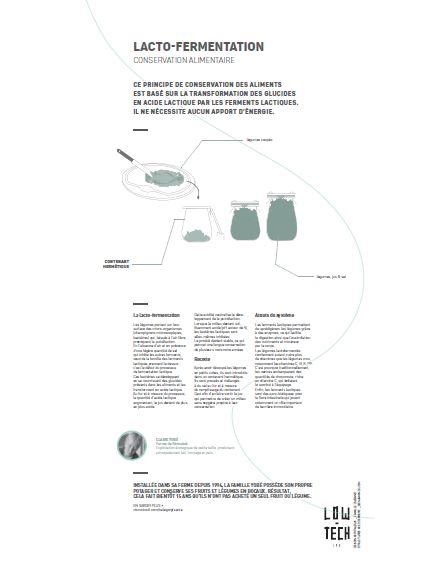
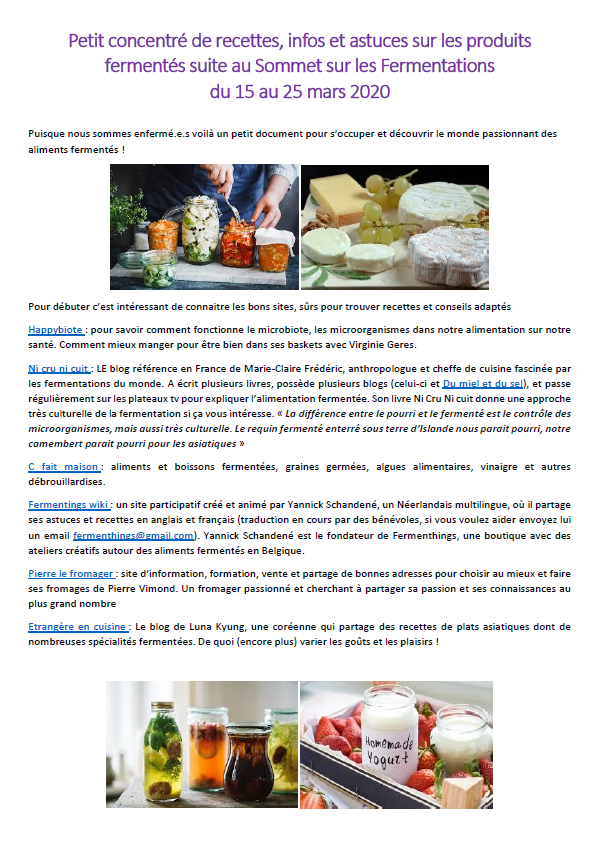
You can download an educational sheet created by the Low-tech Lab for the exhibition "En Quête d'un Habitat Durable" in the "Files" part of the tutorial (tab in the "Outils-Matériaux" section)
In this section, Alice Martin-Demolon also provides you with a collection of information and fermented recipes (preserves, drinks, bread, dairy products, etc.). Feel free to download it.
Notes et références
- Video tutorial by Camille Duband and written instructions by Pierre-Alain Lévêque for the Low-tech Tour, April 2018.
- Knowledge and know-how passed on by Claire Yobé, Keroueze farm.
- ARTE, Food waste in 7 key figures
- National Geographic, A third of all food produced is lost or wasted
- Wikipedia, lacto-fermentation
- Blog ni cru ni cuit
- Lacto-fermentation cooking video: https://www.youtube.com/watch?v=iiNl0Jv6xTw
- The summit on fermentations (France, 2020) -> a summary of the speeches and the recipes are in the ‘Files’ tab of this tutorial.
- For more recipe inspiration and fermentation courses, follow ShiraBio: https://www.instagram.com/shirabio/
- For a wealth of recipes, ferments and tools for fermenting at home, visit the website of Fairment, organisers of the Fermentation Summit: https://fairment.com
For more recipe inspiration and fermentation courses, follow ShiraBio, Ferment'Nation and explore the incredible website (and books) of Marie-Claire Frédéric, anthropologist and chef fascinated by fermentations from around the world: Ni cru ni cuit.
There are several facebook groups for fermentation enthusiasts, and I recommend these
- Home fermentation founded by Ferment'Nation
- Lacto-fermentation and natural preserves, focusing specifically on lacto-fermentation
If you're looking for reference books to learn the art of fermentation, Sébastien aka Ferment'Nation offers in this post from the Home Fermentation group an explained compilation of the best books he's tested. There are specific ones (on lacto-fermentation, cheeses) and general ones. Something to inspire you!
For a wealth of recipes, ferments and tools for fermenting at home, visit the website of Fairment, organisers of the Fermentation Summit: https://fairment.com
Other essential references can be found in the first few pages of the file attached to this tutorial.
If you would like to see more tutorials on fermentations, please take a look at:
- Lacto-fermented conserves
- Fermented foods - Fruit fermentations
- Fermented drinks - Homemade sodas
- Fermented drinks - Flower sodas
- Fermented drinks - Kefir, kombucha and vinegars
- Fermented drinks - Meads
- Fermented foods - homemade animal milk products
- Fermented foods - Vegetable milk kefir and vegan cheeses
- Fermented foods - sourdoughs and breads
- Fermented foods - Asian fermentations of cereals, pulses and variations
- Fermented foods - festival of sauces
- Fermented foods - alternatives to animal proteins
Published


 Français
 English
 Deutsch
 Español
 Italiano
 Português