(Page créée avec « We got hold of a can which we carefully cleaned. We started by fitting a valve to the pre-existing hole at the top of the can. Then we drilled another hole in the bottom o... ») |
(Page créée avec « Pooling of the elements ») |
||
| Ligne 59 : | Ligne 59 : | ||
}} | }} | ||
{{Tuto Step | {{Tuto Step | ||
| − | |Step_Title= | + | |Step_Title=Pooling of the elements |
|Step_Content=Pour la dernière étape, nous avons utilisé une piscine gonflable pour faire office de bassine. Nous avons vissé les tuyaux au bidon, installé les parpaings, le bidon, et la roue. La piscine n'est pas du tout adaptée, un deuxième bidon coupé sur la hauteur serait plus adapté ! | |Step_Content=Pour la dernière étape, nous avons utilisé une piscine gonflable pour faire office de bassine. Nous avons vissé les tuyaux au bidon, installé les parpaings, le bidon, et la roue. La piscine n'est pas du tout adaptée, un deuxième bidon coupé sur la hauteur serait plus adapté ! | ||
|Step_Picture_00=G_n_rateur_d_lectricit__hydrolique___boucle_ferm__324828561_1263000251314993_6790106151134390709_n.jpg | |Step_Picture_00=G_n_rateur_d_lectricit__hydrolique___boucle_ferm__324828561_1263000251314993_6790106151134390709_n.jpg | ||
Version du 17 août 2024 à 13:20

Dernière modification le 17/08/2024
Difficulté
Moyen
Durée
3 jour(s)
Coût
10 EUR (€)
Description
The aim of this prototype is to generate electricity from water. The system operates in a closed loop, meaning that no water is lost and that it can be reused.
Introduction
Using physics, we are planning to make an automatic pump. The principle is simple: a canister with a hole in the bottom empties water into a basin. A pipe runs up from this basin to the top of the canister. The rest of the canister is hermetically sealed. The vacuum created by the waterfall allows the water to be pumped back into the drum. The aim is to create a cycle that lasts forever.
Matériaux
Canister
Bicycle wheel
Steal spoon
Wood
Breeze block
Pipe
Outils
Column drill
Screwdriver
Hand Screwdriver
Étape 1 - Making the wheel and its base
For this step, we started by taking a bicycle wheel and removing the tyre from it. The spokes are screwed to the wheel and we had the option of unscrewing them to insert metal spoons that we had previously drilled with a drill press, and then screwing them back in. We bent them so that we didn't have to cut off their tails.
For the base, we took a plank of wood, cut it and screwed it together as shown in the photo.


Étape 2 - Making the canister base
We started by taking a pallet and boning it with a crowbar. We then made a triangular base. Then we used breeze blocks to make the height.

Étape 3 - Canister modification
We got hold of a can which we carefully cleaned. We started by fitting a valve to the pre-existing hole at the top of the can. Then we drilled another hole in the bottom of the can to insert a grommet. In order to screw it in on both sides, we had to grind off part of the bottom of the can.


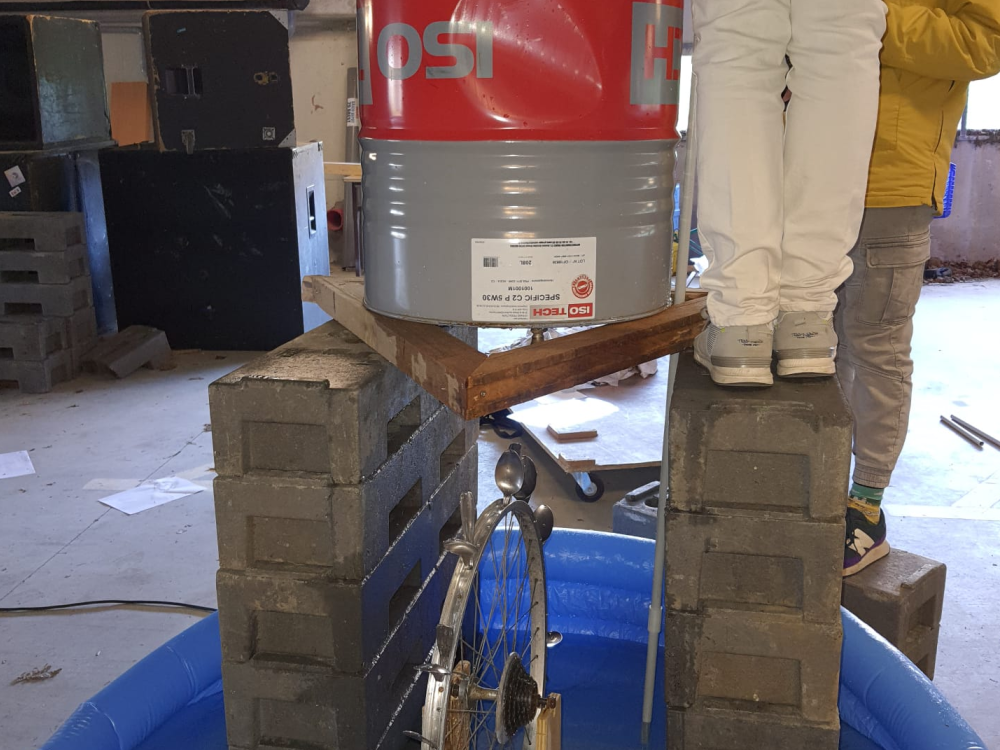
Étape 4 - Pooling of the elements
Pour la dernière étape, nous avons utilisé une piscine gonflable pour faire office de bassine. Nous avons vissé les tuyaux au bidon, installé les parpaings, le bidon, et la roue. La piscine n'est pas du tout adaptée, un deuxième bidon coupé sur la hauteur serait plus adapté !


Draft
 Français
 English
 Deutsch
 Español
 Italiano
 Português