(Page créée avec « Making the wheel and its base ») |
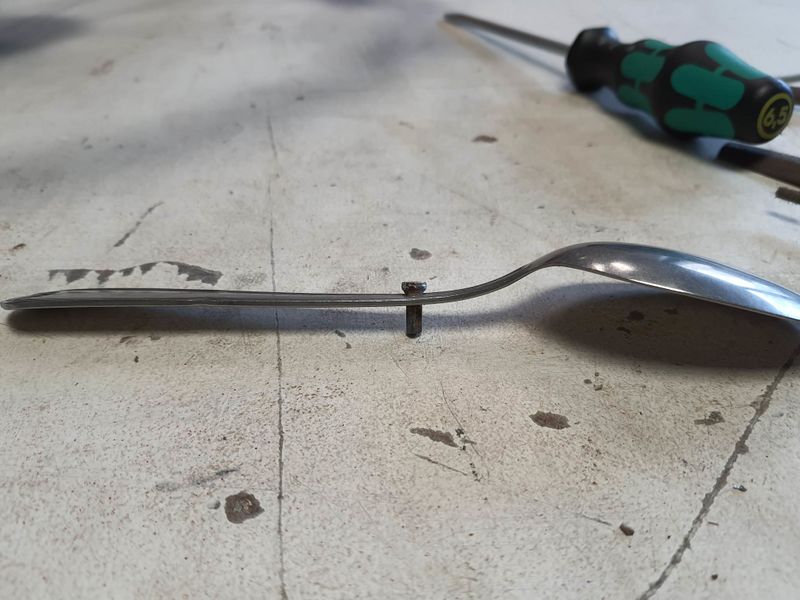
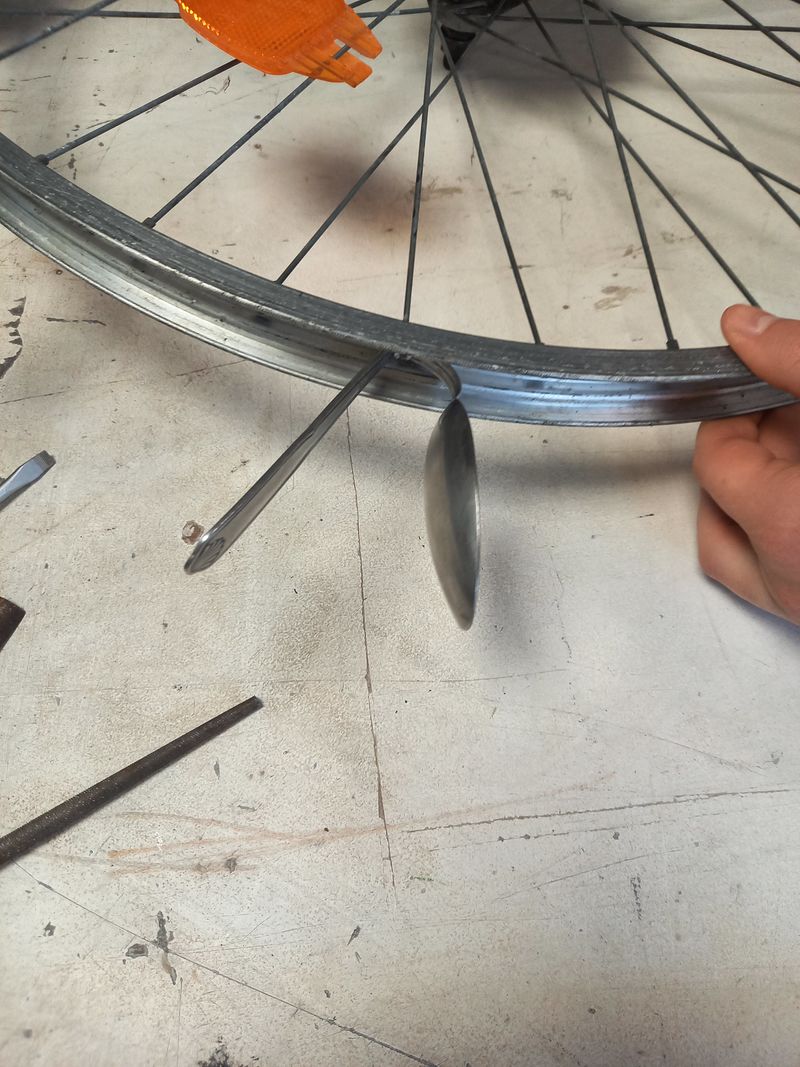
(Page créée avec « For this step, we started by taking a bicycle wheel and removing the tyre from it. The spokes are screwed to the wheel and we had the option of unscrewing them to insert m... ») |
||
| Ligne 38 : | Ligne 38 : | ||
{{Tuto Step | {{Tuto Step | ||
|Step_Title=Making the wheel and its base | |Step_Title=Making the wheel and its base | ||
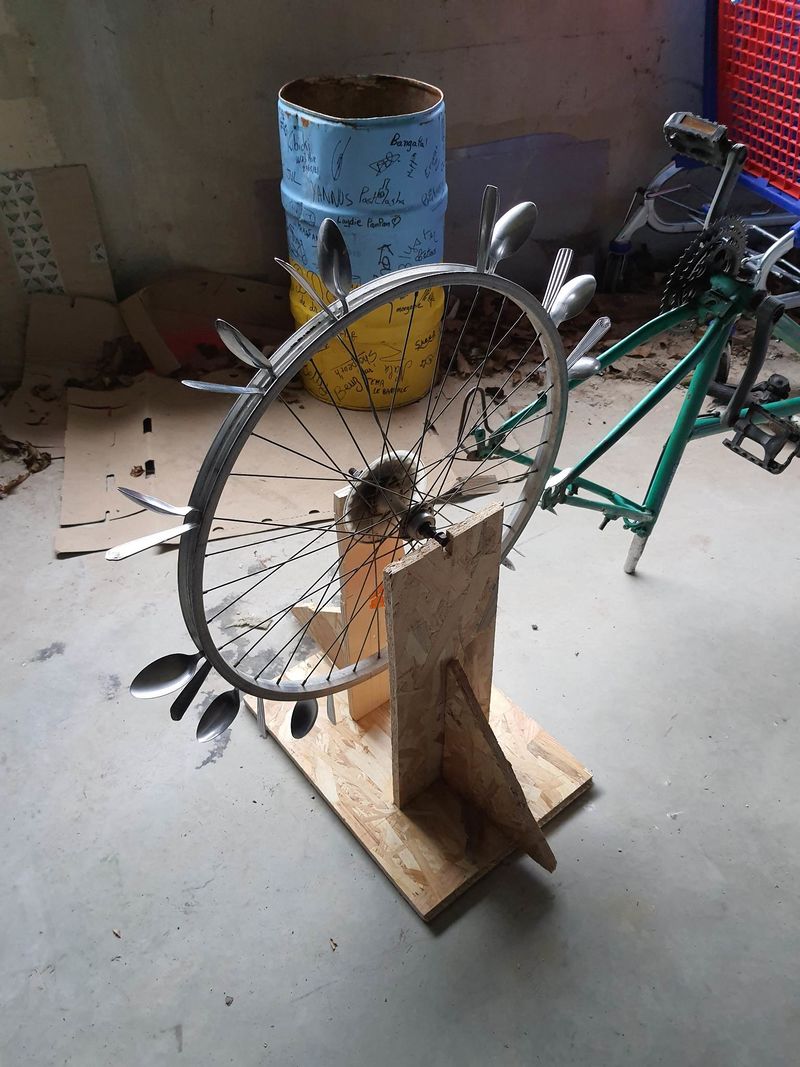
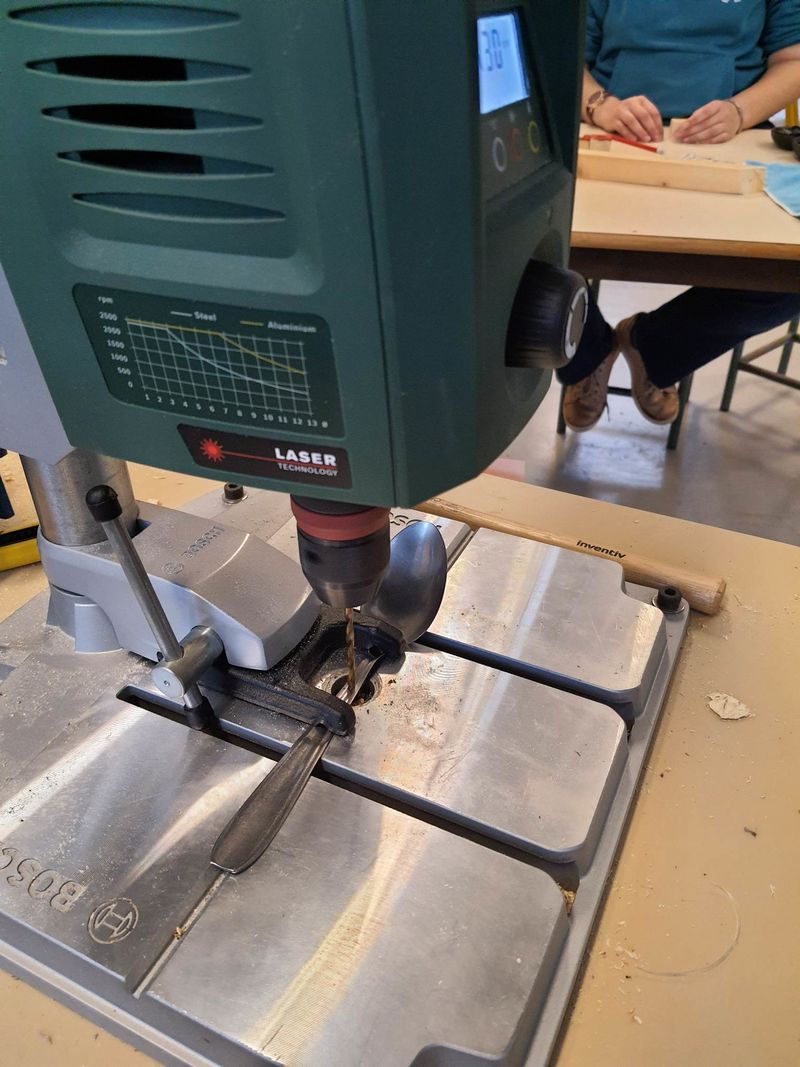
| − | |Step_Content= | + | |Step_Content=For this step, we started by taking a bicycle wheel and removing the tyre from it. The spokes are screwed to the wheel and we had the option of unscrewing them to insert metal spoons that we had previously drilled with a drill press, and then screwing them back in. We bent them so that we didn't have to cut off their tails. |
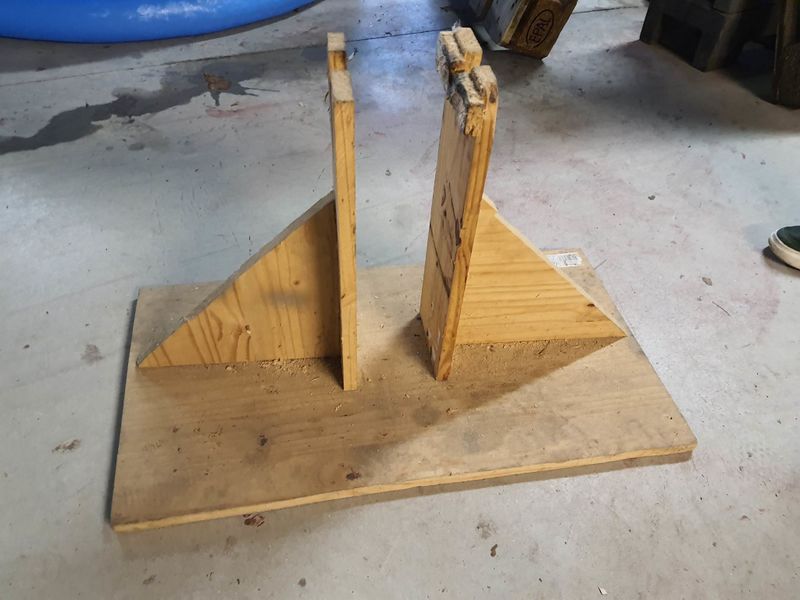
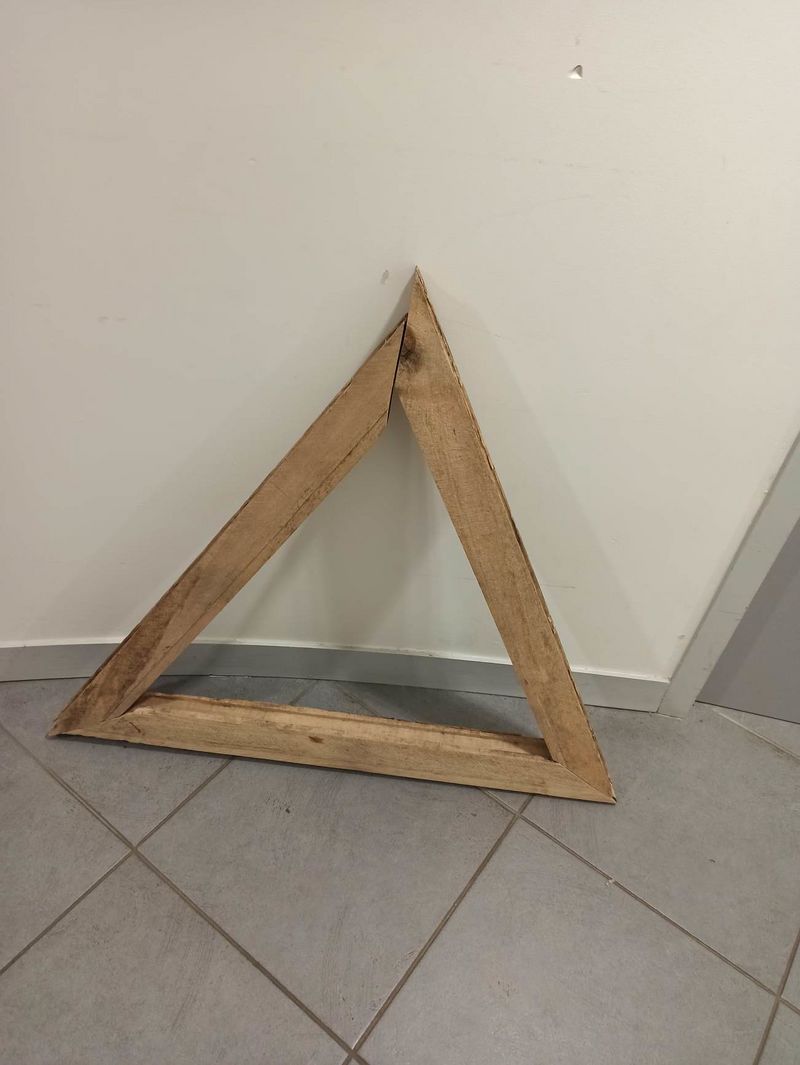
Pour le socle, nous avons récupéré une planche que nous avons coupé et vissé comme la photo ci-joint. | Pour le socle, nous avons récupéré une planche que nous avons coupé et vissé comme la photo ci-joint. | ||
Version du 17 août 2024 à 13:17
Introduction
Matériaux
Can
Bicycle wheel
Steal spoon
Wood
Breeze block
Pipe
Outils
Column drill
Screwdriver
Hand Screwdriver
Étape 1 - Making the wheel and its base
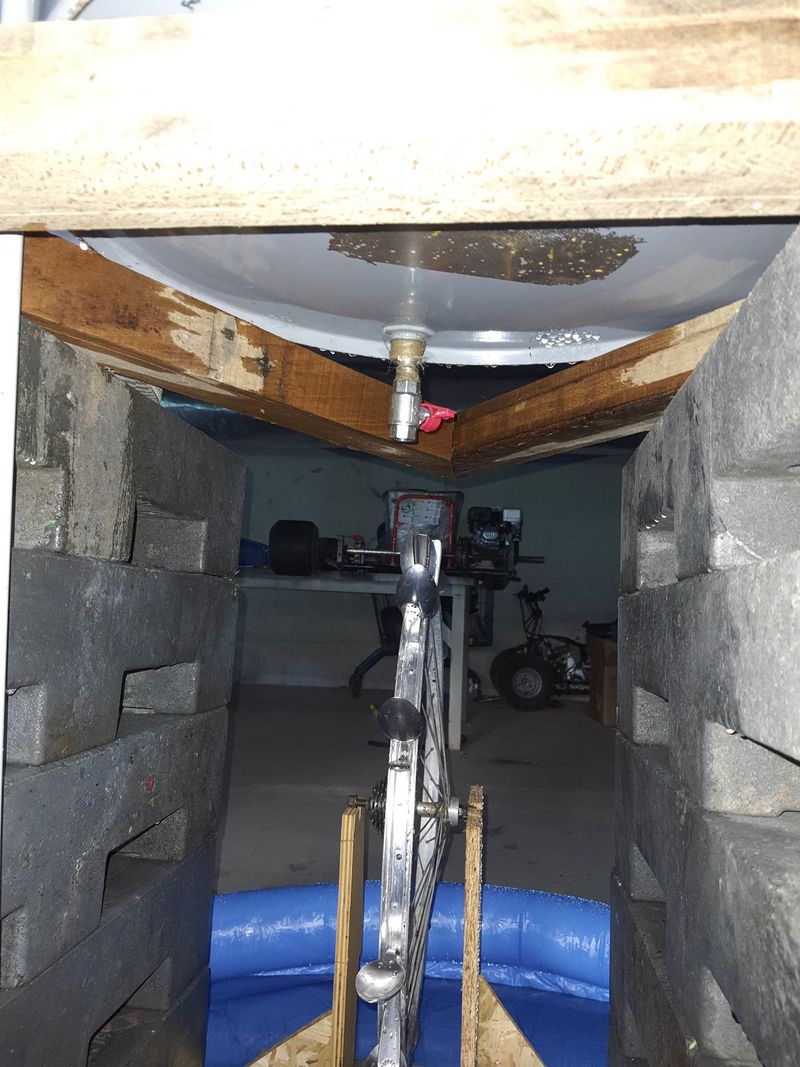
For this step, we started by taking a bicycle wheel and removing the tyre from it. The spokes are screwed to the wheel and we had the option of unscrewing them to insert metal spoons that we had previously drilled with a drill press, and then screwing them back in. We bent them so that we didn't have to cut off their tails.
Pour le socle, nous avons récupéré une planche que nous avons coupé et vissé comme la photo ci-joint.
Étape 2 - Fabrication du socle du bidon
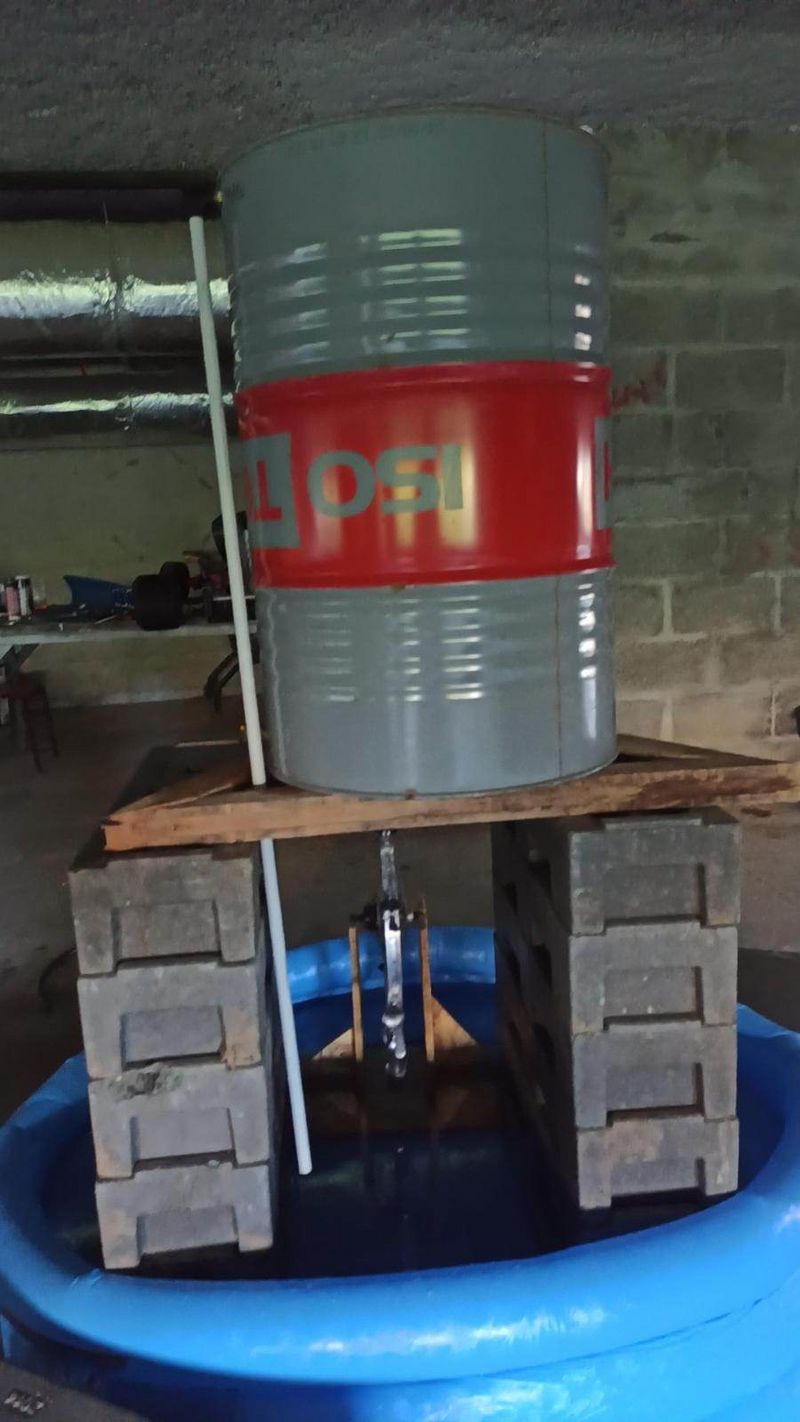
Nous avons commencé par récupérer une palette que nous avons désossé avec un pied de biche. Nous avons ensuite fait un socle en triangle. Ensuite, nous avons récupéré des parpaings pour faire de la hauteur.
Étape 3 - Modification du bidon
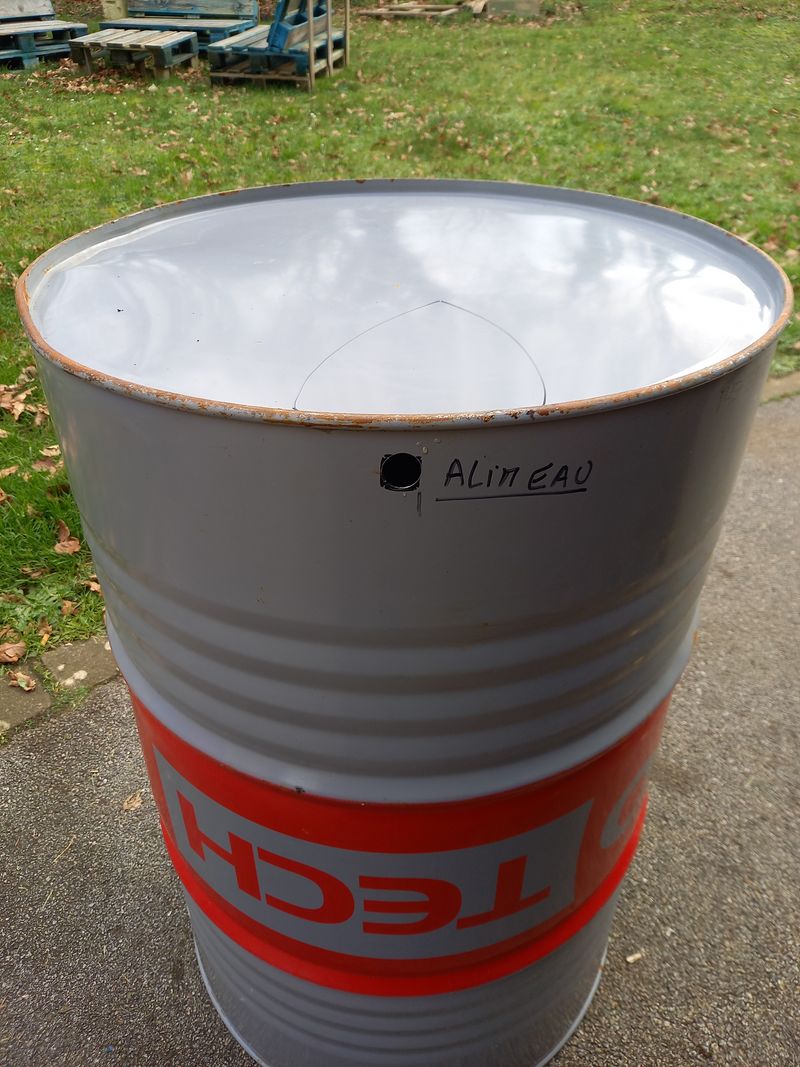
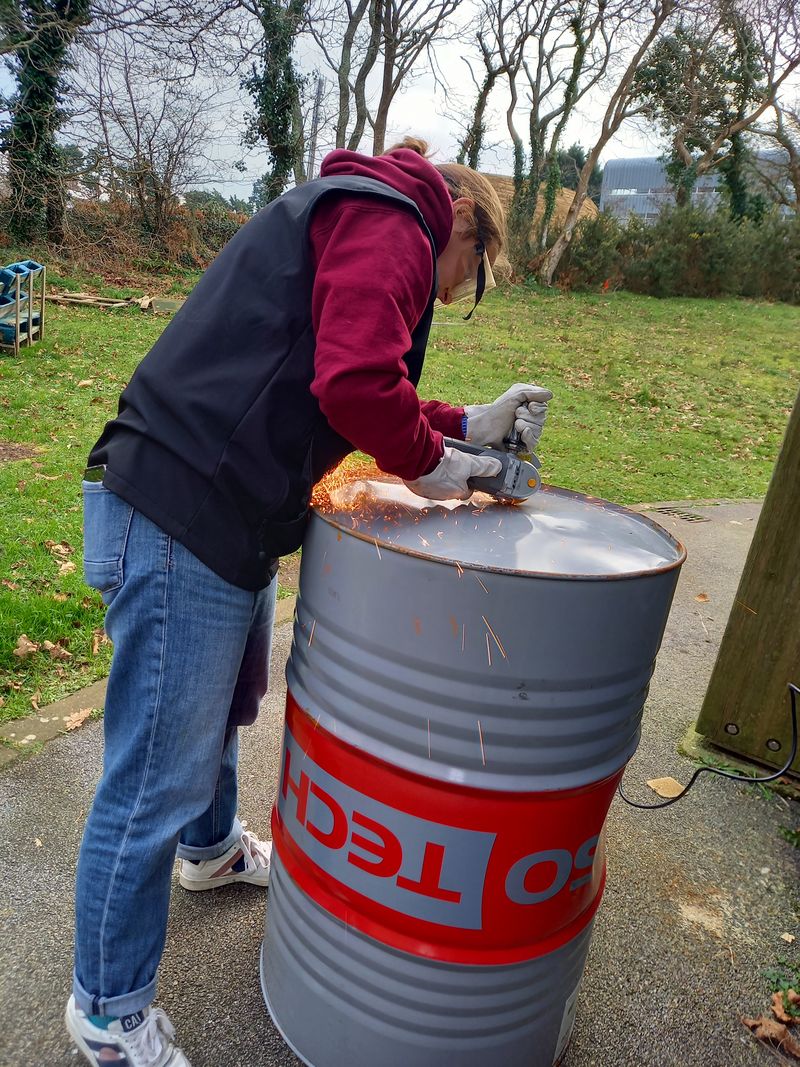
Nous avons récupéré un bidon que nous avons soigneusement nettoyé. Nous avons commencé par mettre une vanne sur le trou préexistant qui était en haut du bidon. Ensuite, nous avons percé un autre trou sur le bas de celui-ci pour y insérer un passe-trou. Afin de le visser des deux côtés, nous avons du meuler une partie du socle bas du bidon.
Étape 4 - Mise en commun des éléments
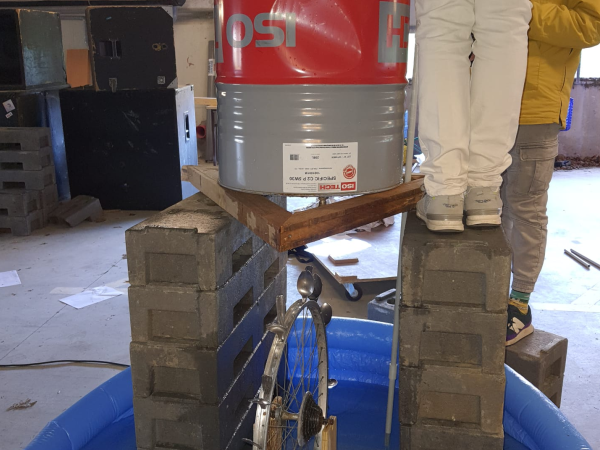
Pour la dernière étape, nous avons utilisé une piscine gonflable pour faire office de bassine. Nous avons vissé les tuyaux au bidon, installé les parpaings, le bidon, et la roue. La piscine n'est pas du tout adaptée, un deuxième bidon coupé sur la hauteur serait plus adapté !
Draft
 Français
 English
 Deutsch
 Español
 Italiano
 Português