(Page créée avec « <nowiki>*</nowiki>Empty plastic bottle ») |
(Page créée avec « And voila, you've got a little box that you can use to store cosmetics and other products. ») |
||
| (14 révisions intermédiaires par le même utilisateur non affichées) | |||
| Ligne 20 : | Ligne 20 : | ||
|Material=<nowiki>*</nowiki>Empty plastic bottle | |Material=<nowiki>*</nowiki>Empty plastic bottle | ||
| − | <nowiki>*</nowiki> | + | <nowiki>*</nowiki>Bottle cap of the same size as the chosen bottle |
| − | |Tools=<nowiki>*</nowiki> | + | |Tools=<nowiki>*</nowiki>Scissors or cutter |
| − | <nowiki>*</nowiki> | + | <nowiki>*</nowiki>Strong glue or hot glue gun |
}} | }} | ||
{{Tuto Step | {{Tuto Step | ||
| − | |Step_Title= | + | |Step_Title=Preparation of the bottles |
| − | |Step_Content= | + | |Step_Content=Wash and dry plastic bottles thoroughly. |
}} | }} | ||
{{Tuto Step | {{Tuto Step | ||
| − | |Step_Title= | + | |Step_Title=Cutting |
| − | |Step_Content= | + | |Step_Content=Use scissors or a cutter to cut off the neck of the bottle, to get the top part we're interested in. |
| − | {{Warning|... | + | {{Warning|...Using scissors (less dangerous than a cutter), carefully cut the limit at the neck of the bottle.}} |
| − | + | The top must fit over the cap. If necessary, cut a narrow strip around the opening to allow the lid to fit properly. | |
<br /> | <br /> | ||
| Ligne 51 : | Ligne 51 : | ||
}} | }} | ||
{{Tuto Step | {{Tuto Step | ||
| − | |Step_Title= | + | |Step_Title=Gluing |
| − | |Step_Content= | + | |Step_Content=Using the glue, place the glue on the inside of the cork, and carefully place the cork at the bottom of the neck of the bottle. |
| − | + | Leave the glue to dry completely. | |
|Step_Picture_00=Petites_Bo_tes_en_Bouteilles_Recycl_es_8.jpg | |Step_Picture_00=Petites_Bo_tes_en_Bouteilles_Recycl_es_8.jpg | ||
|Step_Picture_00_annotation={"version":"3.5.0","objects":[{"type":"image","version":"3.5.0","originX":"left","originY":"top","left":-182,"top":-393,"width":3120,"height":4160,"fill":"rgb(0,0,0)","stroke":null,"strokeWidth":0,"strokeDashArray":null,"strokeLineCap":"butt","strokeDashOffset":0,"strokeLineJoin":"miter","strokeMiterLimit":4,"scaleX":0.27,"scaleY":0.27,"angle":0,"flipX":false,"flipY":false,"opacity":1,"shadow":null,"visible":true,"clipTo":null,"backgroundColor":"","fillRule":"nonzero","paintFirst":"fill","globalCompositeOperation":"source-over","transformMatrix":null,"skewX":0,"skewY":0,"crossOrigin":"","cropX":0,"cropY":0,"src":"https://wiki.lowtechlab.org/images/8/85/Petites_Bo_tes_en_Bouteilles_Recycl_es_8.jpg","filters":[]}],"height":450,"width":600} | |Step_Picture_00_annotation={"version":"3.5.0","objects":[{"type":"image","version":"3.5.0","originX":"left","originY":"top","left":-182,"top":-393,"width":3120,"height":4160,"fill":"rgb(0,0,0)","stroke":null,"strokeWidth":0,"strokeDashArray":null,"strokeLineCap":"butt","strokeDashOffset":0,"strokeLineJoin":"miter","strokeMiterLimit":4,"scaleX":0.27,"scaleY":0.27,"angle":0,"flipX":false,"flipY":false,"opacity":1,"shadow":null,"visible":true,"clipTo":null,"backgroundColor":"","fillRule":"nonzero","paintFirst":"fill","globalCompositeOperation":"source-over","transformMatrix":null,"skewX":0,"skewY":0,"crossOrigin":"","cropX":0,"cropY":0,"src":"https://wiki.lowtechlab.org/images/8/85/Petites_Bo_tes_en_Bouteilles_Recycl_es_8.jpg","filters":[]}],"height":450,"width":600} | ||
| Ligne 61 : | Ligne 61 : | ||
}} | }} | ||
{{Tuto Step | {{Tuto Step | ||
| − | |Step_Title= | + | |Step_Title=Final result |
| − | |Step_Content= | + | |Step_Content=And voila, you've got a little box that you can use to store cosmetics and other products. |
|Step_Picture_00=Petites_Bo_tes_en_Bouteilles_Recycl_es_IMG_20240628_114827.jpg | |Step_Picture_00=Petites_Bo_tes_en_Bouteilles_Recycl_es_IMG_20240628_114827.jpg | ||
|Step_Picture_01=Petites_Bo_tes_en_Bouteilles_Recycl_es_IMG_20240626_145444.jpg | |Step_Picture_01=Petites_Bo_tes_en_Bouteilles_Recycl_es_IMG_20240626_145444.jpg | ||
Version actuelle datée du 23 juillet 2024 à 11:05


Dernière modification le 23/07/2024
Difficulté
Très facile
Durée
5 minute(s)
Coût
0 EUR (€)
Description
Recycling plastic bottles to make small boxes is a great way to reuse materials and create useful objects. This tutorial provides a step-by-step breakdown of how to cut and assemble the bottles to create practical storage boxes. The tutorial covers the materials needed, the cutting technique and tips on how to ensure the boxes are both functional and aesthetically pleasing.
Introduction
This detailed tutorial will guide you step-by-step through cutting and assembling plastic bottles to create practical storage boxes. You'll discover the materials needed, cutting techniques and tips to ensure your creations are both functional and attractive. Immerse yourself in this creative and eco-friendly activity, and turn your plastic waste into useful treasures!

Matériaux
*Empty plastic bottle
*Bottle cap of the same size as the chosen bottle
Outils
*Scissors or cutter
*Strong glue or hot glue gun
Étape 1 - Preparation of the bottles
Wash and dry plastic bottles thoroughly.
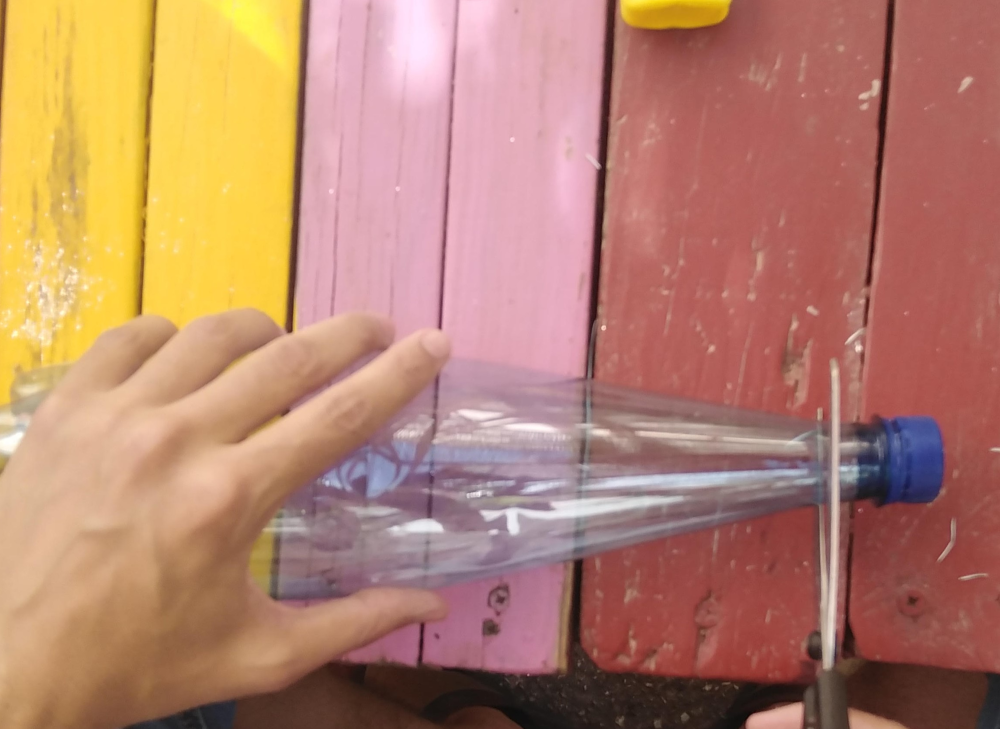
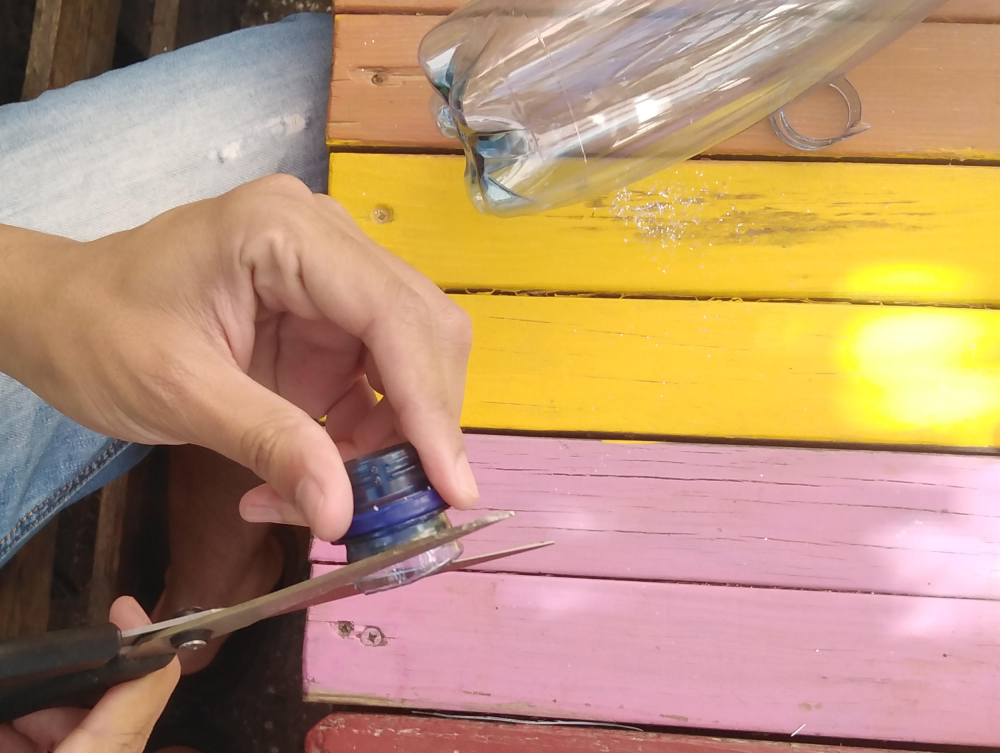
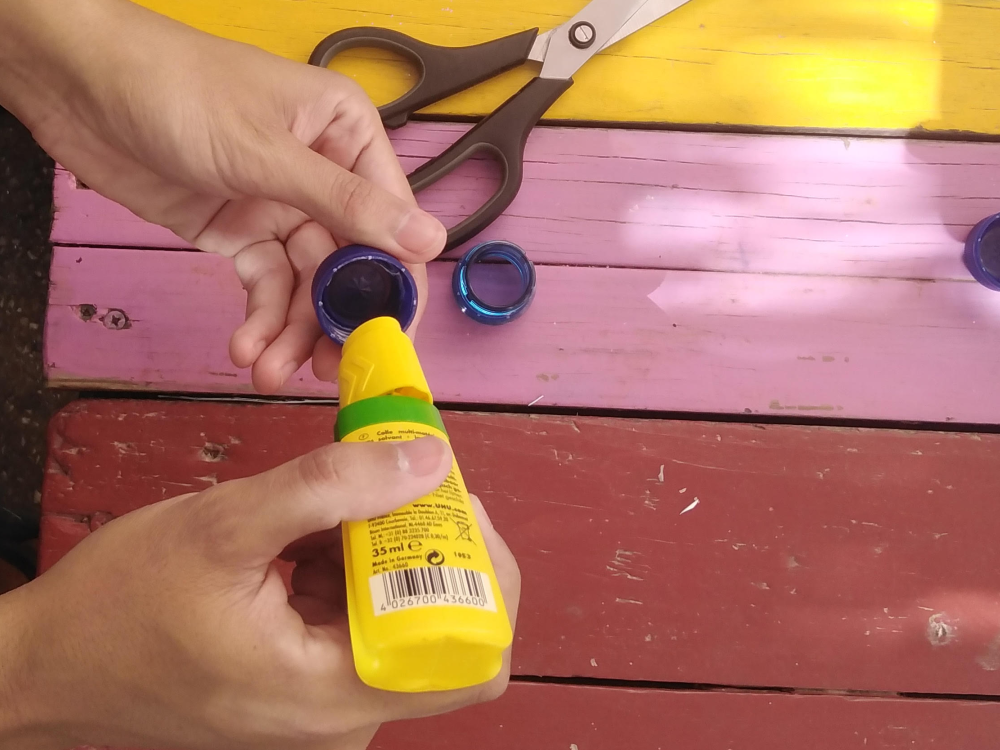
Étape 2 - Cutting
Use scissors or a cutter to cut off the neck of the bottle, to get the top part we're interested in.
The top must fit over the cap. If necessary, cut a narrow strip around the opening to allow the lid to fit properly.


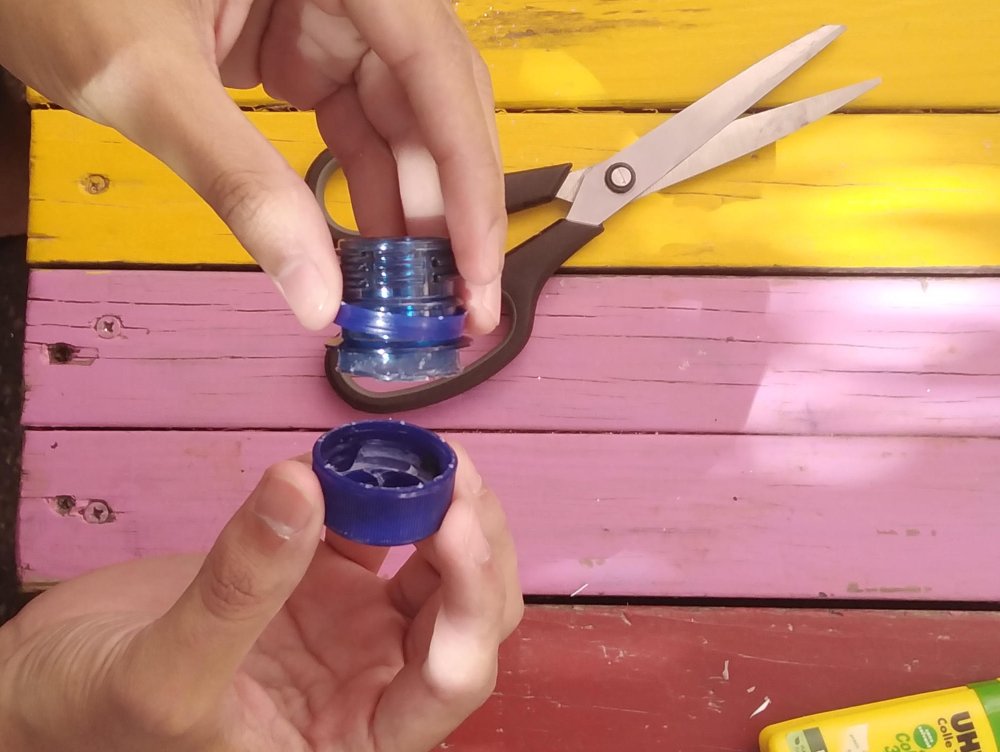
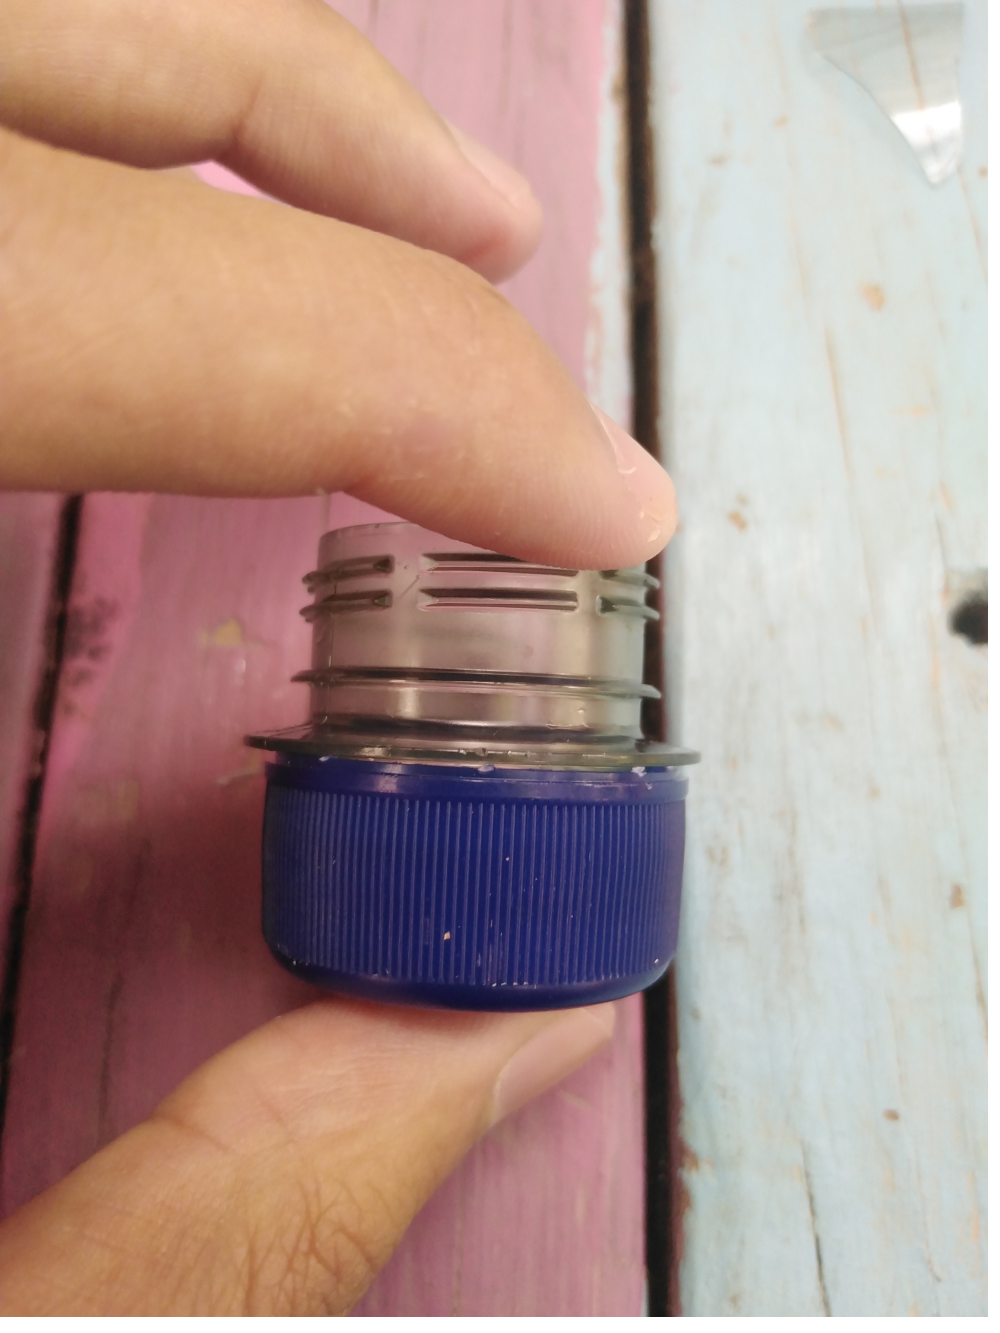
Étape 3 - Gluing
Using the glue, place the glue on the inside of the cork, and carefully place the cork at the bottom of the neck of the bottle.
Leave the glue to dry completely.
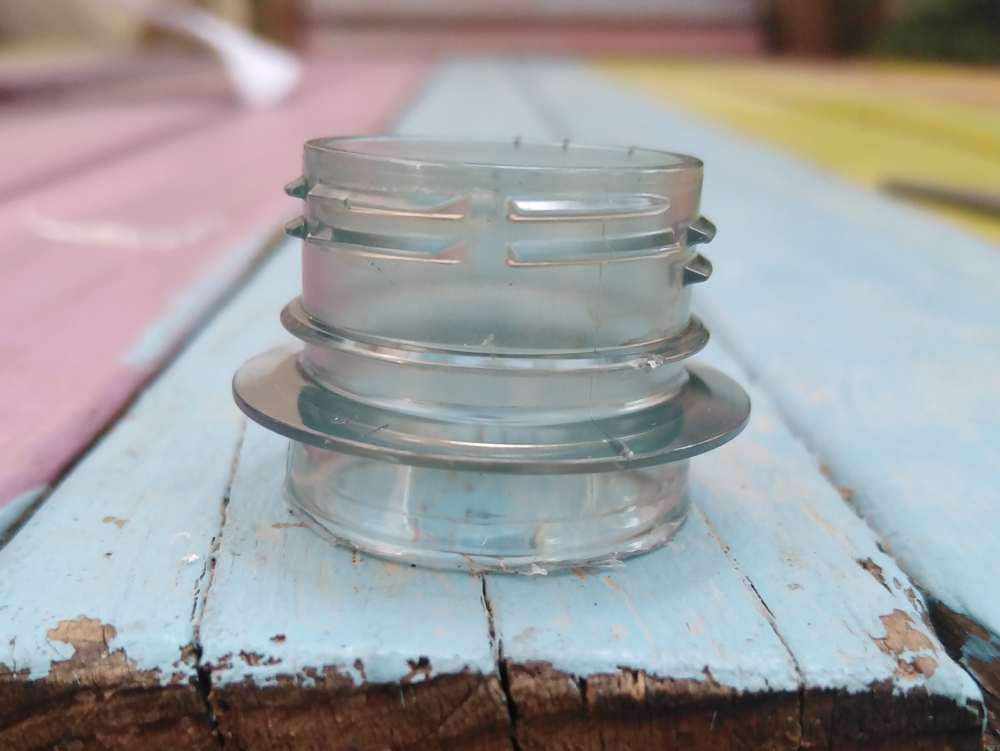
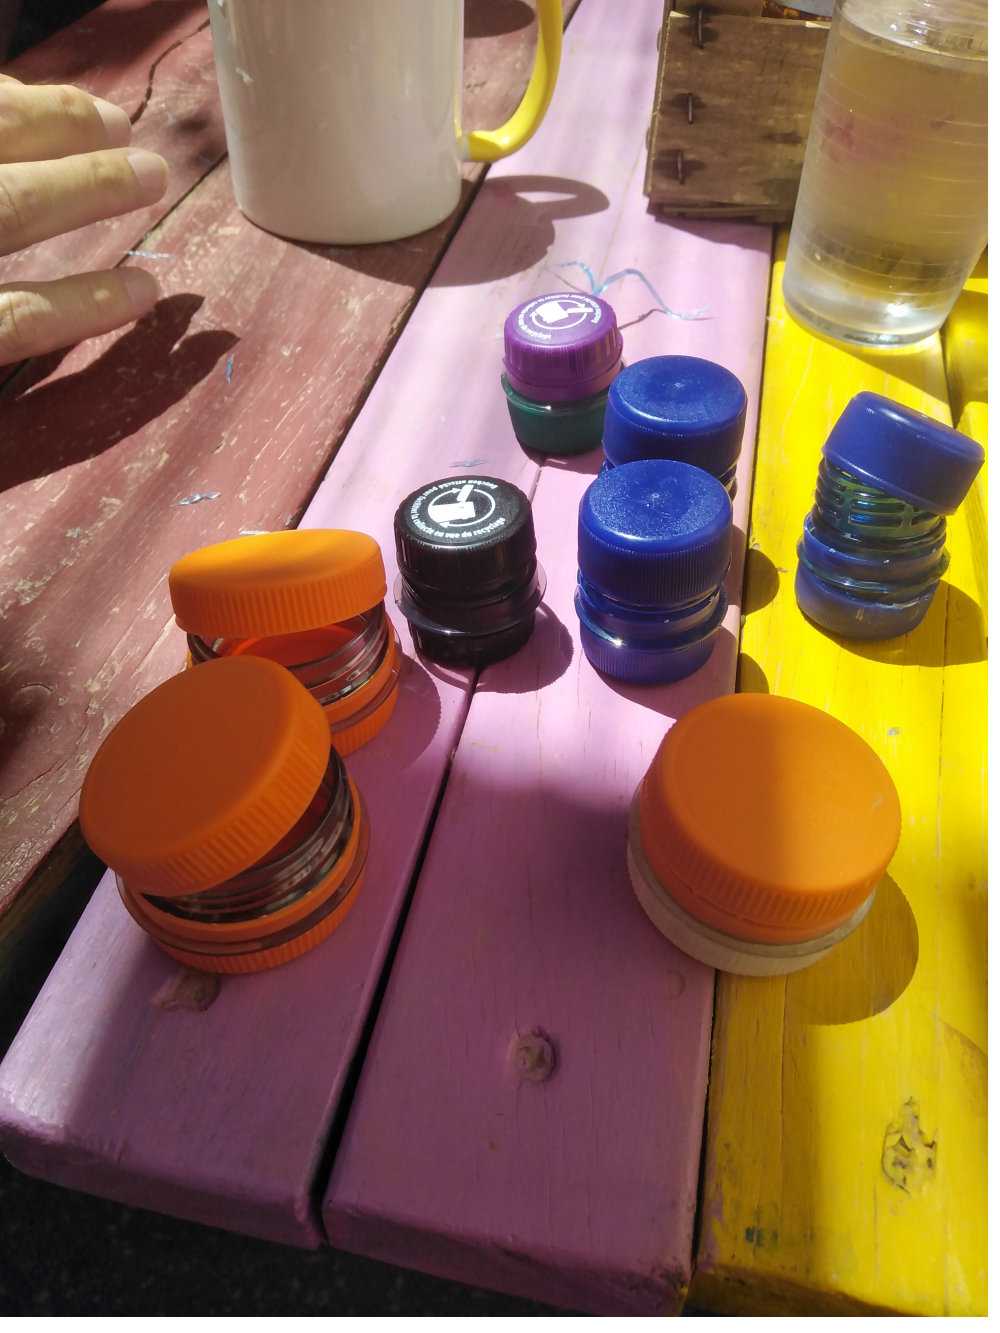
Étape 4 - Final result
And voila, you've got a little box that you can use to store cosmetics and other products.

Draft
 Français
 English
 Deutsch
 Español
 Italiano
 Português