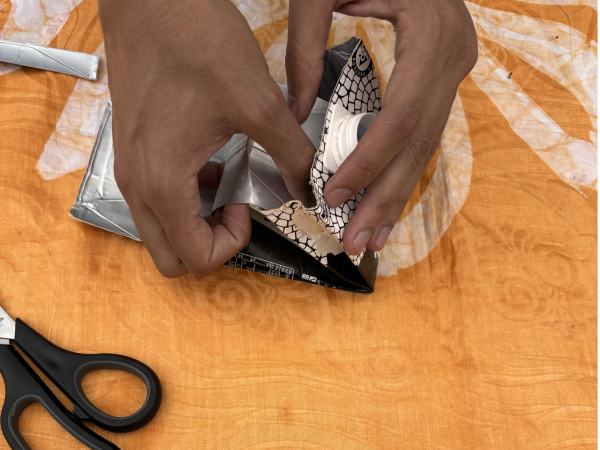
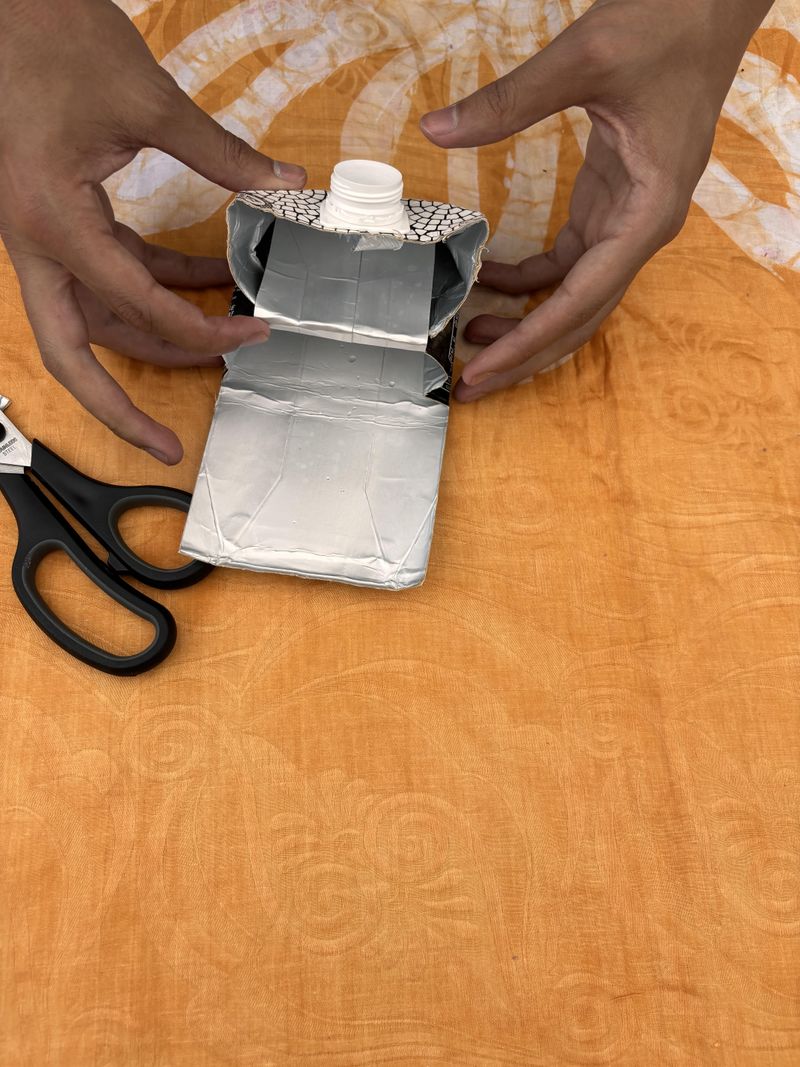
(Page créée avec « Insert the prepared piece into the top third of the brick. This creates a double inner pocket (the purse takes shape!) ») |
(Page créée avec « Fold the sides of the brick ») |
||
| Ligne 81 : | Ligne 81 : | ||
}} | }} | ||
{{Tuto Step | {{Tuto Step | ||
| − | |Step_Title= | + | |Step_Title=Fold the sides of the brick |
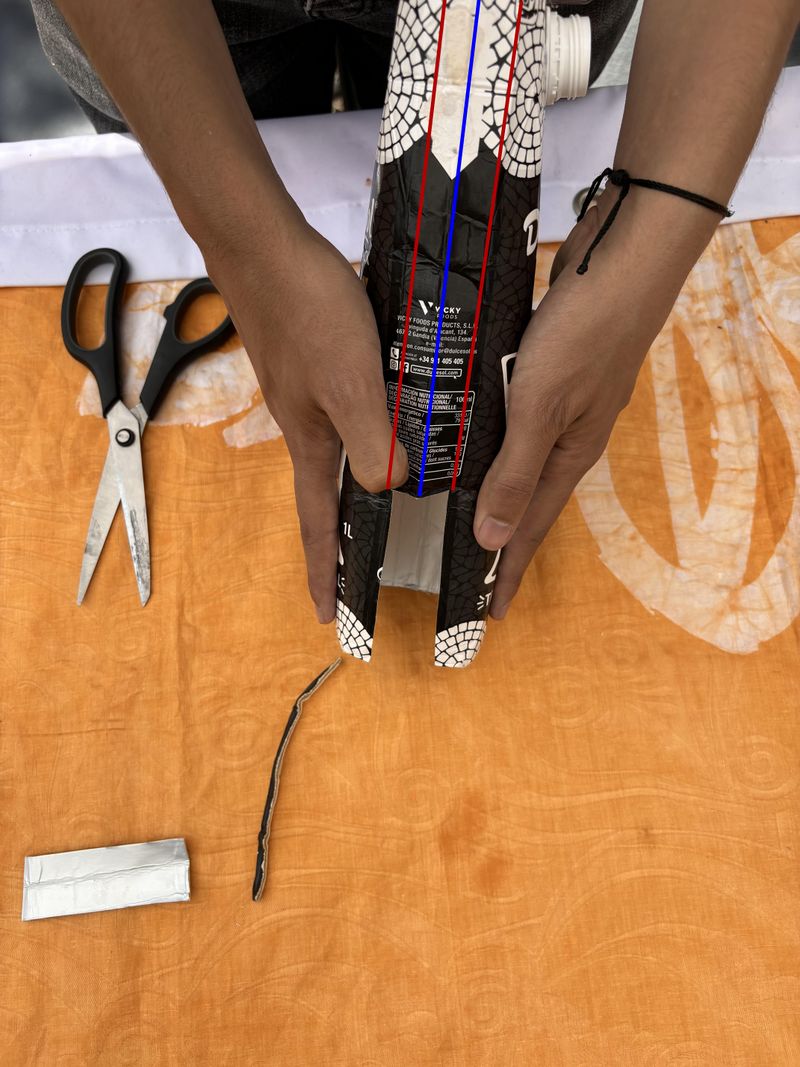
|Step_Content=Plier la boîte des deux côtés, de manière à ce que la ligne centrale ( en bleu) se replie à l'intérieur de la boîte et que les deux lignes à côté ( en rouge ) se replient vers l'extérieur. (voir photo 1) | |Step_Content=Plier la boîte des deux côtés, de manière à ce que la ligne centrale ( en bleu) se replie à l'intérieur de la boîte et que les deux lignes à côté ( en rouge ) se replient vers l'extérieur. (voir photo 1) | ||
|Step_Picture_00=Porte-monnaie_en_brique_12v.jpg | |Step_Picture_00=Porte-monnaie_en_brique_12v.jpg | ||
Version du 23 juillet 2024 à 08:58
Description
We'll show you how to turn a milk or juice carton into a practical wallet. Not only will this give you a very useful wallet, but you'll also be using the carton that would otherwise have ended up in the bin. Turning useless waste into useful products is a key principle of low-tech. What's more, you get your own personal wallet!
Sommaire
Sommaire
- 1 Description
- 2 Sommaire
- 3 Introduction
- 4 Étape 1 - Preparation of the brick
- 5 Étape 2 - Cutting the brick
- 6 Étape 3 - Fold marking
- 7 Étape 4 - Cutting out the bottom section
- 8 Étape 5 - Cutting out the last parts of the brick
- 9 Étape 6 - Insert the cut part
- 10 Étape 7 - Fold the sides of the brick
- 11 Étape 8 - Faire une empreinte à l'intérieur du rabat
- 12 Étape 9 - Faire un trou dans la fermeture du porte-monnaie
- 13 Étape 10 - Fermeture du porte-monnaie
- 14 Commentaires
Introduction
Étape 1 - Preparation of the brick
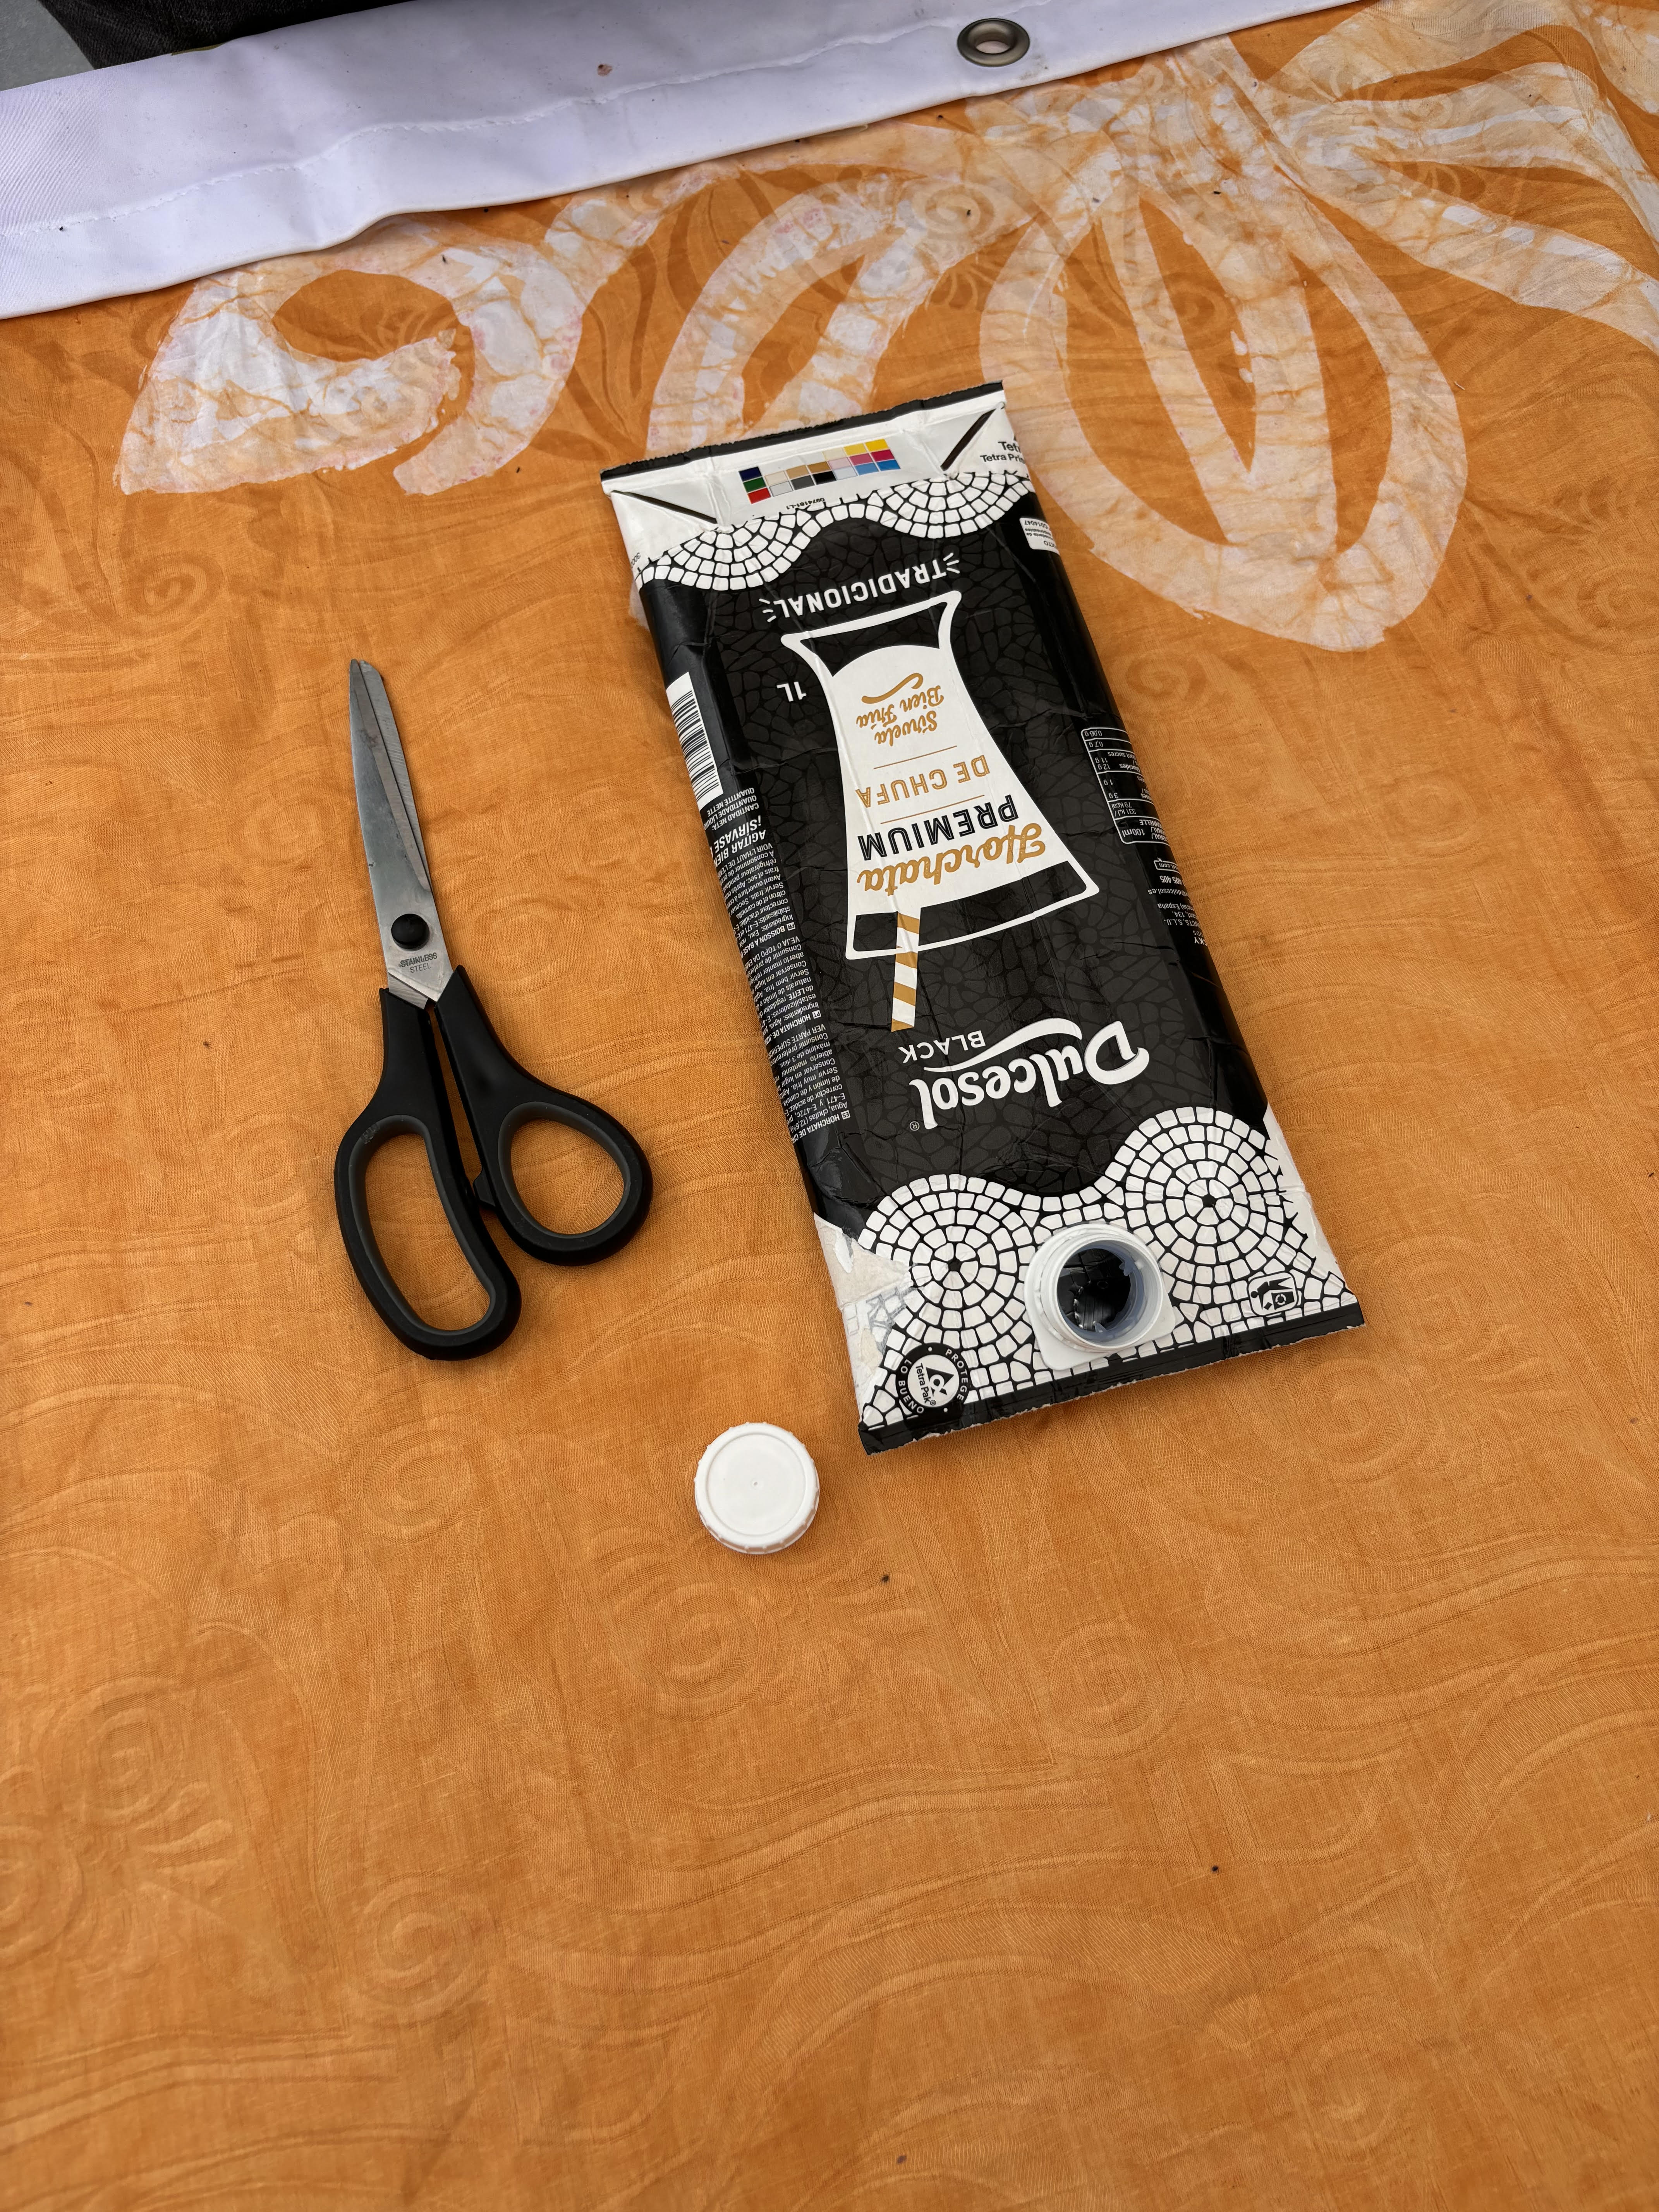
- Rinse the inside thoroughly with water
- Dry the brick with a cloth
- Dry the inside of the brick
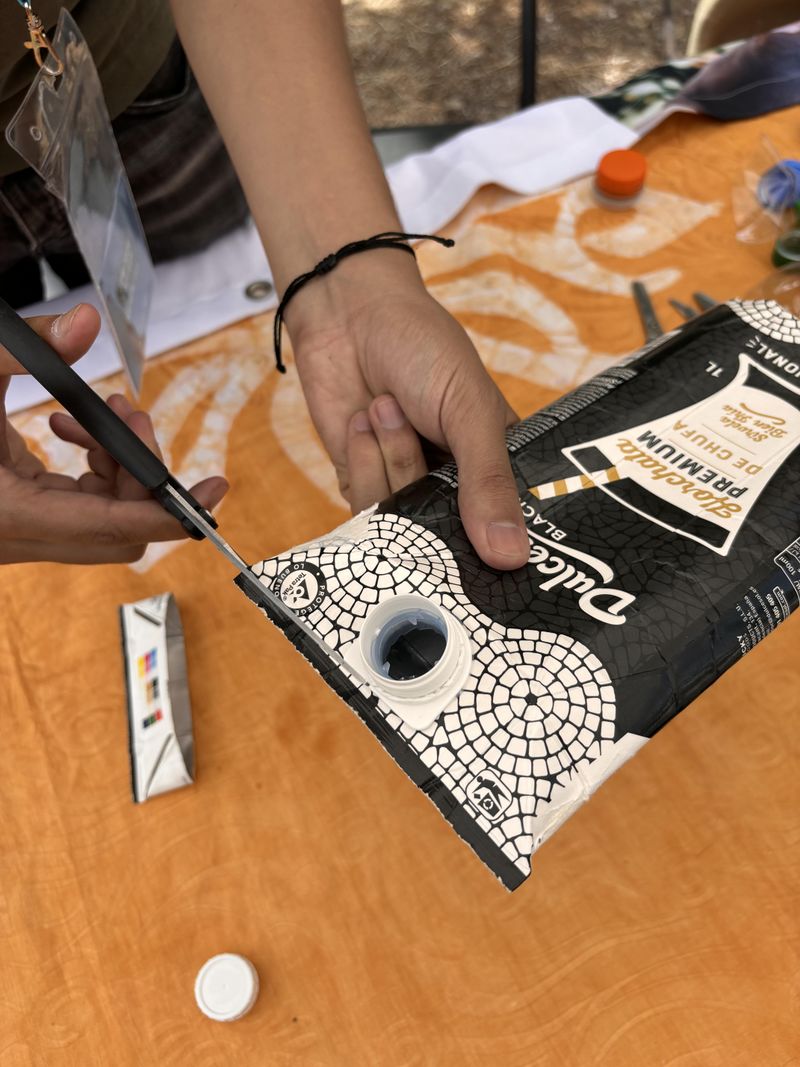
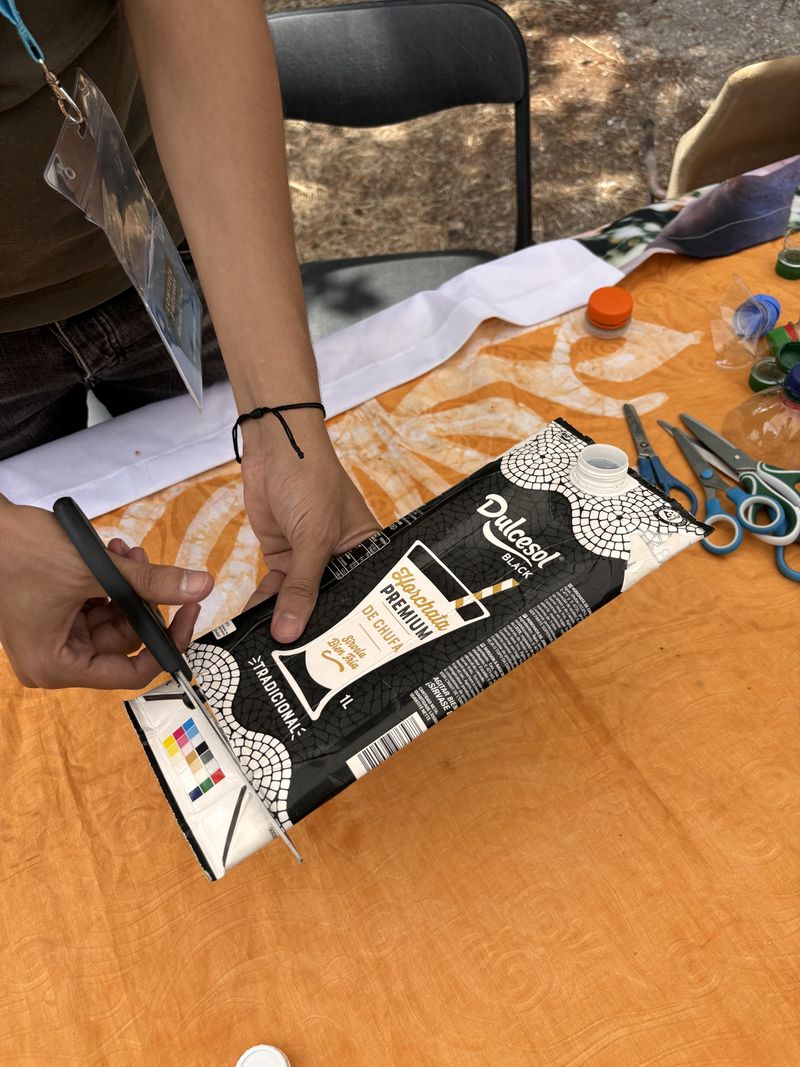
Étape 2 - Cutting the brick
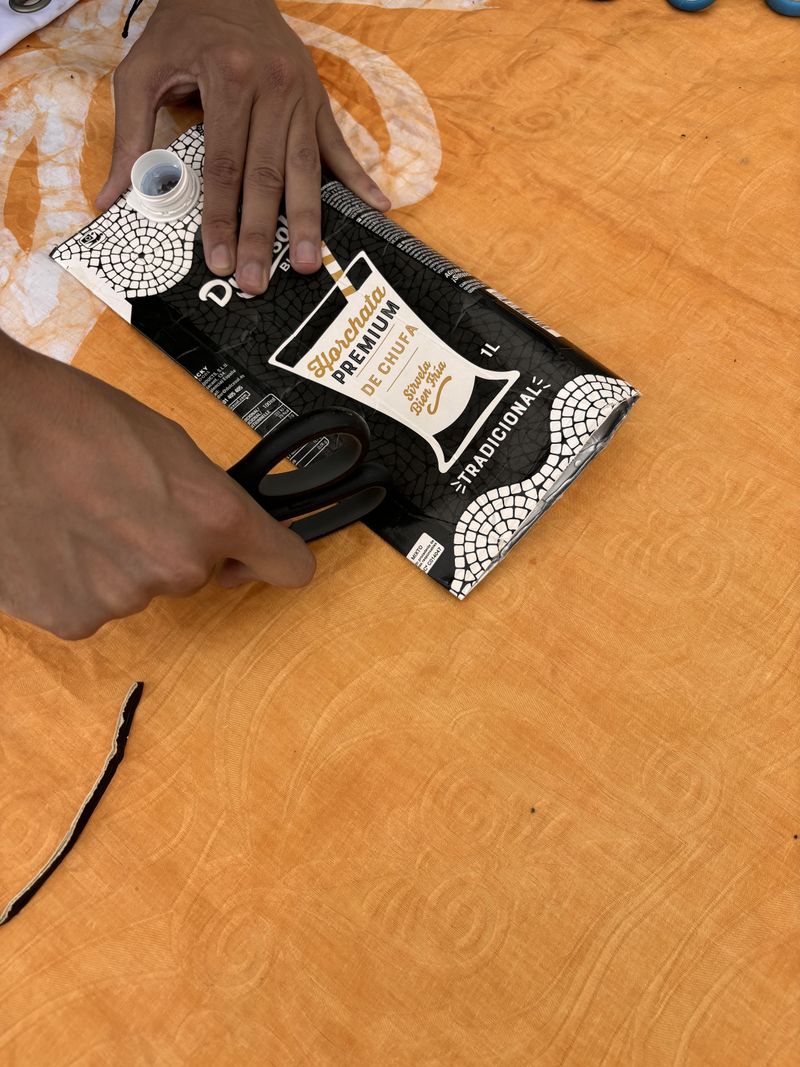
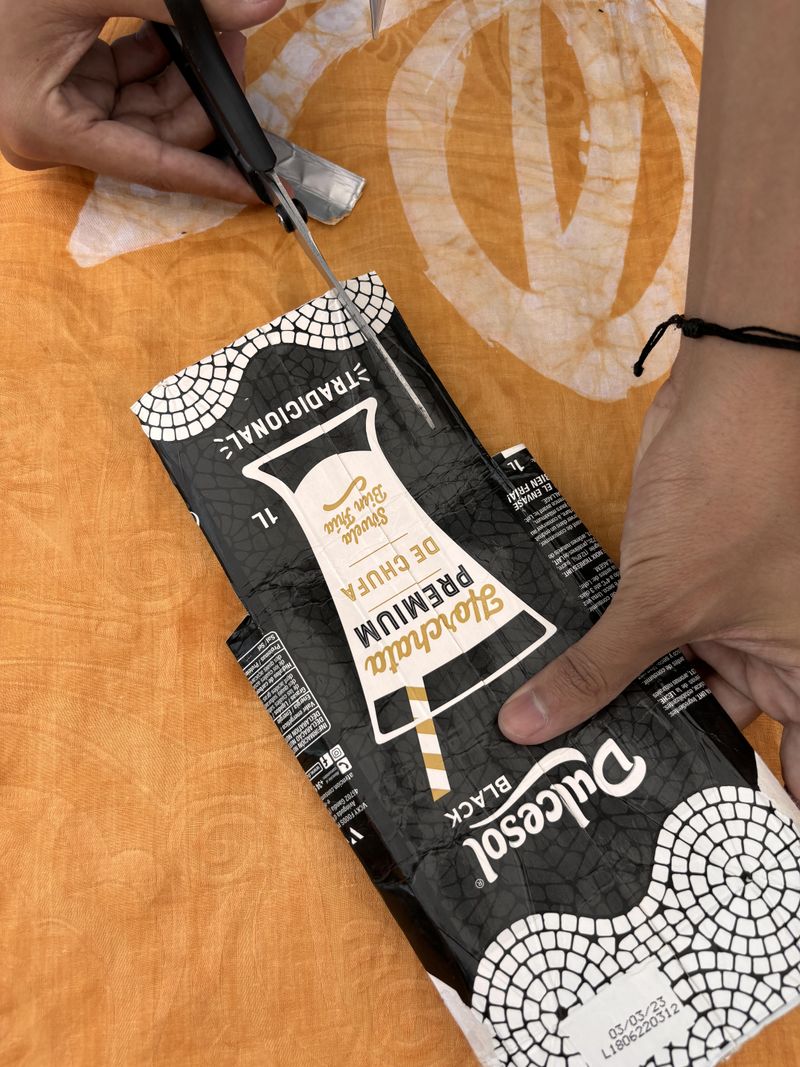
Cut off the top and bottom of the brick to make a cylinder.
Open the cylinder (of the brick) to obtain a flat sheet.
Étape 3 - Fold marking
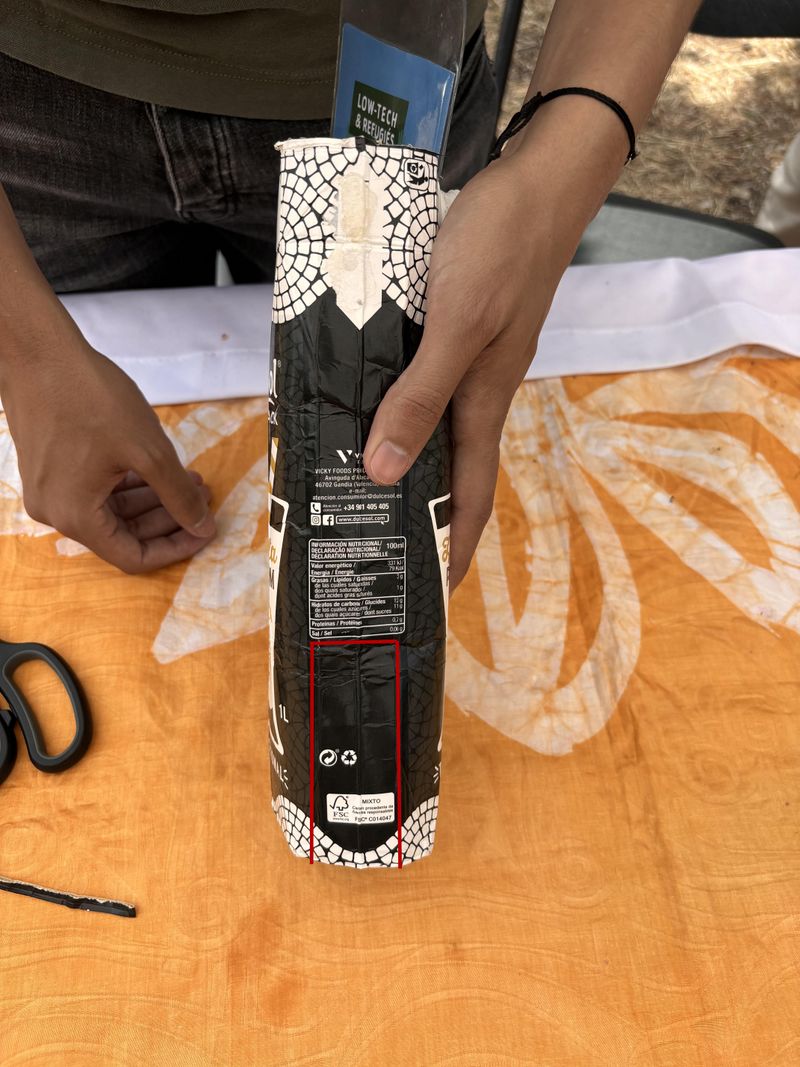
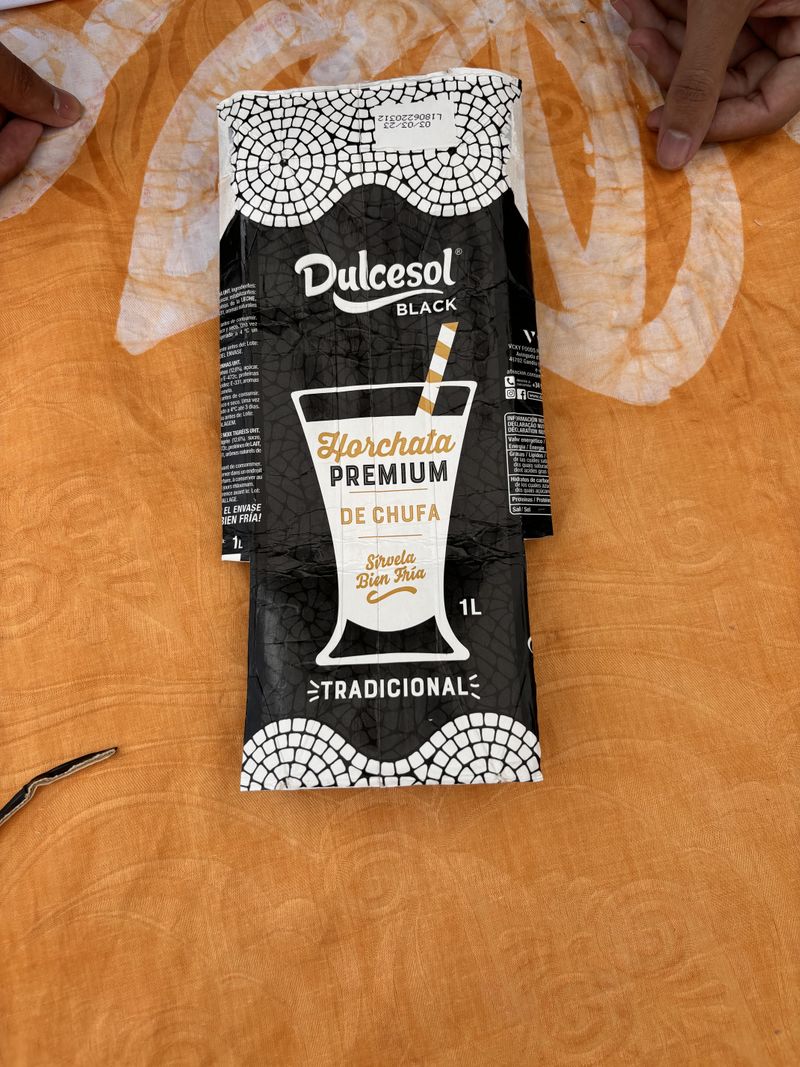
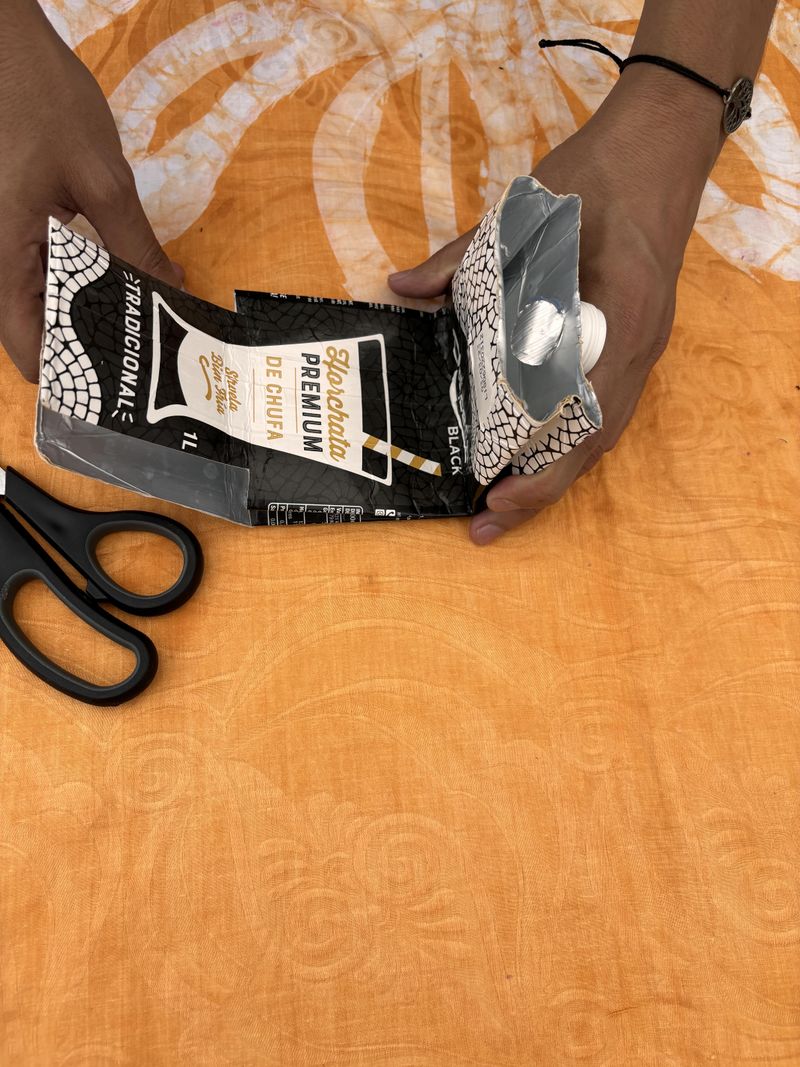
- Fold the brick at 2 equidistant points (as you would fold an A4 page before slipping it into an envelope) to obtain 3 identical lengths.
- Make sure the folds are well marked by pressing firmly on them.
- Fold each part in 2 so that there are 4 parts in each area (see photo 4).
- Now fold the whole cardboard in 3 so that only the bottom tabs stick out. Press down hard on the fold. (see photo 5)
Étape 4 - Cutting out the bottom section
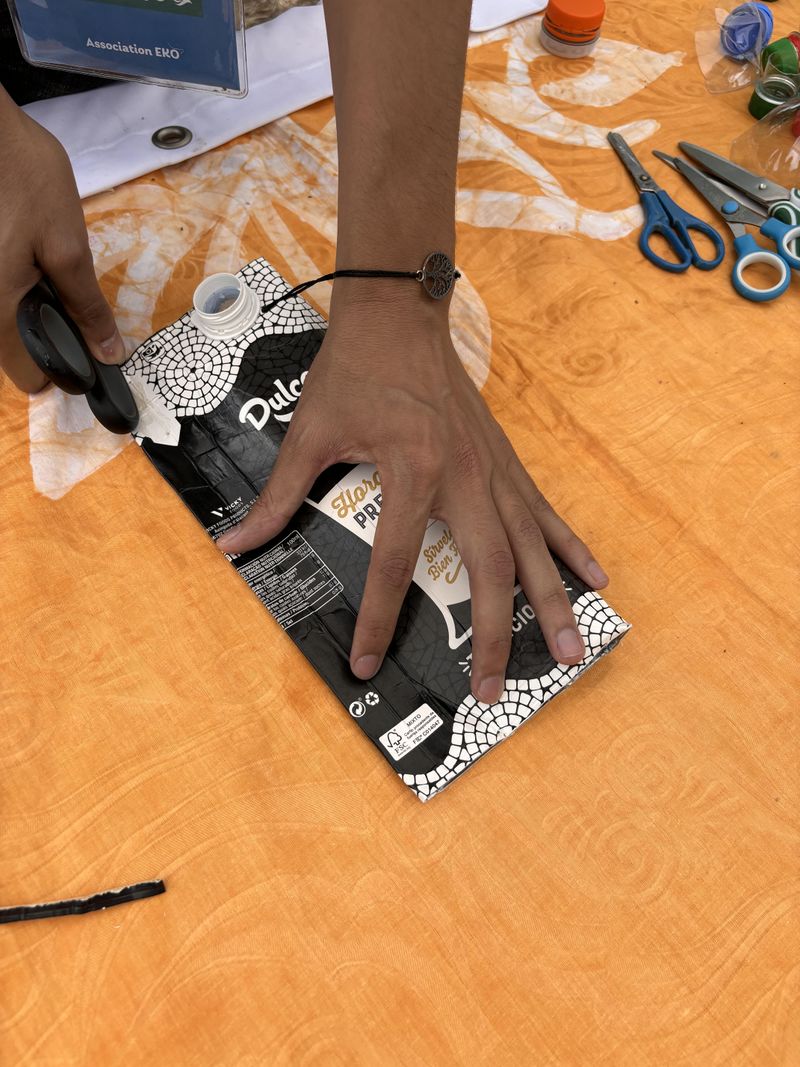
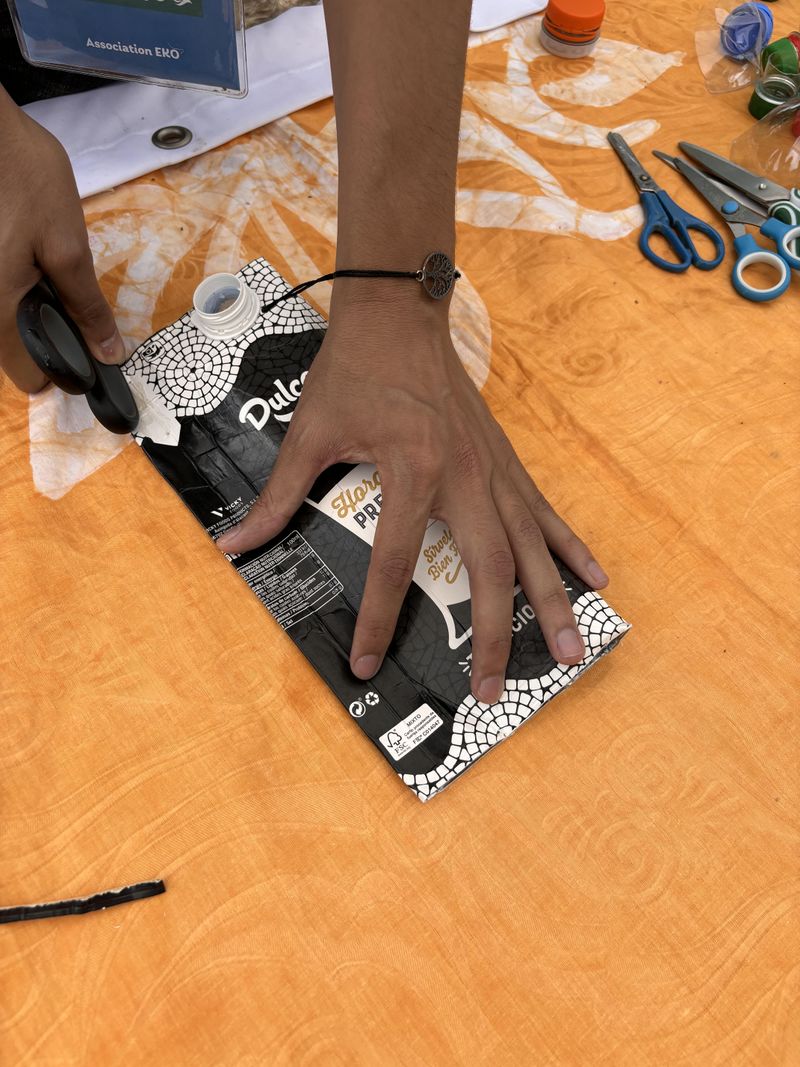
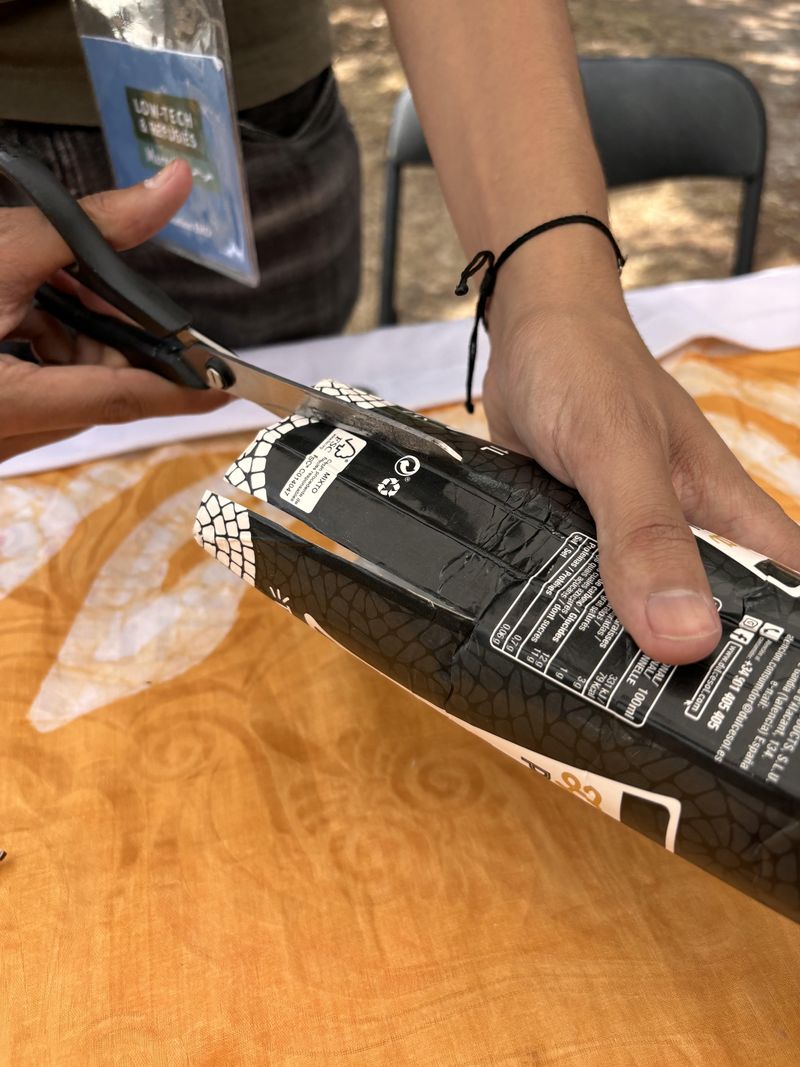
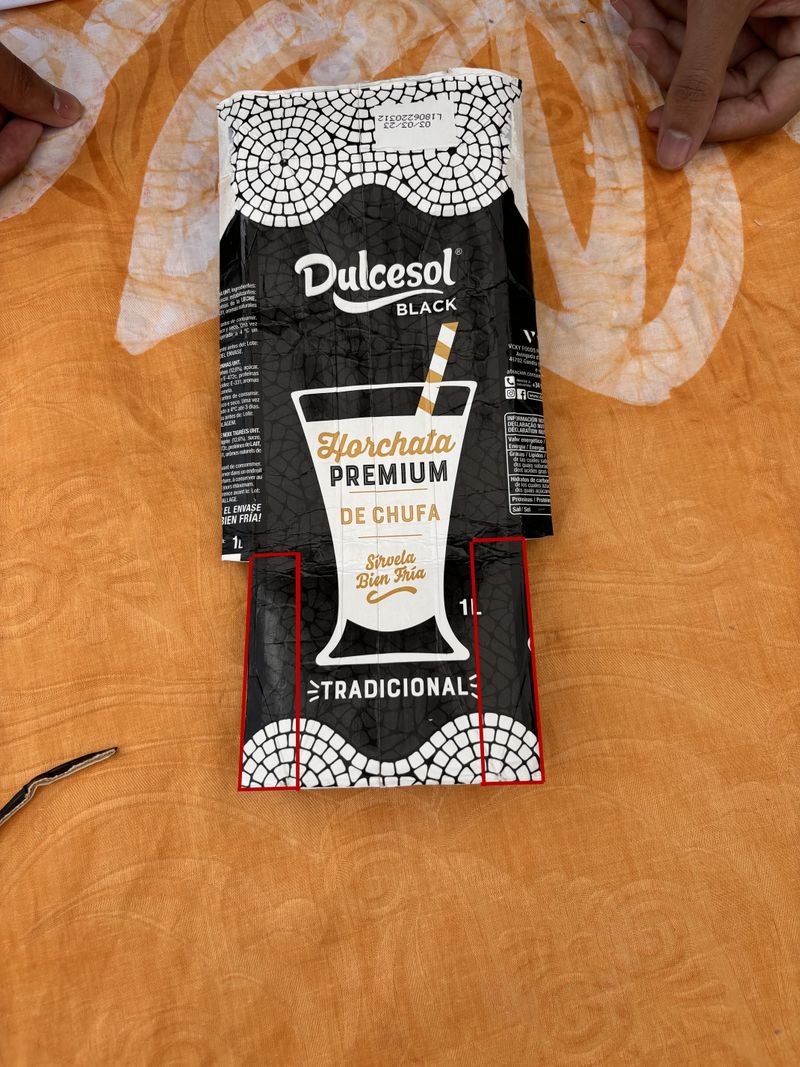
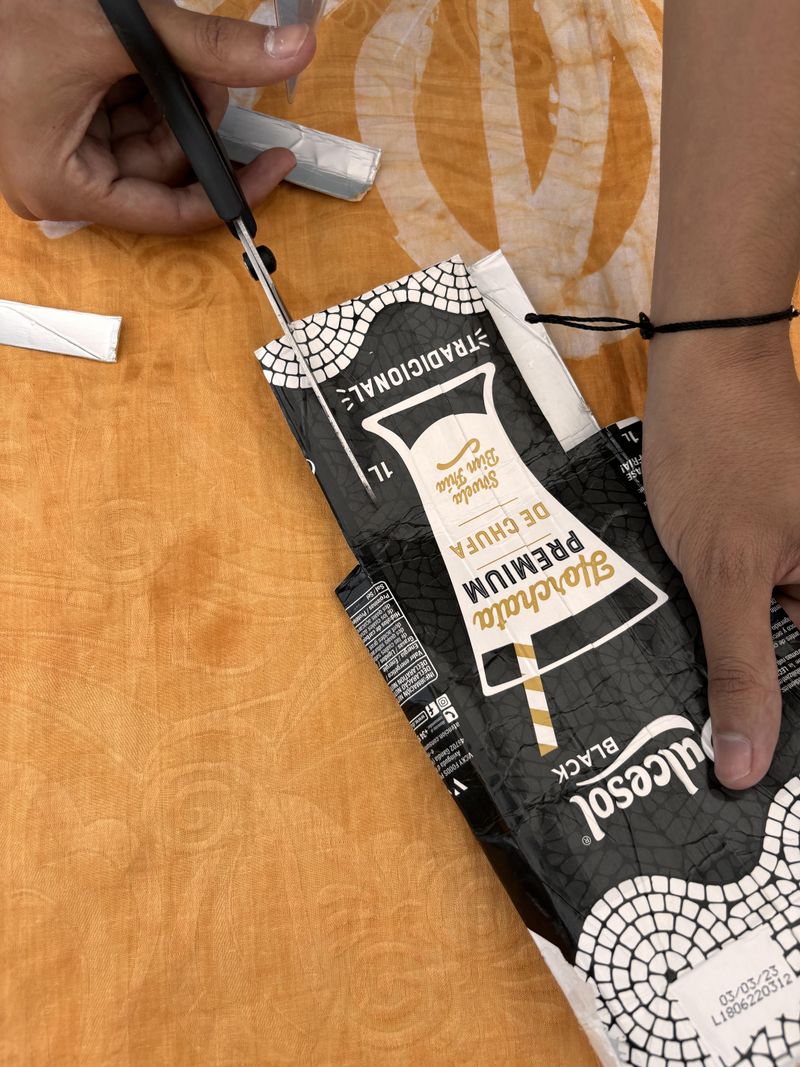
Cut out the 2 bottom side parts of the brick as shown in the photo.
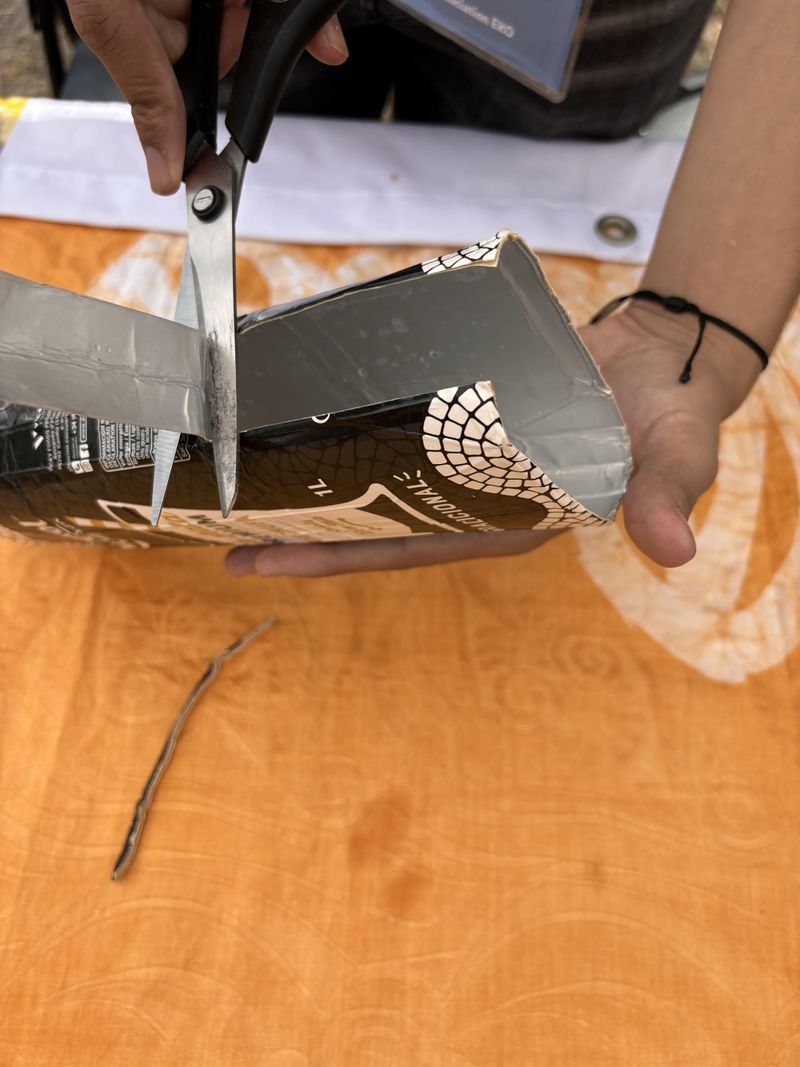
Étape 5 - Cutting out the last parts of the brick
Cut out the two sides of the brick base as shown in the photo.
Étape 6 - Insert the cut part
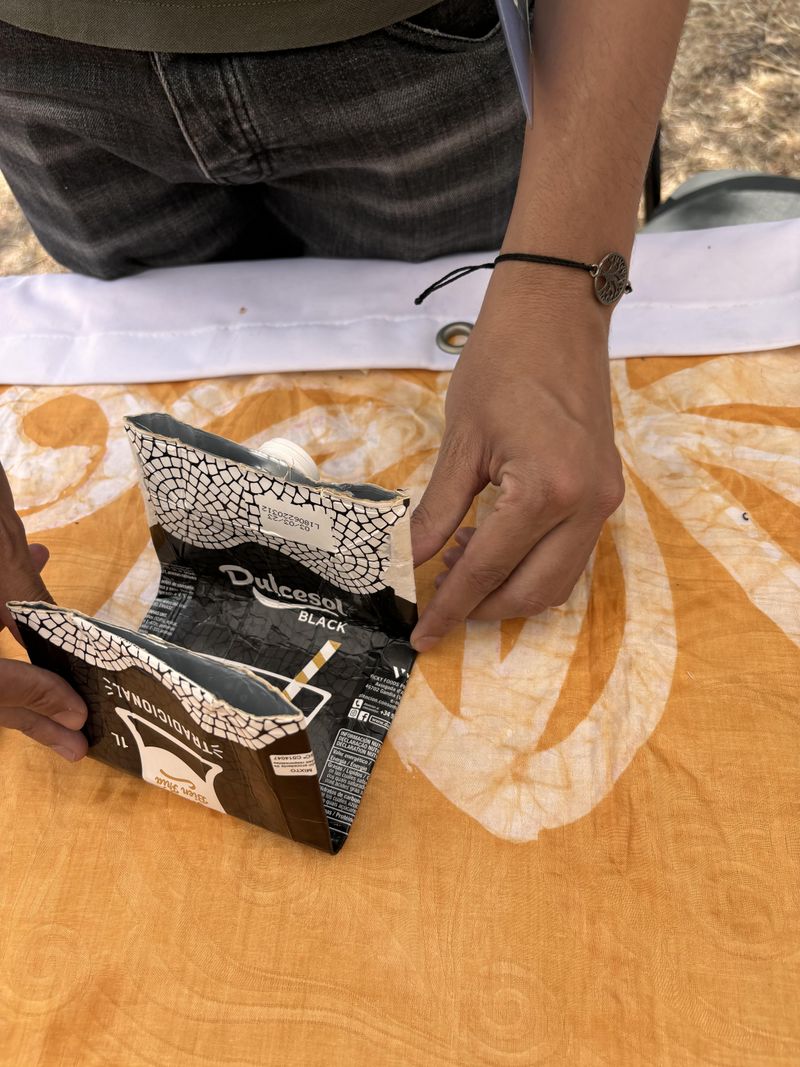
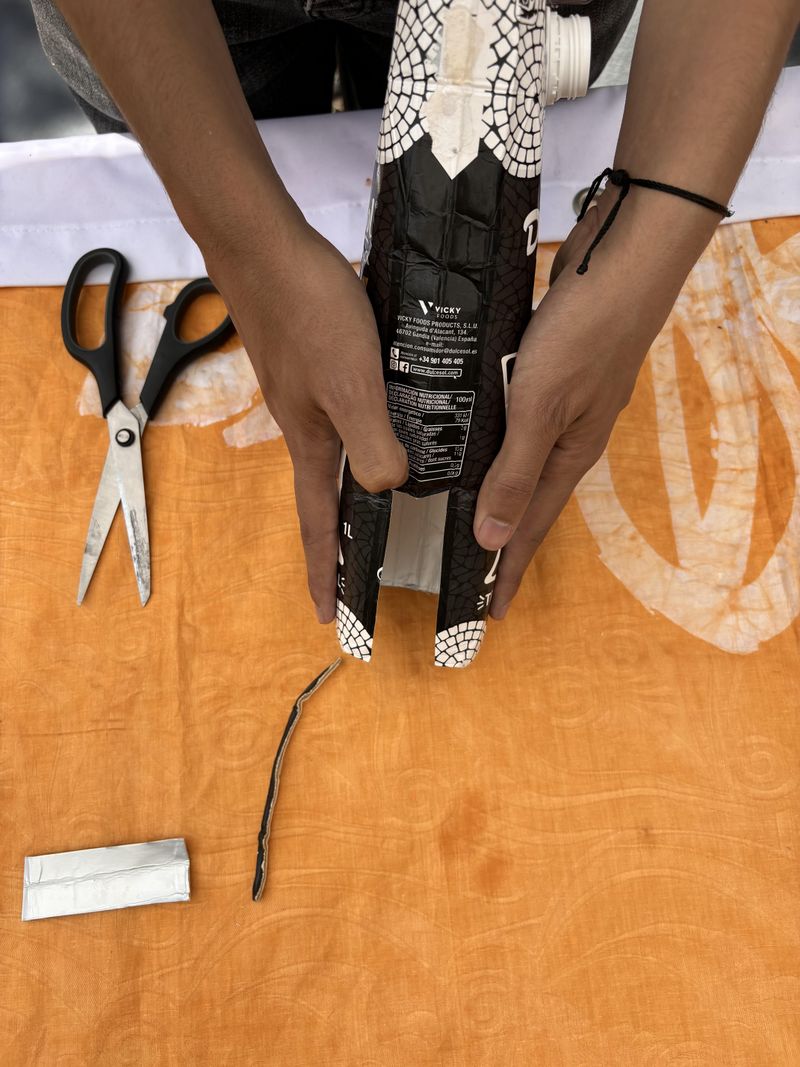
Insert the prepared piece into the top third of the brick. This creates a double inner pocket (the purse takes shape!)
Étape 7 - Fold the sides of the brick
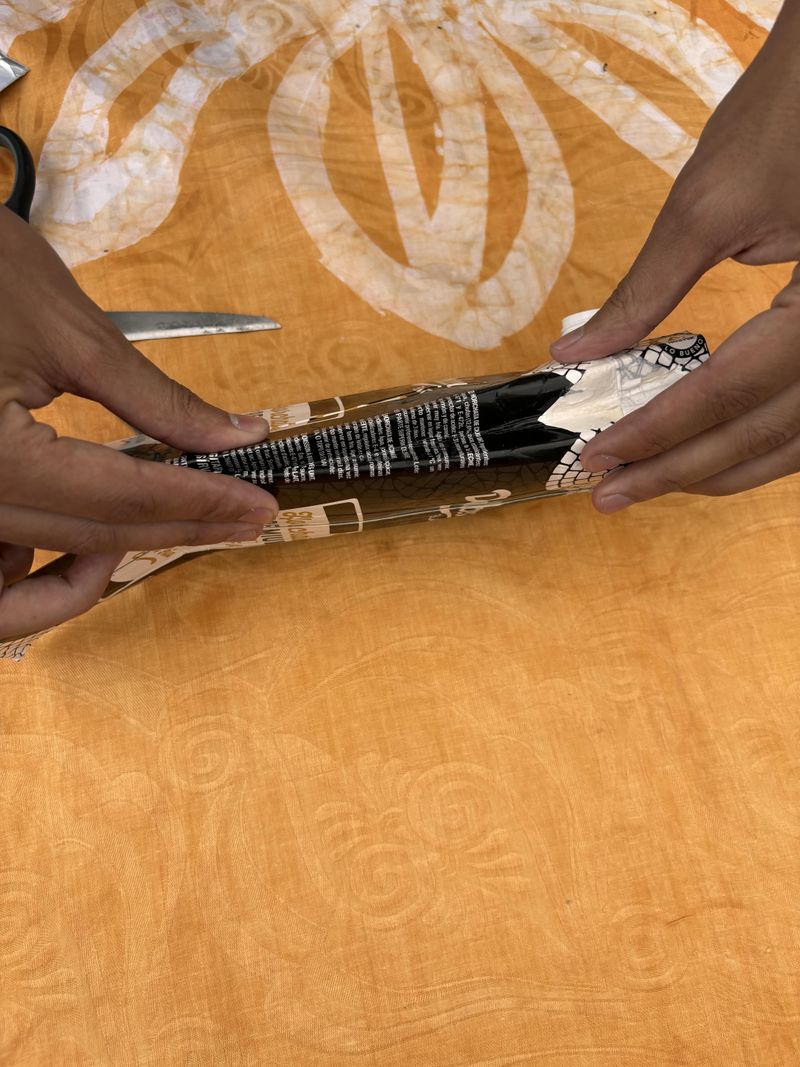
Plier la boîte des deux côtés, de manière à ce que la ligne centrale ( en bleu) se replie à l'intérieur de la boîte et que les deux lignes à côté ( en rouge ) se replient vers l'extérieur. (voir photo 1)
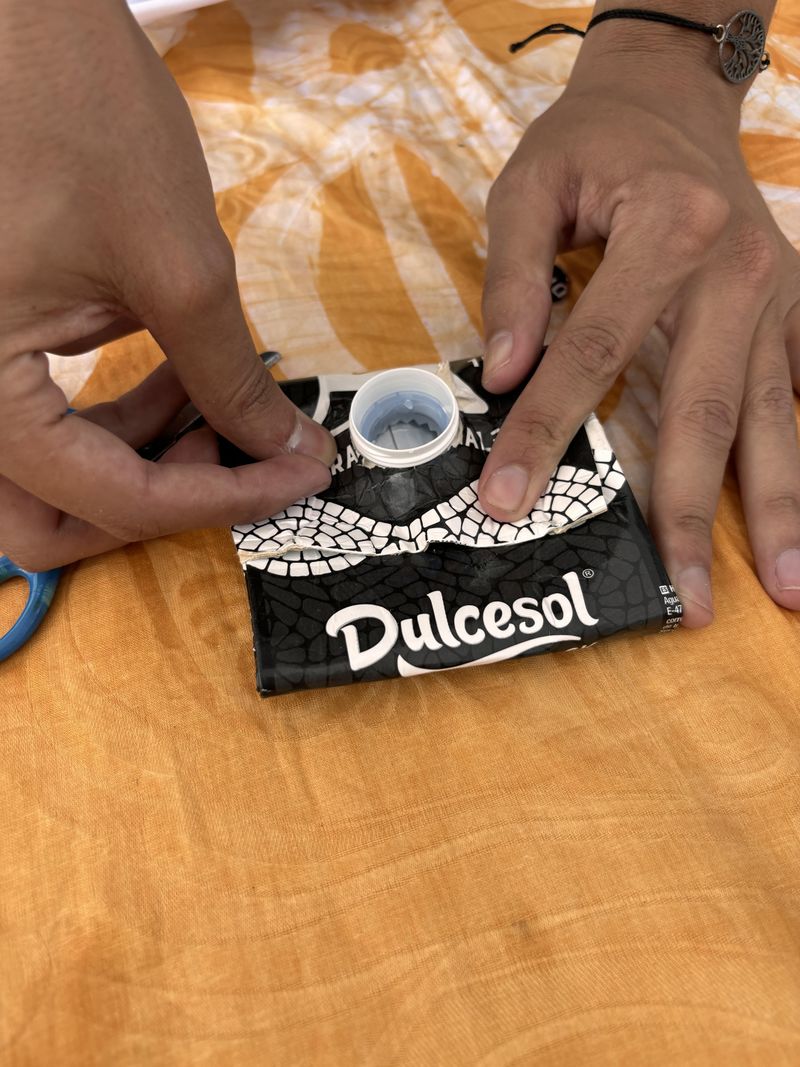
Étape 8 - Faire une empreinte à l'intérieur du rabat
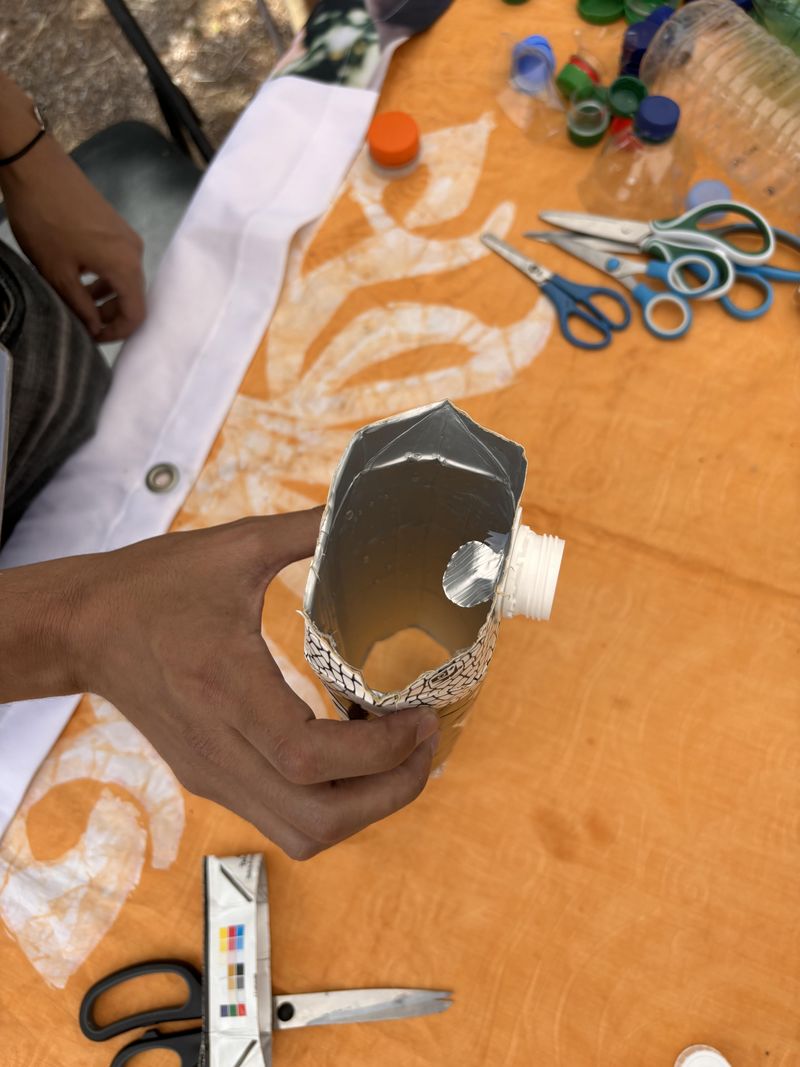
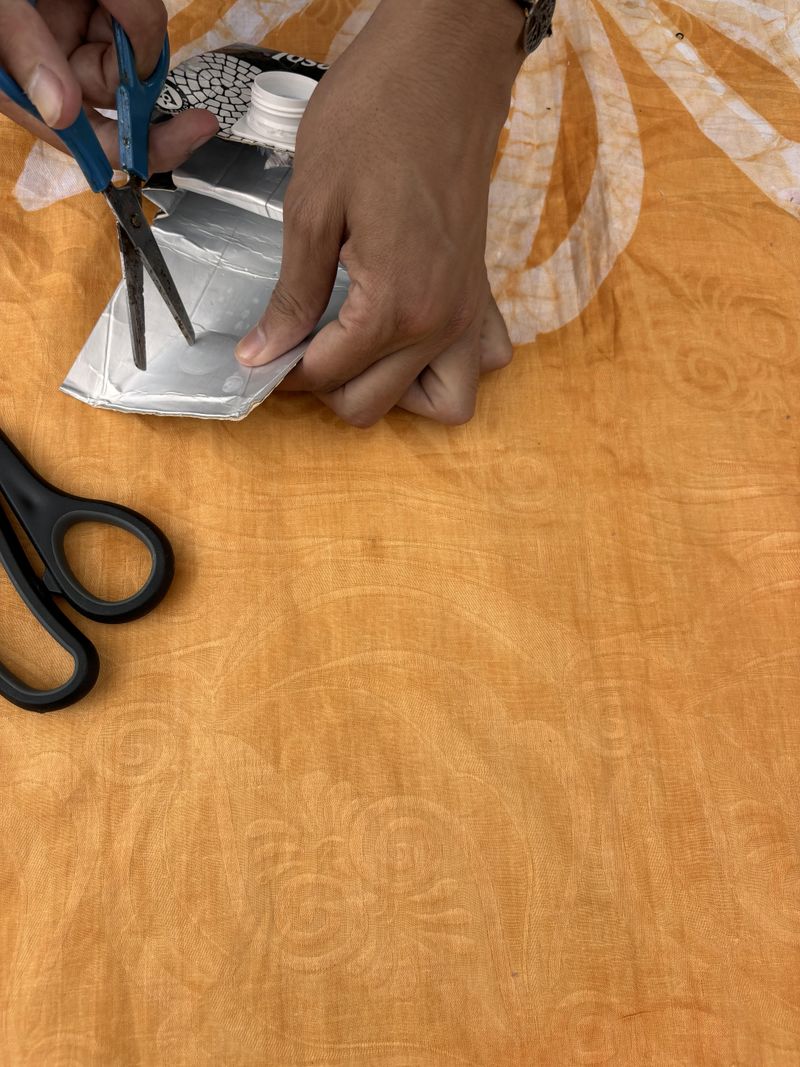
Retirer le bouchon de la brique, rabattre le couvercle, puis presser le carton contre le système de fermeture en plastique de manière à créer une empreinte ronde à l'intérieur du carton.
Étape 9 - Faire un trou dans la fermeture du porte-monnaie
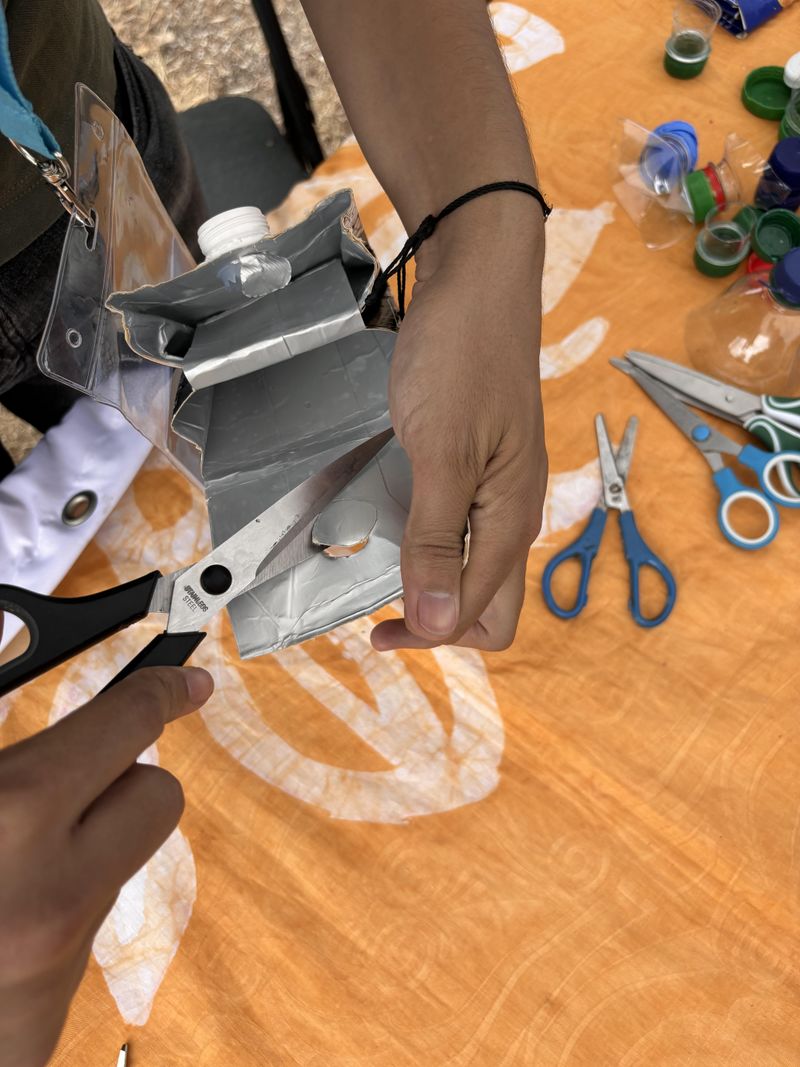
Utiliser un ciseau ou un cutter pour faire un trou dans lequel le bouchon de la brique puisse ressortir.
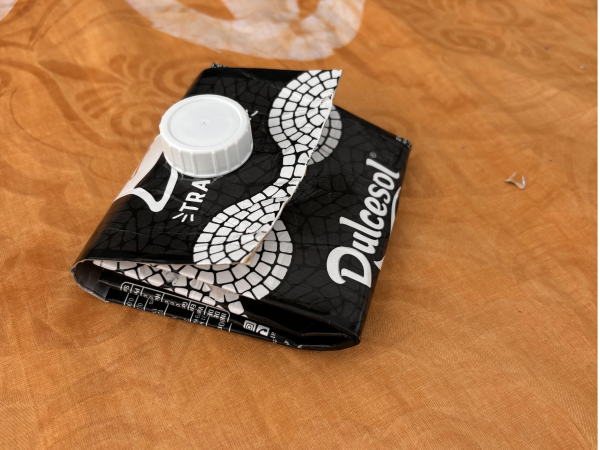
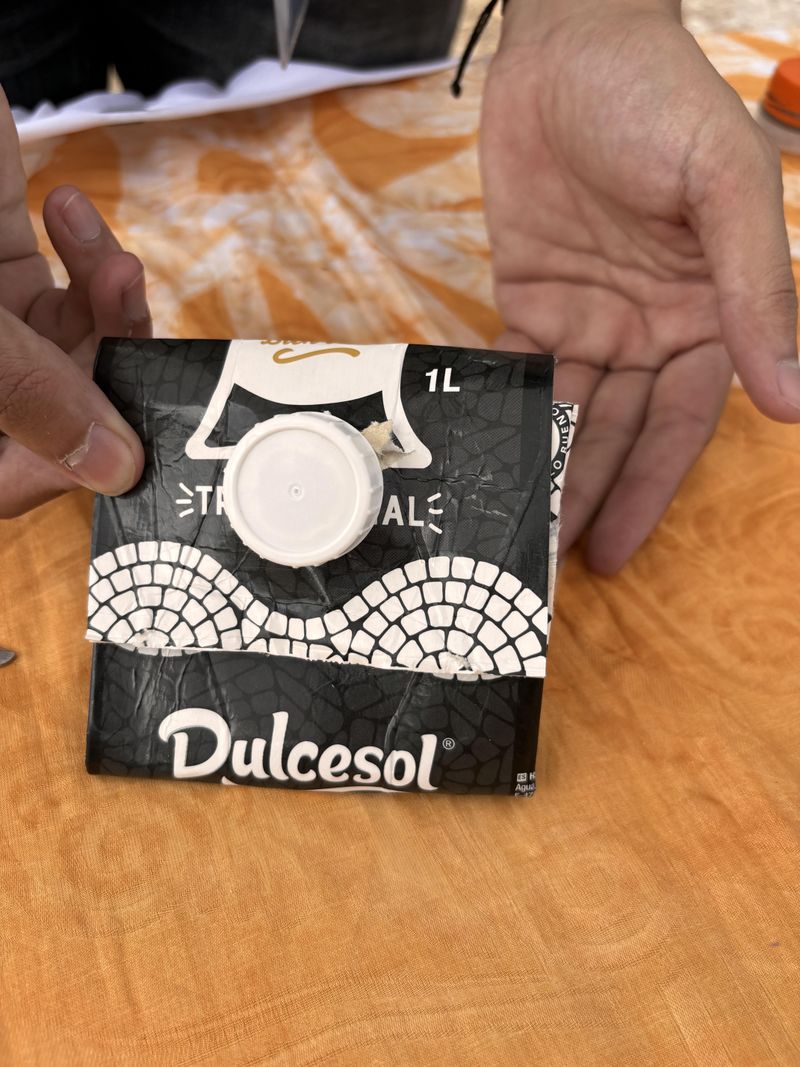
Étape 10 - Fermeture du porte-monnaie
Bravo, ton porte-monnaie est maintenant fermé ! N'hésite pas à ajuster la taille du trou pour faciliter l'ouverture et la fermeture.
Draft
 Français
 English
 Deutsch
 Español
 Italiano
 Português