(Page créée avec « لوح خشبي (16-20 سم على الأقل لكل جانب) ») |
(Page créée avec « 20 مسمارًا ») |
||
| Ligne 29 : | Ligne 29 : | ||
|Tools=لوح خشبي (16-20 سم على الأقل لكل جانب) | |Tools=لوح خشبي (16-20 سم على الأقل لكل جانب) | ||
| − | 20 | + | 20 مسمارًا |
scissors | scissors | ||
Version du 7 juin 2024 à 10:55
Description
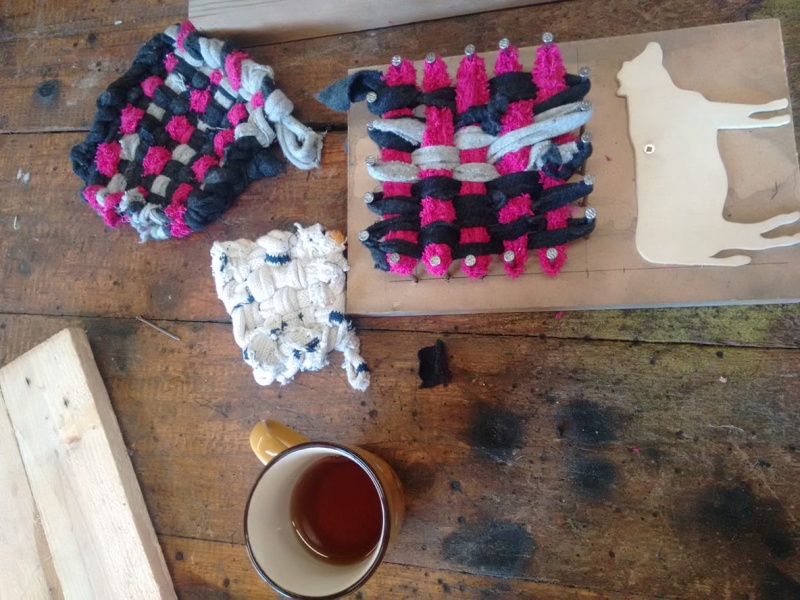
الهدف من هذا البرنامج التعليمي هو إعطاء حياة جديدة لملابسك أو قطع القماش القديمة من خلال صنع إسفنجة صديقة للبيئة.
Introduction
Youtube
Étape 1 - Create the weaving loom
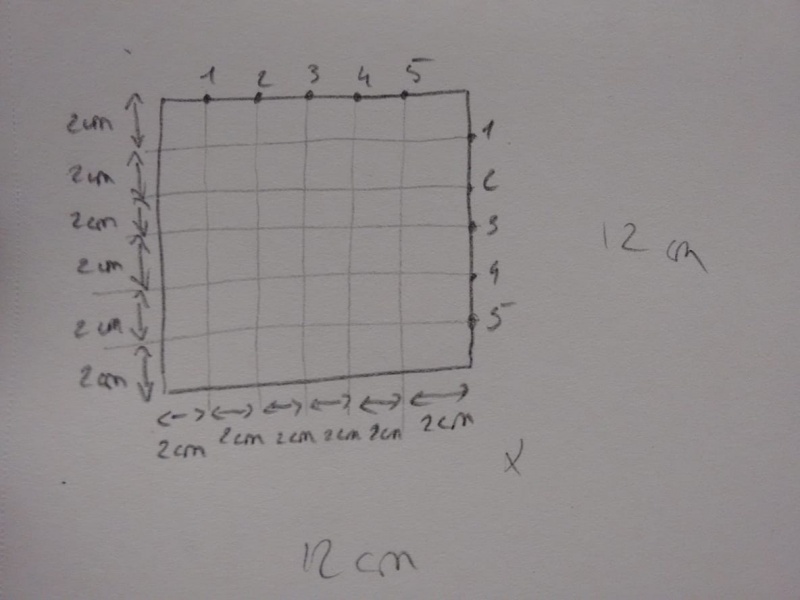
Use your pencil and ruler to draw a square 12cmx12cm.
Put 20 nails every 2 cm. With your hammer, firmly plant the nails into the board onto each of the 20 dots.
Étape 2 - Prepare the cloth
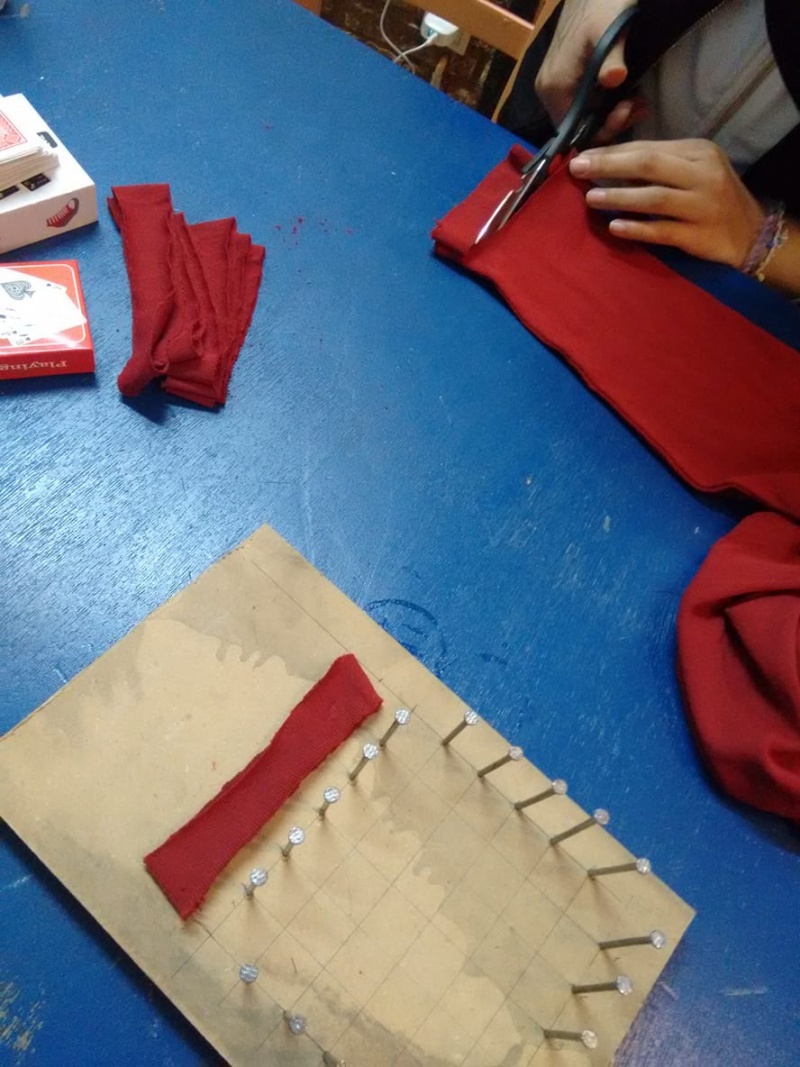
Choose a sock that can stretch over 12 cm.
Use your scissors to cut 10 rings of 4 cm width on your socks.
Étape 3 - Attach the rings
Attach the rings to the nails vertically, only in one side.
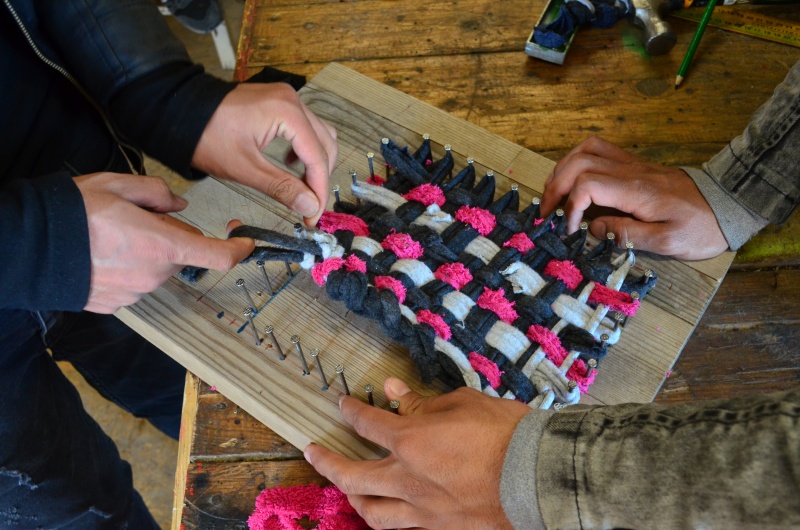
Attach 5 rings vertically (see image).
Étape 4 - Weave
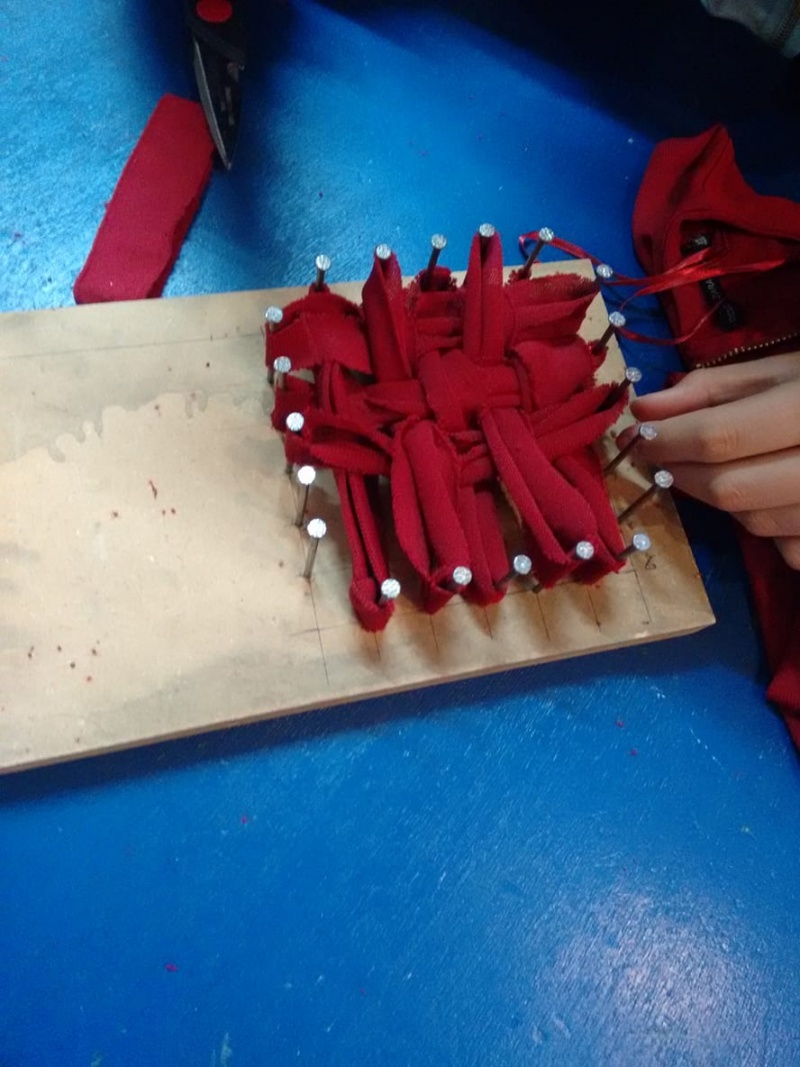
Weave the remaining 5 rings horizontally in and out of the vertical rings. Start by attaching a ring to the top left nail on the left side of the square and pass it over the first vertical ring, under the second vertical ring, over, under and over and then hook it to the opposite top right nail on the right side of the square. Attach 4 more rings horizontally, but weaving the opposite way with each new ring: Horizontal rings 2 and 4 would be under, over, under, over, under. (see image).
Étape 5 - Close the loops
Unhook any ring/loop from its nail, then unhook a second loop right next to it. Pass the second loop into the first loop. Hold on to the second loop and let go of the first loop. The second loop now becomes the “first loop”. Continue this step all around your square. Tighten as you go, as needed.
The final loop that you end up with is the hook that you’ll use to hang and dry your tawashi sponge!
Published

 Français
 English
 Deutsch
 Español
 Italiano
 Português