
Difficulté
Moyen
Durée
3 heure(s)
Coût
3 EUR (€)
Description
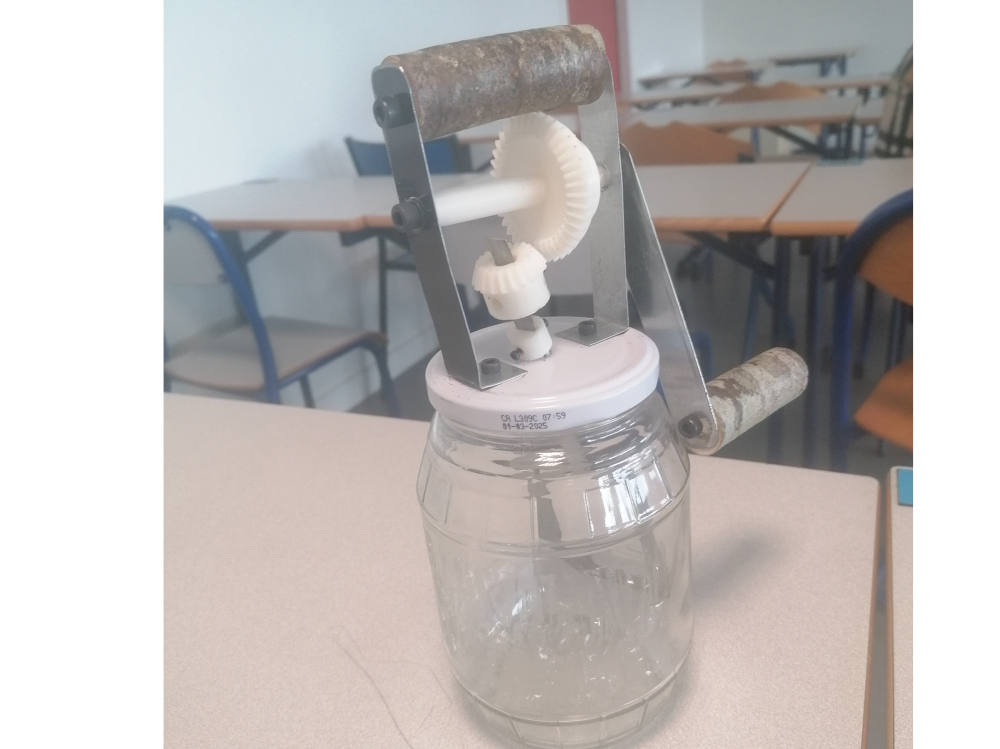
A butter churn is a utensil used to transform cream into butter by agitation. It uses a rotating mechanism to separate the fats from the liquid contained in the cream.
Sommaire
Introduction
Welcome to the presentation page for our butter churn project! In a modern world often reliant on sophisticated technology, we've chosen to return to simple, sustainable solutions for essential everyday needs. Our inspiration stems in particular from the French Butter Crisis of 2017, an event that highlighted the vulnerability of our butter supply.
Faced with this crisis, we set out to design a solution accessible to everyone, through the creation of a low-tech butter churn. Our aim is to give people back control over the production of this staple product, by offering a simple, affordable and environmentally-friendly alternative. Through this project, we aim to demonstrate that low-impact technologies can be just as effective, if not more so, than their high-tech counterparts, while promoting greater food autonomy within communities.
Matériaux
- Old jar (olive here)
- Old PC case
- Different screw sizes
- Threaded insert
- Tree branch (birch here)
Outils
3D Printer
Column drill
Wood saw
Allen key set
Étape 1 - Drill the cover
Drill the holes in the cover as shown in the photo.

Étape 2 - Side supports
Cut the side supports out of the sheet metal
Making the fold
Drilling properly
Assembled on the cover


Étape 3 - Create the top handle
Drilling a piece of birch
Adding screw inserts
Assemble the whole with screws


Étape 4 - Print the tree
Use the 3D file of the tree and add it to the set.

Étape 5 - Print the lower guide
Print the lower guide from your template
Add threaded inserts using a soldering iron
Then screw together

Étape 6 - Add the lower gear
Print the lower gear from your template
Add threaded inserts using a soldering iron
Then screw together

Étape 7 - Handle
Cut the handle
Cut out the metal part linked to the handle
Add it all to the set


Étape 8 - Take advantage
Well done, be proud of yourself, you've reached the end of the tutorial.

Published
 Français
 English
 Deutsch
 Español
 Italiano
 Português