
Difficulté
Très facile
Durée
5 minute(s)
Coût
0 EUR (€)
Description
We'll show you how to turn a milk or juice carton into a practical wallet. Not only will this give you a very useful wallet, but you'll also be using the carton that would otherwise have ended up in the bin. Turning useless waste into useful products is a key principle of low-tech. What's more, you get your own personal wallet!
Sommaire
Sommaire
- 1 Description
- 2 Sommaire
- 3 Introduction
- 4 Étape 1 - Preparation of the brick
- 5 Étape 2 - Cutting the brick
- 6 Étape 3 - Fold marking
- 7 Étape 4 - Découpage de la partie bas
- 8 Étape 5 - Découpage des dernières parties de la brique
- 9 Étape 6 - Insérer la partie coupée
- 10 Étape 7 - Plier les cotés de la brique
- 11 Étape 8 - Faire une empreinte à l'intérieur du rabat
- 12 Étape 9 - Faire un trou dans la fermeture du porte-monnaie
- 13 Étape 10 - Fermeture du porte-monnaie
- 14 Commentaires
Introduction
Reuse and recycling have become essential practices for reducing our environmental impact. One creative way of doing this is to make everyday objects from recycled materials. Today, we're going to learn how to make a wallet from a juice or milk carton. This DIY project is not only environmentally friendly, but also practical and fun to make. Follow the detailed steps below to create your own unique wallet.

Matériaux
-1 brick of milk or juice
Outils
- 1 pair of scissors
Étape 1 - Preparation of the brick
- Rinse the inside thoroughly with water
- Dry the brick with a cloth
- Dry the inside of the brick
Étape 2 - Cutting the brick
Cut off the top and bottom of the brick to make a cylinder.
Open the cylinder (of the brick) to obtain a flat sheet.


Étape 3 - Fold marking
- Fold the brick at 2 equidistant points (as you would fold an A4 page before slipping it into an envelope) to obtain 3 identical lengths.
- Make sure the folds are well marked by pressing firmly on them.
- Fold each part in 2 so that there are 4 parts in each area (see photo 4).
- Maintenant, plier tout le carton en 3 de manière à ce que seules les languettes inférieures dépassent. Appuie sur le pli fortement. (voir photo 5)


Erreur lors de la création de la miniature : Fichier avec des dimensions supérieures à 12,5 MP

Étape 4 - Découpage de la partie bas
Découper les 2 parties de côté de bas de la brique comme il est montré dans la photo


Étape 5 - Découpage des dernières parties de la brique
Découper les deux parties latérales du fond de la brique comme indiqué sur la photo.


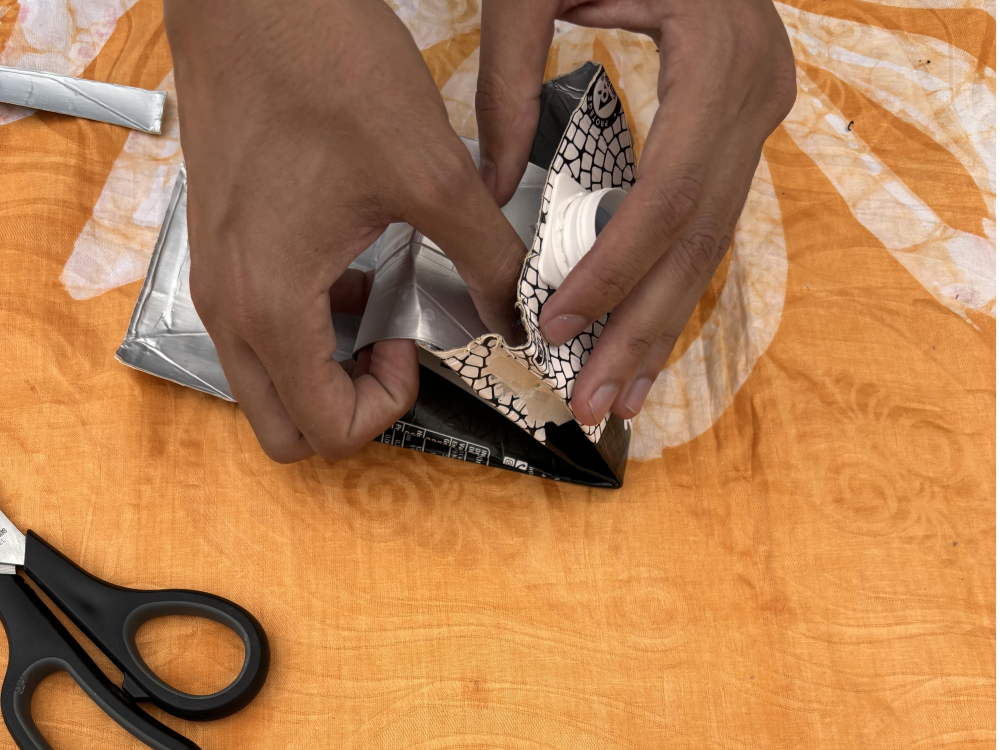
Étape 6 - Insérer la partie coupée
Insérer l'oreille préparée dans le tiers supérieur de la brique. Ainsi, cela créé une double poche intérieure.(le porte-monnaie prend forme !)


Étape 7 - Plier les cotés de la brique
Plier la boîte des deux côtés, de manière à ce que la ligne centrale ( en bleu) se replie à l'intérieur de la boîte et que les deux lignes à côté ( en rouge ) se replient vers l'extérieur. (voir photo 1)


Étape 8 - Faire une empreinte à l'intérieur du rabat
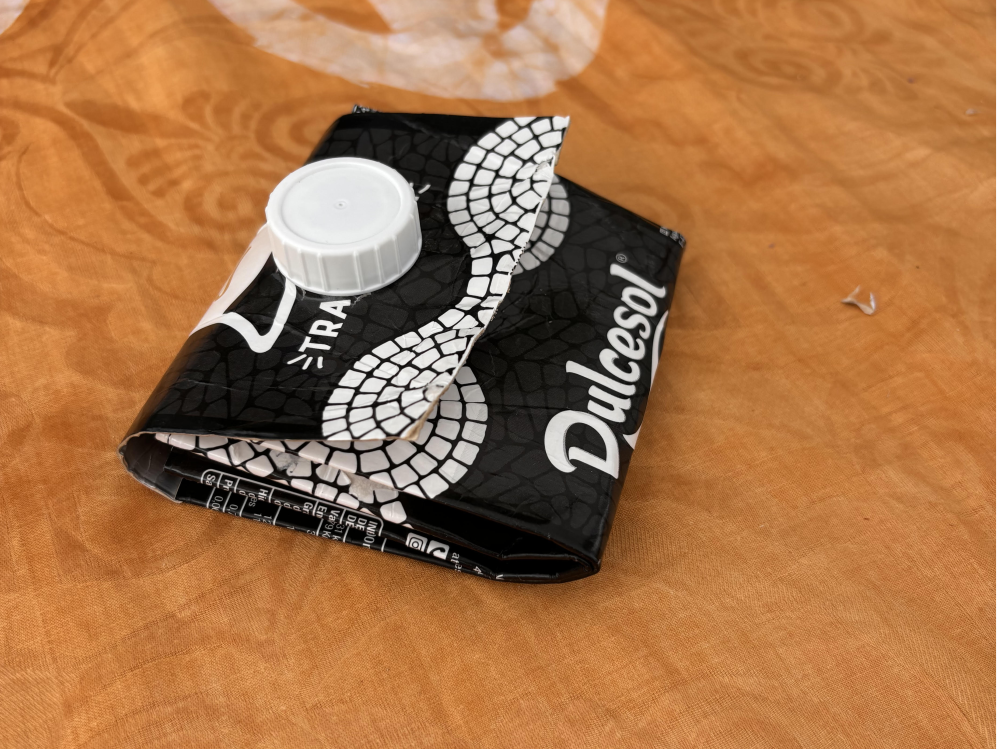
Retirer le bouchon de la brique, rabattre le couvercle, puis presser le carton contre le système de fermeture en plastique de manière à créer une empreinte ronde à l'intérieur du carton.
Étape 9 - Faire un trou dans la fermeture du porte-monnaie
Utiliser un ciseau ou un cutter pour faire un trou dans lequel le bouchon de la brique puisse ressortir.


Étape 10 - Fermeture du porte-monnaie
Bravo, ton porte-monnaie est maintenant fermé ! N'hésite pas à ajuster la taille du trou pour faciliter l'ouverture et la fermeture.


Draft
 Français
 English
 Deutsch
 Español
 Italiano
 Português