

Dernière modification le 17/07/2024
Difficulté
Moyen
Durée
25 minute(s)
Coût
3 EUR (€)
Description
Fabric mask, washable, reusable, 3 folds - Class 2 (general, non-medical use product) - QUICK VERSION
Sommaire
Sommaire
- 1 Description
- 2 Sommaire
- 3 Introduction
- 4 Étape 1 - The mask's barrier piece (outer face)
- 5 Étape 2 - Pose des biais décoratifs (face intérieure)
- 6 Étape 3 - The mask's 3 folds
- 7 Étape 4 - Les glissières à cordon
- 8 Étape 5 - Optionnel : La question du pince-nez
- 9 Étape 6 - Tadaah ! C'est terminé côté couture.
- 10 Commentaires
Introduction
---[Updated on January 21, 2024]--- In France, following the emergence of a Covid-19 variant and the recommendations of The High Council for Public Health, the minister of health, Olivier Veran, recommends not using artisanal masks (home-made) in public spaces anymore. However, Class 1 masks are sufficient.
Here is my face mask for covid times. It's following as much as possible the newest official recommendations. We are in October 2020 as I share this tutorial. Please check the applicable recommendations when you read this tutorial.
It's a "3 folds" masks, with some improvements in terms of comfort, aesthetics and I hope practicality. The initial goal was to create a mask with no damage to the skin and which is not tickling the nose like the disposable ones, and of course to follow an eco-friendly approach (salvage and saving).
If you want a more customizable mask, check out my other totorial "COMPLETE VERSION".
The cost given here is informative as we can use recycled fabric.
The indicated time is approximate, depending on your dexterity, the tools used (machine or not), the desire to take your time or to do it fast, etc.
Fabric choice:
Regularly check Afnor recommendations (French organisation): https://masques-barrieres.afnor.org
and recommended materials: https://www.ifth.org/wp-content/uploads/2020/04/base-de-donnees-matieres-resultats-dga-maj-28042020.pdf
Matériaux
- recycled fabrics (see more info in the intro of this tutorial)
- sewing thread
- for the knot: cord, shoelace, etc.
Outils
- sewing machine, but possible by hand if you are patient
- needle
- triple-centimeter ruler, or sewing/craft tape measure
- set square (triangle)
- pencil (special sewing pencils are available and won't stain the fabric)
- sewing scissors
- 3 small drawing clips, or clothespins, or sewing pins
.
Tips and tricks:
- having the right needles for the different types of fabric you're sewing really makes it easier
- Prepare colored threads for each part of the mask.
- You can use an iron to mark creases.
Tips and tricks to sew Jersey fabric:
- limit the number of jersey layers to just 1, and choose the other layers with little or no stretch to hold them together.
- A special jersey or stitch needle makes machine sewing easier.
- Before seaming or zig-zag stitching, you can make a line in straight stitch, it's easier.
- put the jersey fabric underneath for machine sewing.
Étape 1 - The mask's barrier piece (outer face)
Cut out 1 or 2 or 3 rectangles (depending on the fabric combination chosen) measuring 20x28 cm.
Layer them inside out.
Stop the edge threads with the serger, or if you don't have one, with a simple sewing machine, using the zig-zag stitch. Depending on fabric elasticity, adapt zig-zag stitch sizes. First test it on a scrap of fabric.

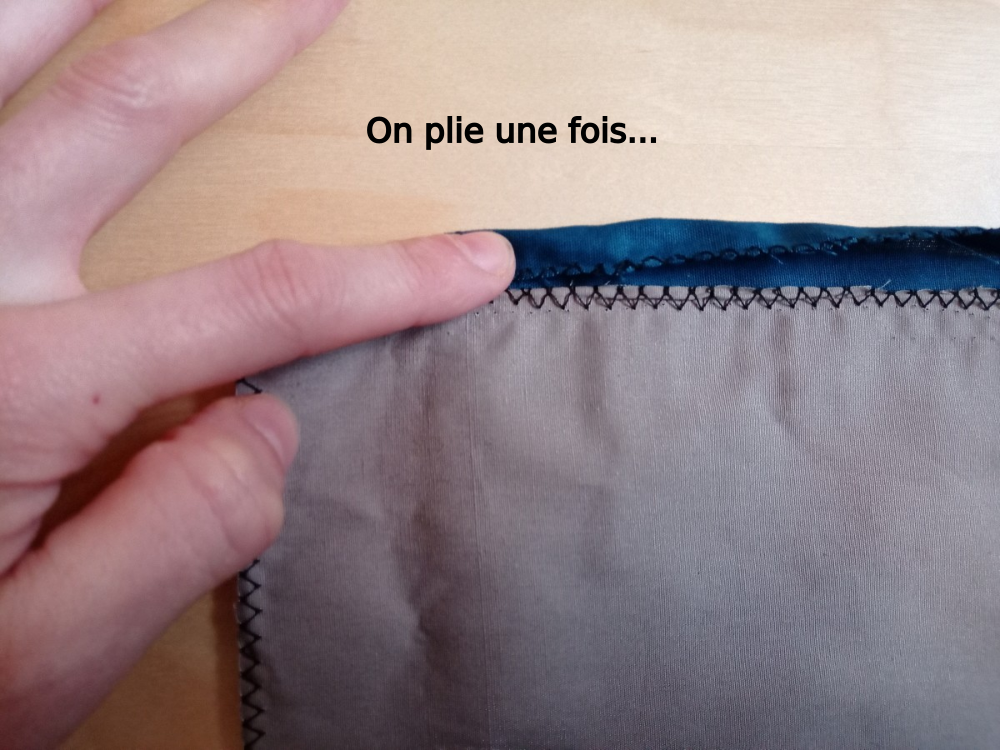
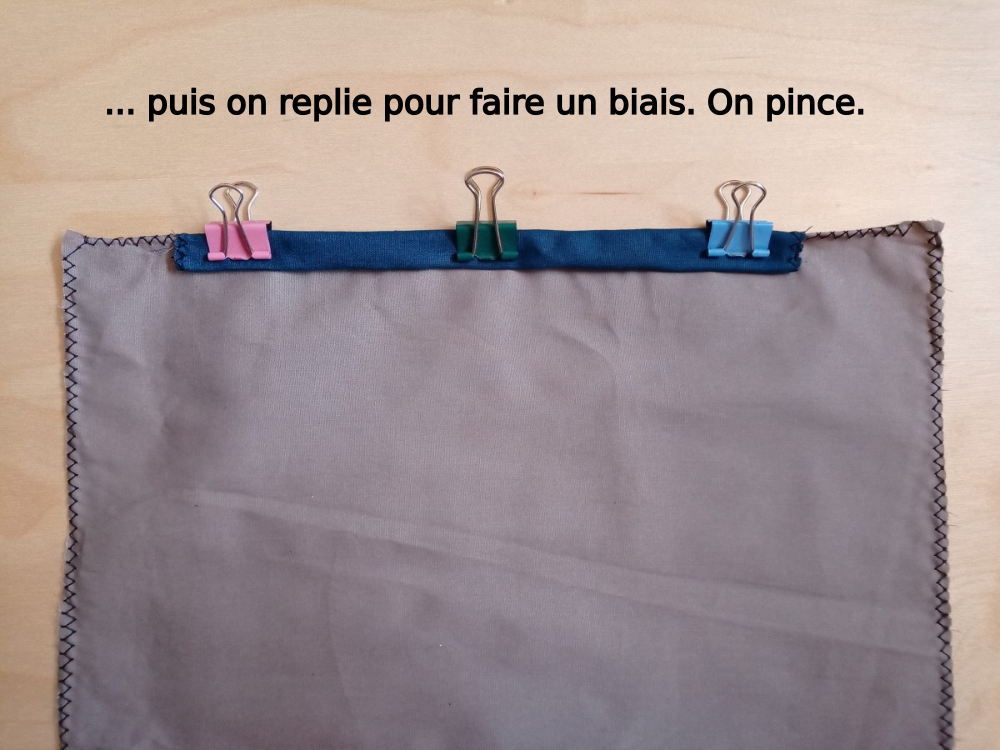
Étape 2 - Pose des biais décoratifs (face intérieure)
Let's add the decorative bias, which also has the advantage of holding fabric edges better than if they were just seamed. Another advantage is that seaming doesn't scratch, since it's covered by the bias.
Cut out 1 piece measuring 20x25cm.
Seam or zig-zag all the way around.
Superimpose the outer face on this inner face.
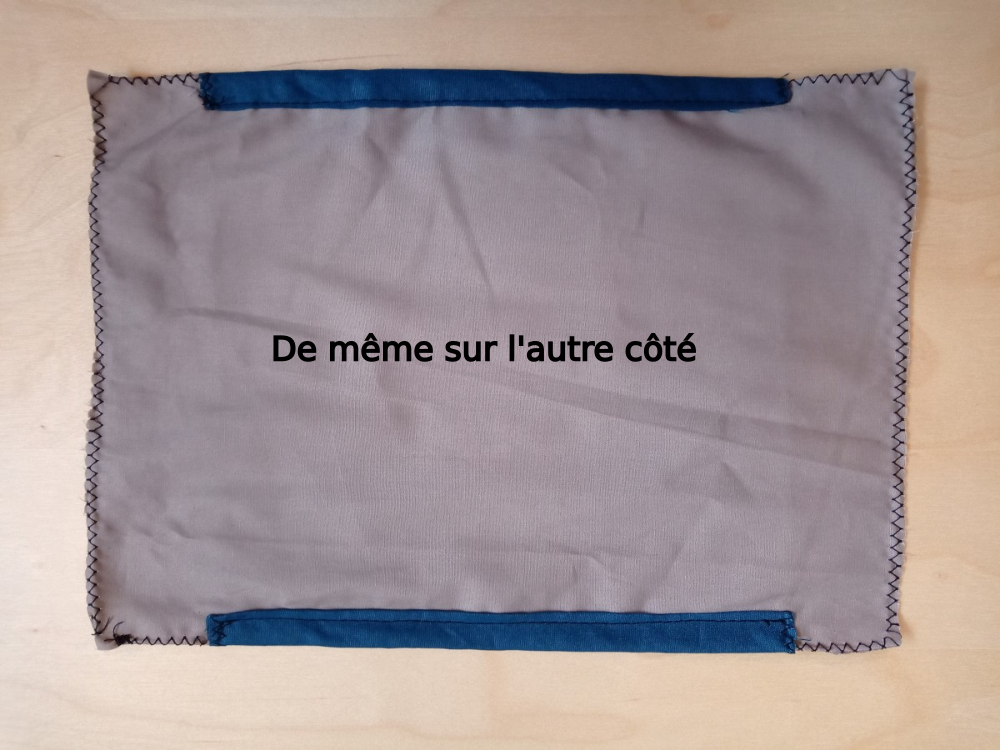
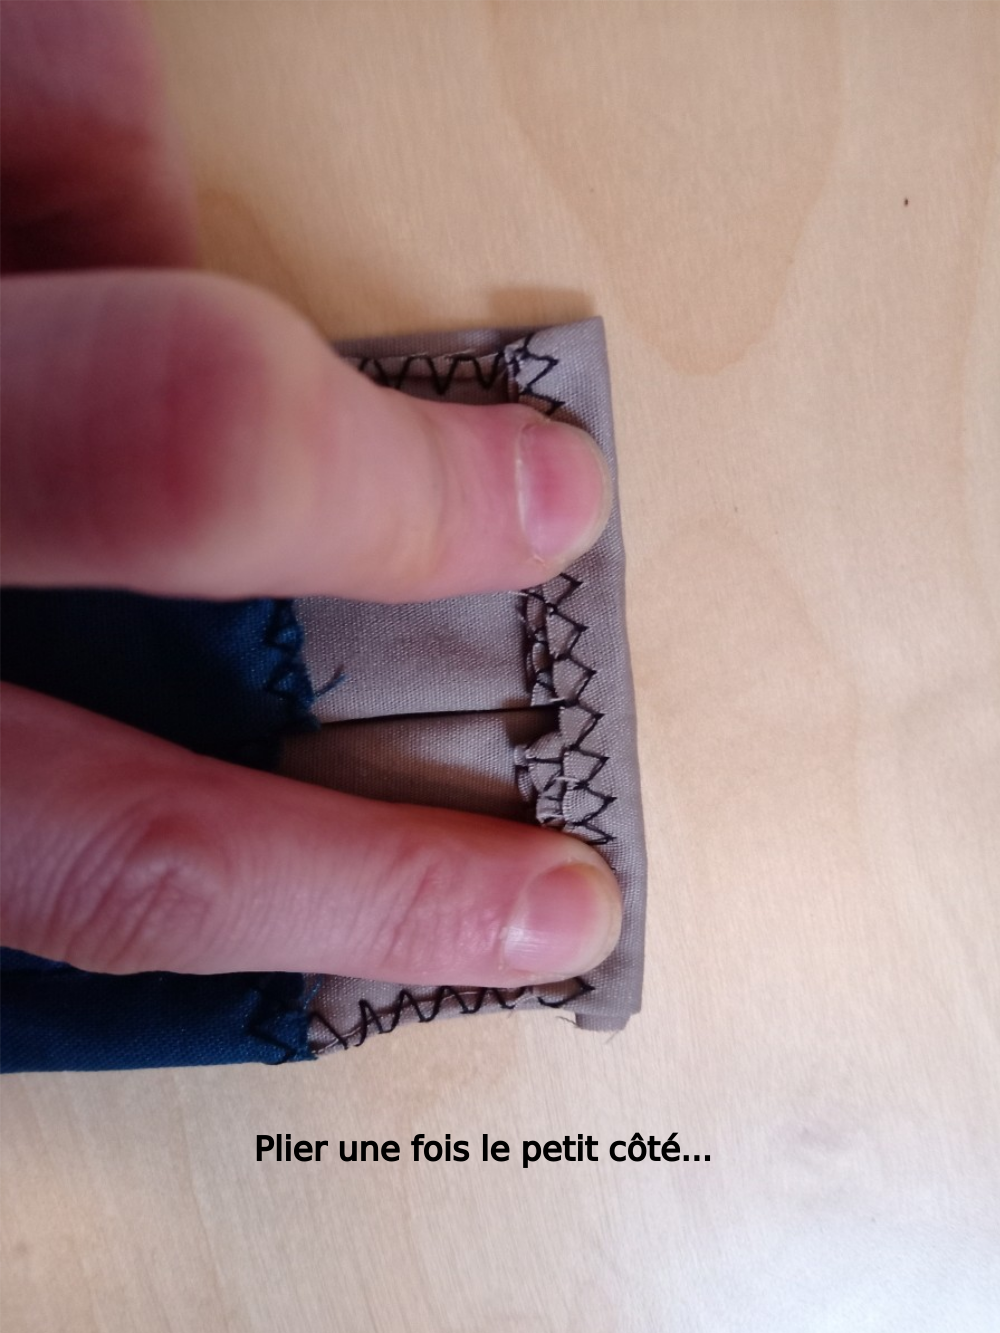
Make 2 lapels on the short sides to create a hem. (To make a lapel, fold the side in on itself 2 times - you can iron this double fold if you think it's necessary - then sew with a straight stitch). This small-side hem may be difficult to make if the hem width is small, or if the fabric is stretchy, so you may prefer to sew it by hand rather than with a machine.
Sew with a straight stitch, about 1 mm from the edge.
Repeat for the second bias.
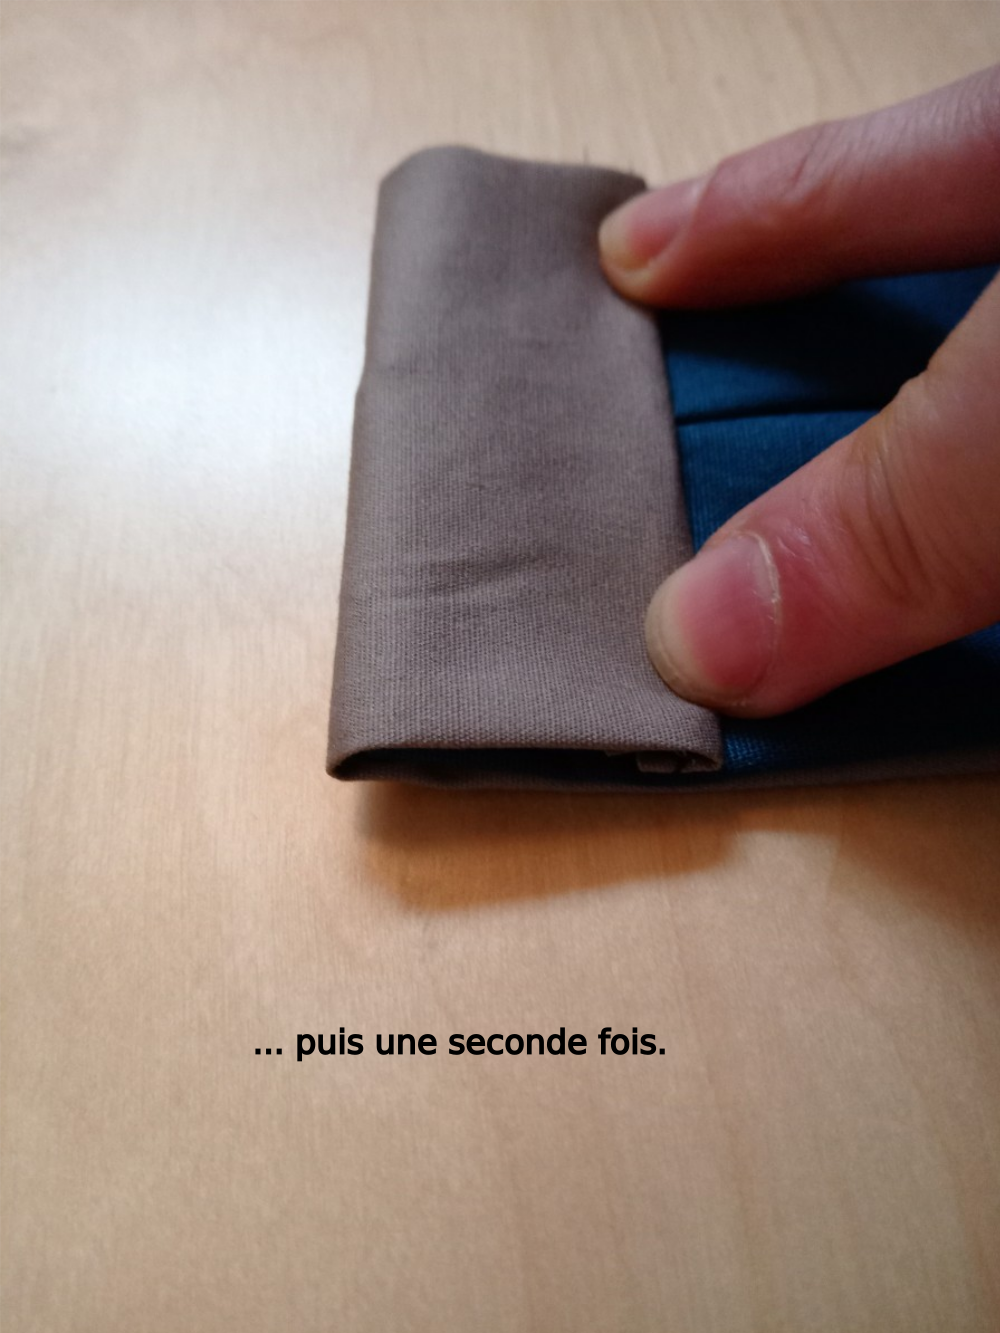
Étape 3 - The mask's 3 folds
Fold according to Afnor's model. https://masques-barrieres.afnor.org/
Ironing can be used to mark creases.

Étape 4 - Les glissières à cordon
On fait un ourlet large qui va servir à passer la cordelette : plier une fois, puis replier à nouveau sur la face extérieure. Coudre à 1mm du bord au point droit.
Cordon : se procurer environ 1 mètre de cordelette, ou à défaut un long lacet à chaussure. Si la matière s'y prête, brûler les 2 bouts pour stopper le déroulage du cordon. Faire un nœud à l'un des bout. Le passer dans une petit épingle à nourrice. Enfiler cette épingle liée au cordon dans le passage du bas droit du masque; faire un demi-tour. Passer l'épingle dans le passage haut gauche. Et voilà !


Étape 5 - Optionnel : La question du pince-nez
L'Afnor ne prévoit pas de pince-nez dans ses documents grand public. Cependant, on peut ajouter une glissière de 6-8cm en haut au milieu du masque. Laisser une encoche; y glisser un fil métal, que l'on enlève au lavage pour ne pas l'endommager. Sur le choix du matériau, je n'ai pas de solution parfaite. Un tortillon de sac à surgelé peut peut-être faire l'affaire. Si vous avez la bonne solution, n'hésitez pas à la partager.
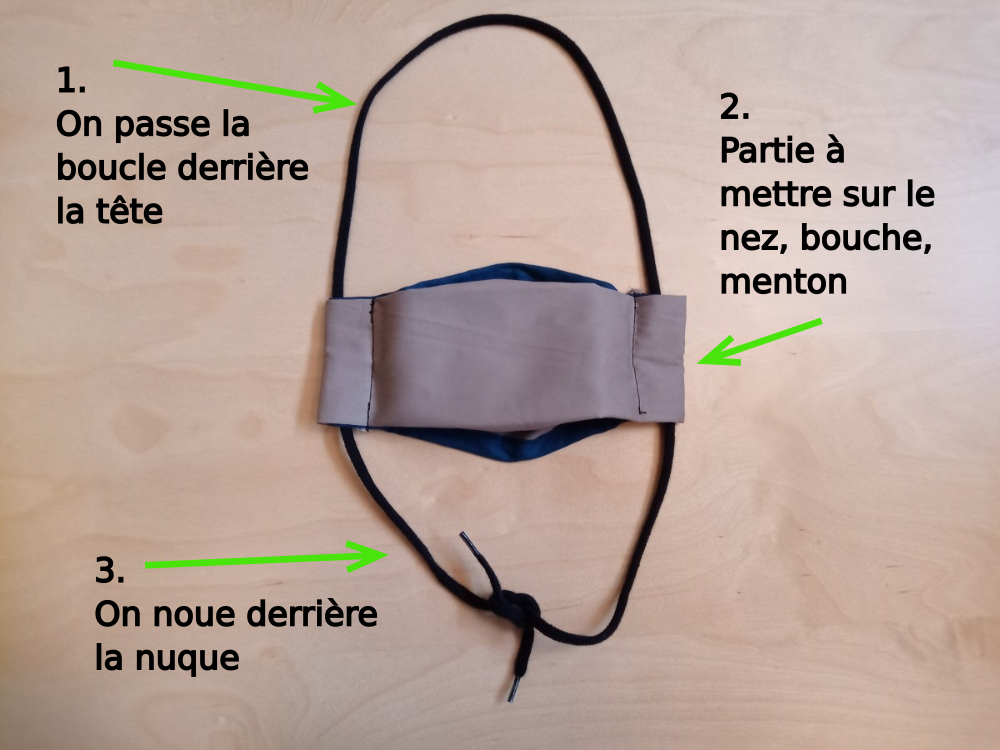
Étape 6 - Tadaah ! C'est terminé côté couture.
Comme on a pas mal tripoté le masque en le confectionnant, il reste à le laver. L'Afnor qui se base sur l'avis de l'ANSM conseille de laver à 60°C au moins 30 minutes en machine, puis sécher au sèche-linge ou à l'air libre. Voir la FAQ, paragraphe « Utilisation »
Attention, laisser la cordelette dans le masque pour le lavage en machine peut provoquer des emmêlages...
Published
 Français
 English
 Deutsch
 Español
 Italiano
 Português