(Page créée avec « Watch the tutorial video here ») |
(Mise à jour pour être en accord avec la nouvelle version de la source de la page) |
||
| (90 révisions intermédiaires par 3 utilisateurs non affichées) | |||
| Ligne 1 : | Ligne 1 : | ||
| − | {{ | + | {{Tuto Details |
| − | | | + | |Main_Picture=Toilettes_s_ches_familiales_E5_-_toilette_seche137_-_vwf.jpg |
| − | | | + | |Licences=Attribution-ShareAlike (CC BY-SA) |
| − | | | + | |Description=<div class="mw-translate-fuzzy"> |
| + | Dry toilets for domestic urban/rural use, occidental context | ||
| + | </div> | ||
| + | |Area=Habitat, Water, Hygiene | ||
|Type=Tutorial | |Type=Tutorial | ||
| − | |||
| − | |||
| − | |||
|Difficulty=Easy | |Difficulty=Easy | ||
| + | |Duration=2 | ||
| + | |Duration-type=hour(s) | ||
|Cost=80 | |Cost=80 | ||
|Currency=EUR (€) | |Currency=EUR (€) | ||
| − | | | + | |Tags=toilette, sèche, litière, biomaitrisé, eau, Low-tech Tour France, toilettes sèches, compost, dry toilet |
| − | |||
| − | |||
| − | |||
|SourceLanguage=fr | |SourceLanguage=fr | ||
|Language=en | |Language=en | ||
|IsTranslation=1 | |IsTranslation=1 | ||
}} | }} | ||
| − | {{ | + | {{Introduction |
|Introduction=This tutorial is based on the dry toilets by [https://www.maisonsnomades.net/ Yves Desarzens, Maisons Nomades]. They're non-flush toilets belonging to the composting toilets type. | |Introduction=This tutorial is based on the dry toilets by [https://www.maisonsnomades.net/ Yves Desarzens, Maisons Nomades]. They're non-flush toilets belonging to the composting toilets type. | ||
Watch the tutorial video here | Watch the tutorial video here | ||
| − | + | This dry toilets model was conceived for a domestic/family use in urban or rural area provided that there is a composting dedicated area. | |
| − | + | In the case of an urban area, depending on the scale and context of the group housing, some problems such as the access to the composting area and the transportation of the toilets to this area could occur. | |
| − | + | The consumption of water an the classic toilets model in the household | |
| − | + | Classic pour-flush toilets represent 20% of the drinking water consumption of a household, almost 150€/y for a 4 members family. It's the second most consuming item after the shower (40%). | |
| − | + | The water used for the flush is drinking water (except in rare cases where rainwater is used), as son as it touches the excrement, this water becomes foul water contaminated and therefore unusable for any other uses. | |
| − | + | Excrement: trash or resources ? | |
| − | + | In average, a human products 50 Liters of solid excrement and 500 Liters of urine every year. in France, a person turns "30 Liters of drinking water into foul water" every day. | |
| − | + | In solid excrement, we find minerals including nitrogen (1,1 lbs/pop/y), phosphorus (0,4 lbs/pop/y) and potassium (0,7 lbs/pop/y) but also pathogens such as bacteria, viruses and parasites and sometimes products such as antibiotics depending on the user's health. | |
| − | + | In urine, we find minerals including nitrogen (8,9 lbs/pop/y), phosphorus (0,7 lbs/pop/y) and potassium (1,8 lbs/pop/y) and very rarely pathogens too. | |
| − | + | These matters, casually considered as trash are flowed through the pipes with the foul water. Then followed by a long process of sewage treatment in water treatment plants found in the city suburbs. These process produce at the same time sewage sludge of which the waste-to-energy conversion is complex. | |
| − | + | In the case where we consider the process in a cyclic way like for the animal manure, it's possible to see human excrement as a "resource". | |
| + | By respecting the hygiene requirements, human excrement can easily be composted and turned into pathogens-free humus which doesn't have anything to do with excrement anymore. For the antibiotics (besides significant use), the researches show that there's no durable effect on the composting. It's important to notice that animal manure already used contains at the start the same contaminants including antibiotics. | ||
| − | + | It's important to not separate the urine from the solid and carbon matter: the cellulose in the the carbon matter prevents the transformation of the urea, rich in nitrogen, ammonium ions (responsible for the stinky smell in urinals for example). This effect also has another very important and positive consequence: if the urine was released in the nature without cellulose addition, the ammonium ions would turn into nitrite ions and cause a faster degradation of the humus, the opposite of the expected effect. | |
| − | + | This problematic is encountered in some contexts where the large-scale urine recovery was thought for fertilizers creation. | |
| − | + | Excrement: a resource thanks to dry toilets | |
| − | + | There's plenty of dry toilets models. Here, the proposed model is a bio-litter toilet. It's the easiest model which doesn't need ventilation. This model is constituted of a stainless steel bucket which collects the dejection (urine and excrement), the toilet paper as well as the vegetable carbon matter. Whether it's in the sale room where they're installed or in the composting area, very few smells are emitted (actually the same amount emitted from classic water toilets). | |
| − | '''[http://www.eautarcie.org/05f.html | + | '''[http://www.eautarcie.org/05f.html Recipe for a good composting]''' |
| − | 1) | + | 1) A rich contribution of vegetable dry matter rich in carbon (straw, dead leaf, sawdust) 30 times more important than the excrement contribution, rich in nitrogen. |
| − | 2) | + | 2) A good ventilation of the compost in order that the aerobic organisms which need oxygen are able to achieve correctly their decomposing work. The shreds participate in creating a well ventilated compost. |
| − | + | What type of user comfort for the dry toilets? | |
| − | + | "+": the bio-litter toilets don't release any smell and don't make any unwanted noises unlike classic toilets. | |
| − | + | "-": The bio-litter toilets require to regularly empty the bucket in the compost (twice a week for a 4 members family). | |
| − | + | "Summary" | |
| − | + | The use of the bio-litter toilets allows to reduce 20% of the water consuming in the household, therefore the bill too. It also allows the creation of usable humus for the garden. All of this for the same or even better comfort compared to classic toilets. | |
| + | |||
| + | '''Retrouvez dans [https://lowtechlab.org/assets/files/rapport-experimentation-habitat-low-tech-low-tech-lab.pdf ce rapport] une analyse à l'usage de ces toilettes sèches, ainsi que des 11 autres low-techs expérimentées lors du projet En Quête d'un Habitat Durable''' | ||
}} | }} | ||
| − | {{ | + | {{TutoVideo |
| − | | | + | |VideoType=Youtube |
| − | | | + | |VideoURLYoutube=https://www.youtube.com/watch?v=9ThiuVN-Koo |
}} | }} | ||
| − | {{ | + | {{Materials |
| − | |Material= | + | |Material="Notes" |
| − | 1) | + | 1) Every measure in this tutorial are only for the stainless steel bucket below and for wood of a thickness of 1,2 in. It will be very simple to adapt the measure depending on the equipment of everyone. |
| − | 2) | + | 2) It isn't recommended to use any other materials than stainless steel for the bucket. The other materials such as galvanized steel or plastic don't react well with urine through time. Furthermore, you have to make sure the bucket can support the weight of anybody. That's why stainless steel is recommended. |
| − | * [http://ecotrone.fr/seaux-et-couvercles-inox_2_seau-15-l-sans-base__0901-15.html | + | * [http://ecotrone.fr/seaux-et-couvercles-inox_2_seau-15-l-sans-base__0901-15.html A stainless steel bucket]. |
| − | * | + | * Classic toilet lid. |
| − | * [https://lecopot.com/473-thickbox/seau-21l-en-plastique-alimentaire-toilette-seche.jpg | + | * [https://lecopot.com/473-thickbox/seau-21l-en-plastique-alimentaire-toilette-seche.jpg A plastic bucket] |
| − | * | + | * A door hinge 4 inches large, preferably stainless steel. |
| − | * | + | * Wood boards/shavings, here 1,2 in thick. |
| − | * | + | * Screws, preferably stainless steel. |
| − | * | + | * Wood glue. |
| − | * | + | * Polyurethane glue. |
| − | * | + | * A lag-screw 4,8 in long. |
| − | * | + | * Sawdust (can be collected at a carpenter). |
| − | * | + | * Dry vegetable matters like straw, dead leaves, etc. |
| − | * | + | * Container allowing to stock sawdust, approximately 20 L. (bucket, bag, etc) |
| − | * | + | * Container allowing to collect the sawdust (small shovel, pot, tin can, etc) |
| − | * | + | * Reclaimed wood or palettes (creation of the composting area). |
| − | |Tools=* | + | |Tools=* Saw |
| − | * | + | * Mechanical gun with cartridges (optional) |
| − | * | + | * Sandler (optional) |
| − | * | + | * Screwer |
| − | * | + | * Drill |
}} | }} | ||
| − | {{ | + | {{Tuto Step |
| − | + | |Step_Title=Mural wedge | |
| − | + | |Step_Content=* Cut a wood square of 4,8*4,8 in and 1,2 in thick | |
| − | + | * Sand and deburr if required | |
| − | |Step_Title= | ||
| − | |Step_Content=* | ||
| − | * | ||
| − | + | "Notes" | |
| − | 1) | + | 1) This wedge allows the support of the dry toilet on the wall of the room where it'll be installed. |
| − | 2) | + | 2) It also allows to have the required width in order to lift the different toilet lids. |
| + | |Step_Picture_00=Toilette_s_che_liti_re_biomaitris_e_cale_murale.PNG | ||
| + | |Step_Picture_01=Toilette_s_che___liti_re_biomaitris_e_sk_cale_murale.jpg | ||
}} | }} | ||
| − | {{ | + | {{Tuto Step |
| + | |Step_Title=Pillar | ||
| + | |Step_Content=* Cut a wood rectangle of 4,8*14,6 in and 1,2 thick | ||
| + | * Sand and deburr if required | ||
| + | |||
| + | Notes : This pillar helps to get back when a user sit. | ||
|Step_Picture_00=Toilette_s_che_liti_re_biomaitris_e_pilier.PNG | |Step_Picture_00=Toilette_s_che_liti_re_biomaitris_e_pilier.PNG | ||
|Step_Picture_01=Toilette_s_che___liti_re_biomaitris_e_sk_pilier.jpg | |Step_Picture_01=Toilette_s_che___liti_re_biomaitris_e_sk_pilier.jpg | ||
| − | |Step_Title= | + | }} |
| − | |Step_Content=* | + | {{Tuto Step |
| − | * | + | |Step_Title=Wedge of the bucket |
| + | |Step_Content=* Cut a wood rectangle of 4,8*4 in and 1,2 thick | ||
| + | * Draw a circle of 3,3 in radius like on the diagram, it's the bucket's diameter | ||
| + | * Cut the drawn circle | ||
| + | * Sand and deburr if required | ||
| − | + | Notes: This wedge helps to center the bucket according to the toilet lids. | |
| − | |||
| − | |||
|Step_Picture_00=Toilette_s_che_liti_re_biomaitris_e_cale_seau.PNG | |Step_Picture_00=Toilette_s_che_liti_re_biomaitris_e_cale_seau.PNG | ||
|Step_Picture_01=Toilettes_s_ches_familiales_cale_seau_2.jpg | |Step_Picture_01=Toilettes_s_ches_familiales_cale_seau_2.jpg | ||
| − | |Step_Title= | + | }} |
| − | |Step_Content=* | + | {{Tuto Step |
| − | + | |Step_Title=Wedge of the toilet lid | |
| − | + | |Step_Content=* Cut a wood rectangle of 4,8*2,2 in and 1,2 in thick | |
| − | * | + | * Sand and deburr if required |
| − | + | Notes: this wedge helps to balance the user weight to the pillar | |
| − | |||
| − | |||
|Step_Picture_00=Toilette_s_che_liti_re_biomaitris_e_cale_abattant.PNG | |Step_Picture_00=Toilette_s_che_liti_re_biomaitris_e_cale_abattant.PNG | ||
|Step_Picture_01=Toilette_s_che___liti_re_biomaitris_e_sk_cale_lunette.jpg | |Step_Picture_01=Toilette_s_che___liti_re_biomaitris_e_sk_cale_lunette.jpg | ||
| − | |||
| − | |||
| − | |||
| − | |||
| − | |||
}} | }} | ||
| − | {{ | + | {{Tuto Step |
| − | + | |Step_Title=Toilet lid | |
| − | + | |Step_Content=* Cut a ring beam of an external diameter of 18 in and of an internal diameter of 12 in. This ring beam is the base of the main lid. | |
| − | |||
| − | |||
| − | |Step_Title= | ||
| − | |Step_Content=* | ||
| − | + | "Note": drill a hole of an adequate diameter to insert the blade of the jigsaw in the interior of the beam ring. | |
| − | * | + | * Create a flat piece of 4,7 in on the edge of the external circle. |
| − | + | "Note" : This flat piece is used for the hinge fixing. | |
| − | |||
| − | * | + | * With the remains of the circle, cut a quarter-moon shape of 1,2 in large and 16 in of external perimeter (see photo). |
| − | * | + | * With the wood glue glue it and then screw it to the lid, at the opposite of the flat piece created before (see photo). |
| − | ' | + | Notes: This piece allows the support on the stainless steel bucket while considering the thickness of bucket's cove. |
| − | + | |Step_Picture_00=Toilette_s_che_liti_re_biomaitris_e_abattant_demo_plat_pilier.PNG | |
| + | |Step_Picture_01=Toilette_s_che_liti_re_biomaitris_e_abattant_lune.PNG | ||
| + | |Step_Picture_02=Toilette_s_che_liti_re_biomaitris_e_abattant_vissage_lune.PNG | ||
| + | |Step_Picture_03=Toilette_s_che___liti_re_biomaitris_e_sk_abbatant.jpg | ||
}} | }} | ||
| − | {{ | + | {{Tuto Step |
| + | |Step_Title=Toilet flap | ||
| + | |Step_Content=* In the plastic bucket, cut a slat of 18*3,1 in. | ||
| + | * Glue it with the polyurethane glue and screw the flap on the front half of the lid (see photo) | ||
| + | |||
| + | "Notes": this flap protects from urine projections. | ||
|Step_Picture_00=Toilette_s_che_liti_re_biomaitris_e_bavette_collage.PNG | |Step_Picture_00=Toilette_s_che_liti_re_biomaitris_e_bavette_collage.PNG | ||
|Step_Picture_01=Toilette_s_che_liti_re_biomaitris_e_bavette_vissee.PNG | |Step_Picture_01=Toilette_s_che_liti_re_biomaitris_e_bavette_vissee.PNG | ||
| − | |||
| − | |||
| − | |||
| − | |||
| − | |||
}} | }} | ||
| − | {{ | + | {{Tuto Step |
| + | |Step_Title=Assembly | ||
| + | |Step_Content=* Glue and screw the mural wedge on the edge of the pillar | ||
| + | * Glue and screw the lid wedge on the opposite edge of the pillar, 1,2 in from the side | ||
| + | * Glue and screw the bucket wedge on the pillar, below the lid wedge. | ||
| + | * Sand the assembly if needed. | ||
| + | * Fix the hinge between the pillar and the lid (see photo). | ||
| + | * Paint or protect the wood (painting or flax oil). | ||
|Step_Picture_00=Toilette_s_che_liti_re_biomaitris_e_assemblage_termin_.PNG | |Step_Picture_00=Toilette_s_che_liti_re_biomaitris_e_assemblage_termin_.PNG | ||
|Step_Picture_01=Toilette_s_che_liti_re_biomaitris_e_assemblage_collage.PNG | |Step_Picture_01=Toilette_s_che_liti_re_biomaitris_e_assemblage_collage.PNG | ||
| Ligne 178 : | Ligne 184 : | ||
|Step_Picture_03=Toilette_s_che_liti_re_biomaitris_e_assemblage_charniere.PNG | |Step_Picture_03=Toilette_s_che_liti_re_biomaitris_e_assemblage_charniere.PNG | ||
|Step_Picture_04=Toilette_s_che___liti_re_biomaitris_e_sk_assemblage_sans_seau.jpg | |Step_Picture_04=Toilette_s_che___liti_re_biomaitris_e_sk_assemblage_sans_seau.jpg | ||
| − | |||
| − | |||
| − | |||
| − | |||
| − | |||
| − | |||
| − | |||
}} | }} | ||
| − | {{ | + | {{Tuto Step |
| + | |Step_Title=Fixing of the toilet lid | ||
| + | |Step_Content=* With a drilling machine and a wood drill, fix the classic toilet lid on the lid created before. | ||
|Step_Picture_00=Toilette_s_che_liti_re_biomaitris_e_assemblage_lunette.PNG | |Step_Picture_00=Toilette_s_che_liti_re_biomaitris_e_assemblage_lunette.PNG | ||
| − | |||
| − | |||
}} | }} | ||
| − | {{ | + | {{Tuto Step |
| + | |Step_Title=Fixing of the toilets | ||
| + | |Step_Content=* Position the supporting system on the pillar, at the chosen place. | ||
| + | * Pass the lag screw through the pillar, the mural wedge and the wall which will welcome the toilets. | ||
| + | |||
| + | "Notes": Depending on the wall material, it my be require to do a pre-drill and install a dowel to welcome the screw. | ||
| + | |||
| + | * center the bucket below the lid | ||
| + | * Place near the toilets a container full of sawdust as well as a container allowing it to be pour into the bucket. | ||
|Step_Picture_00=Toilette_s_che___liti_re_biomaitris_e_fixation_mur_1.PNG | |Step_Picture_00=Toilette_s_che___liti_re_biomaitris_e_fixation_mur_1.PNG | ||
|Step_Picture_01=Toilette_s_che___liti_re_biomaitris_e_fixation_1.PNG | |Step_Picture_01=Toilette_s_che___liti_re_biomaitris_e_fixation_1.PNG | ||
|Step_Picture_02=Toilette_s_che_liti_re_biomaitris_e_sciure.PNG | |Step_Picture_02=Toilette_s_che_liti_re_biomaitris_e_sciure.PNG | ||
| − | |Step_Title= | + | }} |
| − | |Step_Content=* | + | {{Tuto Step |
| − | * | + | |Step_Title=Composting areas |
| + | |Step_Content="Notes": in case there's a watercourse nearby, it's recommended to establish the area at least 197 ft away from the watercourse, downstream if possible in order to avoid any contamination during the composting phase. | ||
| + | * With the help of small wooden palettes, create 2 composting areas in place far from any watercourse and protected areas, sheltered from the weather (under a tree for example). | ||
| + | |||
| + | * Place a the bottom 4 in of straw/vegetable crushing or dead leaves. | ||
| + | |Step_Picture_00=Toilette_s_che_liti_re_biomaitris_e_compost.PNG | ||
| + | }} | ||
| + | {{Tuto Step | ||
| + | |Step_Title=Use of the toilets | ||
| + | |Step_Content=*Do your business on the toilets, add toilet paper. | ||
| + | * Cover of 0,4 in of sawdust. | ||
| + | * When the bucket is full, empty it in the composting area and cover it of layer of crushing/leaves or straw. | ||
| + | * Clean the bucket with water and soap outside and empty it in the composting area, put gloves if needed. | ||
| + | * Wash your hands. | ||
| + | * Re-position the bucket under the toilets with some sawdust at the bottom. | ||
| + | * Disinfect the toilet's seats and flaps the same way as classic toilets. | ||
| + | * Wash your hands | ||
| − | + | "Notes" | |
| − | + | 1) It's important to follow the basic hygienic rules during the emptying. | |
| − | |||
| − | |||
| − | |||
| − | |||
| − | |||
| − | |||
| − | |||
| − | + | 2) It's possible to provide a cleaning area near the composting area with the required material (tap, gloves, brush, soap, disinfectant). | |
| − | |||
| − | |||
|Step_Picture_00=Toilette_s_che_liti_re_biomaitris_e_utilisation_vidage_compost.PNG | |Step_Picture_00=Toilette_s_che_liti_re_biomaitris_e_utilisation_vidage_compost.PNG | ||
|Step_Picture_01=Toilette_s_che_liti_re_biomaitris_e_nettoyage_seau.PNG | |Step_Picture_01=Toilette_s_che_liti_re_biomaitris_e_nettoyage_seau.PNG | ||
|Step_Picture_02=Toilette_s_che_liti_re_biomaitris_e_nettoyage_main.PNG | |Step_Picture_02=Toilette_s_che_liti_re_biomaitris_e_nettoyage_main.PNG | ||
| − | |||
| − | |||
| − | |||
| − | |||
| − | |||
| − | |||
| − | |||
| − | |||
| − | |||
| − | |||
| − | |||
| − | |||
| − | |||
| − | |||
| − | |||
}} | }} | ||
| − | {{ | + | {{Tuto Step |
| − | |Step_Title= | + | |Step_Title=Use of the compost |
| − | |Step_Content=* | + | |Step_Content=* When the first area is full, use the second one and cover the first one with crushing. |
| − | * | + | * Let it compost during 2 years. |
| − | + | "notes": the key to a good compost is the relation between the contribution of the carbon matter (crushing, leaves...) and the nitrogen matter as well as a good ventilation of the compost. This one is allowed by holes between the slats and the space created by the carbon matter. | |
| − | + | The website [http://www.eautarcie.org/05f.html eautarcie] details the composting of the human dejection. | |
| − | * | + | * Don't hesitate to add vegetable crushing if the compost seem very moist, sticky and stinky. |
}} | }} | ||
| − | {{ | + | {{Notes |
| − | |Notes=* | + | |Notes=<div class="mw-translate-fuzzy"> |
| + | * Tutorial pack by Camille Duband and Pierre-Alain Lévêque for the Low-tech Lab in collaboration with [https://www.maisonsnomades.net/ Yves Desarzens, Maisons Nomades], November 2017. | ||
| + | </div> | ||
| − | + | <div class="mw-translate-fuzzy"> | |
| + | Quote in the tutorial video of [https://www.eautarcie.org/05a.html Joseph Orszagh, Eautarcie]. | ||
| + | </div> | ||
| − | * [http://www.eautarcie.org/05f.html | + | <div class="mw-translate-fuzzy"> |
| + | * [http://www.eautarcie.org/05f.html Composting of human dejection.] | ||
| + | </div> | ||
| − | * [http://www.toilettesdumonde.org/_data/file/guide-tdm-toilettes-seches-maison.pdf | + | <div class="mw-translate-fuzzy"> |
| + | * [http://www.toilettesdumonde.org/_data/file/guide-tdm-toilettes-seches-maison.pdf Very complete guide on the dry toilets by Toilettes du monde]. | ||
| + | </div> | ||
| − | * [http://www.oieau.org/consommation/menus.php?page=exterieur | + | <div class="mw-translate-fuzzy"> |
| + | * [http://www.oieau.org/consommation/menus.php?page=exterieur Calculate the water consumption at home by Oieau]. | ||
| + | </div> | ||
| − | * [https://www.cieau.com/le-metier-de-leau/ressource-en-eau-eau-potable-eaux-usees/quels-sont-les-usages-domestiques-de-leau/ | + | <div class="mw-translate-fuzzy"> |
| + | * [https://www.cieau.com/le-metier-de-leau/ressource-en-eau-eau-potable-eaux-usees/quels-sont-les-usages-domestiques-de-leau/ Domestic use of the water by Cieau]. | ||
| + | </div> | ||
| − | *[https://fr.wikipedia.org/wiki/Boues_d%27%C3%A9puration | + | *[https://fr.wikipedia.org/wiki/Boues_d%27%C3%A9puration Wikipedia article on the sewage sludges]. |
| − | *[https://fr.wikipedia.org/wiki/Fumier | + | *[https://fr.wikipedia.org/wiki/Fumier Wikipedia article on the animal manure]. |
| − | *[https://fr.wikipedia.org/wiki/Mati%C3%A8re_f%C3%A9cale_humaine | + | *[https://fr.wikipedia.org/wiki/Mati%C3%A8re_f%C3%A9cale_humaine Wikipedia article on the human faecal material .] |
| − | + | <div class="mw-translate-fuzzy"> | |
| + | Watch the tutorial video here | ||
| + | </div> | ||
| + | }} | ||
| + | {{PageLang | ||
}} | }} | ||
| − | {{ | + | {{Tuto Status |
| − | |Complete= | + | |Complete=Published |
}} | }} | ||
| + | {{Separator}} | ||
Version du 21 janvier 2021 à 16:47
Description
Dry toilets for domestic urban/rural use, occidental context
Dry toilets for domestic urban/rural use, occidental context
Sommaire
Sommaire
- 1 Description
- 2 Sommaire
- 3 Introduction
- 4 Video d'introduction
- 5 Étape 1 - Mural wedge
- 6 Étape 2 - Pillar
- 7 Étape 3 - Wedge of the bucket
- 8 Étape 4 - Wedge of the toilet lid
- 9 Étape 5 - Toilet lid
- 10 Étape 6 - Toilet flap
- 11 Étape 7 - Assembly
- 12 Étape 8 - Fixing of the toilet lid
- 13 Étape 9 - Fixing of the toilets
- 14 Étape 10 - Composting areas
- 15 Étape 11 - Use of the toilets
- 16 Étape 12 - Use of the compost
- 17 Notes et références
- 18 Commentaires
Introduction
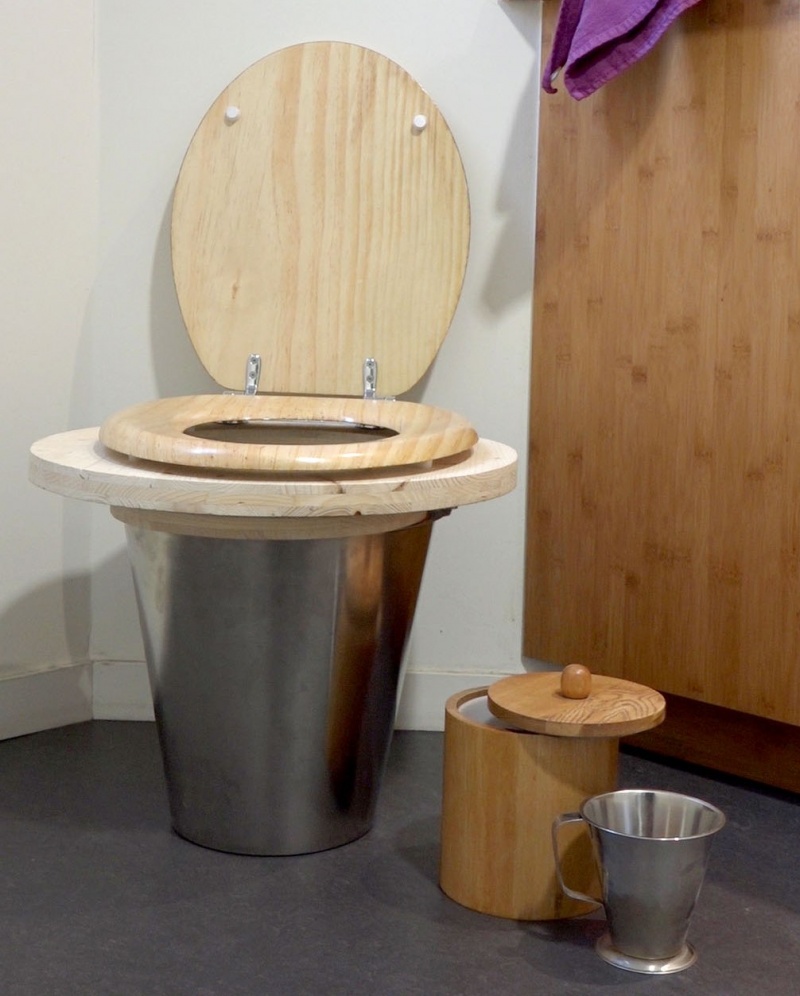
This tutorial is based on the dry toilets by Yves Desarzens, Maisons Nomades. They're non-flush toilets belonging to the composting toilets type.
Watch the tutorial video here
This dry toilets model was conceived for a domestic/family use in urban or rural area provided that there is a composting dedicated area.
In the case of an urban area, depending on the scale and context of the group housing, some problems such as the access to the composting area and the transportation of the toilets to this area could occur.
The consumption of water an the classic toilets model in the household
Classic pour-flush toilets represent 20% of the drinking water consumption of a household, almost 150€/y for a 4 members family. It's the second most consuming item after the shower (40%). The water used for the flush is drinking water (except in rare cases where rainwater is used), as son as it touches the excrement, this water becomes foul water contaminated and therefore unusable for any other uses.
Excrement: trash or resources ?
In average, a human products 50 Liters of solid excrement and 500 Liters of urine every year. in France, a person turns "30 Liters of drinking water into foul water" every day.
In solid excrement, we find minerals including nitrogen (1,1 lbs/pop/y), phosphorus (0,4 lbs/pop/y) and potassium (0,7 lbs/pop/y) but also pathogens such as bacteria, viruses and parasites and sometimes products such as antibiotics depending on the user's health.
In urine, we find minerals including nitrogen (8,9 lbs/pop/y), phosphorus (0,7 lbs/pop/y) and potassium (1,8 lbs/pop/y) and very rarely pathogens too.
These matters, casually considered as trash are flowed through the pipes with the foul water. Then followed by a long process of sewage treatment in water treatment plants found in the city suburbs. These process produce at the same time sewage sludge of which the waste-to-energy conversion is complex.
In the case where we consider the process in a cyclic way like for the animal manure, it's possible to see human excrement as a "resource". By respecting the hygiene requirements, human excrement can easily be composted and turned into pathogens-free humus which doesn't have anything to do with excrement anymore. For the antibiotics (besides significant use), the researches show that there's no durable effect on the composting. It's important to notice that animal manure already used contains at the start the same contaminants including antibiotics.
It's important to not separate the urine from the solid and carbon matter: the cellulose in the the carbon matter prevents the transformation of the urea, rich in nitrogen, ammonium ions (responsible for the stinky smell in urinals for example). This effect also has another very important and positive consequence: if the urine was released in the nature without cellulose addition, the ammonium ions would turn into nitrite ions and cause a faster degradation of the humus, the opposite of the expected effect. This problematic is encountered in some contexts where the large-scale urine recovery was thought for fertilizers creation.
Excrement: a resource thanks to dry toilets
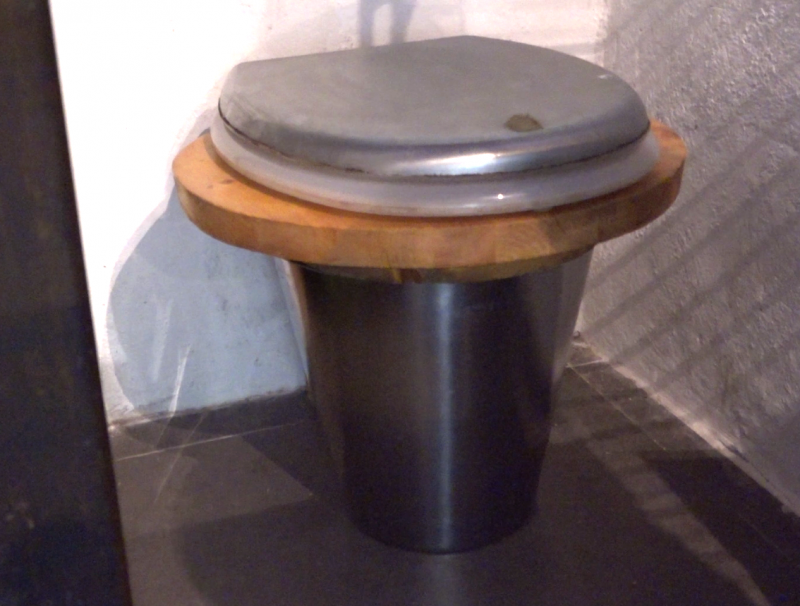
There's plenty of dry toilets models. Here, the proposed model is a bio-litter toilet. It's the easiest model which doesn't need ventilation. This model is constituted of a stainless steel bucket which collects the dejection (urine and excrement), the toilet paper as well as the vegetable carbon matter. Whether it's in the sale room where they're installed or in the composting area, very few smells are emitted (actually the same amount emitted from classic water toilets).
1) A rich contribution of vegetable dry matter rich in carbon (straw, dead leaf, sawdust) 30 times more important than the excrement contribution, rich in nitrogen.
2) A good ventilation of the compost in order that the aerobic organisms which need oxygen are able to achieve correctly their decomposing work. The shreds participate in creating a well ventilated compost.
What type of user comfort for the dry toilets?
"+": the bio-litter toilets don't release any smell and don't make any unwanted noises unlike classic toilets.
"-": The bio-litter toilets require to regularly empty the bucket in the compost (twice a week for a 4 members family).
"Summary"
The use of the bio-litter toilets allows to reduce 20% of the water consuming in the household, therefore the bill too. It also allows the creation of usable humus for the garden. All of this for the same or even better comfort compared to classic toilets.
Retrouvez dans ce rapport une analyse à l'usage de ces toilettes sèches, ainsi que des 11 autres low-techs expérimentées lors du projet En Quête d'un Habitat DurableYoutube
Matériaux
"Notes"
1) Every measure in this tutorial are only for the stainless steel bucket below and for wood of a thickness of 1,2 in. It will be very simple to adapt the measure depending on the equipment of everyone.
2) It isn't recommended to use any other materials than stainless steel for the bucket. The other materials such as galvanized steel or plastic don't react well with urine through time. Furthermore, you have to make sure the bucket can support the weight of anybody. That's why stainless steel is recommended.
- A stainless steel bucket.
- Classic toilet lid.
- A plastic bucket
- A door hinge 4 inches large, preferably stainless steel.
- Wood boards/shavings, here 1,2 in thick.
- Screws, preferably stainless steel.
- Wood glue.
- Polyurethane glue.
- A lag-screw 4,8 in long.
- Sawdust (can be collected at a carpenter).
- Dry vegetable matters like straw, dead leaves, etc.
- Container allowing to stock sawdust, approximately 20 L. (bucket, bag, etc)
- Container allowing to collect the sawdust (small shovel, pot, tin can, etc)
- Reclaimed wood or palettes (creation of the composting area).
Outils
- Saw
- Mechanical gun with cartridges (optional)
- Sandler (optional)
- Screwer
- Drill
Étape 1 - Mural wedge
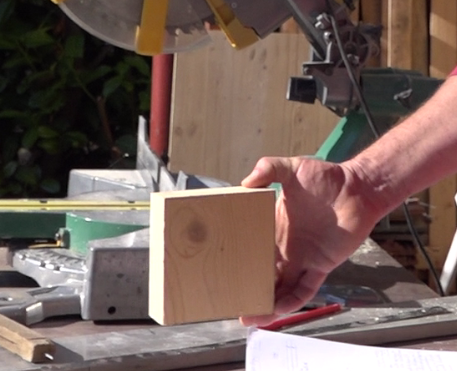
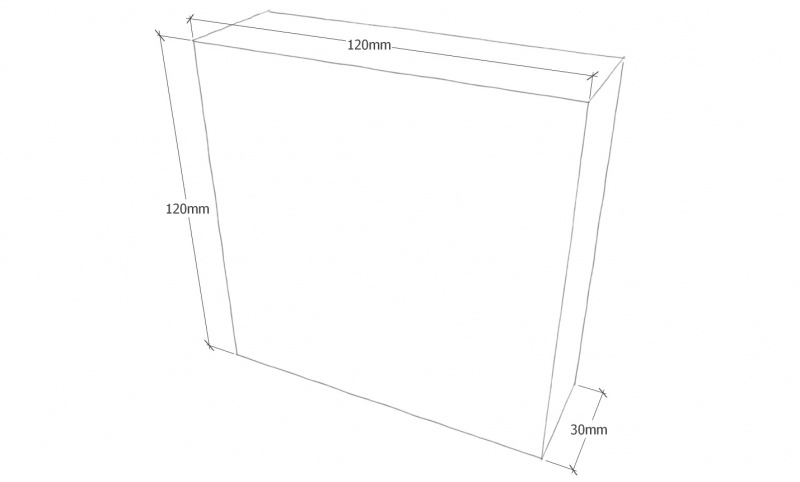
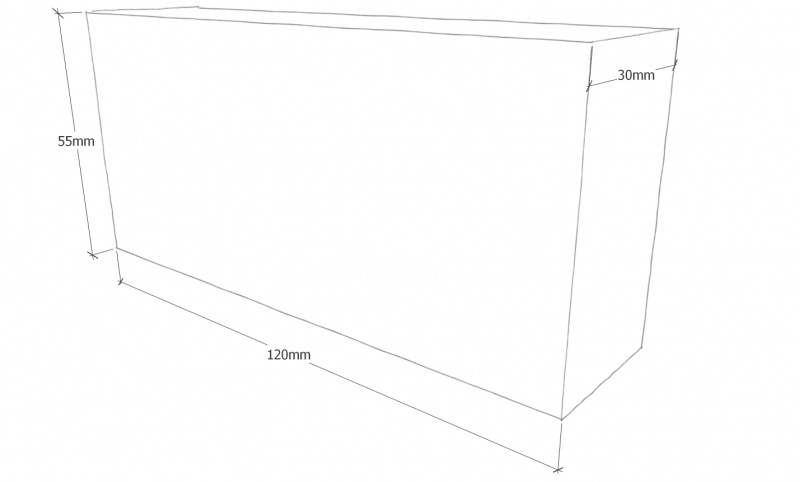
- Cut a wood square of 4,8*4,8 in and 1,2 in thick
- Sand and deburr if required
"Notes"
1) This wedge allows the support of the dry toilet on the wall of the room where it'll be installed.
2) It also allows to have the required width in order to lift the different toilet lids.
Étape 2 - Pillar
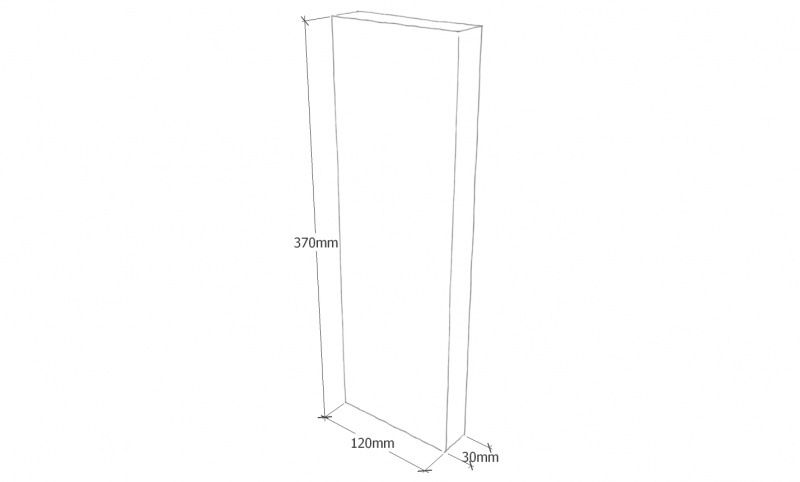
- Cut a wood rectangle of 4,8*14,6 in and 1,2 thick
- Sand and deburr if required
Notes : This pillar helps to get back when a user sit.
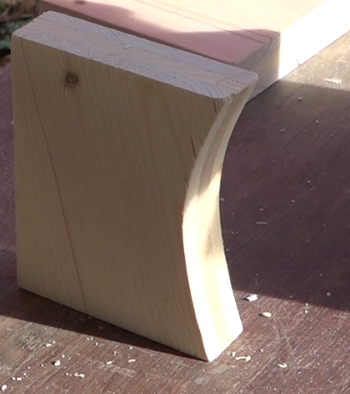
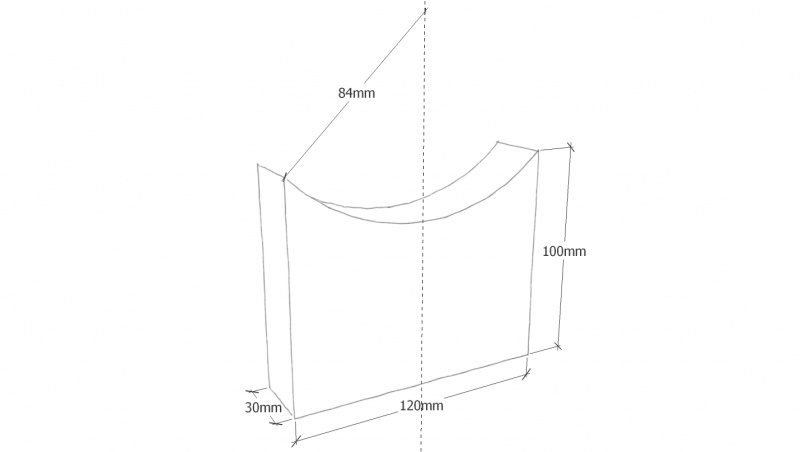
Étape 3 - Wedge of the bucket
- Cut a wood rectangle of 4,8*4 in and 1,2 thick
- Draw a circle of 3,3 in radius like on the diagram, it's the bucket's diameter
- Cut the drawn circle
- Sand and deburr if required
Notes: This wedge helps to center the bucket according to the toilet lids.
Étape 4 - Wedge of the toilet lid
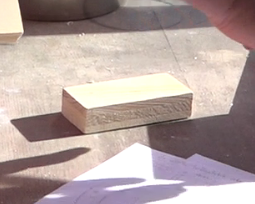
- Cut a wood rectangle of 4,8*2,2 in and 1,2 in thick
- Sand and deburr if required
Notes: this wedge helps to balance the user weight to the pillar
Étape 5 - Toilet lid
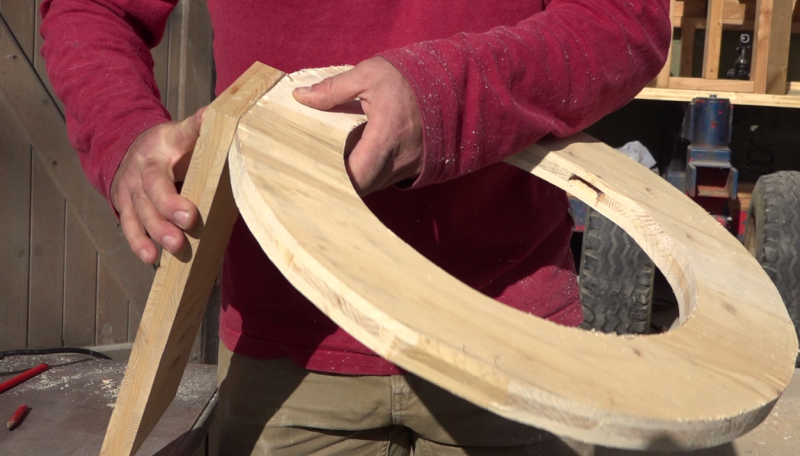
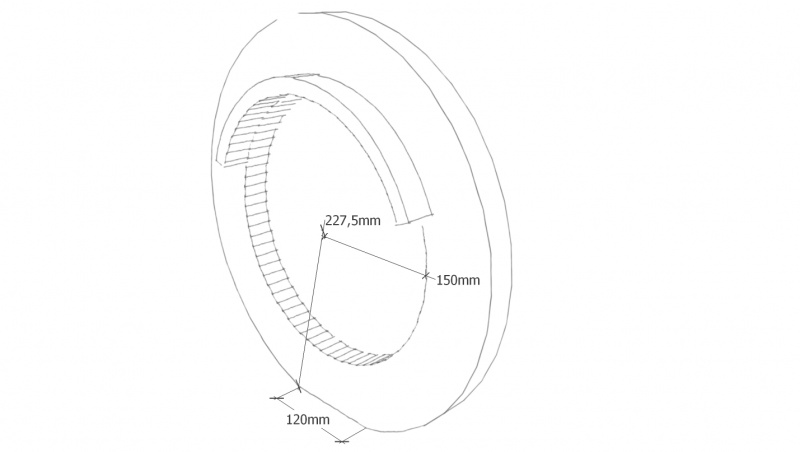
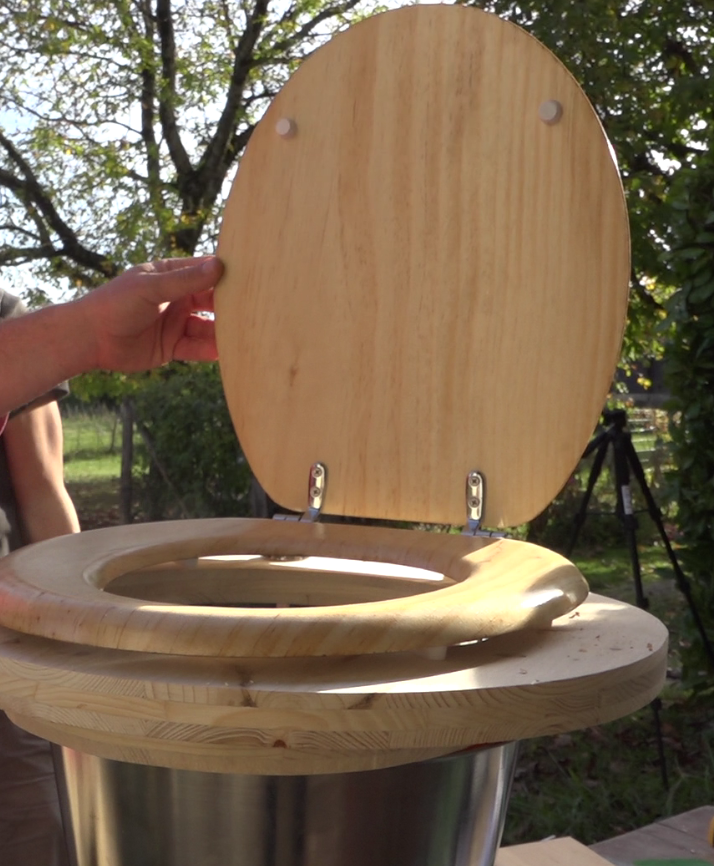
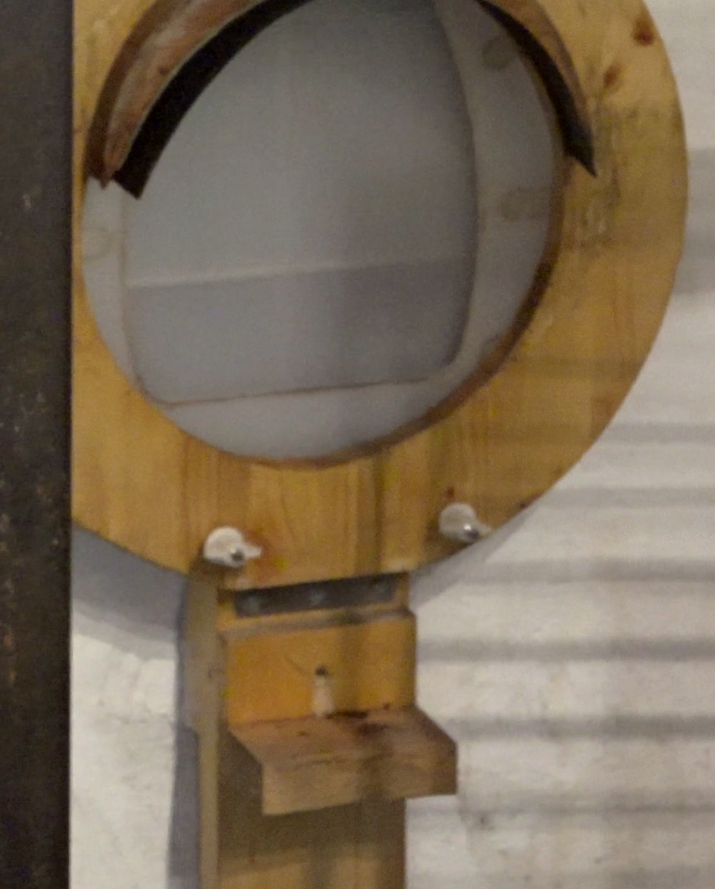
- Cut a ring beam of an external diameter of 18 in and of an internal diameter of 12 in. This ring beam is the base of the main lid.
"Note": drill a hole of an adequate diameter to insert the blade of the jigsaw in the interior of the beam ring.
- Create a flat piece of 4,7 in on the edge of the external circle.
"Note" : This flat piece is used for the hinge fixing.
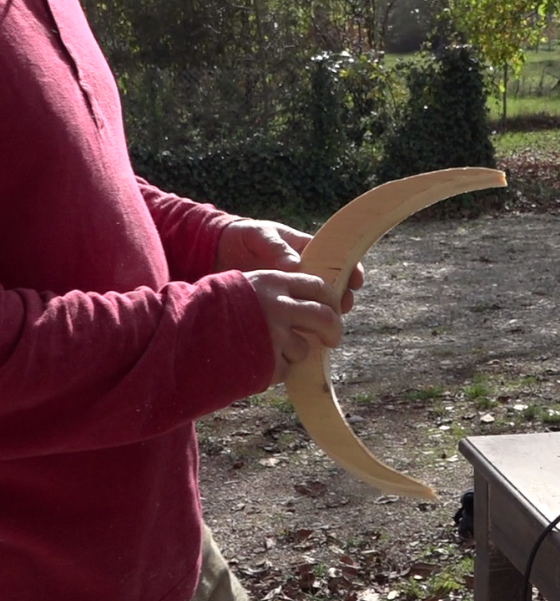
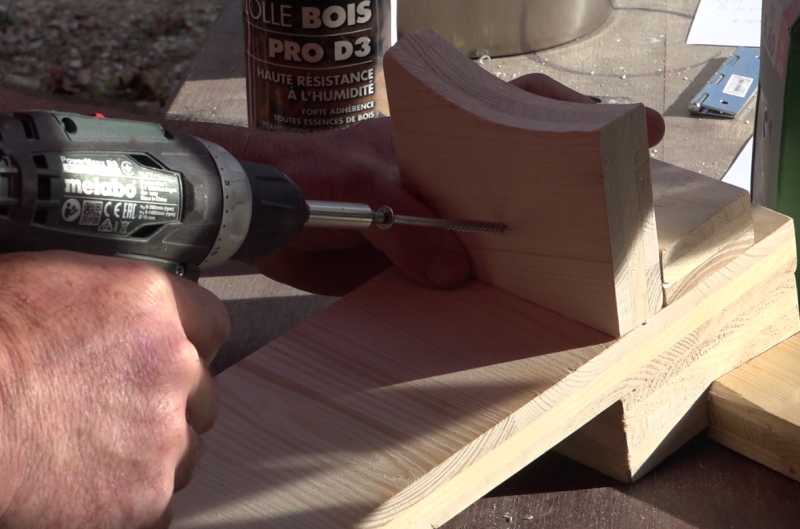
- With the remains of the circle, cut a quarter-moon shape of 1,2 in large and 16 in of external perimeter (see photo).
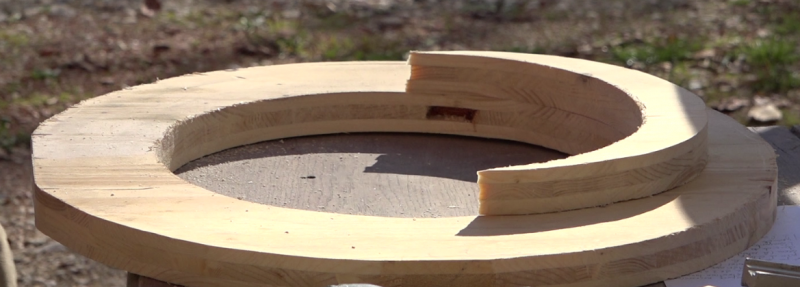
- With the wood glue glue it and then screw it to the lid, at the opposite of the flat piece created before (see photo).
Notes: This piece allows the support on the stainless steel bucket while considering the thickness of bucket's cove.
Étape 6 - Toilet flap
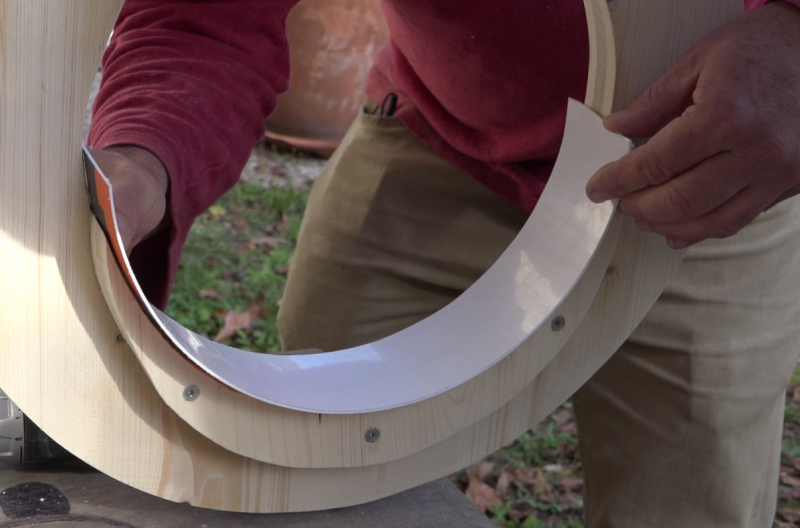
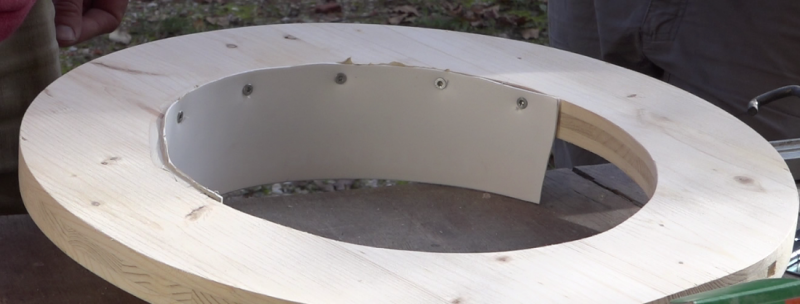
- In the plastic bucket, cut a slat of 18*3,1 in.
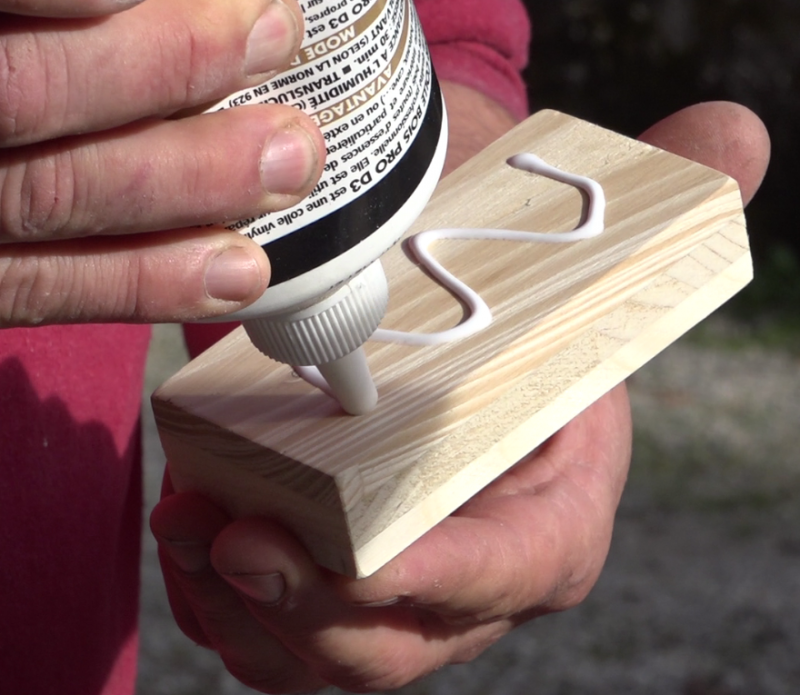
- Glue it with the polyurethane glue and screw the flap on the front half of the lid (see photo)
"Notes": this flap protects from urine projections.
Étape 7 - Assembly
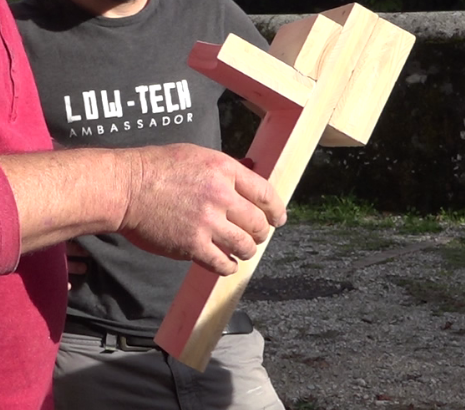
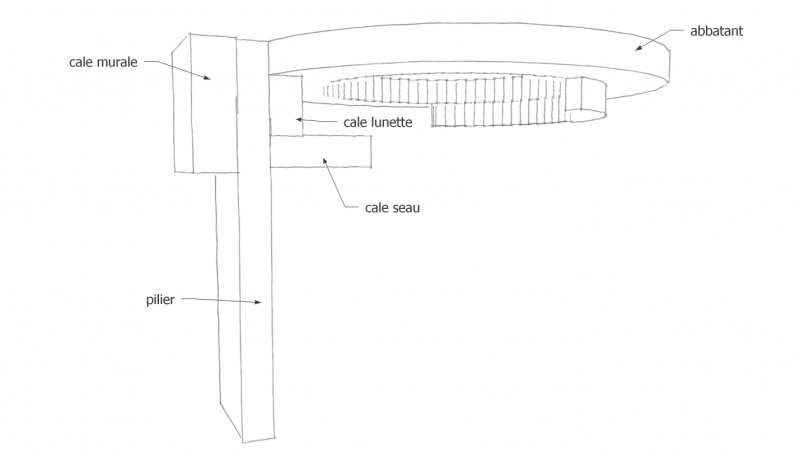
- Glue and screw the mural wedge on the edge of the pillar
- Glue and screw the lid wedge on the opposite edge of the pillar, 1,2 in from the side
- Glue and screw the bucket wedge on the pillar, below the lid wedge.
- Sand the assembly if needed.
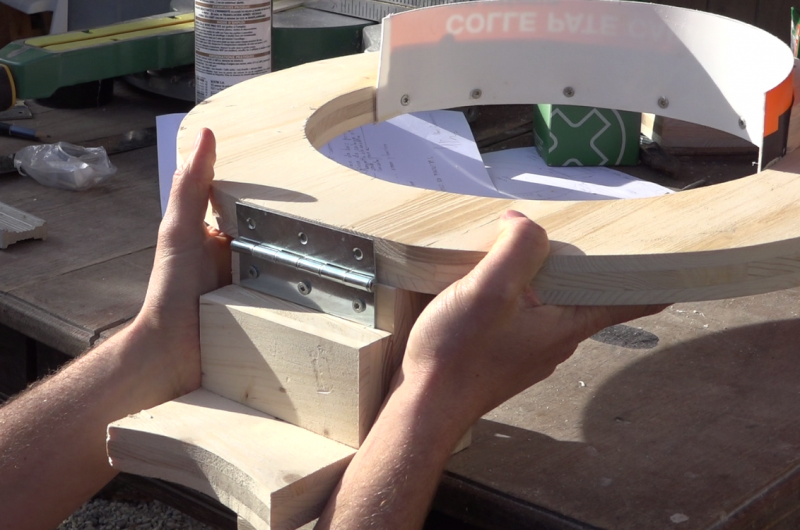
- Fix the hinge between the pillar and the lid (see photo).
- Paint or protect the wood (painting or flax oil).
Étape 8 - Fixing of the toilet lid
- With a drilling machine and a wood drill, fix the classic toilet lid on the lid created before.
Étape 9 - Fixing of the toilets
- Position the supporting system on the pillar, at the chosen place.
- Pass the lag screw through the pillar, the mural wedge and the wall which will welcome the toilets.
"Notes": Depending on the wall material, it my be require to do a pre-drill and install a dowel to welcome the screw.
- center the bucket below the lid
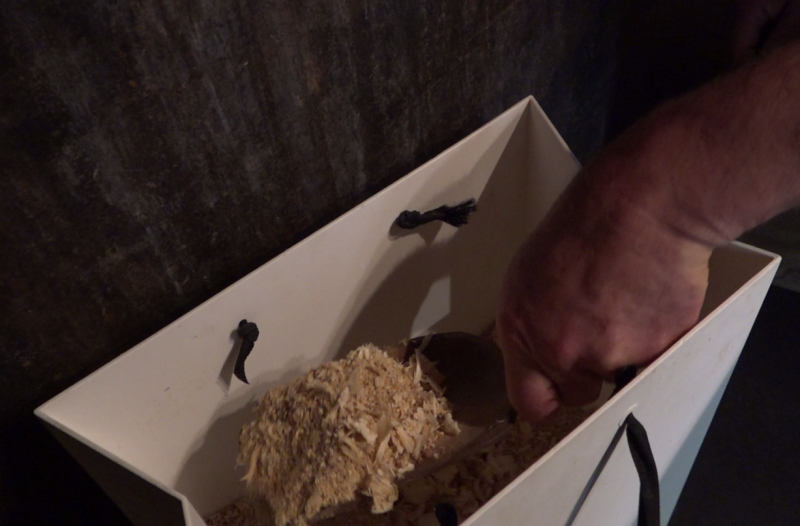
- Place near the toilets a container full of sawdust as well as a container allowing it to be pour into the bucket.
Étape 10 - Composting areas
"Notes": in case there's a watercourse nearby, it's recommended to establish the area at least 197 ft away from the watercourse, downstream if possible in order to avoid any contamination during the composting phase.
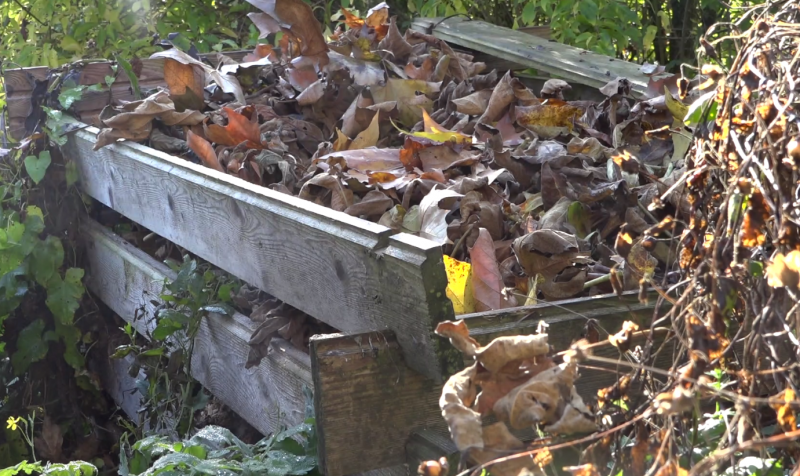
- With the help of small wooden palettes, create 2 composting areas in place far from any watercourse and protected areas, sheltered from the weather (under a tree for example).
- Place a the bottom 4 in of straw/vegetable crushing or dead leaves.
Étape 11 - Use of the toilets
- Do your business on the toilets, add toilet paper.
- Cover of 0,4 in of sawdust.
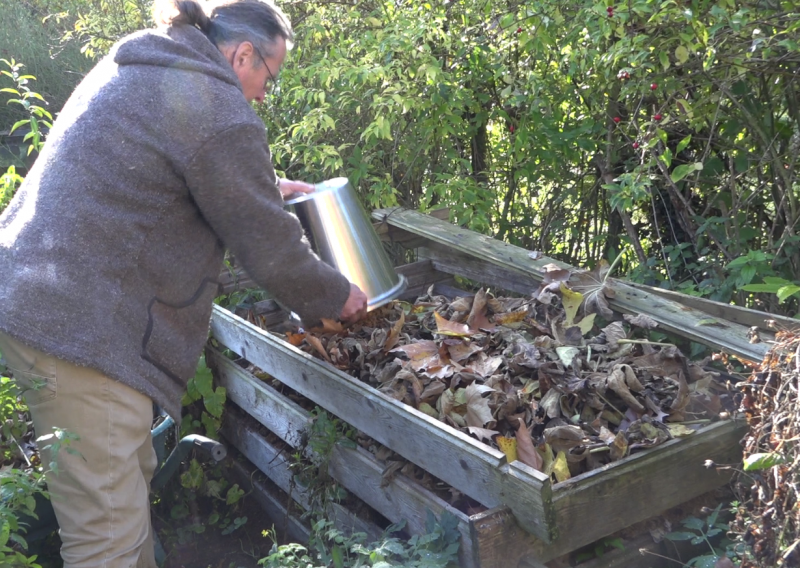
- When the bucket is full, empty it in the composting area and cover it of layer of crushing/leaves or straw.
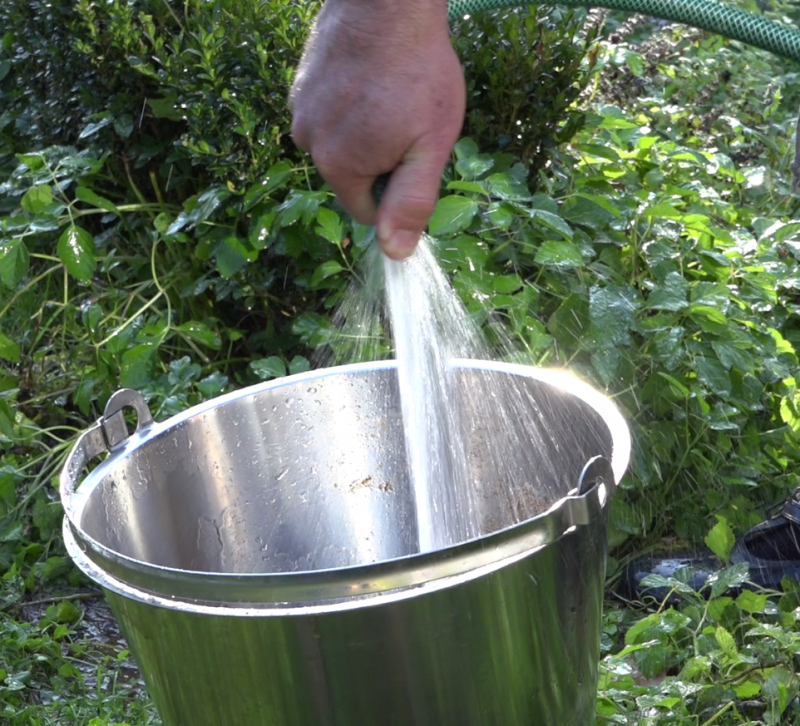
- Clean the bucket with water and soap outside and empty it in the composting area, put gloves if needed.
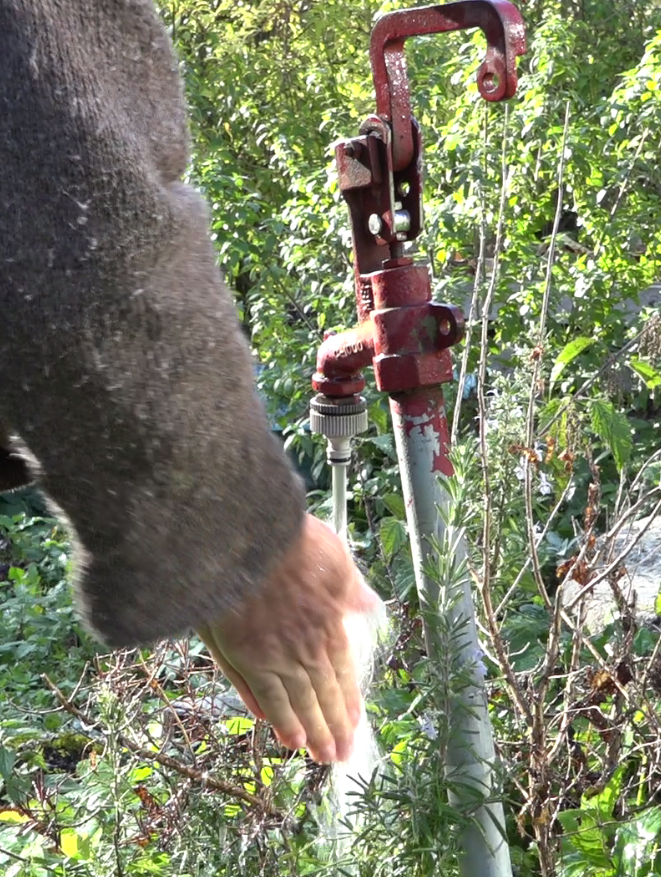
- Wash your hands.
- Re-position the bucket under the toilets with some sawdust at the bottom.
- Disinfect the toilet's seats and flaps the same way as classic toilets.
- Wash your hands
"Notes"
1) It's important to follow the basic hygienic rules during the emptying.
2) It's possible to provide a cleaning area near the composting area with the required material (tap, gloves, brush, soap, disinfectant).
Étape 12 - Use of the compost
- When the first area is full, use the second one and cover the first one with crushing.
- Let it compost during 2 years.
"notes": the key to a good compost is the relation between the contribution of the carbon matter (crushing, leaves...) and the nitrogen matter as well as a good ventilation of the compost. This one is allowed by holes between the slats and the space created by the carbon matter.
The website eautarcie details the composting of the human dejection.
- Don't hesitate to add vegetable crushing if the compost seem very moist, sticky and stinky.
Notes et références
- Tutorial pack by Camille Duband and Pierre-Alain Lévêque for the Low-tech Lab in collaboration with Yves Desarzens, Maisons Nomades, November 2017.
Quote in the tutorial video of Joseph Orszagh, Eautarcie.
Watch the tutorial video here
Published
 Français
 English
 Deutsch
 Español
 Italiano
 Português