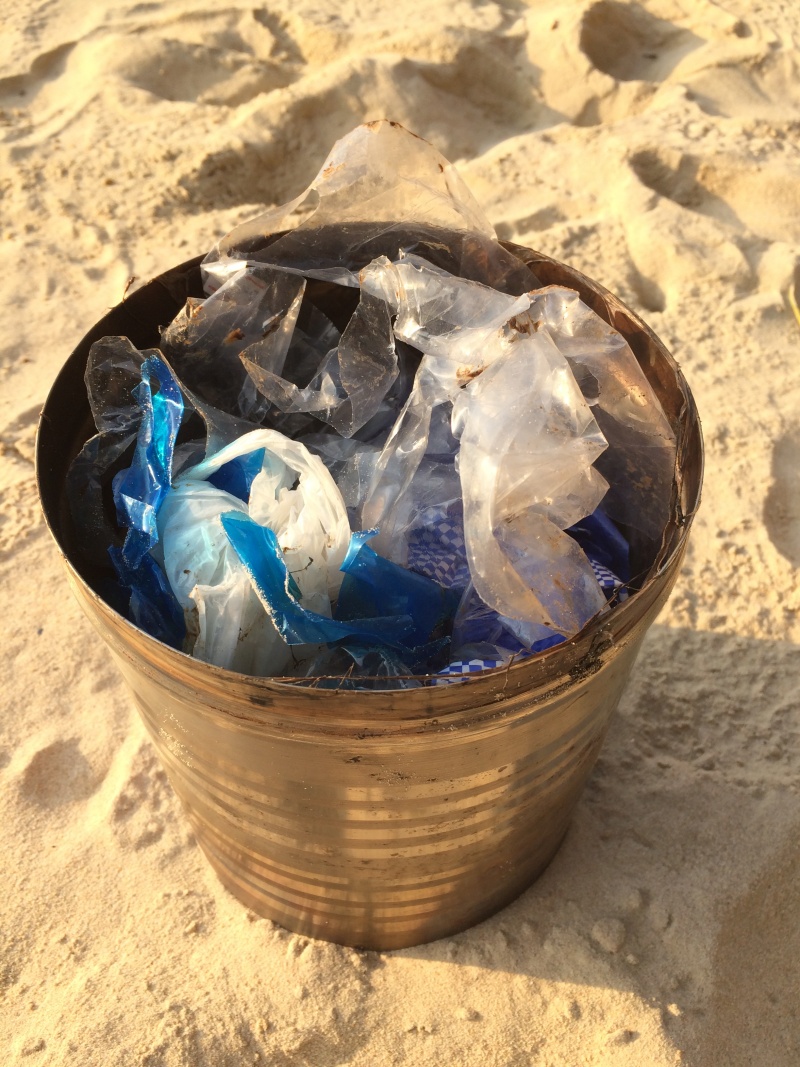
(Page créée avec « Pack the first tank with plastic ») |
(Page créée avec « For this test, plastic waste is mostly polypropylene. ») |
||
| Ligne 37 : | Ligne 37 : | ||
{{ {{tntn|Tuto Step}} | {{ {{tntn|Tuto Step}} | ||
|Step_Title=Pack the first tank with plastic | |Step_Title=Pack the first tank with plastic | ||
| − | |Step_Content= | + | |Step_Content=For this test, plastic waste is mostly polypropylene. |
|Step_Picture_00=Pyrolyseur_de_plastique_IMG_0925.JPG | |Step_Picture_00=Pyrolyseur_de_plastique_IMG_0925.JPG | ||
}} | }} | ||
Version du 11 septembre 2019 à 18:20
Description
Produce fuel from plastic
Introduction
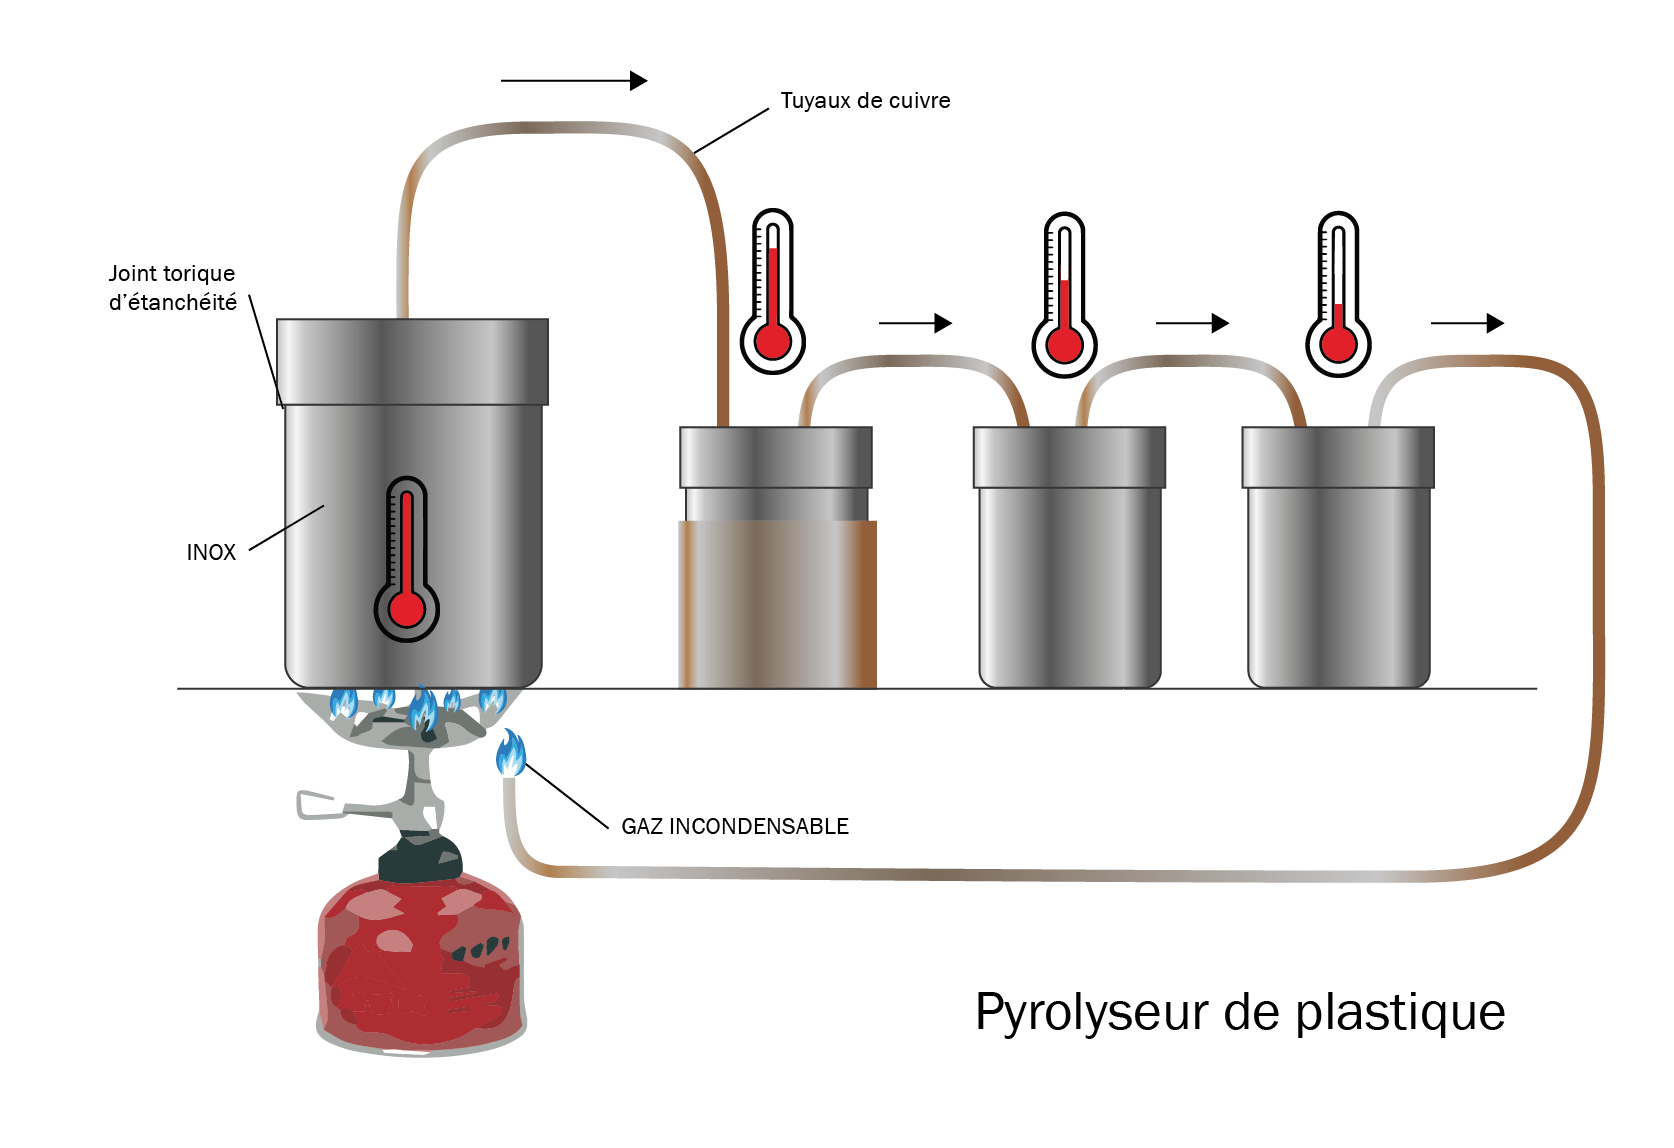
Plastic pyrolysis is a distillation process that allows plastic waste to be converted into fuel. Plastic waste is heated above 400°C in a first tank into a gas. Depending on condensation (cooling) temperatures, several types of fuel are produced : - between 390 and 170°C, the gas condensates into diesel fuel. - between 210 and 20°C, the gas condensates into gasoline. - below 20°C, there remains non-condensable residual gas that can be burned to provide heat to the process.
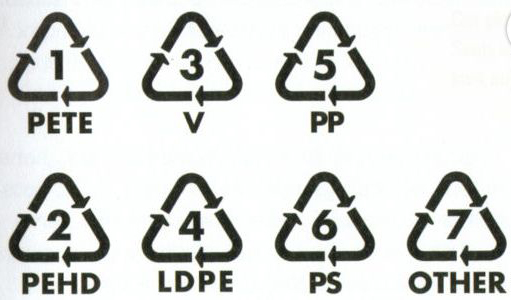
In this prototype, we are only using polypropylene (PP) and/or high density polyethylene (HDPE) and low density (LDPE). Please note that using mostly polypropylene will produce more gasoline, while using mostly polyethylene will produce more diesel fuel. It is however possible to mix both.
Matériaux
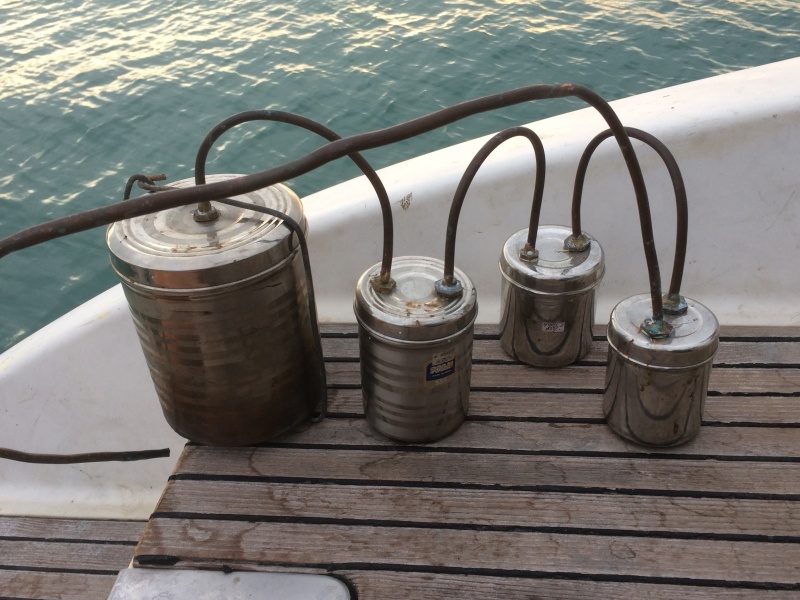
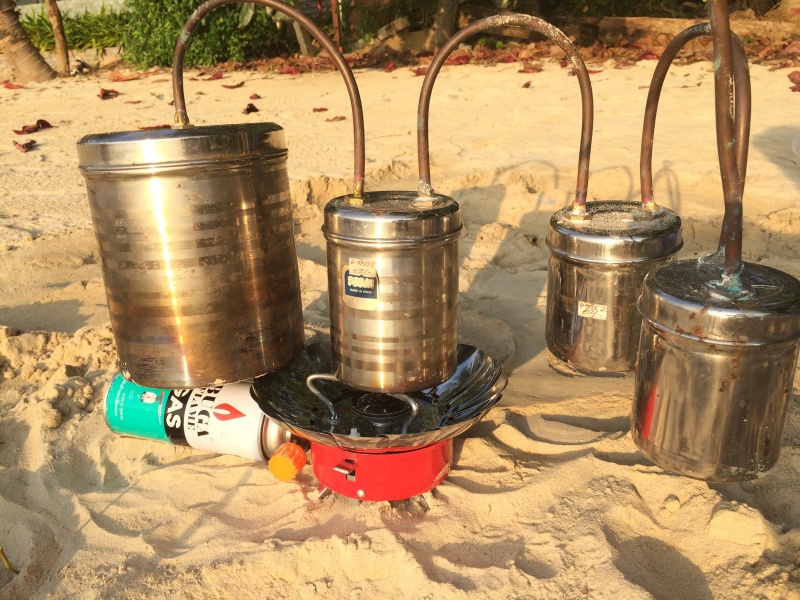
- 1 large stainless steel tank with lid
- 3 small stainless steel tanks
- copper pipes (diameter 6mm)
- 7 copper uniseal joint (for watertightness of joints)
- O-ring (for watertightness of tanks)
- Plastic waste PP and/or HDPE/LDPE
Outils
- Solder
- A heating system (min. 400°C)
- butane/propane gas canister (375mL)
Étape 2 - Préchauffer la deuxième cuve
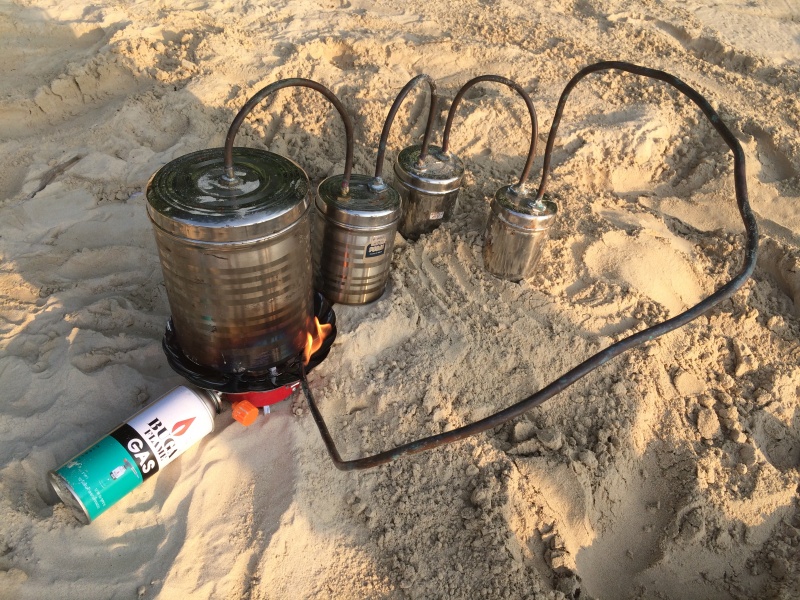
Ce préchauffage est indispensable. Il permet la condensation des gaz à haute température avant de passer dans les deux dernières cuves.
Étape 3 - Apparition du gaz résiduel
Laisser se consommer le plastique jusqu'à l'obtention du gaz incondensable. Il vient comme un apport au gaz utilisé initialement. Pour ce test, 125mL de gaz en bombe ont été utilisés, auxquels s'est ajouté le gaz résiduel.
Étape 4 - Récupération du carburant
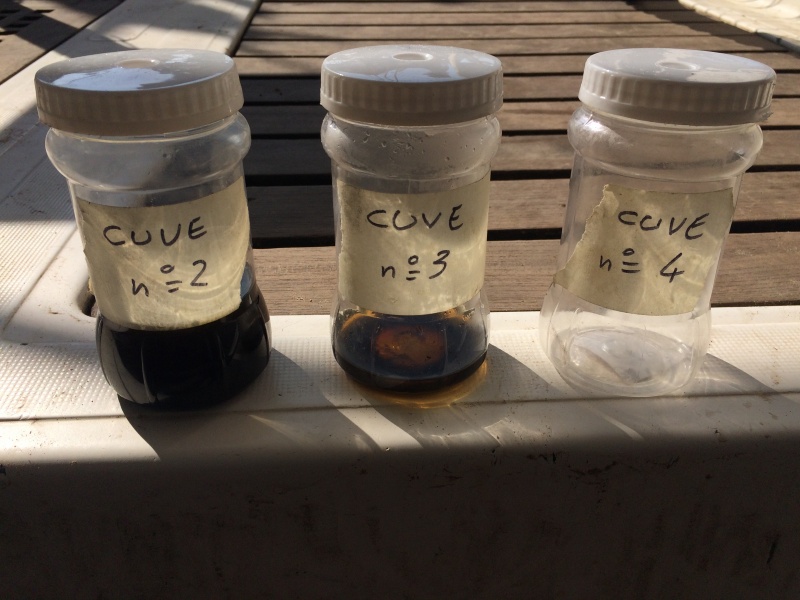
Ici, le dispositif à chauffé pendant environ 1h. Eteindre le système et laisser refroidir avant d'ouvrir les cuves. On obtient environ 125mL de carburant dans la cuve n°2 et 30mL dans la cuve n°3.
- Résultat du test à confirmer en laboratoire.
Notes et références
https://fr.wikipedia.org/wiki/Pyrolyse
Published
 Français
 English
 Deutsch
 Español
 Italiano
 Português