
(Page créée avec « • Direct belt with gear shift (see column drill) • Belt in 8-shape, to reverse the direction of rotation (see sewing machine) • Twisted belt, to go from a horizont... ») |
|||
| Ligne 78 : | Ligne 78 : | ||
• A 2 cm gap between two pallet boards allows the belt that connects the wheel to the transmission pulley 1 to pass through. | • A 2 cm gap between two pallet boards allows the belt that connects the wheel to the transmission pulley 1 to pass through. | ||
| − | {{Warning | + | {{Warning| Be careful that the cyclist's knees do not touch the table while pedaling.}} |
|Step_Picture_00=P_dalier_multifonction_table.jpeg | |Step_Picture_00=P_dalier_multifonction_table.jpeg | ||
|Step_Picture_01=P_dalier_multifonction_rainure_table.jpeg | |Step_Picture_01=P_dalier_multifonction_rainure_table.jpeg | ||
Version du 27 août 2020 à 19:42
Difficulté
Moyen
Durée
2 jour(s)
Coût
50 EUR (€)
Description
A bicycle crankset that can power multiple tools such as a blender, a drill press, a sewing machine or even an electric generator.
Introduction
This crankset has been installed on the Nomade des Mers laboratory sailboat for 4 years. Initially designed and installed by Olivier Guy, techno professor in Normandy, it was modified during the boat's stopovers around the world. It currently powers several tools: a blender, a grain mill, a sewing machine, an electric generator to recharge batteries and power a Peltier refrigerator, as well as a drill press that serves as a drill, grinder, sander and lathe.
The purpose of this machine is threefold:
• Uses mechanical rather than electrical energy: in the boat the supply of solar panel energy is precious. We could not have all of these machines powered by on-board batteries. We can therefore be more autonomous without needing to increase our electric storage capacity.
• Allows one to exercise in a useful and enjoyable way.
• Easily repairable and upgradeable: the special feature of this crankset is that it is multifunctional; you can connect an infinite number of tools to it.
This tutorial describes the manufacturing of the multifunctional crankset's base, but doesn't precisely describe how to connect each tool (each is adapted according to the desired tools and available material).
Matériaux
• Bike with derailleur gears
• Belts of different sizes (to be measured depending on your mounting. They can be found in lawnmowers, or in garages)
• Fasteners, eye straps and metal corner braces
• Wood (battens, plywood, pallet boards)
• Pulleys around 60mm in diameter (can be found in hardware stores)
Outils
• Wood saw
• Hacksaw
• Screwdriver
• Flat wrenches
Étape 1 - Adapting the bicycle and attaching to the ground
• Remove the tire from the rear wheel.
• Cut off the bike frame and remove unnecessary items (see diagram). In our case it was a multi-speed bike, but to simplify we decided to always stay on the maximum speed (largest chainring with smallest sprocket). We kept the sprockets and chainrings, but we disassembled the chainring shifting mechanism and cut the shift cable that changes the sprocket.
• Attach the frame of the bike to the ground. In our case, we attached the handlebars of the bike's base into the saddle tube to give lateral stability, and a frame tube was embedded in a tube attached to the ground. You will need to adapt this according to the available parts and the type of bicycle.
• Install a comfortable seat at a appropriate distance from the pedals. We opted for a seat with a backrest instead of a saddle, because the cyclist's pelvis does not need to move in the same way as regular cycling. The distance between the pedal and the seat should allow the leg to fully extend at the furthest part of the pedal turn, and the cyclist's hands must be able to easily handle the tools that will be driven by the crankset (blender, sewing machine, drill, etc).


Étape 2 - Mounting transmission pulleys
• Salvage the hub of the front wheel (which is not used) and remove all spokes.
• Attach a pulley on either side of the hub. Transmission pulley 1 will be driven by a belt connected to the bike wheel, and transmission pulley 2 will power the desired tool with a second belt.
• Secure the hub on a block of wood with the eye straps. This block of wood will later be attached to the table.

Étape 3 - Making the table
• Since it is difficult to shorten a belt, it is best to determine the height of your table based on the belt you have. In our case, the table is 1 meter above the ground. Its structure is made of battens and the worktop is made of pallet boards. Attach it securely to the ground.
• A 2 cm gap between two pallet boards allows the belt that connects the wheel to the transmission pulley 1 to pass through.


Étape 4 - Connecting Tools
Countless tools can be powered by the crankset. Here are the ones we are currently using:
• Fruit juice blender
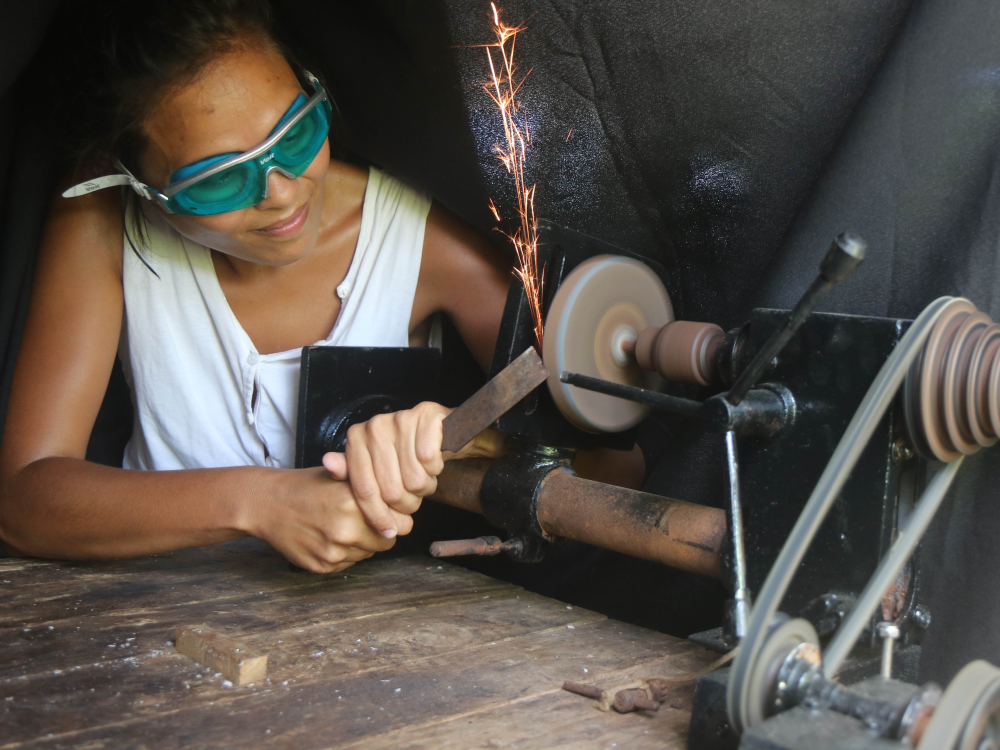
• Column drill to drill and grind. It can also be used as a lathe
• Sewing machine
• Grain mill
• Electric generator to power Peltier units and charge batteries.
Depending on the tools, several types of connection are possible:
• Direct belt with gear shift (see column drill)
• Belt in 8-shape, to reverse the direction of rotation (see sewing machine)
• Twisted belt, to go from a horizontal axis rotation to a vertical axis rotation (see blender)
• Belt with corner return (see mill)
• Via the crankset chain. For our electric generator, since its optimal rotation speed is much slower than the other tools, we preferred to attach it to the frame of the bike and power it directly via the crankset chain. This allows you to generate electricity at the same time as you are powering another tool.


Notes et références
- Tutoriel rédigé par Corentin et Caroline à bord du Nomade des Mers en juillet 2020.
- Beaucoup d'autres exemples de machines à pédales : L'avenir négligé de la Bicyclette Stationnaire, Low-tech Magazine.
- Vidéo de présentation de l'ONG Maya Pedal, spécialisée dans la construction de machine agricoles à pédales.
- Plein d'exemple de machines à pédales réalisées par la communauté : https://www.facebook.com/groups/1192299394158466/permalink/2986878371367217/
Published
 Français
 English
 Deutsch
 Español
 Italiano
 Português