(Mise à jour pour être en accord avec la nouvelle version de la source de la page) |
|||
| (168 révisions intermédiaires par 6 utilisateurs non affichées) | |||
| Ligne 1 : | Ligne 1 : | ||
| − | {{ | + | {{Tuto Details |
| − | | | + | |Main_Picture=Four_solaire_(cuiseur_type_boîte)_Four_solaire_cuiseur_type_bo_te_FourSolaireTypeBoite.jpg |
| − | | | + | |Licences=Attribution (CC BY) |
| − | | | + | |Description=<div class="mw-translate-fuzzy"> |
| + | Box or a parable shaped, the solar oven makes it possible to warm your food using the sun rays. | ||
| + | </div> | ||
| + | |Area=Food, Energy | ||
|Type=Tutorial | |Type=Tutorial | ||
| − | |||
| − | |||
|Difficulty=Easy | |Difficulty=Easy | ||
| − | |||
| − | |||
|Duration=1 | |Duration=1 | ||
|Duration-type=day(s) | |Duration-type=day(s) | ||
| − | | | + | |Cost=150 |
| − | | | + | |Currency=EUR (€) |
| + | |Tags=LT4Refugees, Agami, NomadeDesMers, four solaire, énergie solaire, cuisson, cuisine solaire, four, solar cooking | ||
|SourceLanguage=fr | |SourceLanguage=fr | ||
|Language=en | |Language=en | ||
|IsTranslation=1 | |IsTranslation=1 | ||
}} | }} | ||
| − | {{ | + | {{Introduction |
|Introduction=CONTEXT : | |Introduction=CONTEXT : | ||
| Ligne 23 : | Ligne 23 : | ||
Indeed, almost 3 billions of individuals only got wood to cook their food. | Indeed, almost 3 billions of individuals only got wood to cook their food. | ||
| − | + | 1. '''In the "Southern" countries ''' | |
| + | |||
| + | In the Southern countries, the solar cooker answers many issues and presents numerous benefits : | ||
| − | |||
* Health: prevent eyes and lungs infection due to smoke production, avoid diarrhoea by making water clean through the process of pasteurization. | * Health: prevent eyes and lungs infection due to smoke production, avoid diarrhoea by making water clean through the process of pasteurization. | ||
| − | * | + | * Environment: restrain the deforestation and the soil degradation. |
| + | * Climate: reduce the emissions of greenhouse gases. | ||
* Economic: reduce the cost of combustible | * Economic: reduce the cost of combustible | ||
* Human: emancipate women and children from the wood chore (15 hours par week, 4 times 20kg). | * Human: emancipate women and children from the wood chore (15 hours par week, 4 times 20kg). | ||
| − | 2. ''' | + | 2. '''In the Northern countries''' : |
| + | |||
| + | In the Northern countries, more and more people wish to be self-sufficient regarding energy. David is one of them; he is using the solar energy. He use a solar oven to boil his water, cook his pieds, cakes or others recipes with gentle cooking. | ||
| − | + | 3. '''Advantages''' : | |
| − | + | Built from easy to find material: wood, plywood board, domestic aluminium paper, glass and thermal insulator (cork, sheep's wool, vermiculite, polystyrene...). The production process is easy and cheap. When the sun is here, you can reach high temperatures, up to 120° to 170°, in this two ears system. | |
| − | + | '''Functioning''' : | |
| − | ' | + | The solar oven is a box hermetically isolated with a transparent cover and reflective faces inside: the sun rays enter by the glass and reflect on the borders of the box to hit the dark surface of the pot. The energy of those rays is so transformed into heat, heat that is stuck in the box. |
| + | To increase the received solar flux, two ears covered by aluminium are fixed on each side of the box. This permits to reflect the light on the glass which should be as perpendicular as possible to the sun rays. With the metropolitan France's latitudes, the right tilt of sun regarding to the horizon is around 60° in summer and 30° in winter. Thereby, the optimal tilt of the glass is 30° in winter and 60° in summer. | ||
| + | The solar oven only runs thanks to the sun rays: clouds, fog and dust reduce the the radiation and thereby, therefore increase the cooking time. | ||
| − | + | {{Info|1=Note de l'auteur (David) | |
| − | + | ||
| − | + | ||
| + | |||
| + | Dominique Loquais (un presque voisin) m'a prêté son "[http://four-solaire.iguane.org/ four solaire Atominique]". Les performances de sont four atomique ne sont pas comparable à celui que je présente ici. Pour vous dire au mois de Mars j'ai fais cramé un gâteau ce qui ne serait jamais arrivé dans mon petit four même en plein été... La surface de réflexion est beaucoup plus importante sur le four atomique et une foultitude de petits détails le rend plus pertinent/performant. Je vous encourage donc si vous souhaitez vous en faire un de plutôt vous diriger vers le [http://four-solaire.iguane.org/ four de Dominique] ([https://fablabo.net/wiki/Four_solaire_45%C2%B0 plan web], [https://www.youtube.com/watch?v=zxiDHV-izzg vidéo tuto], [https://www.decitre.fr/livres/je-construis-mon-four-solaire-9782374110066.html petit livret], [https://www.decitre.fr/ebooks/les-fours-solaires-9782212171716_9782212171716_11.html bouquin]). Mon petit four peut convenir si vous avez peut de place car son encombrement est plus faible et si vous souhaitez l'améliorer je préconise : | ||
| + | * D'ajouter 2 réflecteurs sur les côtés | ||
| + | * De placer la trappe de visite à l'arrière et non sur le dessus pour ne pas perdre la chaleur quand on ouvre. Cette dernière modification ne permet plus la bascule d'inclinaison été/hiver détaillé plus bas mais honnêtement je ne m'en suis finalement jamais servie l'hiver (journée trop courte en ensoleillement, trop nuageuse...)}} | ||
}} | }} | ||
| − | {{ | + | {{TutoVideo |
| − | | | + | |VideoType=Youtube |
| − | | | + | |VideoURLYoutube=https://www.youtube.com/watch?v=vGX-hU6sX2Q |
}} | }} | ||
| − | {{ | + | {{Materials |
|Step_Picture_00=Four_solaire__cuiseur_type_bo_te__Outil.bmp | |Step_Picture_00=Four_solaire__cuiseur_type_bo_te__Outil.bmp | ||
|Step_Picture_01=Four_solaire__cuiseur_type_bo_te__Mate_riel.bmp | |Step_Picture_01=Four_solaire__cuiseur_type_bo_te__Mate_riel.bmp | ||
|Step_Picture_02=Four_solaire__cuiseur_type_bo_te__Mate_riel1.bmp | |Step_Picture_02=Four_solaire__cuiseur_type_bo_te__Mate_riel1.bmp | ||
| − | |Material= | + | |Material=The box: |
| − | * 9 | + | |
| − | + | * 9 plywood panels of 500x500mm and around 10mm of thickness (not too thick to not overweight the box) | |
| − | * 4 | + | |
| − | * | + | * Isolator of around 40mm of thickness (4 panels of 500x500mm): polystyrene (available at the fishmonger/ at the and of the market or in electric shop), cork panel, vermiculite... |
| − | * | + | |
| − | * | + | * 4 meters of stick (same thickness of the isolator) |
| − | + | * Aluminium paper or black tape (more expensive) | |
| − | * | + | * Casing assembly 4x40 (around 80) |
| − | * | + | * Nails 1,5x25mm (around 10) |
| − | * | + | |
| − | * 1 | + | Glass, cadre and ears: |
| − | * 3 | + | |
| − | + | * Glass of 410x470mm, not too thick, 2 to 3mm (available in carpenters' trashes) | |
| − | |Tools=* | + | * Chipboard panel of the same thickness of the winder, one of 500x500mm and another one of 500x550mm |
| − | * | + | * Wood pallet or wooden board (8 boards of around 500x60mm and not to thick (around 20mm) |
| − | * | + | * 1 meter of thin hinge with flat head screws OR 6 hinges |
| − | * | + | * 3 meters of string (4mm of diameter) |
| − | * | + | |
| − | * | + | * Seal |
| − | * | + | |Tools=* Screwer/ drill |
| − | * | + | * Jigsaw |
| − | * | + | * Hacksaw |
| + | * Glass cutter (if needed) | ||
| + | * Tape | ||
| + | * Lighter | ||
| + | * Stall | ||
| + | * Clamp | ||
| + | * Tape measure | ||
* Cutter | * Cutter | ||
| − | * | + | * Scissors |
| − | * | + | * Sandpaper |
| − | * | + | * Square, ruler, protractor |
| − | * | + | * Helmet and safety glasses |
* [[:Fichier:Plans cuiseur solaire.jpg|Plans]] | * [[:Fichier:Plans cuiseur solaire.jpg|Plans]] | ||
| + | |Tuto_Attachments={{Tuto Attachments | ||
| + | |Attachment=Four_solaire__cuiseur_type_bo_te__four_solaire_entropie_juillet2013.pdf | ||
| + | }} | ||
| + | |ExternalAttachmentsLinks={{ExternalAttachmentsLinks | ||
| + | |ExternalAttachmentsLinks=https://www.asso-entropie.fr/fr/design-libre/notices/four-solaire/ | ||
| + | }} | ||
}} | }} | ||
| − | {{ | + | {{Tuto Step |
| − | + | |Step_Title=The box interior: cutting of panels and assembly of the box | |
| − | + | |Step_Content=1) Take the [[:Fichier:Plans cuiseur solaire.jpg|plans de la boîte]] , the plywood panels and the tape measure | |
| − | |||
| − | |||
| − | |||
| − | |||
| − | |||
| − | |Step_Title= | ||
| − | |Step_Content=1) | ||
| − | 2) | + | 2) Copy the dimensions of the side A on one of the panels with a ruler. |
| − | 3) | + | 3) Use the protractor to create an angle of 60° and another one of 30° as shown on the schema. |
| − | 4) | + | 4) Fix the panel on the working table with the clamp. |
| − | 5) | + | 5) Protect the ears and the eyes |
| − | 6) | + | 6) Cut following the drawings with the jigsaw. |
| − | 7) | + | 7) Copy the dimensions of the schema on the second panel to realize the side B. |
| − | 8) | + | 8) Cut the second panel |
| − | 9) | + | 9) Draw, cut the panels C, D and E |
| − | ''' | + | '''Comment''': if at the cutting of the panels, the borders of the plywood panel contains thorns, it can be useful to sand the borders with sandpaper. |
| − | + | The panels being voluntary thin, it is necessary to fix on the panels A and B the sticks that will be used as support to screw the panels C, D and E. The sticks will be, in ideal, of the same thickness of the isolator. | |
| − | + | Cut the sticks | |
| − | 1) | + | 1) Take the sticks and draw the desired dimensions |
| − | 2) | + | 2) Fix the sticks on the clamping and cut with a saw. |
| − | + | Fix the stick to the panels | |
| − | 3) | + | 3) Position one of the stick and use the clamp to maintain the whole |
| − | 4) | + | 4) Return the panel and screw with a screw (two screws per stick is enough). |
| − | ''' | + | '''Comment''': Keep in mind to keep the thickness of a panel between the end of the panel and the stick (it is at this place that the panels C, D and E will come). |
| − | 1) | + | 1) Screw the panels C, D and E on the sticks, 3 screws are enough. |
| − | + | We obtain so the inside of the box. The isolator will be added and then the inside box will be covered with reflectings. | |
| − | ''' | + | '''Comment''': To screw, it is sometime judicious to pre-screw with a drill or a broach. |
| + | |Step_Picture_00=Four_solaire__cuiseur_type_bo_te__Caisse_ext_rieure.jpg | ||
| + | |Step_Picture_01=Four_solaire__cuiseur_type_bo_te__D_coupe.jpg | ||
| + | |Step_Picture_02=Four_solaire__cuiseur_type_bo_te__Trac_.jpg | ||
| + | |Step_Picture_03=Four_solaire__cuiseur_type_bo_te__baguettes_et_serre_joint_.jpg | ||
| + | |Step_Picture_04=Four_solaire__cuiseur_type_bo_te__vVis.jpg | ||
| + | |Step_Picture_05=Four_solaire__cuiseur_type_bo_te__assemblage_panneau_.jpg | ||
}} | }} | ||
| − | {{ | + | {{Tuto Step |
| − | + | |Step_Title=The isolator: cutting and positioning of the isolator in the box. | |
| − | + | |Step_Content=The isolator will be bound between the sticks. | |
| − | |Step_Title= | ||
| − | |Step_Content= | ||
| − | 1) | + | 1) Take the isolator and the tape measure |
| − | 2) | + | 2) Reproduce the measures on the isolation panels with the tape measure |
| − | 3) | + | 3) Cut with the cutter and then snap into place. |
| + | |Step_Picture_00=Four_solaire_(cuiseur_type_boîte)_Step05a.jpg | ||
| + | |Step_Picture_01=Four_solaire_(cuiseur_type_boîte)_Step05b.jpg | ||
}} | }} | ||
| − | {{ | + | {{Tuto Step |
| − | + | |Step_Title=The interior of the box: cutting of the panels A', B', C', D' and E'. | |
| − | + | |Step_Content=1) Reproduce the measures on the panels and cut | |
| − | |||
| − | |||
| − | |||
| − | |Step_Title= | ||
| − | |Step_Content=1) | ||
| − | 2) | + | 2) Annotate the inside face of a "I" to recognize the face that will be covered by aluminium paper. |
| − | 3) | + | 3) Coast the panels A', B', C', D' and E' of aluminium paper. |
| − | 4) | + | 4) Fix the aluminium paper with tape on the back. |
| − | + | Attention: the aluminium paper is really fragile. If a hole appears, cover it with aluminium paper and tape. | |
| − | 5) | + | 5) Slot the panels at their place. |
| − | + | To finish with the box: | |
| − | 6) | + | 6) Use the rest of the plywood to finish the box. In other words, close the space occupied by isolator, use the tape measure to do so. |
| − | 7) | + | 7) Screw the panels with on the sticks (two screws per panels are enough). |
| + | |Step_Picture_00=Four_solaire__cuiseur_type_bo_te__Alu_boite_int_rieure.jpg | ||
| + | |Step_Picture_01=Four_solaire__cuiseur_type_bo_te__Scotch_alu_.jpg | ||
| + | |Step_Picture_02=Four_solaire__cuiseur_type_bo_te__Pose_plaque_alu_.jpg | ||
| + | |Step_Picture_03=Four_solaire__cuiseur_type_bo_te__Chutes.bmp | ||
| + | |Step_Picture_04=Four_solaire__cuiseur_type_bo_te__rebords.jpg | ||
}} | }} | ||
| − | {{ | + | {{Tuto Step |
| − | + | |Step_Title=The cadre of the glass: cutting, assembly and fixation on the box | |
| − | + | |Step_Content=Explanation: The cadre is formed by 3 layers, it will coat the glass and maintain it. A first layer (panel 1, 2, 3 and 4) will form the inside cadre. Above we put the glass that should enter by 1,5cm. To avoid that the glass goes out and that it is well maintained, we add a layer of the same thickness and dimensions of panels 1, 2, 3 and 4 minus the 1,5cm taken by the glass. Then, we cover the panels 1', 2', 3' and 4'. This last layer is putted alongside, thereby, the aire will have more difficulties to penetrate. | |
| − | |||
| − | |||
| − | |||
| − | |||
| − | |Step_Title= | ||
| − | |Step_Content= | ||
| − | 1) | + | 1) Take the pallet/wood boards |
| − | 2) | + | 2) Cut the board 1, 2, 3 and 4 and use those as pattern to make a second series: 1', 2', 3' and 4'. |
| − | + | Comment: Use the schemas for the dimensions | |
| − | 3) | + | 3) Make two strips of 500x35mm and two of 470x45mm from the chipboard panel of the same thickness of the glass. |
| − | 4) | + | 4) The boards 1 and 1' will be slotted to the chipboard "a" and this alongside, in a way to block the air. Screw the whole in a way to create 4 modules. |
| − | 5) | + | 5) Fix the two modules together, then the 2 others together in a way to create angles |
| − | 6) | + | 6) Interlock the glass |
| − | 7) | + | 7) Fix the modules togethers, the glass in maintained: the cadre is finished. |
| − | + | "Comment": if the window has been retrieve, it is possible to cut it with a glass cutter (410x470mm). | |
| − | 8) | + | 8) If needed, cut the meter of hinge with a hacksaw in a way to obtain at least 6 hinges (with 2 holes at minimum). |
| − | 9) | + | 9) Take 2 hinges and fix them with flat headed screws on the border of the glass/cadre. |
| − | 10) | + | 10). Screw the other side of the hinge to the board A' of the box. |
| − | 11) | + | 11) Add seal on the board A', B', C', and D' in a way to not let air penetrate when the cadre in closed. |
| + | |Step_Picture_00=Four_solaire__cuiseur_type_bo_te__Cadre.jpg | ||
| + | |Step_Picture_01=Four_solaire__cuiseur_type_bo_te__cadre_vitre.jpg | ||
| + | |Step_Picture_02=Four_solaire__cuiseur_type_bo_te__cadre_2_me_couche.jpg | ||
| + | |Step_Picture_03=Four_solaire__cuiseur_type_bo_te__cadre_3_me_couche.jpg | ||
| + | |Step_Picture_04=Four_solaire__cuiseur_type_bo_te__fixation_cadre.jpg | ||
| + | |Step_Picture_05=Four_solaire__cuiseur_type_bo_te__fixation_cadre_2.jpg | ||
}} | }} | ||
| − | {{ | + | {{Tuto Step |
| − | + | |Step_Title=The ears | |
| − | + | |Step_Content=1) Take the last panel of plywood of 500x550mm of dimension | |
| − | |||
| − | |||
| − | |Step_Title= | ||
| − | |Step_Content=1) | ||
| − | 2) | + | 2) Cut a strip of 15x500mm. This one will serve to thicken the chipboard of 3mm to better screw and fix the hinges. |
| − | 3) | + | 3) Coat the panel of aluminium. |
| − | 4) | + | 4) Fix the hinges on the inside face (covered by aluminium) and on the cadre. |
| − | 5) | + | 5) Take the last chipboard, cover it with aluminium and fix the strip on one of the extremities with a nail. |
| − | 6) | + | 6) Fix the ear to the cadre/glass with the last 2 hinges. |
| − | + | "Comment": The back face with the tape will be the visible, it is therefore important to do it right! | |
| − | + | The ears are fixed. It is time to add the strings to maintain to a certain angle. | |
| − | 7) | + | 7) For the summer position, it is extern ear that will be maintained in suspension. We screw a screw on the extern side of the cadre and roll a string. |
| − | + | For the winter position, it is will be the intern position | |
| − | 8) | + | 8) On the ear, drill 2 holes at around 2cm of gap in the corner et located at around 70mm of the border. |
| − | 9) | + | 9) In the rest, take a little piece of wood (20x10mm) and drill 2 holes. |
| − | 10) | + | 10) Insert a string in one of the 2 holes small wooden piece, then of one of the holes of the ear, then the second one of the ear and finally in the second one of the small piece of wood. |
| − | 11) | + | 11) Tie a knot at the extremity of the string and burn the end to avoid it to frayed. |
| − | 12) | + | 12) Repeat the process with the thinner ear, however, this time, screw on the inside of the cadre. This ear will be the first to be closed, the string will settle itself between the glass and the ear. |
| − | + | It is time to create the chocks allowing to maintain those in the air | |
| − | 13) | + | 13) With the rest, create sticks of around 1,5cm of thickness, sharp the end of the stick in a way to create a picket. |
| − | 14) | + | 14) Make holes in the ears, it will serve to put the pickets. |
| − | 15) | + | 15) Naile the stick at the exterior of the cadre. |
| − | 16) | + | 16) Fix the nail at the opposite. That will serve as a hold when the oven will be closed. |
| − | + | "Commenté: this side can be improved, don't hesitate to propose other solutions. | |
| + | |Step_Picture_00=Four_solaire_(cuiseur_type_boîte)_Step05c.jpg | ||
| + | |Step_Picture_01=Four_solaire_(cuiseur_type_boîte)_Step05d.jpg | ||
| + | |Step_Picture_02=Four_solaire_(cuiseur_type_boîte)_Step05e.jpg | ||
| + | |Step_Picture_03=Four_solaire_(cuiseur_type_boîte)_Step05f.jpg | ||
}} | }} | ||
| − | {{ | + | {{Tuto Step |
| − | | | + | |Step_Title= |
| + | |Step_Content='''Vous avez deux minutes ? Que vous souhaitiez ou non réaliser cette low-tech, votre réponse à [https://framaforms.org/votre-avis-sur-ce-tutoriel-du-low-tech-lab-1589450161 ce formulaire] nous aiderait à améliorer nos tutos. Merci d'avance pour votre aide !''' | ||
| − | + | Comme tout le travail du Low-tech Lab, '''ce tutoriel est participatif''', n'hésitez pas à ajouter les modifications qui vous semblent importantes, et à partager vos réalisations en commentaires. | |
| − | + | }} | |
| − | + | {{Notes | |
| + | |Notes=""DIRECTIONS FOR USE & REMARKS" | ||
| − | '''REFERENCES''' | + | * Use dark containers, or painted in black. |
| − | * | + | * To capture the maximum of raws, directed correctly the solar oven to the sun. It is enough to redirect it once every hour in a manner to have the shadow of the oven directly on its back. |
| − | * | + | * To loose the less of heat as possible, avoid to open too often the oven during the cooking process. The best is to put all of the necessary ingredients at the beginning. |
| − | * [http://www.vaucanson.org/php5/Accueil/attachments/article/742/Four_solaire_principe.pdf Comment récupérer un maximum d’énergie | + | |
| − | * | + | '''REFERENCES''' |
| − | * | + | |
| + | * This solar oven has been realized by David Mercereau, don't hesitate to look closer its yourte and its low-tech [http://david.mercereau.info/ on his blog]. | ||
| + | * To have more information on the solar ovens, their use, how to orientate and the solar recipes, the Low-Tech team invites you to consult the solar oven section in its [https://www.pearltrees.com/s/file/preview/129215780/plansfr.pdf Biblilowthèque]. | ||
| + | * [http://www.vaucanson.org/php5/Accueil/attachments/article/742/Four_solaire_principe.pdf Comment récupérer un maximum d’énergie solaire ?] | ||
| + | * It is also possible to make internship with the association [http://www.boliviainti-sudsoleil.org/spip.php?article596 Bolivia Inti] or to directly buy solar ovens at ID Cook or Solarcooking. | ||
| + | * Don't hesitate to comment, share, and complet this tutorial. | ||
| + | }} | ||
| + | {{PageLang | ||
}} | }} | ||
| − | {{ | + | {{Tuto Status |
| − | |Complete= | + | |Complete=Published |
}} | }} | ||
| + | {{Separator}} | ||
Version du 18 mai 2020 à 10:15
Description
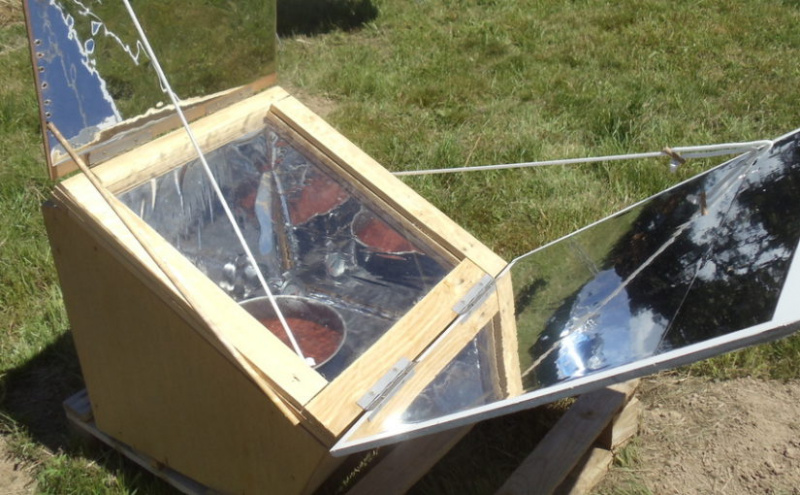
Box or a parable shaped, the solar oven makes it possible to warm your food using the sun rays.
Box or a parable shaped, the solar oven makes it possible to warm your food using the sun rays.
Sommaire
Sommaire
- 1 Description
- 2 Sommaire
- 3 Introduction
- 4 Video d'introduction
- 5 Étape 1 - The box interior: cutting of panels and assembly of the box
- 6 Étape 2 - The isolator: cutting and positioning of the isolator in the box.
- 7 Étape 3 - The interior of the box: cutting of the panels A', B', C', D' and E'.
- 8 Étape 4 - The cadre of the glass: cutting, assembly and fixation on the box
- 9 Étape 5 - The ears
- 10 Étape 6 -
- 11 Notes et références
- 12 Commentaires
Introduction
CONTEXT :
"The increase of greenhouse gases concerns the entire planet. Each solar oven avoid the production of 1.5 tons of CO2 per year." Bolivia Inti. Indeed, almost 3 billions of individuals only got wood to cook their food.
1. In the "Southern" countries
In the Southern countries, the solar cooker answers many issues and presents numerous benefits :
- Health: prevent eyes and lungs infection due to smoke production, avoid diarrhoea by making water clean through the process of pasteurization.
- Environment: restrain the deforestation and the soil degradation.
- Climate: reduce the emissions of greenhouse gases.
- Economic: reduce the cost of combustible
- Human: emancipate women and children from the wood chore (15 hours par week, 4 times 20kg).
2. In the Northern countries :
In the Northern countries, more and more people wish to be self-sufficient regarding energy. David is one of them; he is using the solar energy. He use a solar oven to boil his water, cook his pieds, cakes or others recipes with gentle cooking.
3. Advantages :
Built from easy to find material: wood, plywood board, domestic aluminium paper, glass and thermal insulator (cork, sheep's wool, vermiculite, polystyrene...). The production process is easy and cheap. When the sun is here, you can reach high temperatures, up to 120° to 170°, in this two ears system.
Functioning :
The solar oven is a box hermetically isolated with a transparent cover and reflective faces inside: the sun rays enter by the glass and reflect on the borders of the box to hit the dark surface of the pot. The energy of those rays is so transformed into heat, heat that is stuck in the box. To increase the received solar flux, two ears covered by aluminium are fixed on each side of the box. This permits to reflect the light on the glass which should be as perpendicular as possible to the sun rays. With the metropolitan France's latitudes, the right tilt of sun regarding to the horizon is around 60° in summer and 30° in winter. Thereby, the optimal tilt of the glass is 30° in winter and 60° in summer. The solar oven only runs thanks to the sun rays: clouds, fog and dust reduce the the radiation and thereby, therefore increase the cooking time.
Youtube
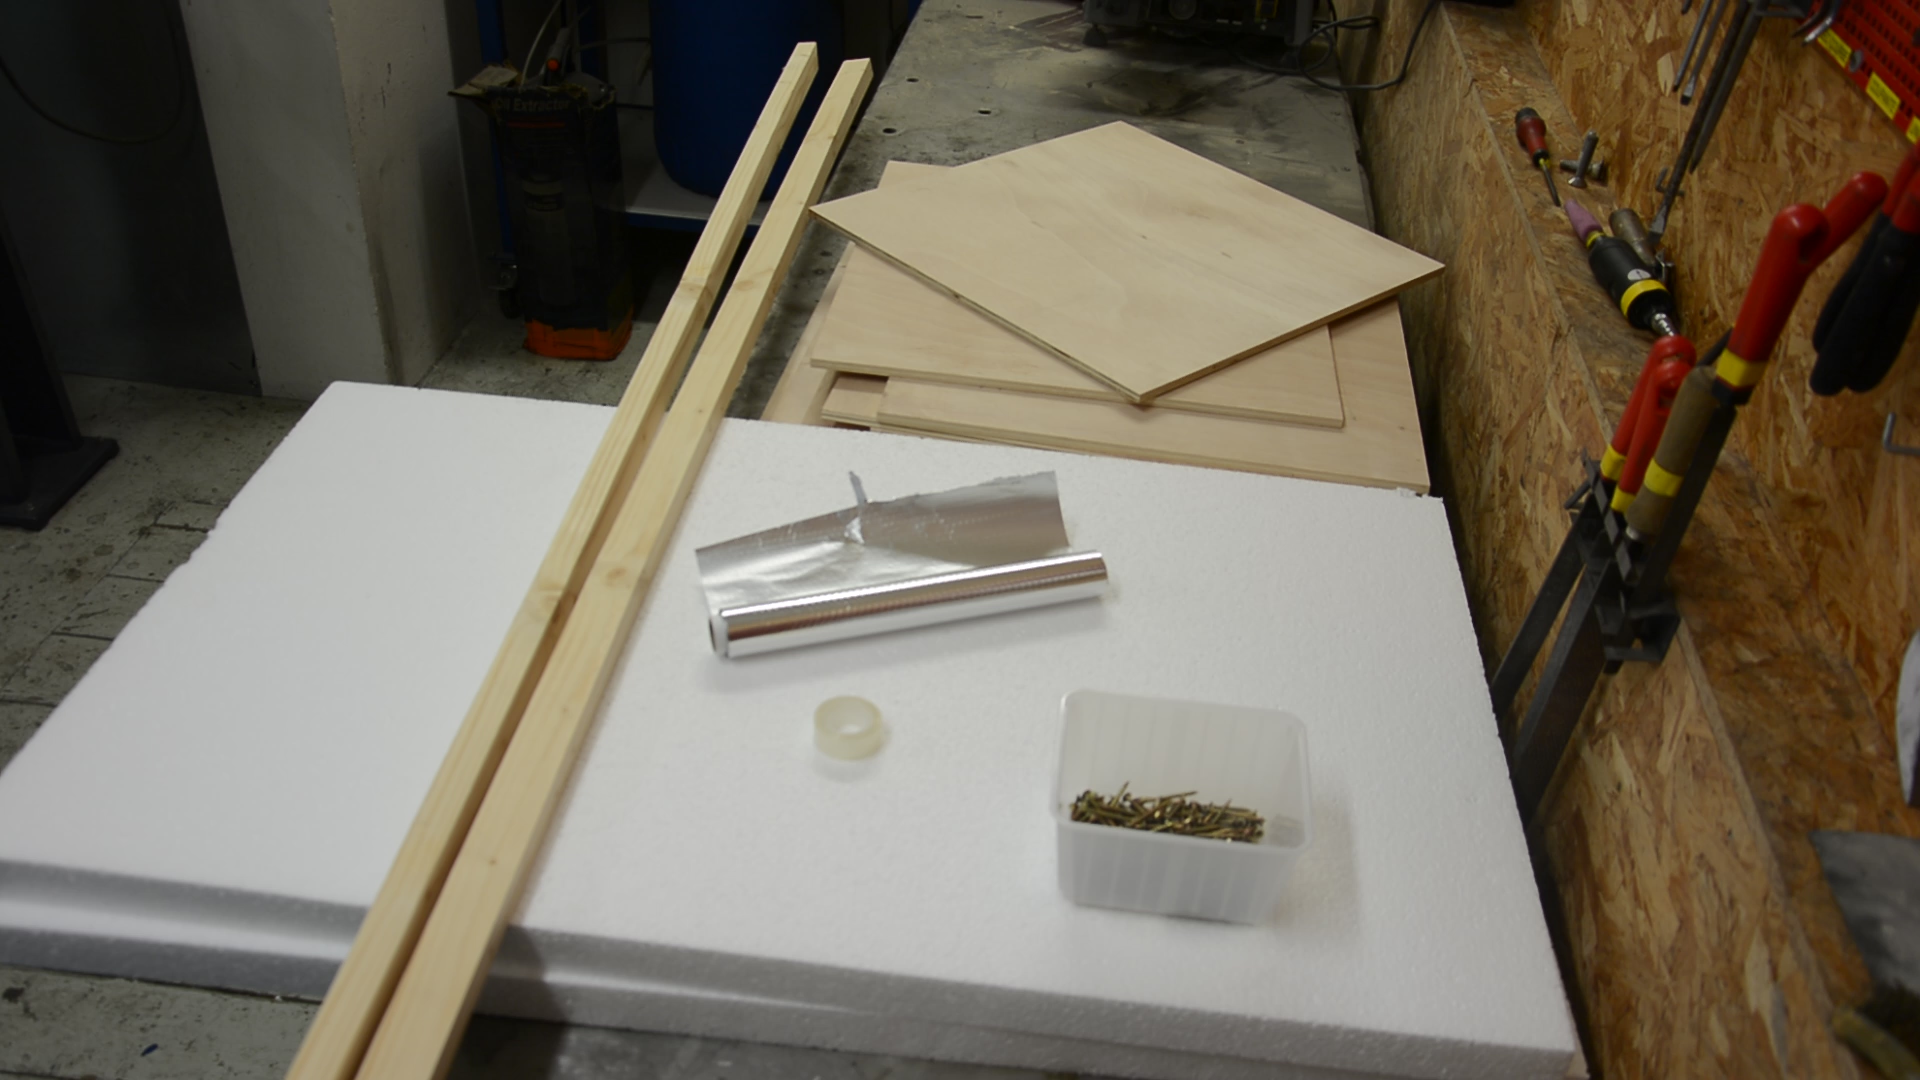
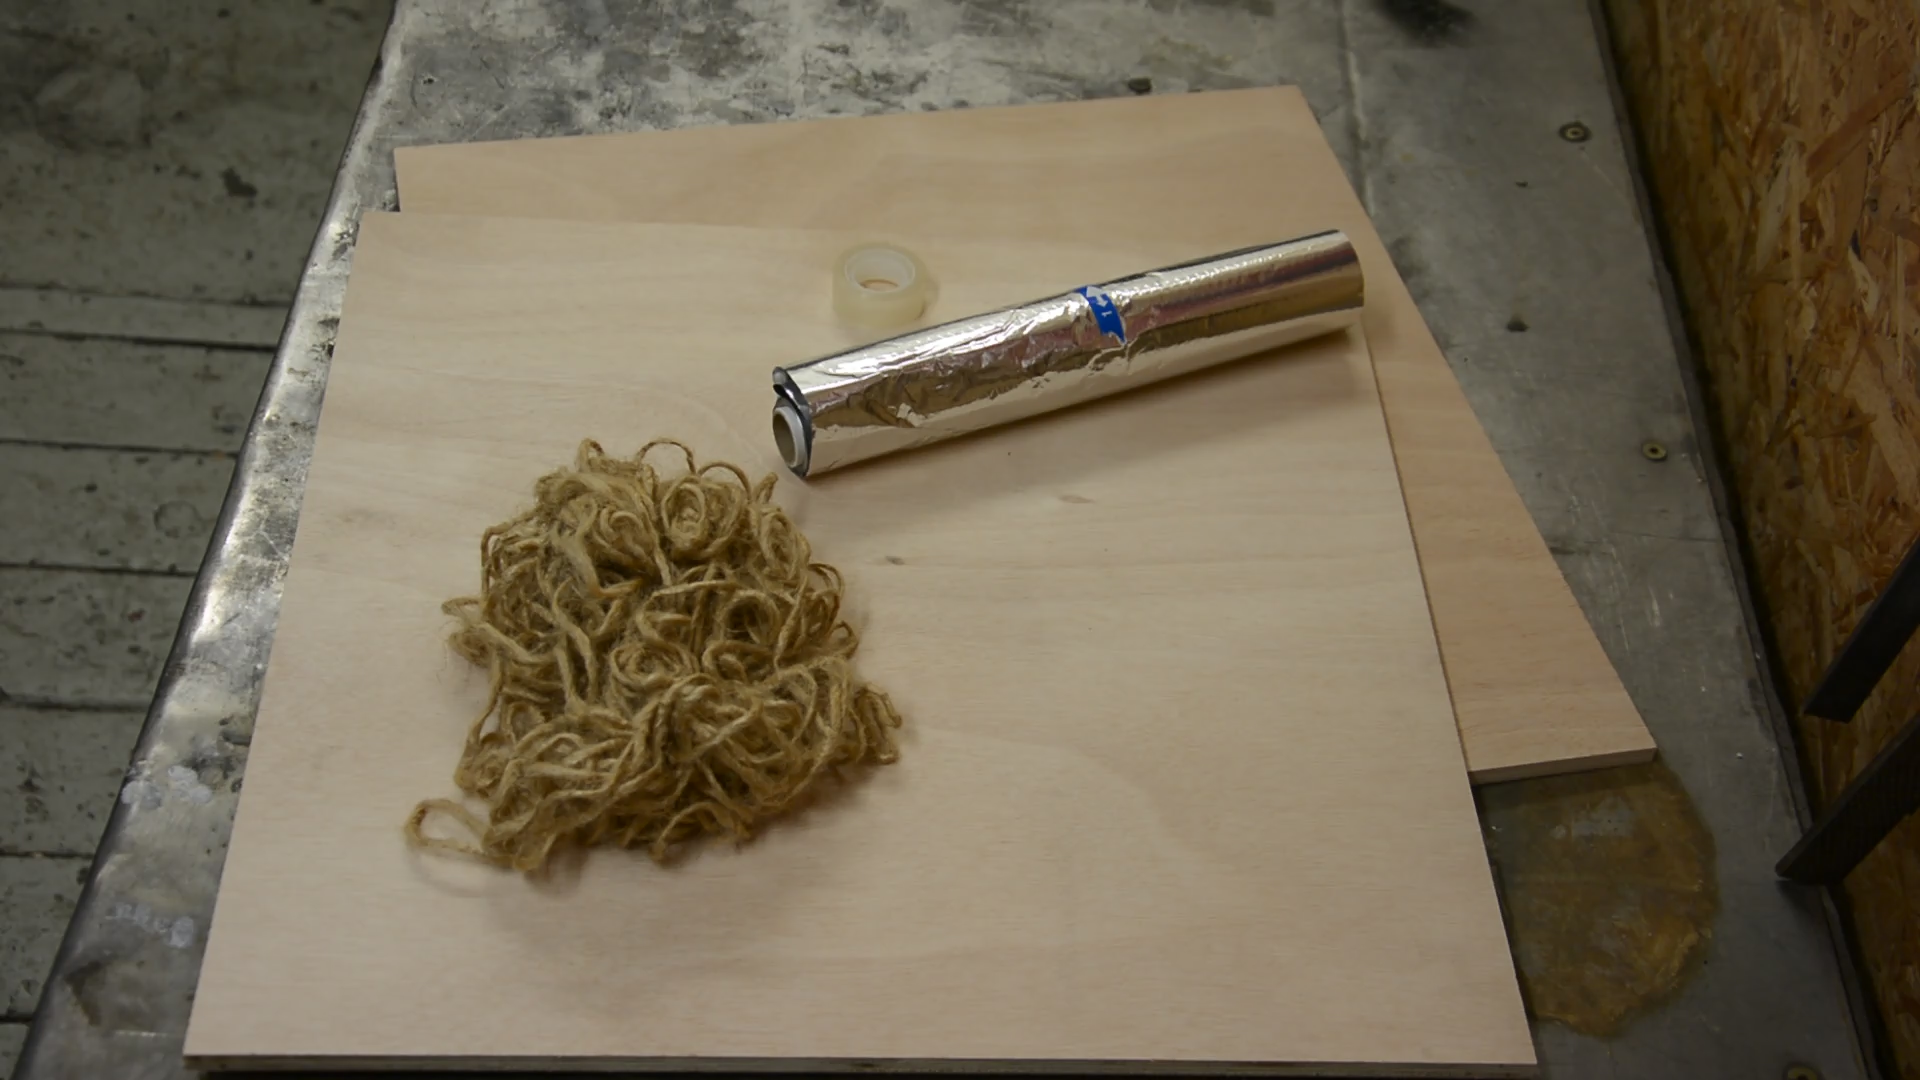
Matériaux
The box:
- 9 plywood panels of 500x500mm and around 10mm of thickness (not too thick to not overweight the box)
- Isolator of around 40mm of thickness (4 panels of 500x500mm): polystyrene (available at the fishmonger/ at the and of the market or in electric shop), cork panel, vermiculite...
- 4 meters of stick (same thickness of the isolator)
- Aluminium paper or black tape (more expensive)
- Casing assembly 4x40 (around 80)
- Nails 1,5x25mm (around 10)
Glass, cadre and ears:
- Glass of 410x470mm, not too thick, 2 to 3mm (available in carpenters' trashes)
- Chipboard panel of the same thickness of the winder, one of 500x500mm and another one of 500x550mm
- Wood pallet or wooden board (8 boards of around 500x60mm and not to thick (around 20mm)
- 1 meter of thin hinge with flat head screws OR 6 hinges
- 3 meters of string (4mm of diameter)
- Seal
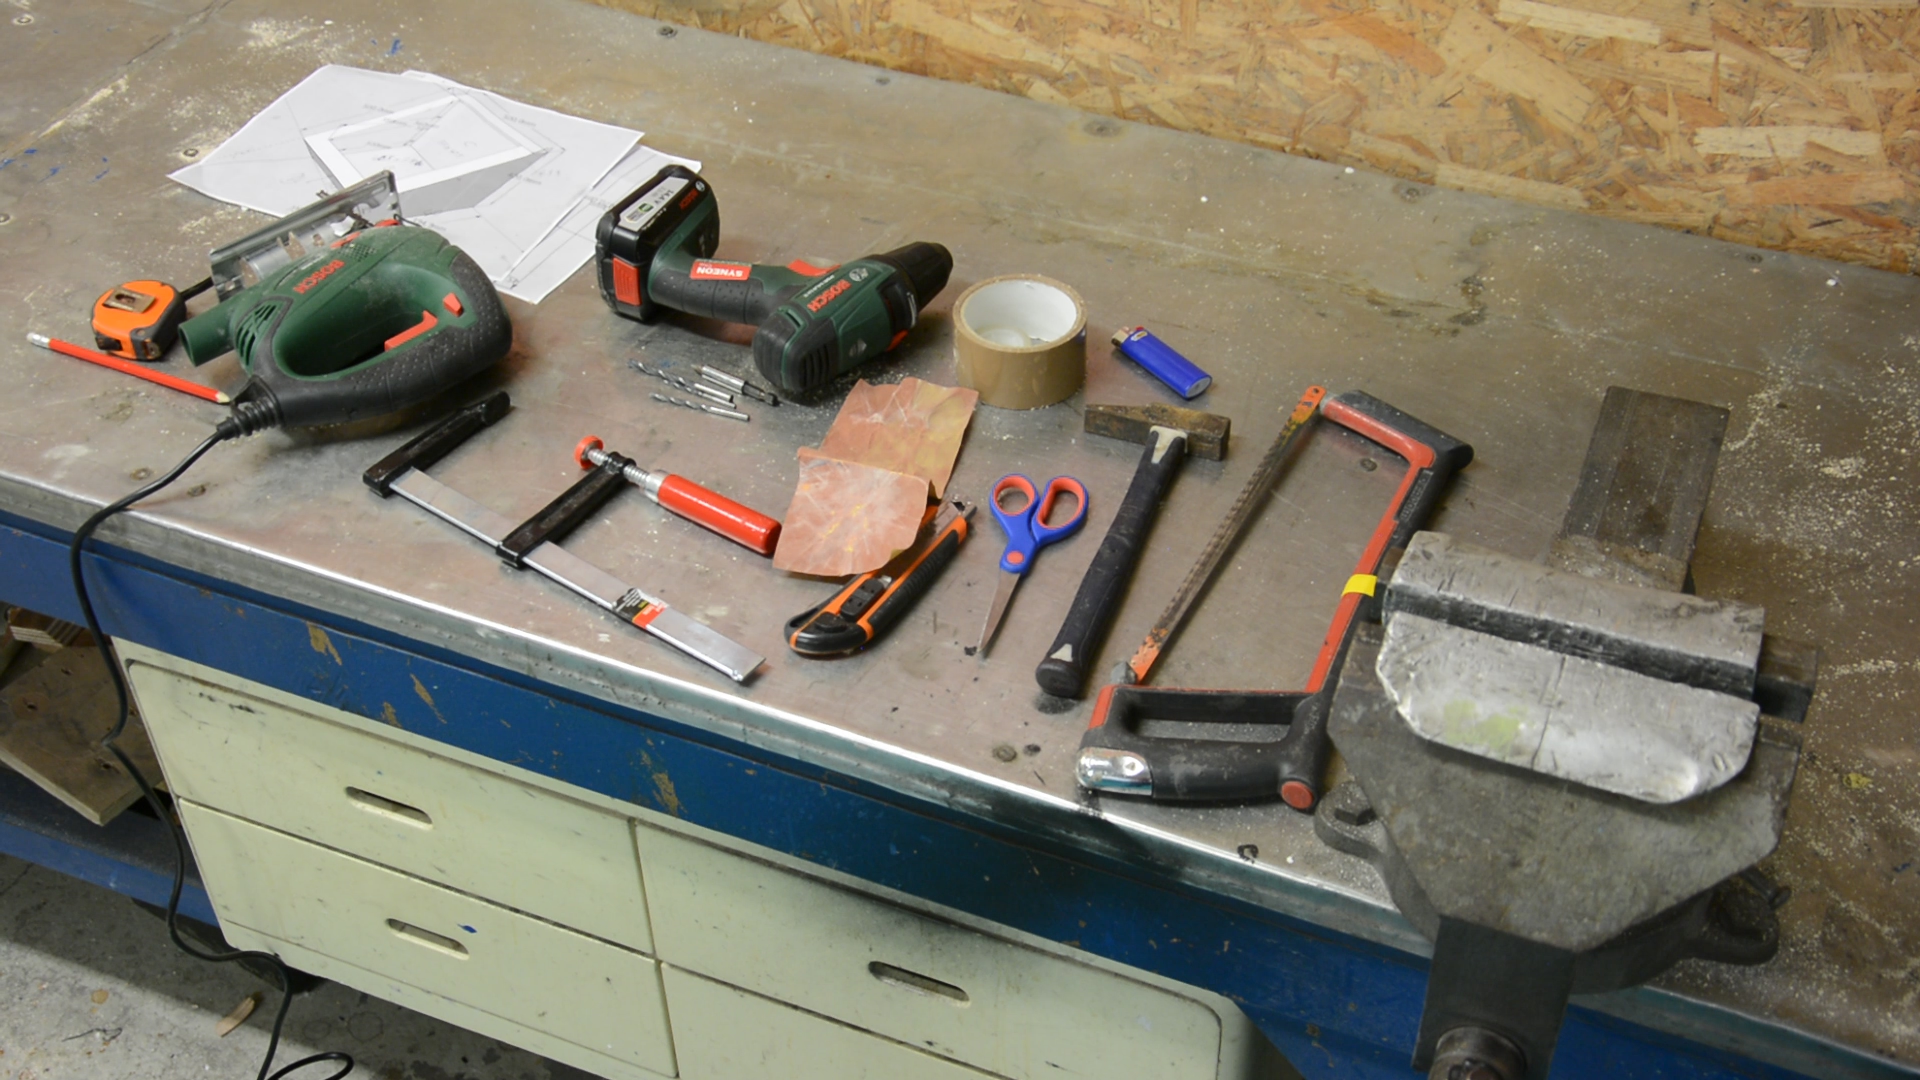
Outils
- Screwer/ drill
- Jigsaw
- Hacksaw
- Glass cutter (if needed)
- Tape
- Lighter
- Stall
- Clamp
- Tape measure
- Cutter
- Scissors
- Sandpaper
- Square, ruler, protractor
- Helmet and safety glasses
- Plans
Étape 1 - The box interior: cutting of panels and assembly of the box
1) Take the plans de la boîte , the plywood panels and the tape measure
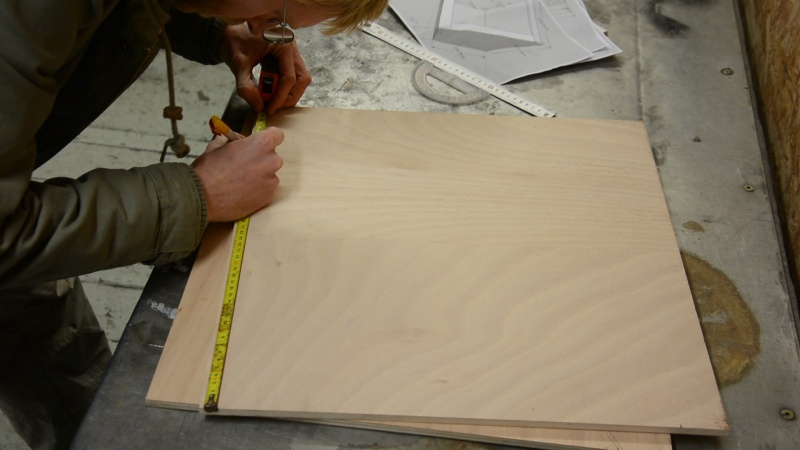
2) Copy the dimensions of the side A on one of the panels with a ruler.
3) Use the protractor to create an angle of 60° and another one of 30° as shown on the schema.
4) Fix the panel on the working table with the clamp.
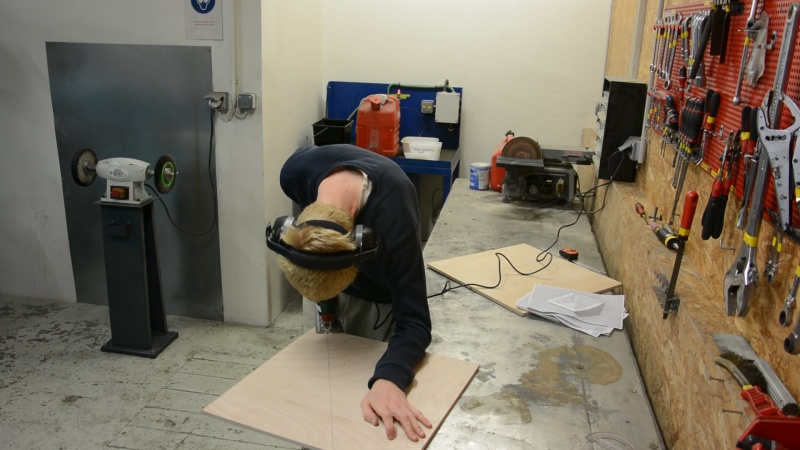
5) Protect the ears and the eyes
6) Cut following the drawings with the jigsaw.
7) Copy the dimensions of the schema on the second panel to realize the side B.
8) Cut the second panel
9) Draw, cut the panels C, D and E
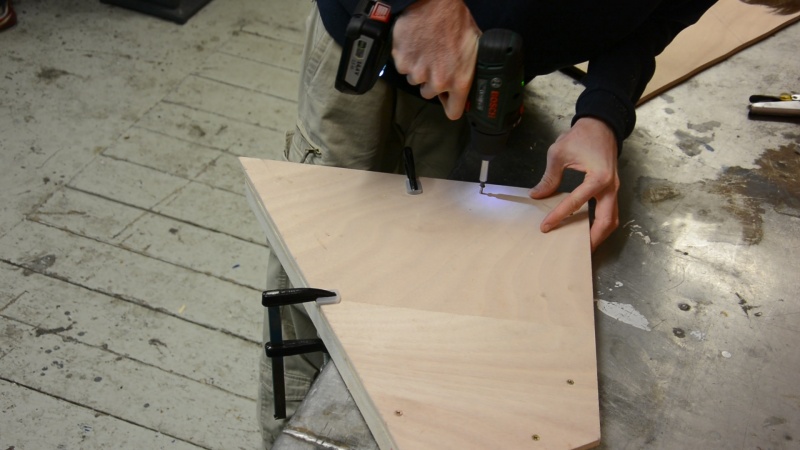
Comment: if at the cutting of the panels, the borders of the plywood panel contains thorns, it can be useful to sand the borders with sandpaper.
The panels being voluntary thin, it is necessary to fix on the panels A and B the sticks that will be used as support to screw the panels C, D and E. The sticks will be, in ideal, of the same thickness of the isolator.
Cut the sticks
1) Take the sticks and draw the desired dimensions
2) Fix the sticks on the clamping and cut with a saw.
Fix the stick to the panels
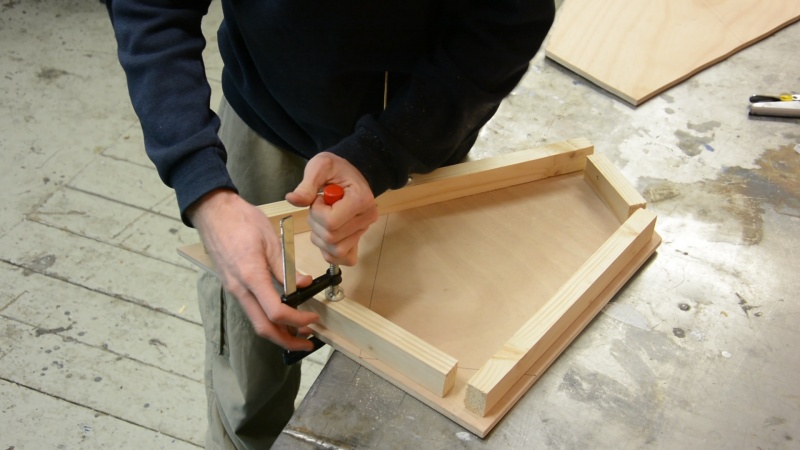
3) Position one of the stick and use the clamp to maintain the whole
4) Return the panel and screw with a screw (two screws per stick is enough).
Comment: Keep in mind to keep the thickness of a panel between the end of the panel and the stick (it is at this place that the panels C, D and E will come).
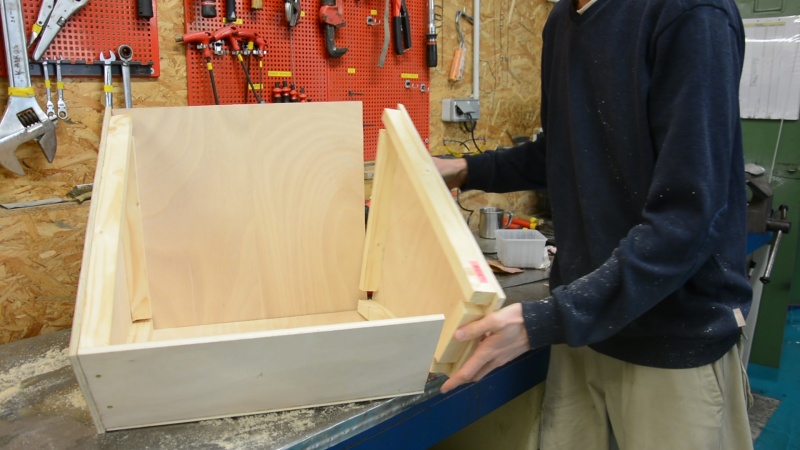
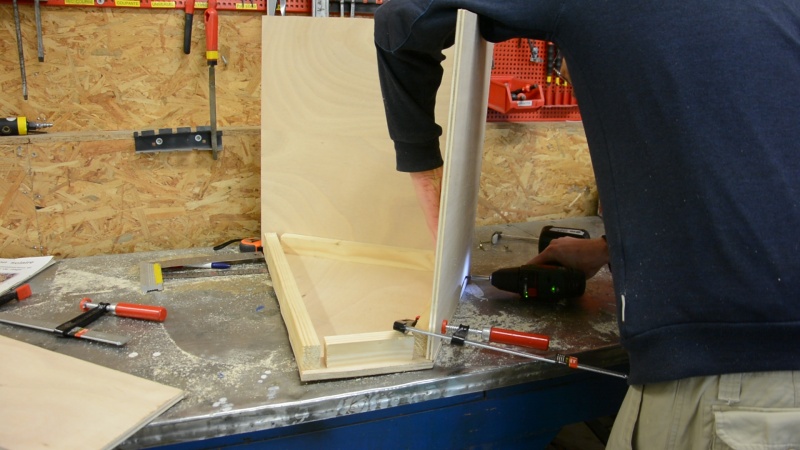
1) Screw the panels C, D and E on the sticks, 3 screws are enough.
We obtain so the inside of the box. The isolator will be added and then the inside box will be covered with reflectings.
Comment: To screw, it is sometime judicious to pre-screw with a drill or a broach.
Étape 2 - The isolator: cutting and positioning of the isolator in the box.
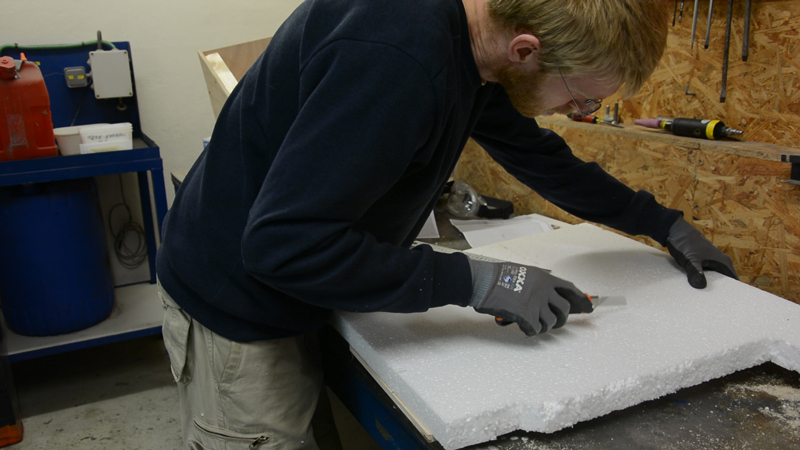
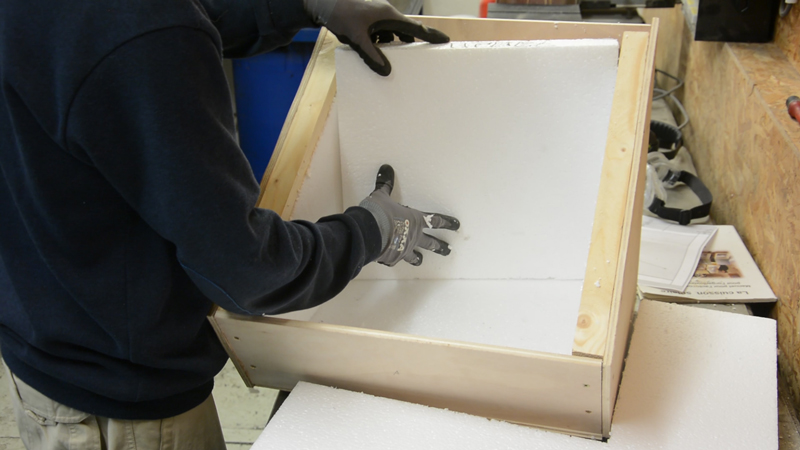
The isolator will be bound between the sticks.
1) Take the isolator and the tape measure
2) Reproduce the measures on the isolation panels with the tape measure
3) Cut with the cutter and then snap into place.
Étape 3 - The interior of the box: cutting of the panels A', B', C', D' and E'.
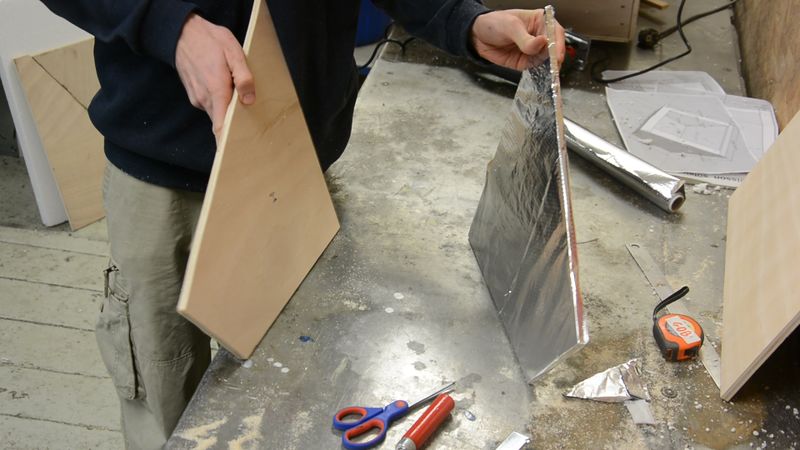
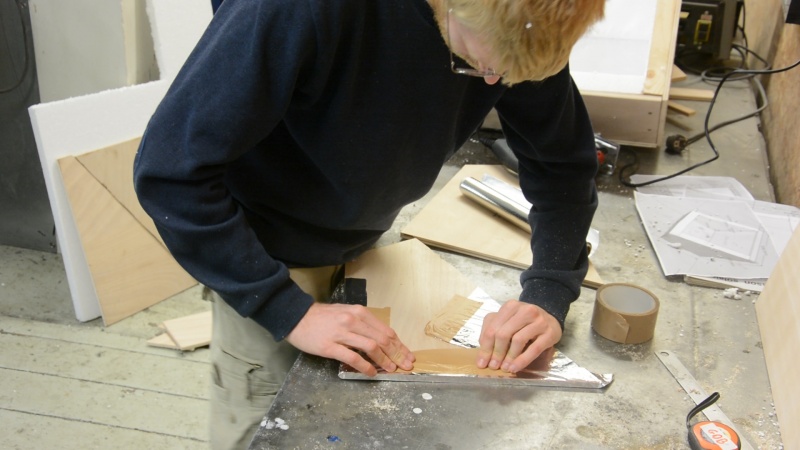
1) Reproduce the measures on the panels and cut
2) Annotate the inside face of a "I" to recognize the face that will be covered by aluminium paper.
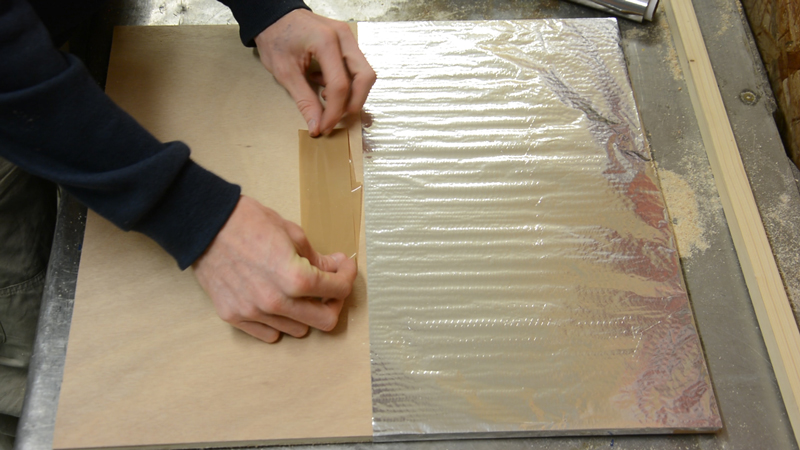
3) Coast the panels A', B', C', D' and E' of aluminium paper.
4) Fix the aluminium paper with tape on the back.
Attention: the aluminium paper is really fragile. If a hole appears, cover it with aluminium paper and tape.
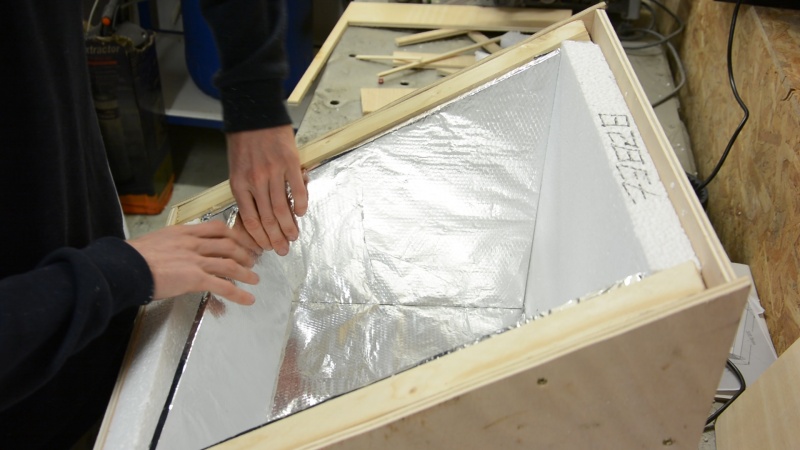
5) Slot the panels at their place.
To finish with the box:
6) Use the rest of the plywood to finish the box. In other words, close the space occupied by isolator, use the tape measure to do so.
7) Screw the panels with on the sticks (two screws per panels are enough).
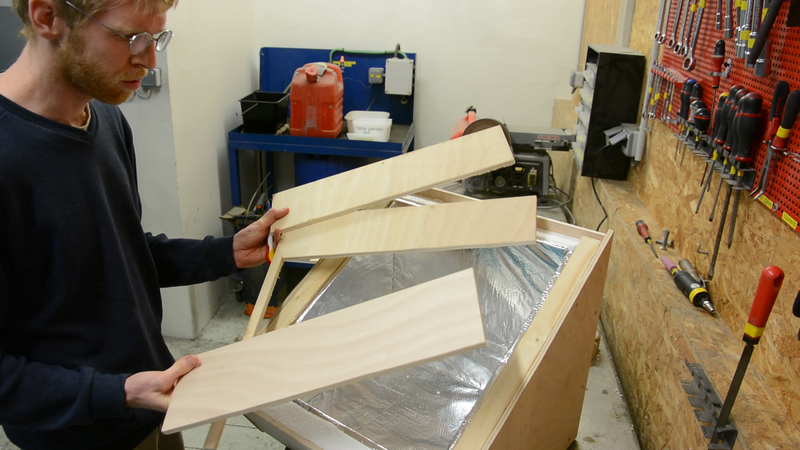
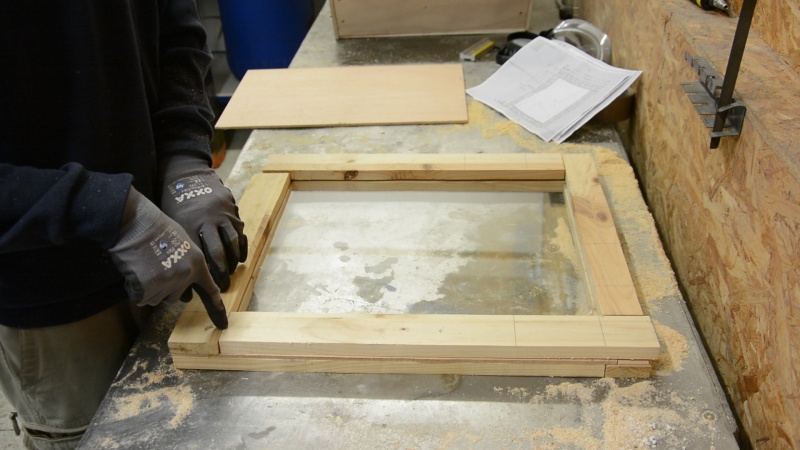
Étape 4 - The cadre of the glass: cutting, assembly and fixation on the box
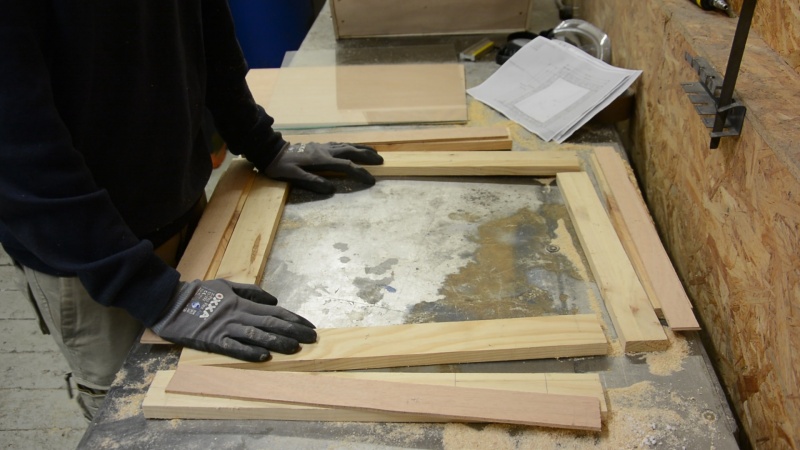
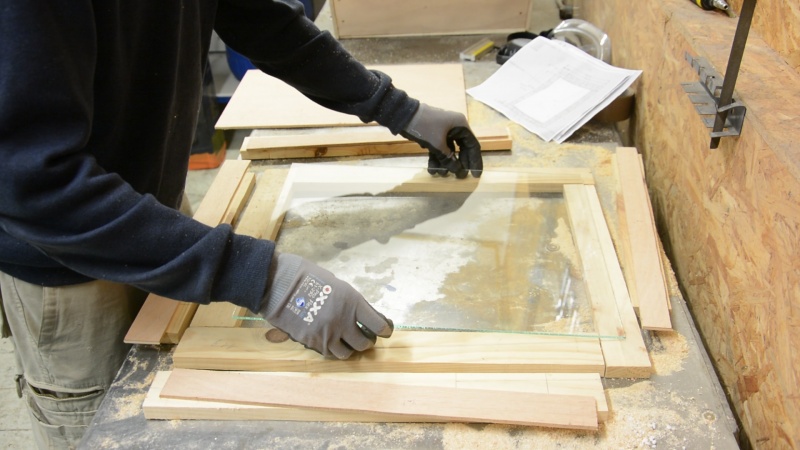
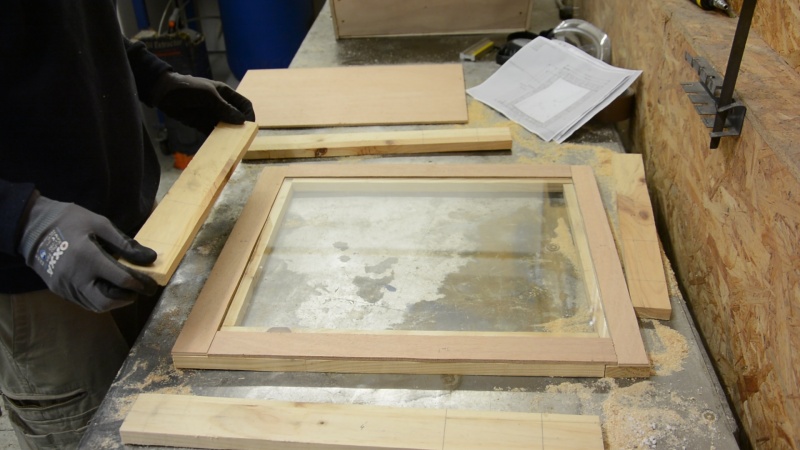
Explanation: The cadre is formed by 3 layers, it will coat the glass and maintain it. A first layer (panel 1, 2, 3 and 4) will form the inside cadre. Above we put the glass that should enter by 1,5cm. To avoid that the glass goes out and that it is well maintained, we add a layer of the same thickness and dimensions of panels 1, 2, 3 and 4 minus the 1,5cm taken by the glass. Then, we cover the panels 1', 2', 3' and 4'. This last layer is putted alongside, thereby, the aire will have more difficulties to penetrate.
1) Take the pallet/wood boards
2) Cut the board 1, 2, 3 and 4 and use those as pattern to make a second series: 1', 2', 3' and 4'.
Comment: Use the schemas for the dimensions
3) Make two strips of 500x35mm and two of 470x45mm from the chipboard panel of the same thickness of the glass.
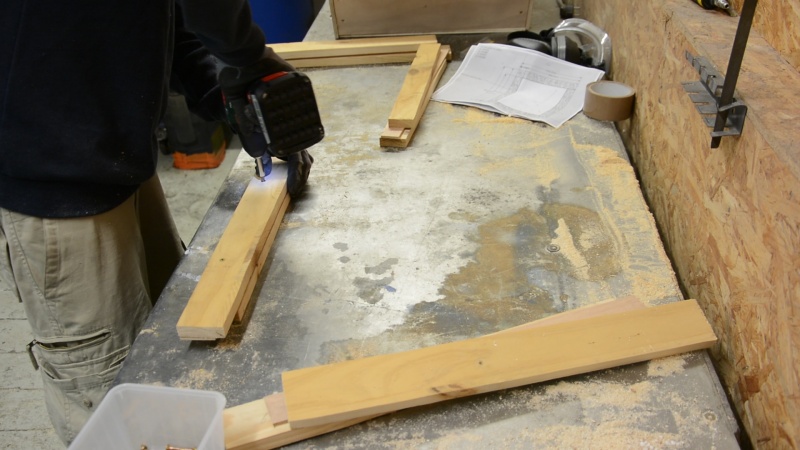
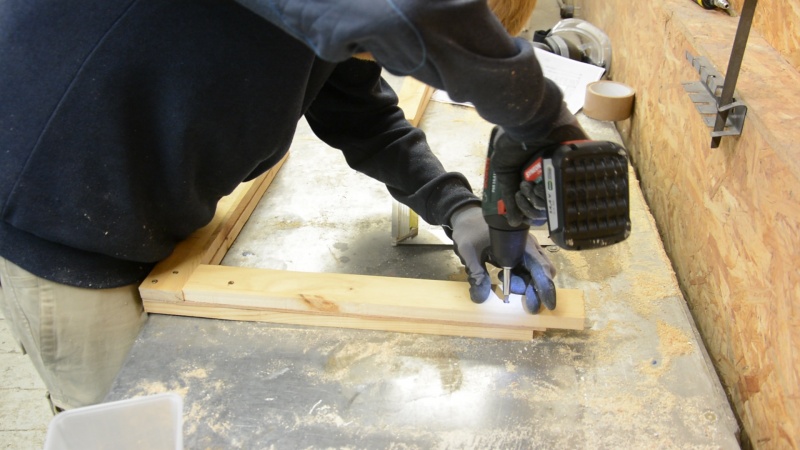
4) The boards 1 and 1' will be slotted to the chipboard "a" and this alongside, in a way to block the air. Screw the whole in a way to create 4 modules.
5) Fix the two modules together, then the 2 others together in a way to create angles
6) Interlock the glass
7) Fix the modules togethers, the glass in maintained: the cadre is finished.
"Comment": if the window has been retrieve, it is possible to cut it with a glass cutter (410x470mm).
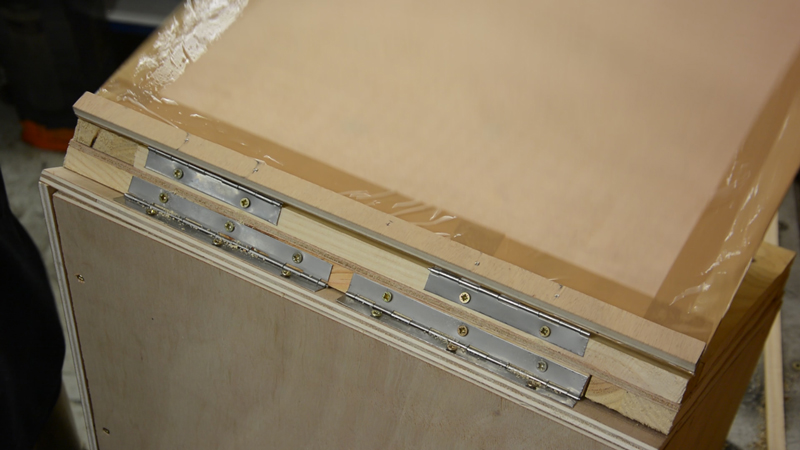
8) If needed, cut the meter of hinge with a hacksaw in a way to obtain at least 6 hinges (with 2 holes at minimum).
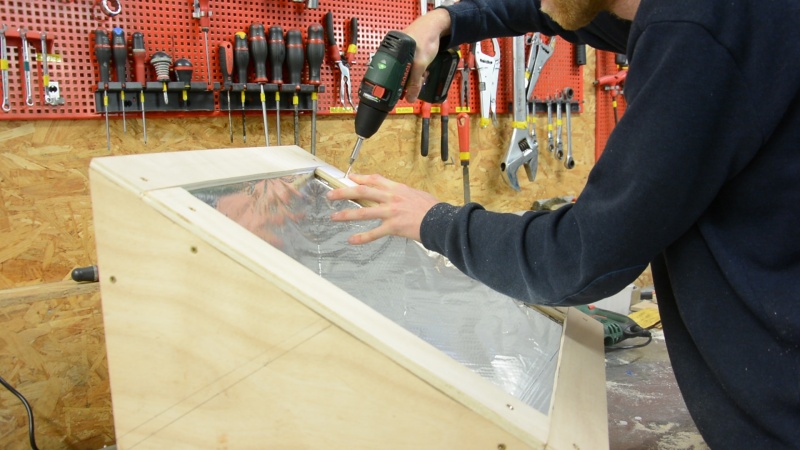
9) Take 2 hinges and fix them with flat headed screws on the border of the glass/cadre.
10). Screw the other side of the hinge to the board A' of the box.
11) Add seal on the board A', B', C', and D' in a way to not let air penetrate when the cadre in closed.
Étape 5 - The ears
1) Take the last panel of plywood of 500x550mm of dimension
2) Cut a strip of 15x500mm. This one will serve to thicken the chipboard of 3mm to better screw and fix the hinges.
3) Coat the panel of aluminium.
4) Fix the hinges on the inside face (covered by aluminium) and on the cadre.
5) Take the last chipboard, cover it with aluminium and fix the strip on one of the extremities with a nail.
6) Fix the ear to the cadre/glass with the last 2 hinges.
"Comment": The back face with the tape will be the visible, it is therefore important to do it right!
The ears are fixed. It is time to add the strings to maintain to a certain angle.
7) For the summer position, it is extern ear that will be maintained in suspension. We screw a screw on the extern side of the cadre and roll a string.
For the winter position, it is will be the intern position
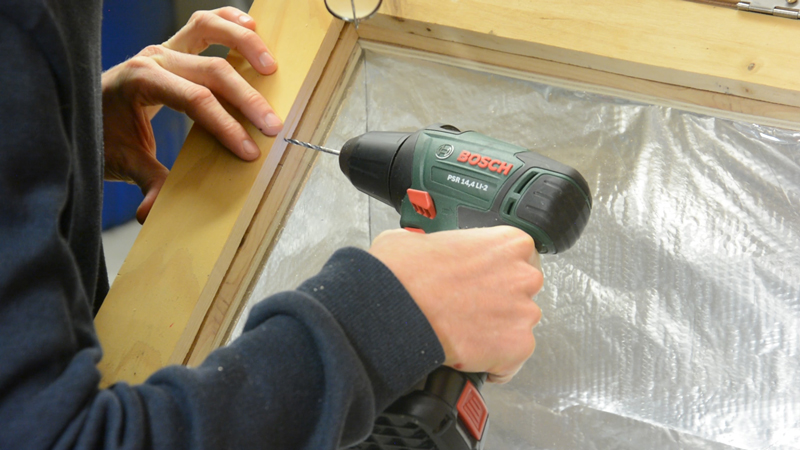
8) On the ear, drill 2 holes at around 2cm of gap in the corner et located at around 70mm of the border.
9) In the rest, take a little piece of wood (20x10mm) and drill 2 holes.
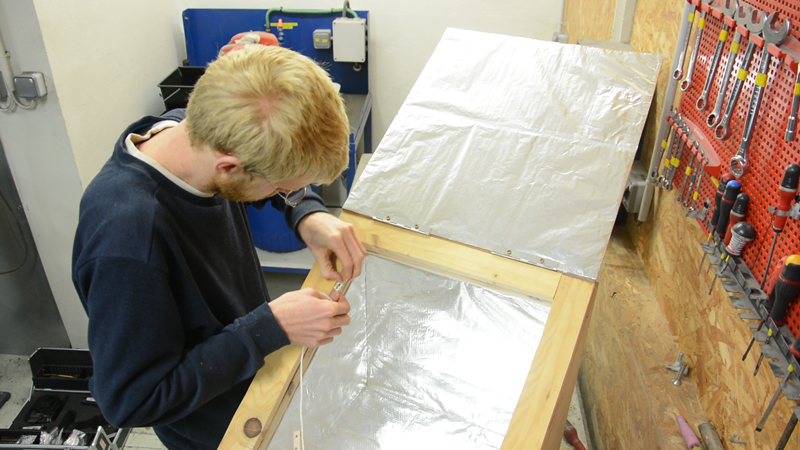
10) Insert a string in one of the 2 holes small wooden piece, then of one of the holes of the ear, then the second one of the ear and finally in the second one of the small piece of wood.
11) Tie a knot at the extremity of the string and burn the end to avoid it to frayed.
12) Repeat the process with the thinner ear, however, this time, screw on the inside of the cadre. This ear will be the first to be closed, the string will settle itself between the glass and the ear.
It is time to create the chocks allowing to maintain those in the air
13) With the rest, create sticks of around 1,5cm of thickness, sharp the end of the stick in a way to create a picket.
14) Make holes in the ears, it will serve to put the pickets.
15) Naile the stick at the exterior of the cadre.
16) Fix the nail at the opposite. That will serve as a hold when the oven will be closed.
"Commenté: this side can be improved, don't hesitate to propose other solutions.
Étape 6 -
Vous avez deux minutes ? Que vous souhaitiez ou non réaliser cette low-tech, votre réponse à ce formulaire nous aiderait à améliorer nos tutos. Merci d'avance pour votre aide !
Comme tout le travail du Low-tech Lab, ce tutoriel est participatif, n'hésitez pas à ajouter les modifications qui vous semblent importantes, et à partager vos réalisations en commentaires.
Notes et références
""DIRECTIONS FOR USE & REMARKS"
- Use dark containers, or painted in black.
- To capture the maximum of raws, directed correctly the solar oven to the sun. It is enough to redirect it once every hour in a manner to have the shadow of the oven directly on its back.
- To loose the less of heat as possible, avoid to open too often the oven during the cooking process. The best is to put all of the necessary ingredients at the beginning.
REFERENCES
- This solar oven has been realized by David Mercereau, don't hesitate to look closer its yourte and its low-tech on his blog.
- To have more information on the solar ovens, their use, how to orientate and the solar recipes, the Low-Tech team invites you to consult the solar oven section in its Biblilowthèque.
- Comment récupérer un maximum d’énergie solaire ?
- It is also possible to make internship with the association Bolivia Inti or to directly buy solar ovens at ID Cook or Solarcooking.
- Don't hesitate to comment, share, and complet this tutorial.
Published
 Français
 English
 Deutsch
 Español
 Italiano
 Português