Description
An oven made with easily accessible materials to cook food and heat a room up with just a small amount of wood.
Introduction
This oven fabrication technique was documented on during one of our trips, looking for low-techs in South America from June to September 2017 in Ecuador, Peru and Bolivia.
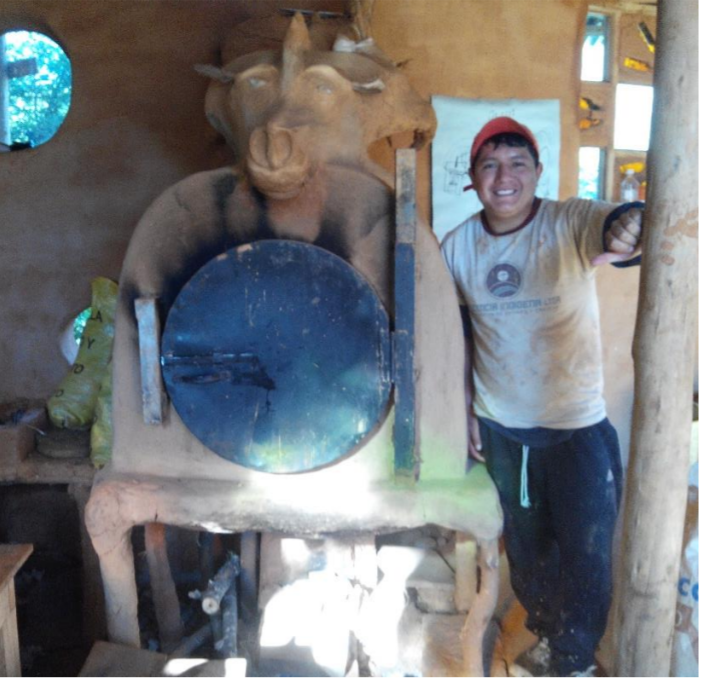
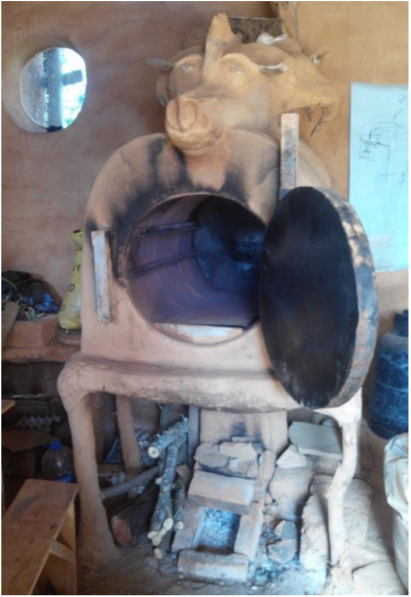
This oven, used in the Finca Fina farm near Malacatos in Ecuador, can cook all sorts of foods with just a small amount of wood. It can store heat sufficiently and once it's hot, it can carry on cooking dishes for a considerable amount of time without being maintained. The fact that only a little fuel is used, is an advantage for regions where there isn't much wood. On a certain scale, this advantage helps reduce deforestation due to the use of wood for cooking. The low consumption of wood prevents the user from travelling as often for a supply of wood.
Easy to make, some knowledge in masonry is however needed, one part is made out of bricks, displayed to form an arch. Certain metal parts need to be welded, so welding skills are also recommended.
Matériaux
• A metal canister of at least 30 cm in diameter
• Some bricks 4 cm thick maximum
   • A big bucket
   • A metal pipe 10 cm in diameter (the length depends on the height of the ceiling in the house and the chimney must exceed the roof by at least 30 cm).
   • Soil (clay soil if possible)
   • Cement
   • A grill whose width is slightly smaller than that of the canister
   • Wire mesh less than 0.5 cm
Outils
• Wire cutter
   • Trowel
   • Welder (if necessary)
   • Wood saw
   •  Shovel
Étape 1 - Making the table
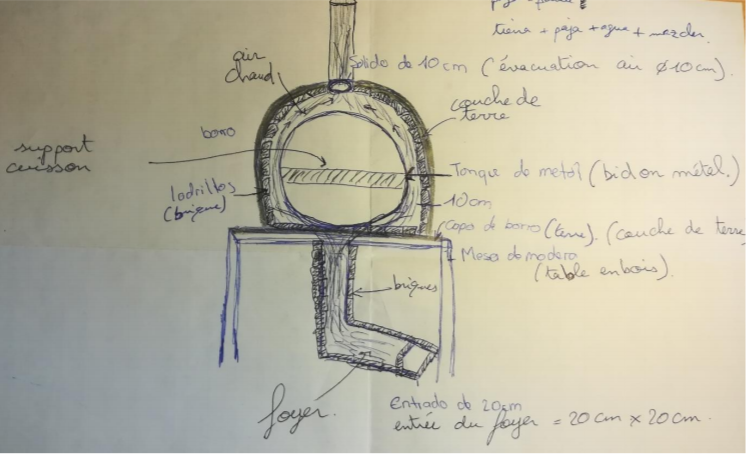
• Build a solid wooden table. Shape it so the canister can be laid down on the middle of the table and so that 30 cm are left on each side of it.
   • Make a square-shaped hole in the middle of the table 20 cm*20 cm
   • Cover it with an even layer of mud 4 cm thick
Étape 2 - The brick arch
• Lay the bricks on the surface of the table without covering the hole. The surface must be the straightest and most horizontal possible.
   • Lay the canister on the middle of the table, horizontally. It must be slightly raised so the air can circulate underneath.
   • Build a cement-brick arch in order to cover the canister, leaving a 10 cm space around it. Leave a
     10 cm hole on top of the arch for the passage of the flue.
   • At the end of this stage, only the opening of the canister should be visible.
Étape 3 - The fireplace
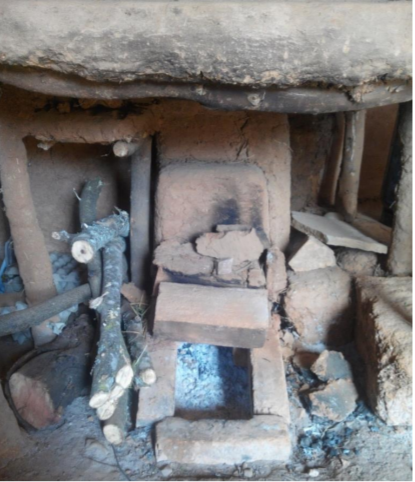
• Under the table, build a rectangular fireplace with an opening for the fuel to be put in.
   • At the back of the fireplace, build a vertical chimney with a 20*20 dimension, going from the ground, up to the underside of the table.
   • Check the sealing of the cement.
Étape 4 - Insulation
• Mix the soil (clay soil if possible) with water in a big bucket.
   • Mix well.
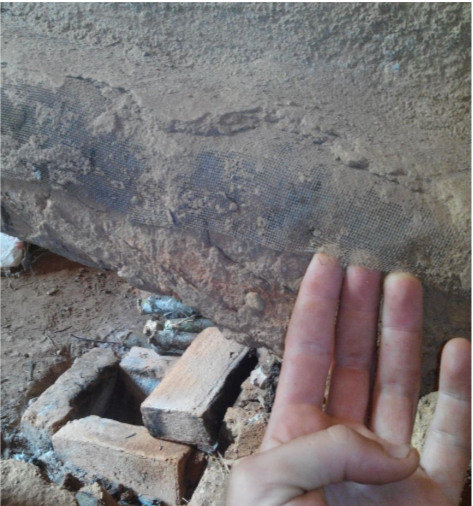
   • Cover the arch with the fine wire mesh once the correct shape has been given.
   • Make sure you leave the 10 cm hole in the arch free, for the flue
     ,
   • Cover the wire mesh with a 4 cm layer of mud without covering up the 10 cm hole.
   • Leave to dry.
Étape 5 - The evacuation of smoke
Place the 10 cm diameter pipe between the hole left in the arch and the roof, so it's tight
Étape 6 - The door and the grill
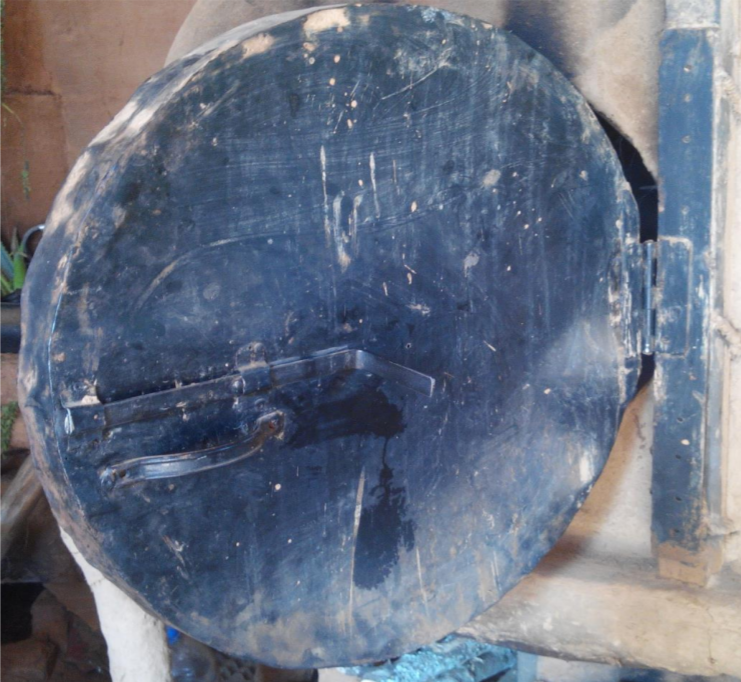
• Shut the barrel so it's airtight. A hinge can be welded on the side of the opening of the barrel. (see photo)
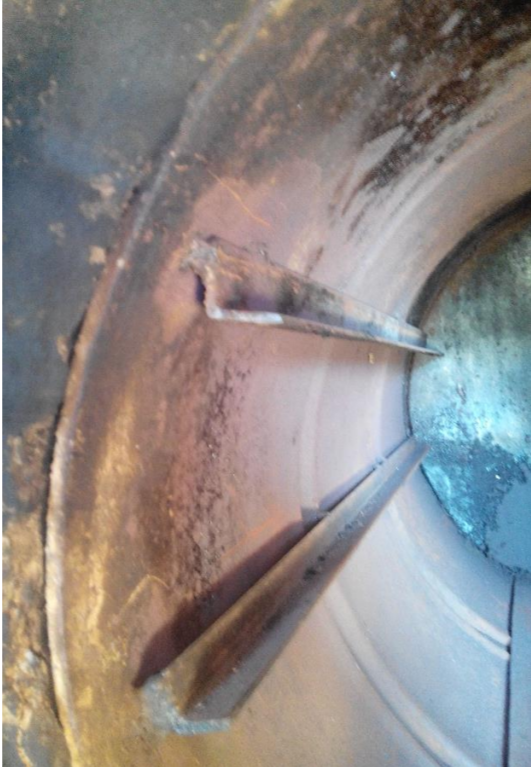
• Brackets for the grill can be welded directly inside the canister(see photo)
Étape 7 - Using the oven
Once the soil is completely dry :
   • Start a fire up in the fireplace. Maintain it sufficiently.
   • Wait until the oven is really hot, a suitable thermometer can be placed inside to check the temperature. This can take between 30 and 40 minutes.
   • Place the dish(es) in the oven and keep an eye on the baking process by quickly opening the oven door. Carry on maintaining the fire as normal.
The heat provided by the oven can also warm up a room.
Translation by Michelle Demarais
Published
 Français
 English
 Deutsch
 Español
 Italiano
 Português