Description
Rester sous la douche sans gaspiller d'eau
Introduction
This shower prototype have been realized with Jonathan Benabed, auto-constructor o f his tiny-house
This system is largely inspired by the recycling shower project of Jason Selvarajan.
"A few figures:
- 40% of the water consumption of a French household comes from the use of the shower. This represents 60 to 80L of water per shower.
- A shower head has a flow rate of about 15L/min if no water saving device is installed.
- A French person spends an average of 10 minutes in the shower to wash, most of which is spent "enjoying" the hot water, waking up, etc.
"The recycling shower:
The objective of this shower prototype is to divide by 7 the water consumption of a shower without impacting the comfort of the user who want to stay under hot water for a while.
The shower is currently in the test phase in order to know its real environmental and economic impact. Indeed, depending on the purchase of new or second-hand equipment, the realization of this shower can very quickly become too expensive for real profitability (not to mention the ecological cost of new equipment).
In our case, we bought a maximum of second-hand equipment for a total cost of 150€.
According to the ShowerloopCalculator, this type of recycling shower is cost effective in less than a year of operation for a 4-person home.
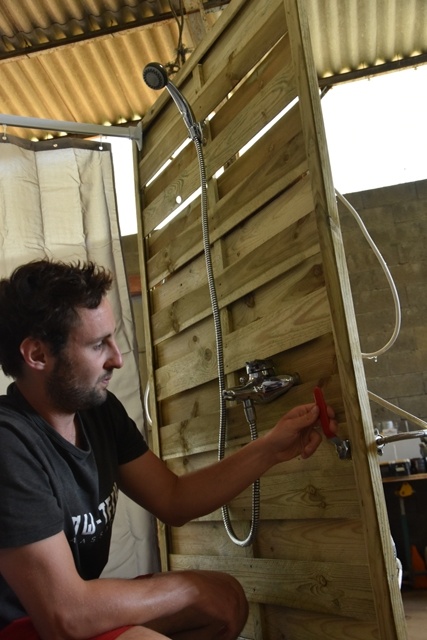
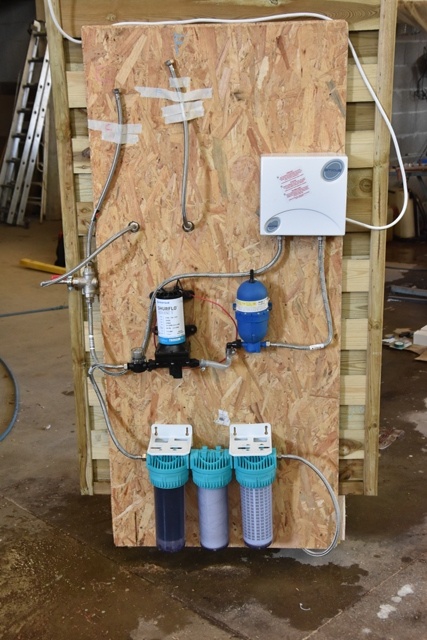
The pictures presented come from a demonstration prototype, without housing integration for a better visibility of the system. However, it's relatively simple to adapt to a classic shower. Great care must be taken to ensure that the connections are watertight.
Principle of operation:
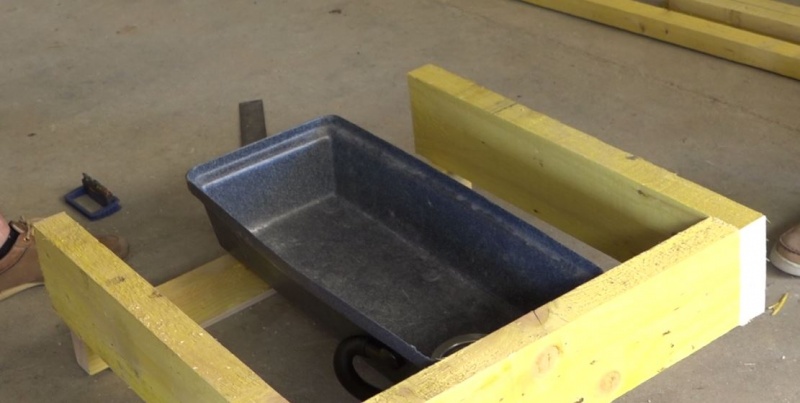
The principle of the recycling shower is to be able to fill a water tank of about 10L located under the shower tray.
When the user use the water from the shower to relax and enjoy, he can operate a valve to shut off the water supply to pump, filtrate, reheat and supply the shower head with water of the tank.
Estimates suggest a 7-fold reduction in the consumption of a conventional shower.
Any contribution that simplifies the system is welcome.
Sanitary Aspect:
The system permit a 20 microns water filtration then an activated carbon filtration to remove the last particles and smells
However, filters are not designed to eliminate potential bacteria.
It's possible to add a UV lamp ensuring the elimination of potential pathogens.
By comparing the use of the shower to a bath where user stay in his water, we have made the choice not to install UV lamp in view of the cost. We have not yet conducted a health test to determine whether or not such a lamp is useful.
Matériaux
- A tank or a plastic container with a minimum capacity of 10L
- A bunghole with overflow system and closing system
- One 1/2" male gland
- An instantaneous water-heater (Electrical with fuse or gas depending on context)
- A self-priming pump type camping car, 12V, minimum 10L/min (example) + 220V>12V power supply adapted (about 4A in 12V)
- An accumulator adapted to the pump (example)
- A filtration station with associated cartridges ( 50 microns, 20 microns, activated carbon) (example)
- Male to male adapters 3/4>1/2 for filter holders and possibly wall passageways
- A 3-way valve
- Flexible female / female 1/2
- Teflon coil
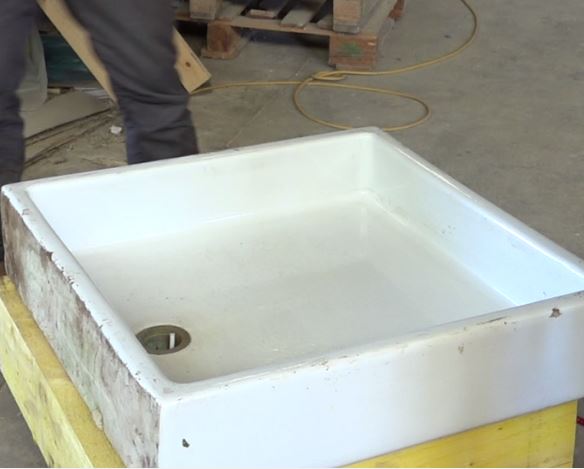
- Optional: a shower tray
- Optional: UV lamp
Outils
- Flat keys
- Screwdriver
- Hole saw
- Drilling machine
- Cutter
Étape 1 - Water tank and shower tray
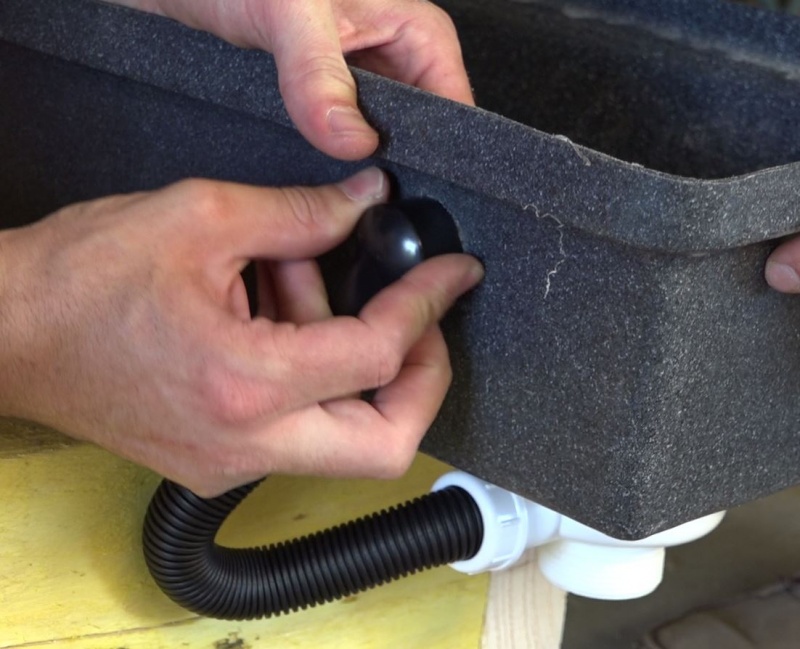
- Using the hole saws, install the plug in the bottom of the tank and the overflow system at the maximum height of the tank.
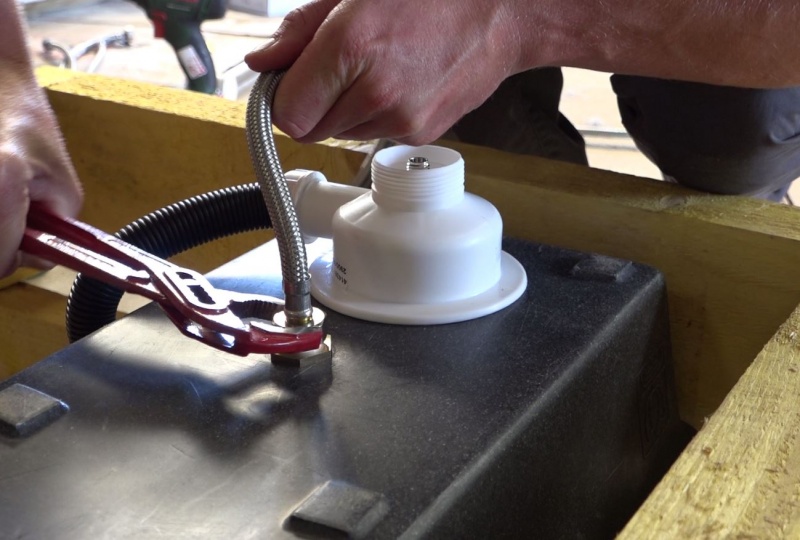
- Install the wall passageway on the lowest level of the tank
- Perform a leak test
- Connect the outlet of the plug/overfill to the sewer system
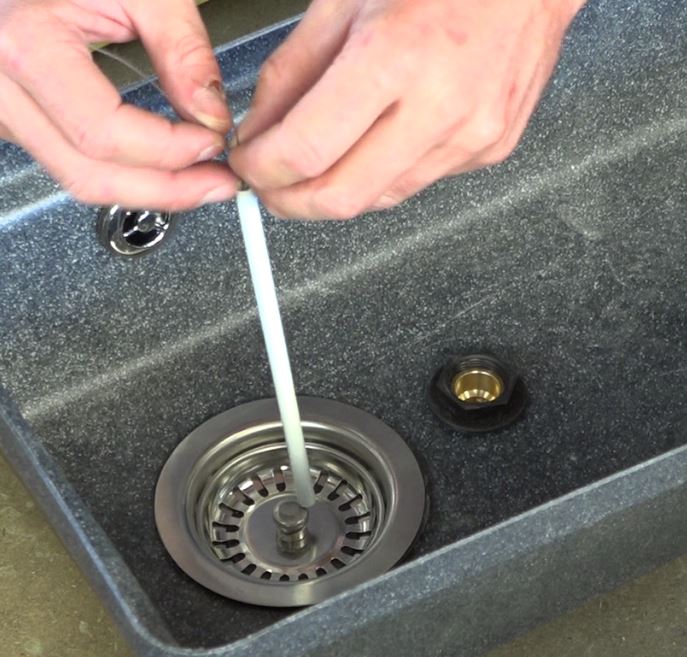
- Remove the drain from the shower tray
- Install the reserve under the shower tray by aligning the hole in the shower tray with the drain in the reserve. (it is interesting to leave the reserve accessible from one side for maintenance)
- In order to be able to open or close the plug from the shower tray, adapt a rod, accessible by hand from the hole in the tray
"Note:
The tank is to be installed under the shower tray. According to the availability of each one:
- Either, take down the actual shower tray, raise him with a structure and install the tank behind (This option can need works more or less important)
- Or, use the actual shower tray to support the tank and install a second tray (From second-hand if possible) above, all thanks to a supporting structure
Étape 2 - Montage du circuit de recyclage
A l'aide de flexible femelle/femelle:
- Relier le passe-paroi de la réserve à l'entrée de la station de filtration
- Relier la sortie de la station de filtration à la pompe
- Relier la pompe à l'accumulateur
- Relier l'accumulateur à l'entrée du chauffe-eau instantané
- Relier la sortie du chauffe eau instantané à l'une des entrées de la vanne 3 voies
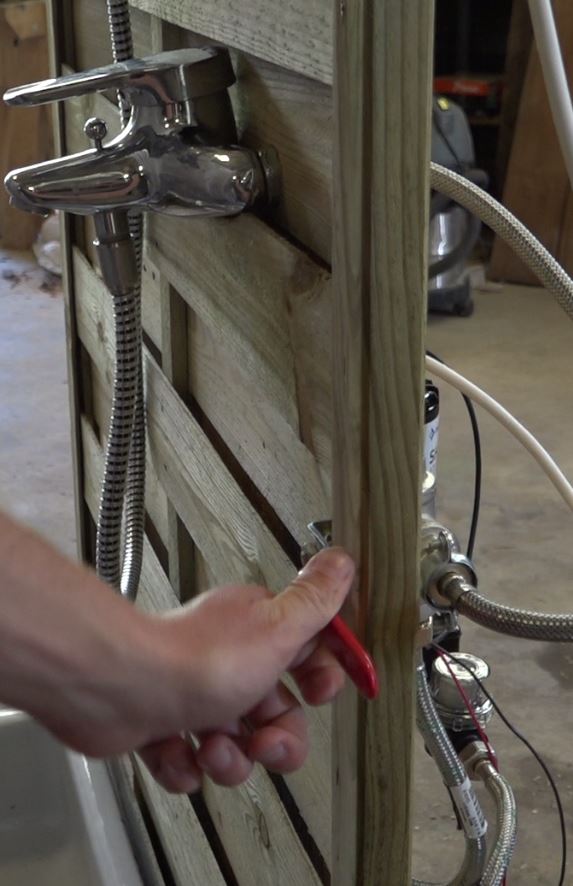
- Après avoir coupé l'eau en amont, dévisser l'entrée eau chaude réseau du mitigeur
- Relier la deuxième entrée de la vanne 3 voies à l'arrivé de l'eau chaude du réseau.
- Relier la sortie de la vanne 3 voies à l'entrée chaude du mitigeur
- Vérifier l'étanchéité grâce à une mise sous pression
- Réaliser l'alimentation électrique du chauffe-eau et de la pompe en prenant soin de respecter les règles d'installation (fusible, hors d'eau, etc)
Facultatif:
- Si le choix est fait d'installer une lampe UV, installer celle-ci après l'accumulateur
Remarques:
- L'ensemble du circuit de recyclage peut être, par exemple, fixé à un mur attenant à la douche ou encore camouflé dans un placard au pied de la douche.
- L'usage d’électricité (pompe et chauffe-eau) nécessite de faire le montage avec soin en suivant les règles de montage de chacun des systèmes pour éviter tout incident.
- Faire bien attention à bien repérer les 2 entrées (qui ont une position "fermée") de la vannes 3 voies et la sortie, qui reste toujours ouverte
- Si le chauffe eau instantané le permet, régler la sortie chaude à la température qui vous semble idéal pour une douche.
- Attention au positionnement des portes filtres: il faut laisser 10 à 15 centimètres sous ceux-ci afin de pouvoir les dévisser.
Étape 3 - Utilisation
- Lors de la phase de lavage, avec le savon, utiliser la douche de manière classique, vanne 3 voie sur l'eau chaude sanitaire
- Lorsque l'on passe en utilisation "détente":
- Fermer la bonde de la réserve
- Positionner la vanne 3 voie sur le mode recyclage
- Positionner le mitigeur au maximum sur le chaud, seulement si vous avez pu régler la température du chauffe eau instantané (sinon attention aux brûlures!)
- La pompe et le chauffe eau s'allument automatiquement permettant de rester le temps souhaité sous l'eau chaude.
- Lorsque la douche est terminée, vider la réserve et remettre la vanne 3 voies et mitigeur en position classique.
Remarque:
Ceci est une utilisation possible. D'autres tests sont à effectuer comme l'utilisation du recyclage avec de l'eau bien savonneuse ou encore l'utilisation de la réserve pour plusieurs douches.
Étape 4 - Entretien
- Le fond de la réserve est à nettoyer régulièrement pour enlever les cheveux et autres grosses impuretés (comme dans une douche classique)
- Les filtres 20 et 50 microns sont à laver lorsque le débit de la douche diminue. (A priori tous les ans)
Notes et références
- Tutoriel réalisé par Pierre-Alain Lévêque, Low-tech Tour France en collaboration avecJonathan Benabed
- Système largement inspiré par la showerloop
Published
 Français
 English
 Deutsch
 Español
 Italiano
 Português