(Page créée avec « * A wood board ep. 10mm x L. 20cm x l. 15cm * A cutter blade * Two bolts L. 50mm x D. 5mm * 12 washers diameter 5mm ») |
(Mise à jour pour être en accord avec la nouvelle version de la source de la page) |
||
| (31 révisions intermédiaires par 3 utilisateurs non affichées) | |||
| Ligne 1 : | Ligne 1 : | ||
{{ {{tntn|Tuto Details}} | {{ {{tntn|Tuto Details}} | ||
| − | | | + | |Main_Picture=D_coupeuse_de_bouteille_plastique_rouet_plastique.png |
| − | | | + | |Licences=Attribution-ShareAlike (CC BY-SA) |
| − | | | + | |Description=Make plastic yarn with a bottle cutter |
| + | |Area=Tools | ||
|Type=Tutorial | |Type=Tutorial | ||
| − | |||
| − | |||
|Difficulty=Very easy | |Difficulty=Very easy | ||
| + | |Duration=30 | ||
| + | |Duration-type=minute(s) | ||
|Cost=5 | |Cost=5 | ||
|Currency=EUR (€) | |Currency=EUR (€) | ||
| − | | | + | |Tags=NomadeDesMers, LT4Refugees |
| − | |||
| − | |||
| − | |||
|SourceLanguage=fr | |SourceLanguage=fr | ||
|Language=en | |Language=en | ||
| Ligne 32 : | Ligne 30 : | ||
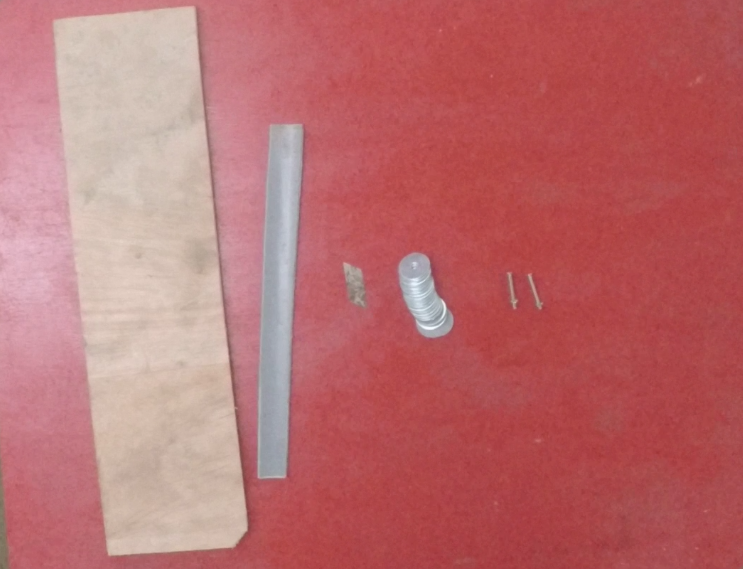
* Two bolts L. 50mm x D. 5mm | * Two bolts L. 50mm x D. 5mm | ||
* 12 washers diameter 5mm | * 12 washers diameter 5mm | ||
| − | |Tools=* | + | |Tools=* A drill |
| − | * | + | * A 5 mm drill bit |
| − | * | + | * Two carpenter's clamps |
| − | * | + | * A clamp |
| − | * | + | * A flat screwdriver |
| − | * | + | * A socket wrench |
| − | * | + | * Scissors |
}} | }} | ||
| − | |||
{{ {{tntn|Tuto Step}} | {{ {{tntn|Tuto Step}} | ||
| + | |Step_Title=Operation | ||
| + | |Step_Content=Drill two holes in the board. In these two holes are bolted bolts, around which are inserted washers. A cutter blade is disposed between the washers. | ||
| + | |||
| + | With this device, we can cut plastic bottles to transform them into yarn of adjustable thickness (the thickness of the yarn is modified with the height of the cutter blade). | ||
| + | |||
| + | On the system used here, the dimensions are slightly different. The manufacturing remains exactly the same, but the dimensions given in this tutorial are optimized compared to those shown in the photos. | ||
|Step_Picture_00=D_coupeuse_de_bouteille_plastique_syst_me_fini.png | |Step_Picture_00=D_coupeuse_de_bouteille_plastique_syst_me_fini.png | ||
|Step_Picture_01=D_coupeuse_de_bouteille_plastique_syst_me_fini_2.png | |Step_Picture_01=D_coupeuse_de_bouteille_plastique_syst_me_fini_2.png | ||
|Step_Picture_02=D_coupeuse_de_bouteille_plastique_syst_me_fini_3.png | |Step_Picture_02=D_coupeuse_de_bouteille_plastique_syst_me_fini_3.png | ||
| − | |||
| − | |||
| − | |||
| − | |||
| − | |||
| − | |||
}} | }} | ||
{{ {{tntn|Tuto Step}} | {{ {{tntn|Tuto Step}} | ||
| + | |Step_Title=Board drilling | ||
| + | |Step_Content=* At about 5 cm from the top edge of the board, mark the location of two holes spaced by 4cm; | ||
| + | |||
| + | * Dril two holes where indicated with the 5mm drill bit | ||
|Step_Picture_00=D_coupeuse_de_bouteille_plastique_marque_trous.png | |Step_Picture_00=D_coupeuse_de_bouteille_plastique_marque_trous.png | ||
|Step_Picture_01=D_coupeuse_de_bouteille_plastique_per_age.png | |Step_Picture_01=D_coupeuse_de_bouteille_plastique_per_age.png | ||
|Step_Picture_02=D_coupeuse_de_bouteille_plastique_per_age_2.png | |Step_Picture_02=D_coupeuse_de_bouteille_plastique_per_age_2.png | ||
| − | |||
| − | |||
| − | |||
| − | |||
}} | }} | ||
{{ {{tntn|Tuto Step}} | {{ {{tntn|Tuto Step}} | ||
| + | |Step_Title=Nuts, bolt and washers | ||
| + | |Step_Content=* Insert the screws into the holes; | ||
| + | * File 6 washers on each screw; | ||
| + | * Pre-screw the nuts on the screws. | ||
|Step_Picture_00=D_coupeuse_de_bouteille_plastique_boulons.png | |Step_Picture_00=D_coupeuse_de_bouteille_plastique_boulons.png | ||
|Step_Picture_01=D_coupeuse_de_bouteille_plastique_rondelles.png | |Step_Picture_01=D_coupeuse_de_bouteille_plastique_rondelles.png | ||
|Step_Picture_02=D_coupeuse_de_bouteille_plastique_rondelles_2.png | |Step_Picture_02=D_coupeuse_de_bouteille_plastique_rondelles_2.png | ||
|Step_Picture_03=D_coupeuse_de_bouteille_plastique_ecrous.png | |Step_Picture_03=D_coupeuse_de_bouteille_plastique_ecrous.png | ||
| − | |||
| − | |||
| − | |||
| − | |||
}} | }} | ||
{{ {{tntn|Tuto Step}} | {{ {{tntn|Tuto Step}} | ||
| + | |Step_Title=Cutter blade | ||
| + | |Step_Content=Using a clamp (safety requires), insert the cutter blade between the washers at the same height on each side. | ||
| + | |||
| + | The sharpened side of the bladeis in front of the short side of the board. | ||
|Step_Picture_00=D_coupeuse_de_bouteille_plastique_lame.png | |Step_Picture_00=D_coupeuse_de_bouteille_plastique_lame.png | ||
|Step_Picture_01=D_coupeuse_de_bouteille_plastique_lame_2.png | |Step_Picture_01=D_coupeuse_de_bouteille_plastique_lame_2.png | ||
| − | |||
| − | |||
| − | |||
| − | |||
}} | }} | ||
{{ {{tntn|Tuto Step}} | {{ {{tntn|Tuto Step}} | ||
| − | + | |Step_Title=Tightenning | |
| − | |Step_Title= | + | |Step_Content=Using the flat screwdriver and the socket wrench, tighten the nuts on the bolts. |
| − | |Step_Content= | ||
| − | + | Squeeze tight so that the blade does not move. | |
| − | + | the bottle cutter is ready! | |
| + | |Step_Picture_00=D_coupeuse_de_bouteille_plastique_serrage.png | ||
}} | }} | ||
{{ {{tntn|Tuto Step}} | {{ {{tntn|Tuto Step}} | ||
| + | |Step_Title=Use | ||
| + | |Step_Content=For optimal cutting of PET bottles, remove the bottom of the bottle. | ||
| + | |||
| + | Pre-cut a thin plastic strip at the bottom of the bottle (corresponding to the spacing between the cutter blade and the board). | ||
| + | |||
| + | Insert the thin strip between the cutter blade and the board. Applying slight pressure on the neck of the bottle with one hand, pull the plastic slide with the other hand. With a little practice, it is possible to make a big yarn with the whole bottle. | ||
|Step_Picture_00=D_coupeuse_de_bouteille_plastique_d_coupe_fond_bouteille.png | |Step_Picture_00=D_coupeuse_de_bouteille_plastique_d_coupe_fond_bouteille.png | ||
|Step_Picture_01=D_coupeuse_de_bouteille_plastique_pr_d_coupe.png | |Step_Picture_01=D_coupeuse_de_bouteille_plastique_pr_d_coupe.png | ||
| Ligne 95 : | Ligne 98 : | ||
|Step_Picture_04=D_coupeuse_de_bouteille_plastique_d_coupe_plastique_2.png | |Step_Picture_04=D_coupeuse_de_bouteille_plastique_d_coupe_plastique_2.png | ||
|Step_Picture_05=D_coupeuse_de_bouteille_plastique_fil_plastique.png | |Step_Picture_05=D_coupeuse_de_bouteille_plastique_fil_plastique.png | ||
| − | |Step_Title= | + | }} |
| − | |Step_Content= | + | {{ {{tntn|Tuto Step}} |
| + | |Step_Title=Applications | ||
| + | |Step_Content=This yarn is very useful for making objects of all kinds. When heated, the wire retracts and offers a very satisfactory resistance. | ||
| − | + | On the boat, the crew of Nomade des Mers and its partners made all sorts of objects thanks to the plastic yarn: parts of the fridge without energy Pimp my Fridge, low-tech crutch ... | |
| − | + | Opposite the manufacture of a crutch. Plastic offers sufficient strength to support the weight of a man. | |
| − | |||
| − | |||
|Step_Picture_00=D_coupeuse_de_bouteille_plastique_utilisation.png | |Step_Picture_00=D_coupeuse_de_bouteille_plastique_utilisation.png | ||
|Step_Picture_01=D_coupeuse_de_bouteille_plastique_utilisation2.png | |Step_Picture_01=D_coupeuse_de_bouteille_plastique_utilisation2.png | ||
| Ligne 109 : | Ligne 112 : | ||
|Step_Picture_04=D_coupeuse_de_bouteille_plastique_utilisation5.png | |Step_Picture_04=D_coupeuse_de_bouteille_plastique_utilisation5.png | ||
|Step_Picture_05=D_coupeuse_de_bouteille_plastique_b_quille.png | |Step_Picture_05=D_coupeuse_de_bouteille_plastique_b_quille.png | ||
| − | |||
| − | |||
| − | |||
| − | |||
| − | |||
| − | |||
}} | }} | ||
{{ {{tntn|Notes}} | {{ {{tntn|Notes}} | ||
| − | |Notes= | + | |Notes=This low-tech was inspired by the work of many DIYers, especially on YouTube. |
| − | + | sources: | |
http://www.utsumi.com.br/pet/English/filetador/index.html | http://www.utsumi.com.br/pet/English/filetador/index.html | ||
https://www.youtube.com/watch?v=hQeeJEpBYsg | https://www.youtube.com/watch?v=hQeeJEpBYsg | ||
| − | + | Feel free to comment, share, and enhance the tutorial information useful for its improvement. | |
| − | + | <div class="mw-translate-fuzzy"> | |
| + | Check out the Low-tech Lab's [http://lowtechlab.org/biblilowtech/ Biblilowtech] ! | ||
| + | </div> | ||
}} | }} | ||
{{ {{tntn|Tuto Status}} | {{ {{tntn|Tuto Status}} | ||
| − | |Complete= | + | |Complete=Published |
}} | }} | ||
| + | {{ {{tntn|Separator}}}} | ||
Version du 8 août 2019 à 11:13
Description
Make plastic yarn with a bottle cutter
Introduction
Bottles have a significant impact on the environment. 89 billion bottles of plastic water are sold each year worldwide. The United States is the largest consumer of bottled water. The French are major exporters of bottled water. India and China have tripled and doubled their consumption between 2000 and 2005. For the example, according to the Worldwatch institute, which is an independent body, nearly 2 million tons of polyethylene terephthalate (PET) bottles end up in discharge each year in the United States.
In many countries of the world, channels of collection and recycling of these bottles have been set up. For example, Valorplast in France organizes the collection and recycling of these bottles, which are given a second life as pillows, duvets, cushions, pens ... Unfortunately many of them, especially in countries that do not have collection and recycling channels are still in circulation and pile up in open dumps or end up in the oceans. Even in France, where the sectors exist, less than 20% of plastics are recycled.
The crew of Nomade des Mers has discovered in Brazil how important the problem of plastic recycling is. PET, PVC, HDPE ... The types of plastic are numerous, almost all reusable or recyclable, but too few are.
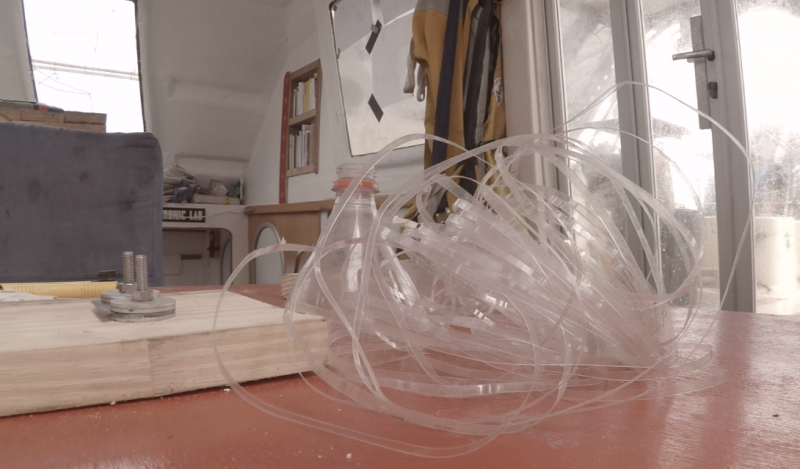
A possible reuse of PET water bottles is the transformation into yarn. Thanks to a very simple tool to manufacture at low cost, it is possible to turn a PET bottle into a plastic yarn that can be used for all kinds of things, especially for making very strong connections. Chairs, crutches, trolleys, tables, tools ... This plastic yarn is a very useful resource and currently almost inexhaustible.Étape 1 - Operation
Drill two holes in the board. In these two holes are bolted bolts, around which are inserted washers. A cutter blade is disposed between the washers.
With this device, we can cut plastic bottles to transform them into yarn of adjustable thickness (the thickness of the yarn is modified with the height of the cutter blade).
On the system used here, the dimensions are slightly different. The manufacturing remains exactly the same, but the dimensions given in this tutorial are optimized compared to those shown in the photos.
Étape 2 - Board drilling
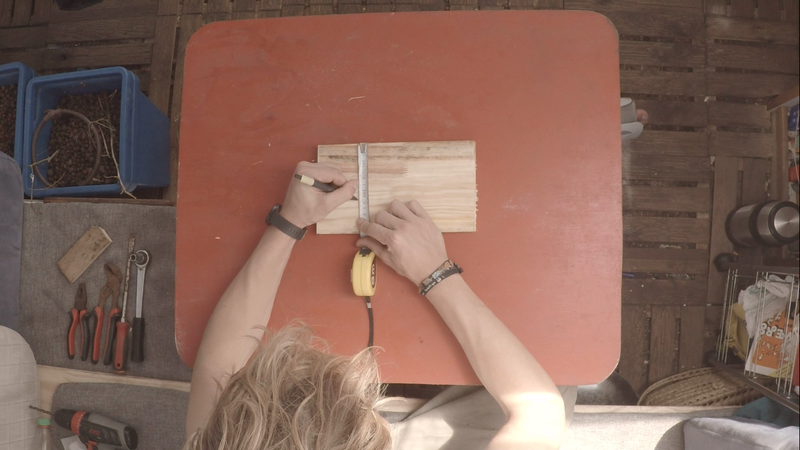
- At about 5 cm from the top edge of the board, mark the location of two holes spaced by 4cm;
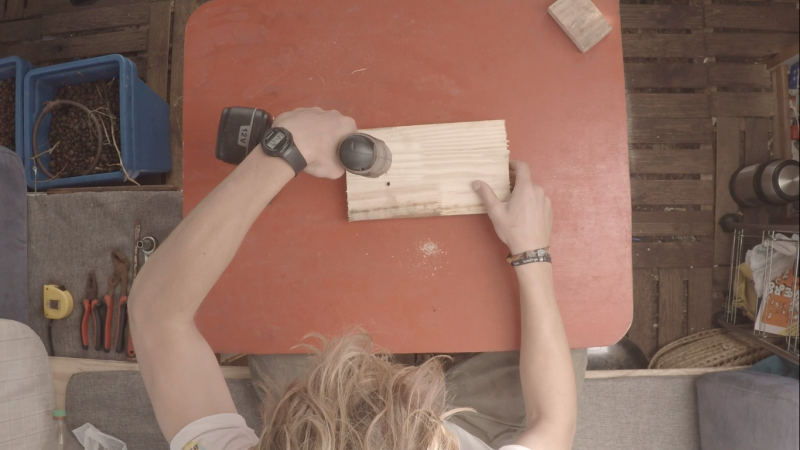
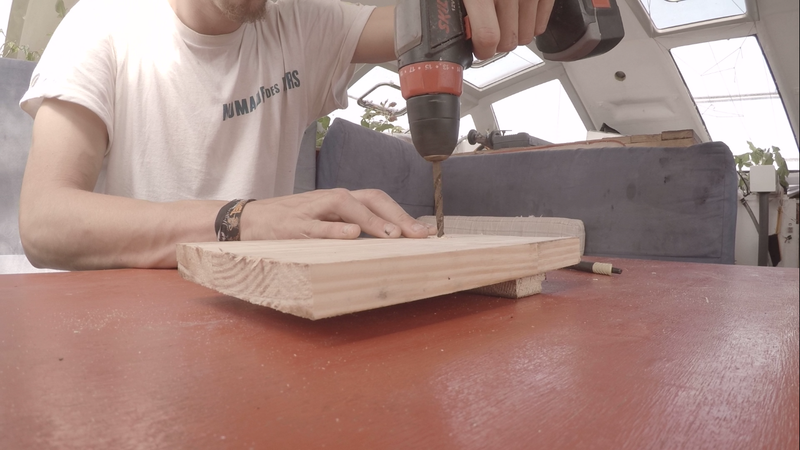
- Dril two holes where indicated with the 5mm drill bit
Étape 3 - Nuts, bolt and washers
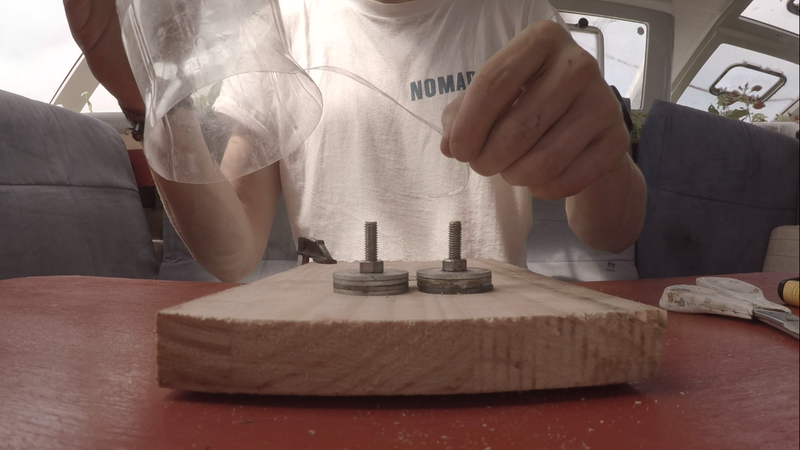
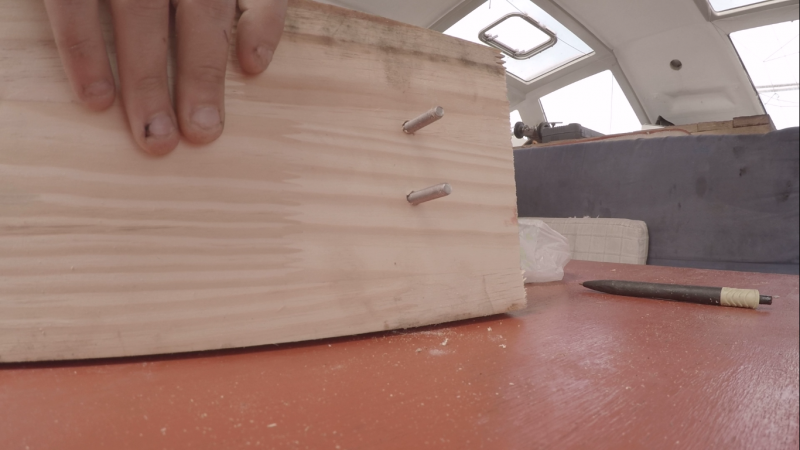
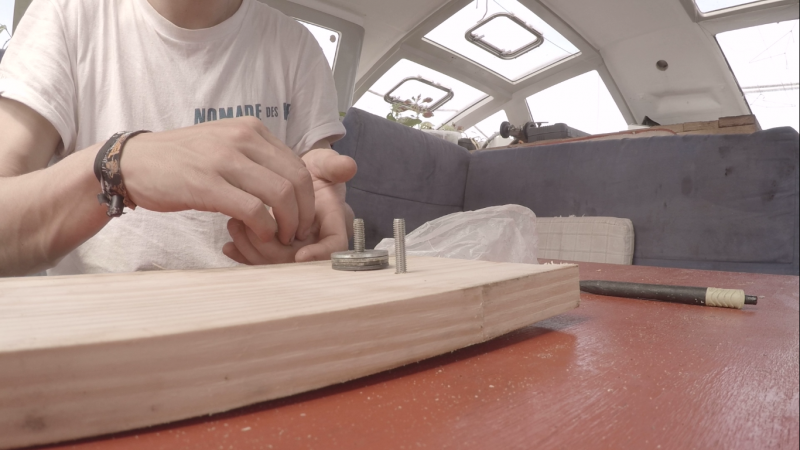
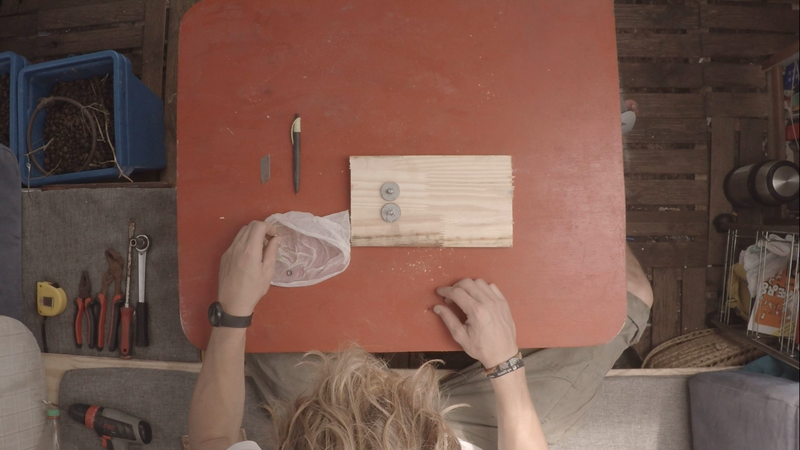
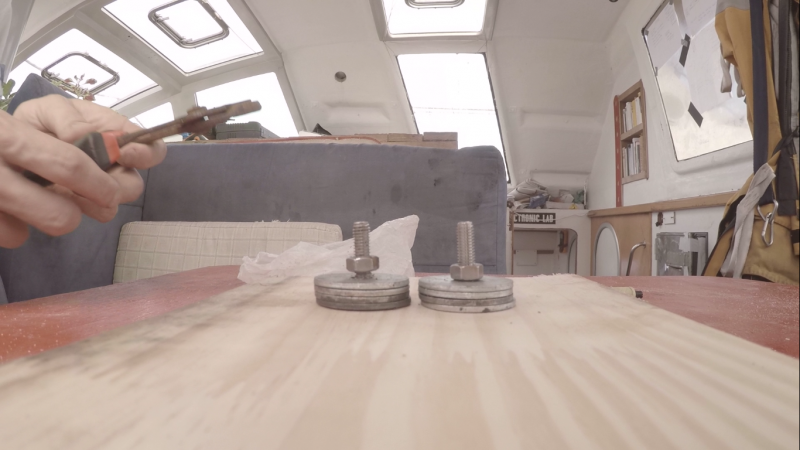
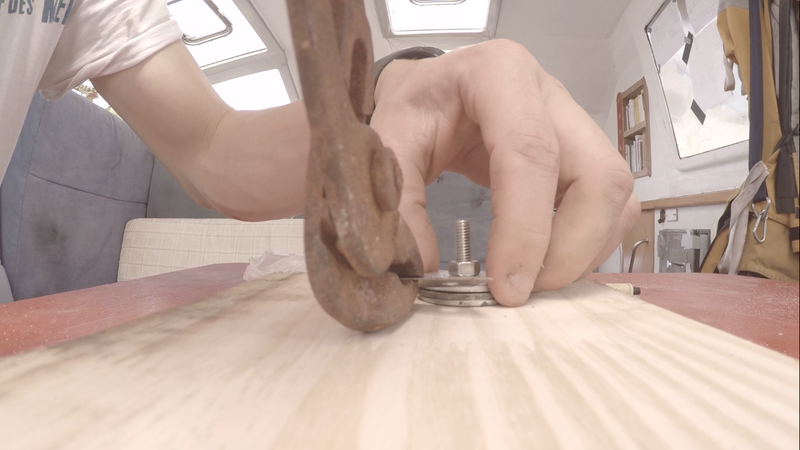
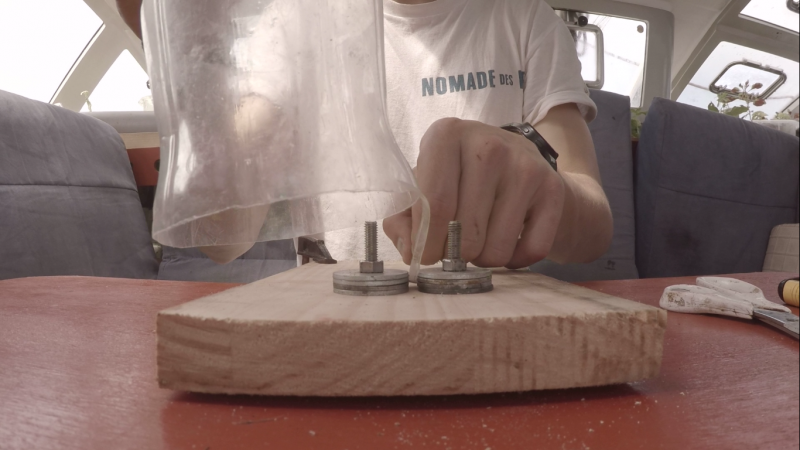
- Insert the screws into the holes;
- File 6 washers on each screw;
- Pre-screw the nuts on the screws.
Étape 4 - Cutter blade
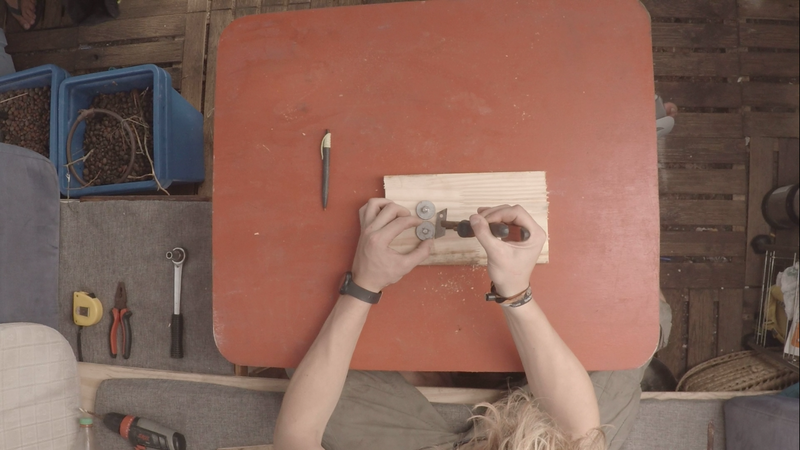
Using a clamp (safety requires), insert the cutter blade between the washers at the same height on each side.
The sharpened side of the bladeis in front of the short side of the board.
Étape 5 - Tightenning
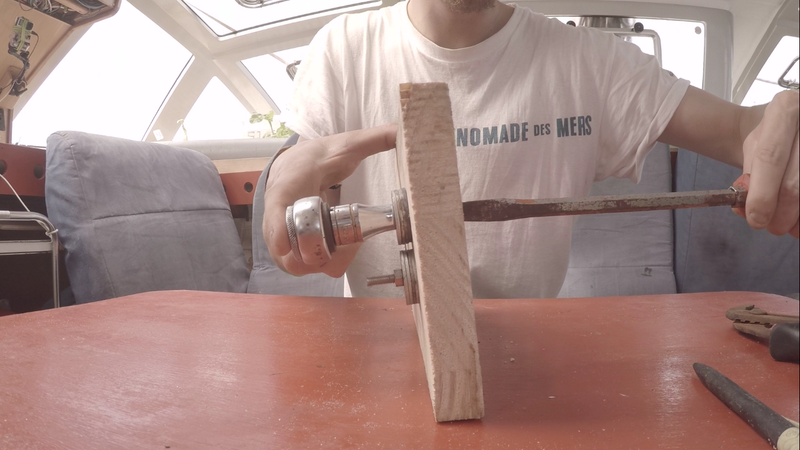
Using the flat screwdriver and the socket wrench, tighten the nuts on the bolts.
Squeeze tight so that the blade does not move.
the bottle cutter is ready!
Étape 6 - Use
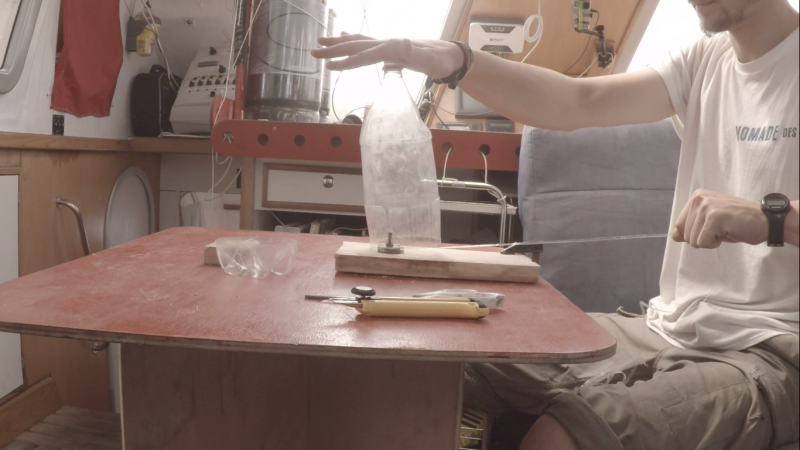
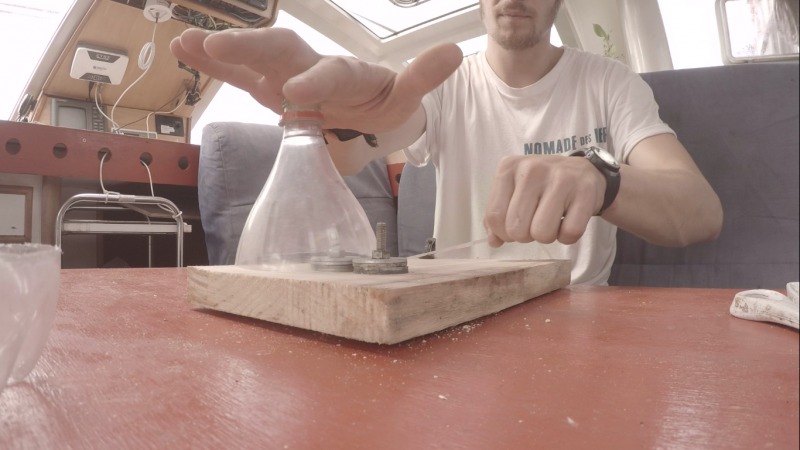
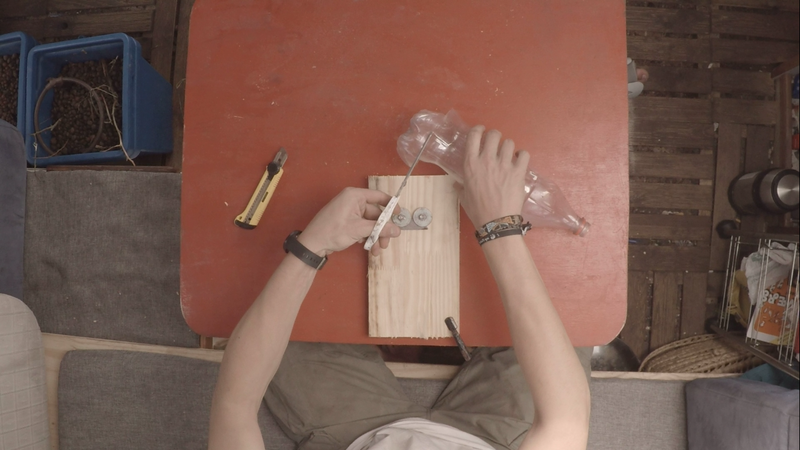
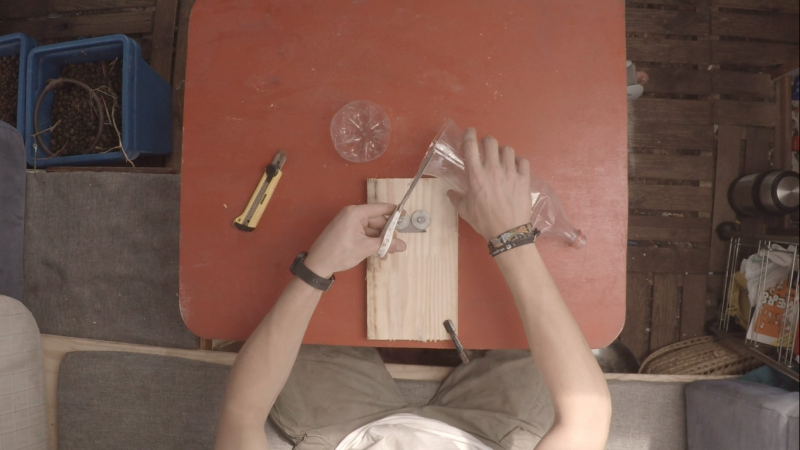
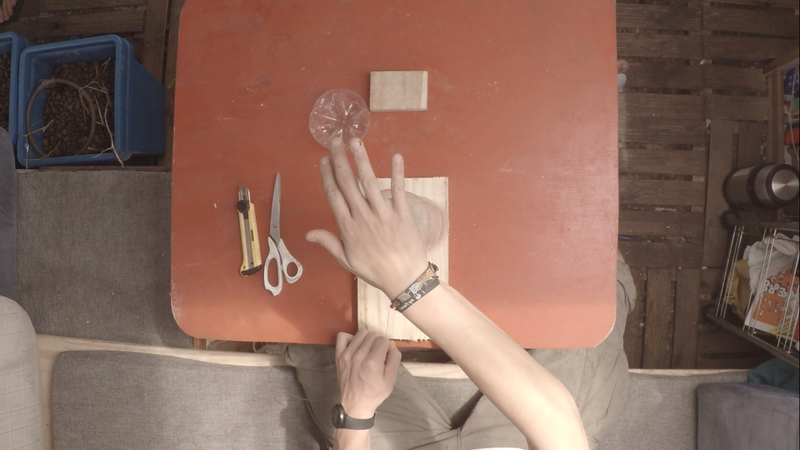
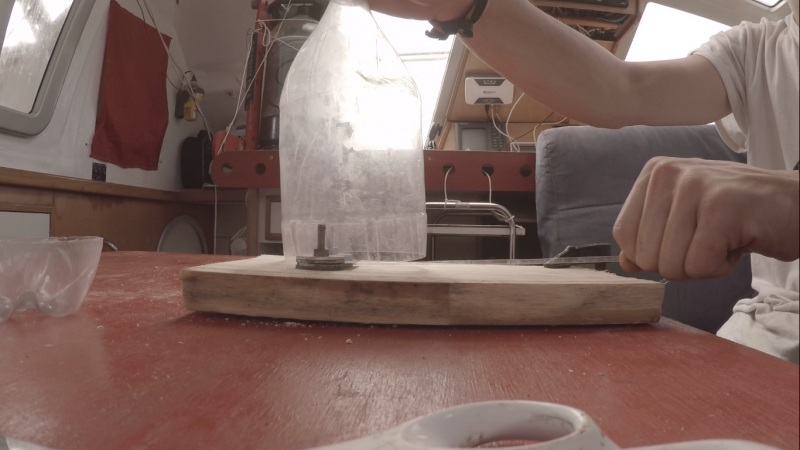
For optimal cutting of PET bottles, remove the bottom of the bottle.
Pre-cut a thin plastic strip at the bottom of the bottle (corresponding to the spacing between the cutter blade and the board).
Insert the thin strip between the cutter blade and the board. Applying slight pressure on the neck of the bottle with one hand, pull the plastic slide with the other hand. With a little practice, it is possible to make a big yarn with the whole bottle.
Étape 7 - Applications
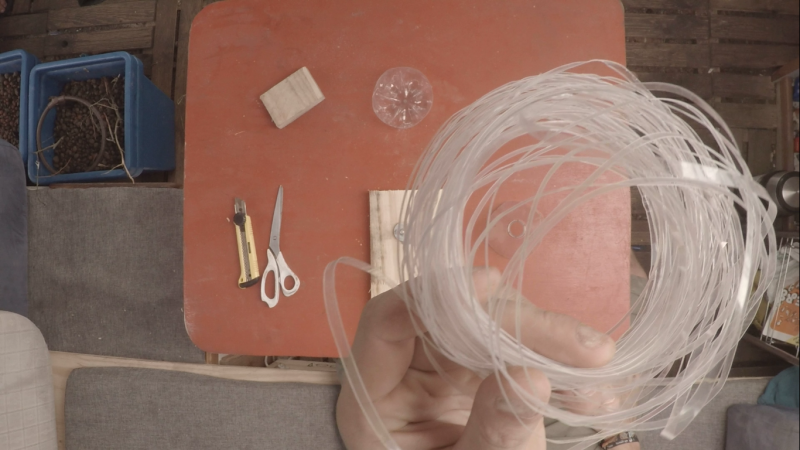
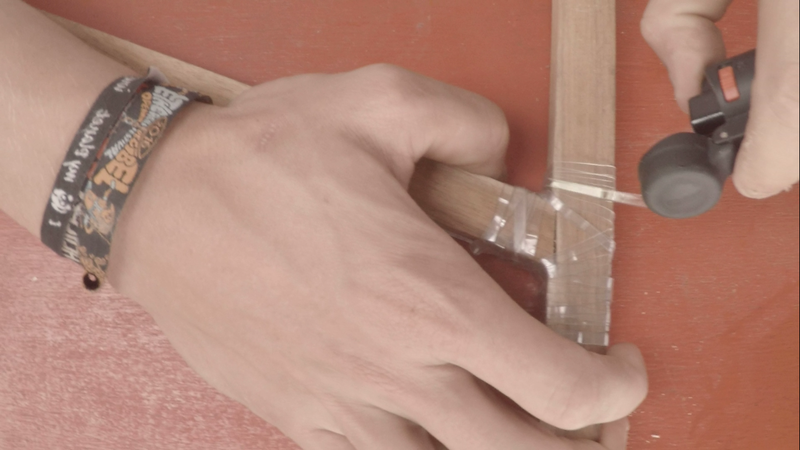
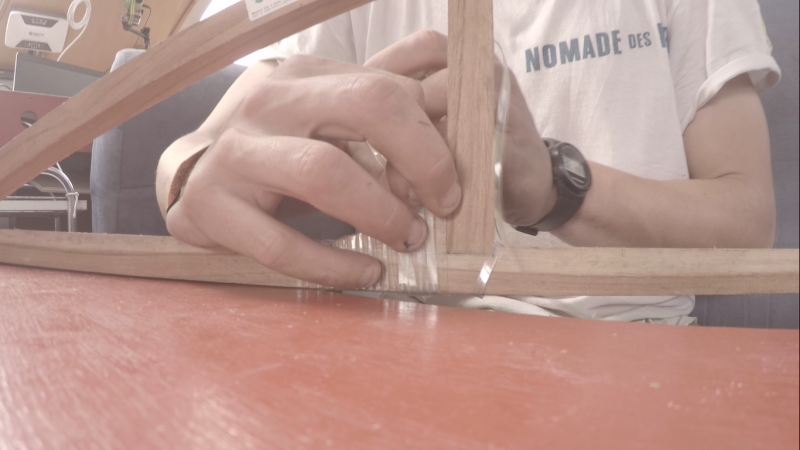
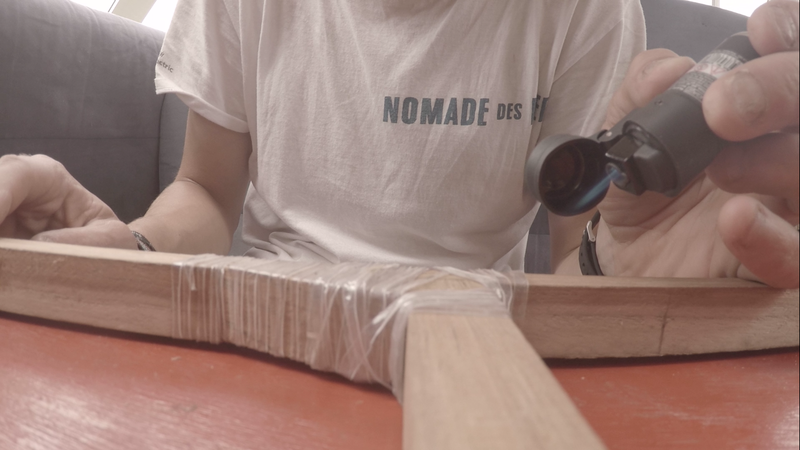
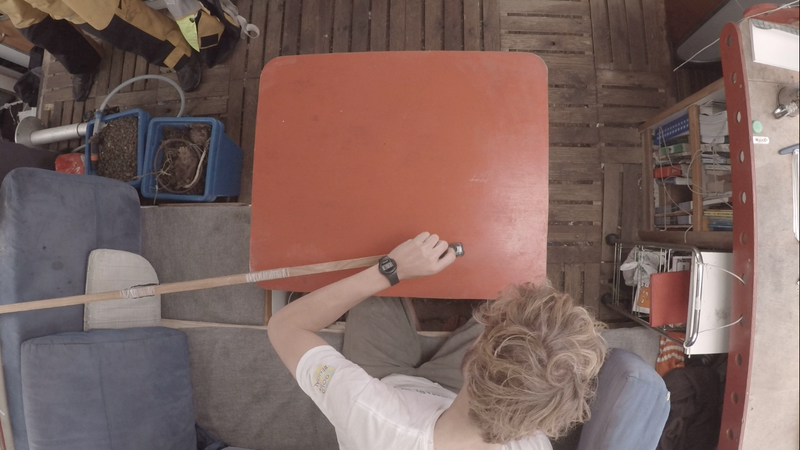
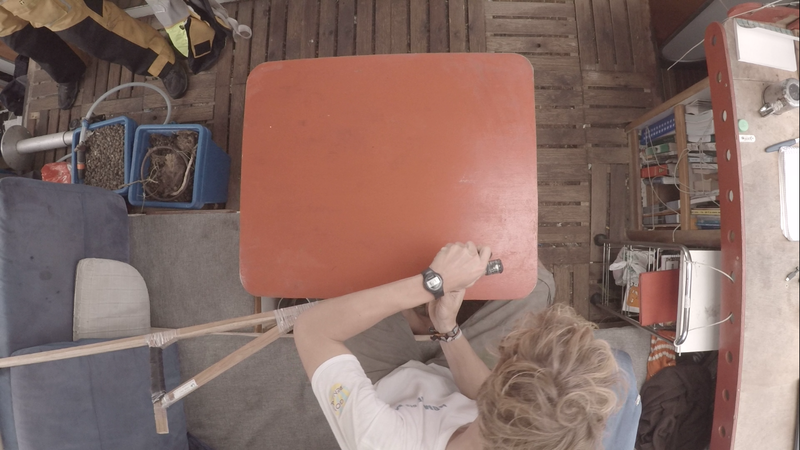
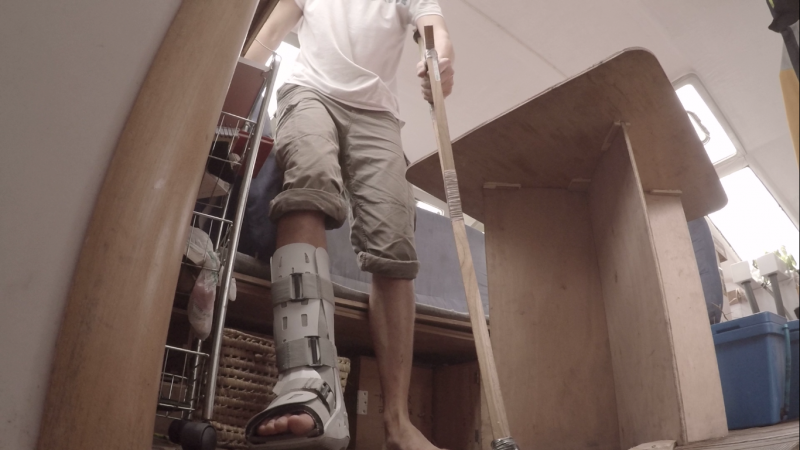
This yarn is very useful for making objects of all kinds. When heated, the wire retracts and offers a very satisfactory resistance.
On the boat, the crew of Nomade des Mers and its partners made all sorts of objects thanks to the plastic yarn: parts of the fridge without energy Pimp my Fridge, low-tech crutch ...
Opposite the manufacture of a crutch. Plastic offers sufficient strength to support the weight of a man.
Notes et références
This low-tech was inspired by the work of many DIYers, especially on YouTube.
sources: http://www.utsumi.com.br/pet/English/filetador/index.html
https://www.youtube.com/watch?v=hQeeJEpBYsg
Feel free to comment, share, and enhance the tutorial information useful for its improvement.
Check out the Low-tech Lab's Biblilowtech !
Published
 Français
 English
 Deutsch
 Español
 Italiano
 Português