(Page créée avec « *Pour two buckets of soil mortar at the location of the secondary hotplates. *Insert the molds at the hotplate sites. You could use two plastic bowls of the same diameter... ») |
(Page créée avec « Filling the Cooker ») |
||
| Ligne 163 : | Ligne 163 : | ||
}} | }} | ||
{{Tuto Step | {{Tuto Step | ||
| − | |Step_Title= | + | |Step_Title=Filling the Cooker |
|Step_Content=* Remplir le vide avec du mortier de terre jusqu'au niveau des bordures du four. Laisser des espaces vides au niveau de la chambre de combustion et à l'intérieur des moules de comales secondaires. Veillez également à ne pas obstruer le conduit de cheminée. | |Step_Content=* Remplir le vide avec du mortier de terre jusqu'au niveau des bordures du four. Laisser des espaces vides au niveau de la chambre de combustion et à l'intérieur des moules de comales secondaires. Veillez également à ne pas obstruer le conduit de cheminée. | ||
* Marquer les mesures exactes des 3 comales et découper le contour à l'aide d'une truelle de maçon. | * Marquer les mesures exactes des 3 comales et découper le contour à l'aide d'une truelle de maçon. | ||
Version du 31 août 2020 à 19:49
Description
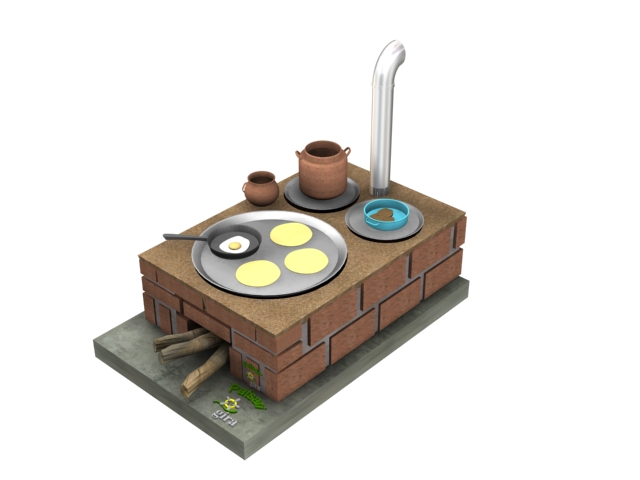
A firewood-saving stove model developed in the 2000s in Mexico by GIRA (Interdisciplinary Group of Rural-Appropriate Technology). Simple to construct, cost-effective and hygienic, the Patsari stove has spread widely among rural communities in Mexico.
Sommaire
Sommaire
- 1 Description
- 2 Sommaire
- 3 Introduction
- 4 Video d'introduction
- 5 Étape 1 - Construction Plans
- 6 Étape 2 - Stove Base
- 7 Étape 3 - Formwork Construction
- 8 Étape 4 - Implementing Mortar
- 9 Étape 5 - Building the Edges of the Stove
- 10 Étape 6 - Constructing the Combustion Chamber
- 11 Étape 7 - Filling the Base
- 12 Étape 8 - Positioning the First Hotplate and Smoke Venting Tunnels
- 13 Étape 9 - Positioning the Secondary Hotplates
- 14 Étape 10 - Filling the Cooker
- 15 Étape 11 - Circuit d'évacuation des fumées
- 16 Étape 12 - Installation des comales
- 17 Étape 13 - Finitions et pose de la cheminée
- 18 Étape 14 - Recommendations d'utilisation
- 19 Notes et références
- 20 Commentaires
Introduction
The Patsari stove adapted and improved upon the Lorena model which was developed in Guatemala and Mexico in the 1980s. It was designed and distributed by the Grupo Interdisciplinario de Tecnología Rural Apropriada (GIRA) located in Patzcuaro, Michoacan, Mexico. During 20 years of fieldwork in collaboration with users of the Lorena design, several improvements have been incorporated into the Patsari model:
- The exterior is made of brick in order to increase its lifespan
- The construction process uses molds for standardization purposes, to ensure the correct dimensions of the combustion chamber
- An optimized combustion chamber
- Secondary burners that maximize heat transfer to multiple cooking surfaces
- Chicanes redirect the hot gases to the secondary burners.
- The hotplates (comals) are sealed to prevent smoke from entering the room.
- A prefabricated chimney base for easier cleaning
In the Purhe'pecha indigenous peoples' language, Patsari means "the one who takes care of;" the stove is designed to take care of the health of the users as well as the overall environment. The main advantages of this cooker are:
- 50% reduction in fuel consumption compared to an open fire.
- 66% reduction in the concentration of particles and toxic gases (CO) in indoor air compared to an open fire.
- Reduced eye irritation and respiratory illness from cooking fumes.
- Saves time and money; because less wood is consumed, less time is spent collecting wood and less money is spent purchasing it.
- Built with local materials, soil and sand.
- Easily adaptable, simple-to-use on a daily basis.
Youtube
Matériaux
-
Outils
-
Étape 2 - Stove Base
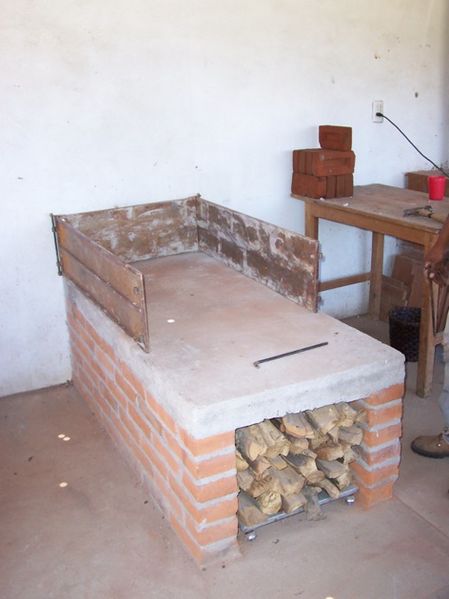
Before constructing the Patsari stove, you need a solid, stable base, not only for greater comfort for the user, but also for the sake of safety around children and pets. In general, the base measures 1m wide by 1.20m long and 60cm high; these measurements ensure sufficient space for placing kitchen utensils, for example.
Construction Materials
The base can be constucted with available household materials or other materials that are easily affordable. Some examples of potential materials are:
- adobe
- concrete
- brick
- metal
These bases can be filled in completely or hollow. The hollow base has more advantages, because it can be used to store and dry wood, or for storing dishes.
Étape 3 - Formwork Construction
- On the base, a form is made in which to pour the mixture. This mold will be made of four wooden planks (covered with form release oil) or metal sheets with four metal bars for adjustment.
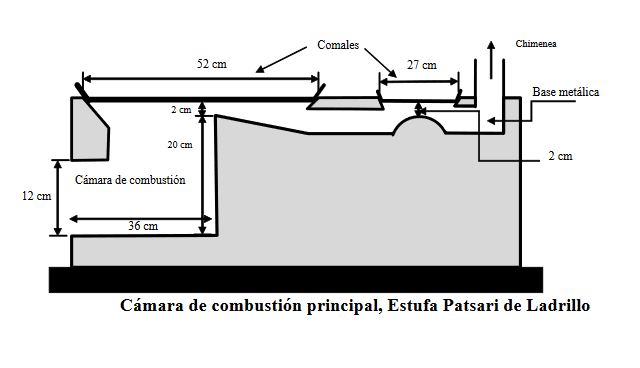
- Recommended dimensions: 80cm x 100cm x 27.5cm
If the stove is to be built in a corner of the house or near a wall, leave a gap (about 5cm) for the pieces of the formwork to be removed.
Étape 4 - Implementing Mortar
- Implementing the basic mortar:
- Mix 3 buckets of commercial grade sand (20L) + 1 bucket of cement (Multibat type)
- Mix well with a shovel
- Slowly add 5 to 10 liters of water while mixing continuously
This mixture will be used to bond the bricks.
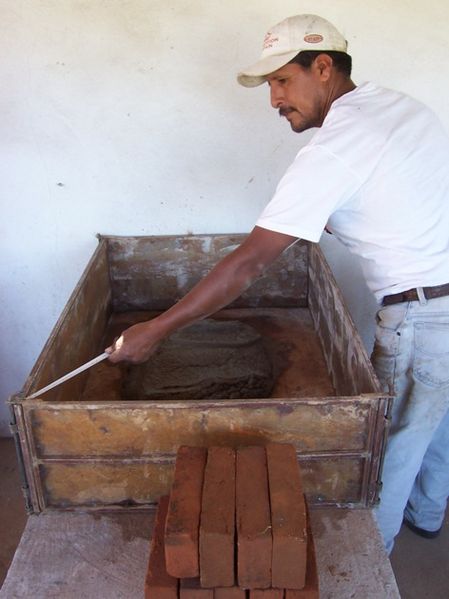
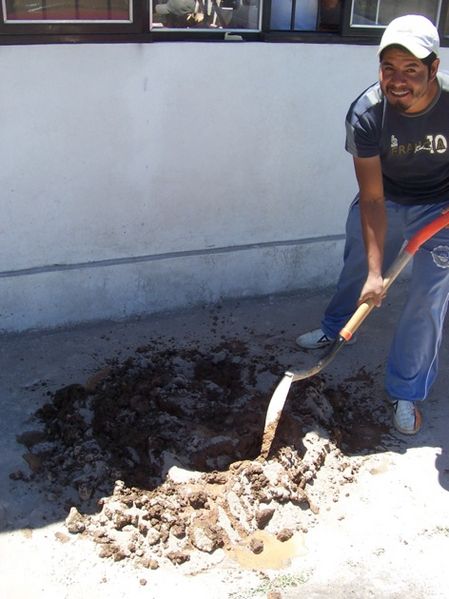
2. Making the clay mortar
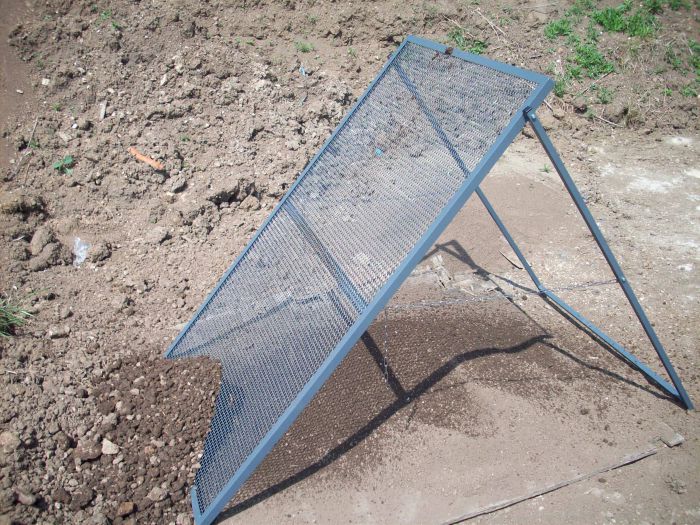
- Mix 2 buckets of commercial grade sand + 1.5 buckets of soil (sifted finely)
- Stir well until mixture is a uniform color.
- Add 3-4 scoops of mortar.
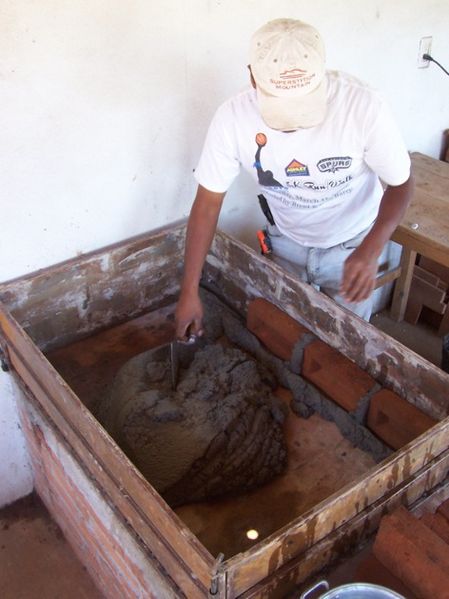
- Add 5-10 liters of water, pouring little by little into the mixture. It is recommended to stir the mixture, so that it is evenly moist, until it reaches a sticky consistency. To see if the mixture has the right amount of moisture, take a handful and see if it runs off your hand; if not, it is ready to use.
This mixture will be used for filling the interior of the cooker.
Étape 5 - Building the Edges of the Stove
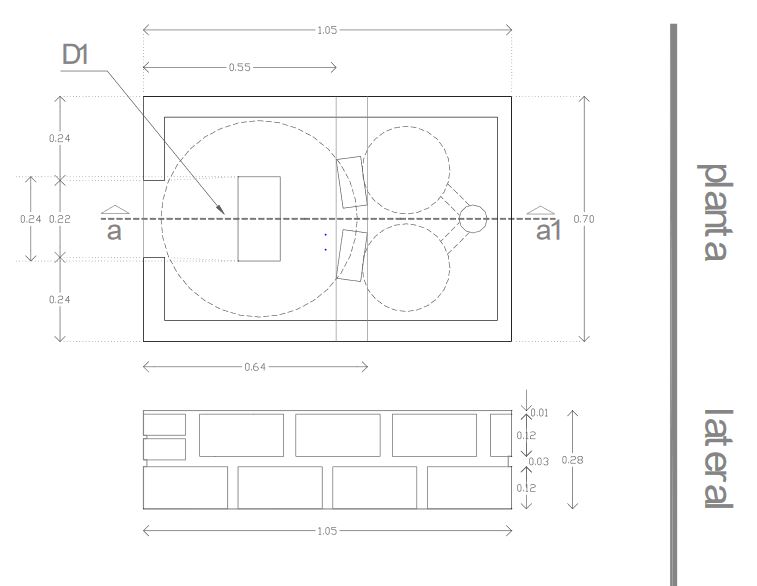
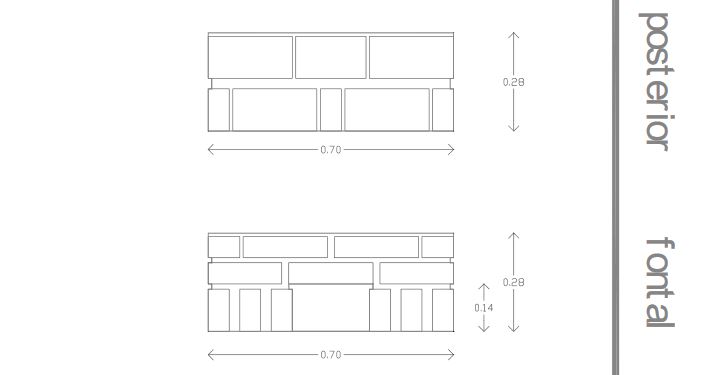
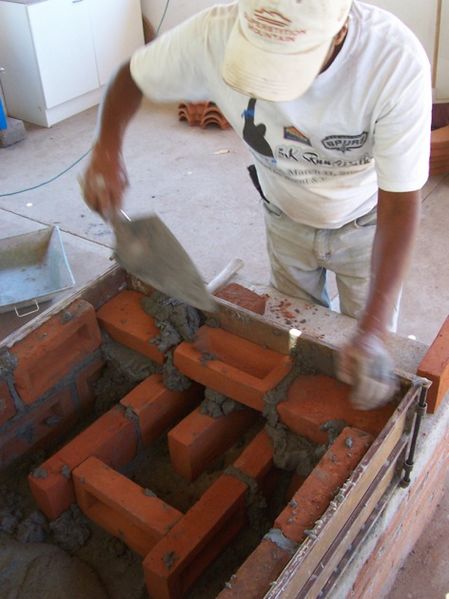
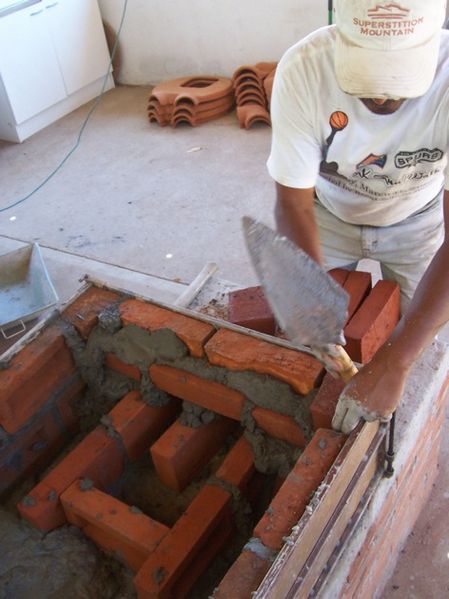
- Dip the bricks in a bucket of water and assemble them with mortar according to the plans above. The recommended thickness of mortar is usually 2cm.
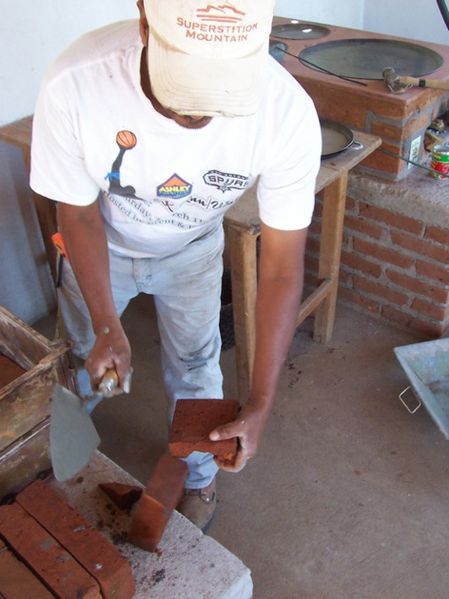
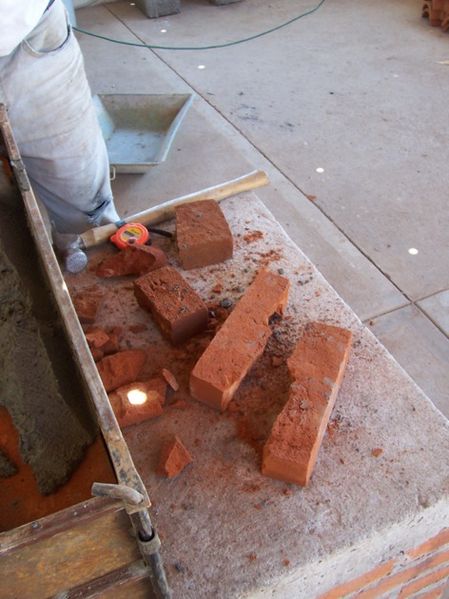
- Split some bricks as needed to adapt them to the correct dimensions.
Étape 6 - Constructing the Combustion Chamber
- Dip the bricks in a bucket of water and assemble them with mortar according to the plans above. The recommended thickness of mortar is usually 2cm.
- On the last row, break 1 brick in half lengthwise to create a border that will wedge the "comal" (hotplate) in place.
Étape 7 - Filling the Base
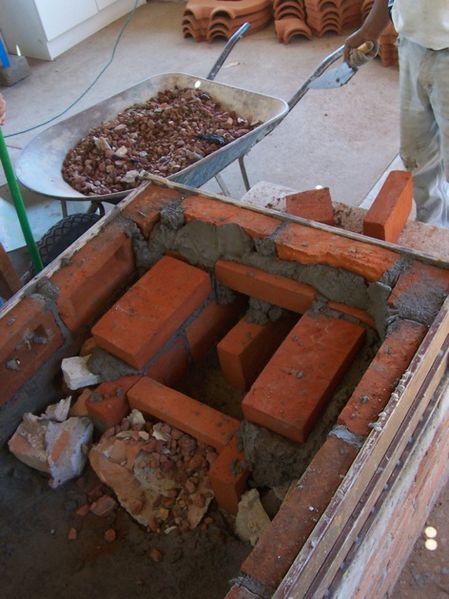
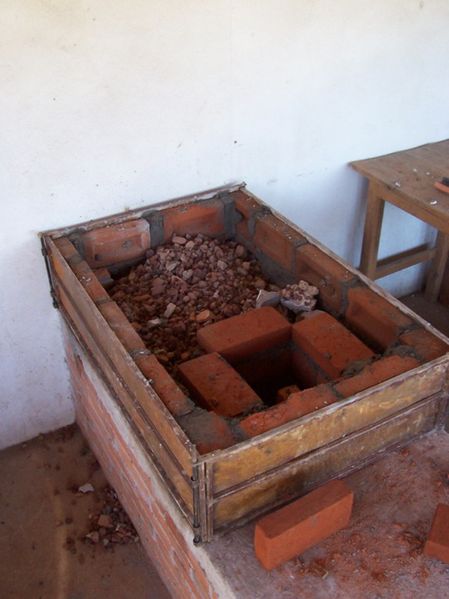
- Fill the space around the combustion chamber with gravel to a level height.
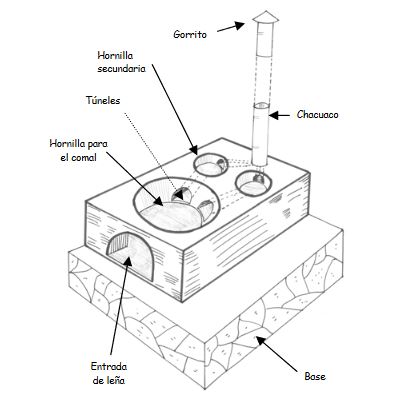
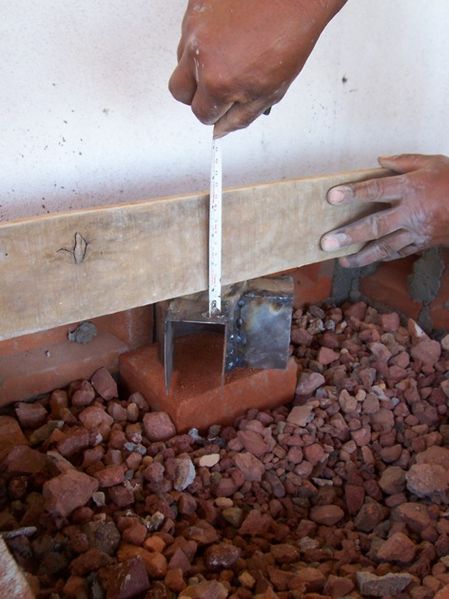
- At the end of the stove, position the "chacuaco" (smoke venting piece)
- Cover the gravel with a thin layer of sand to fill in the gaps. Smooth it over.
Étape 8 - Positioning the First Hotplate and Smoke Venting Tunnels
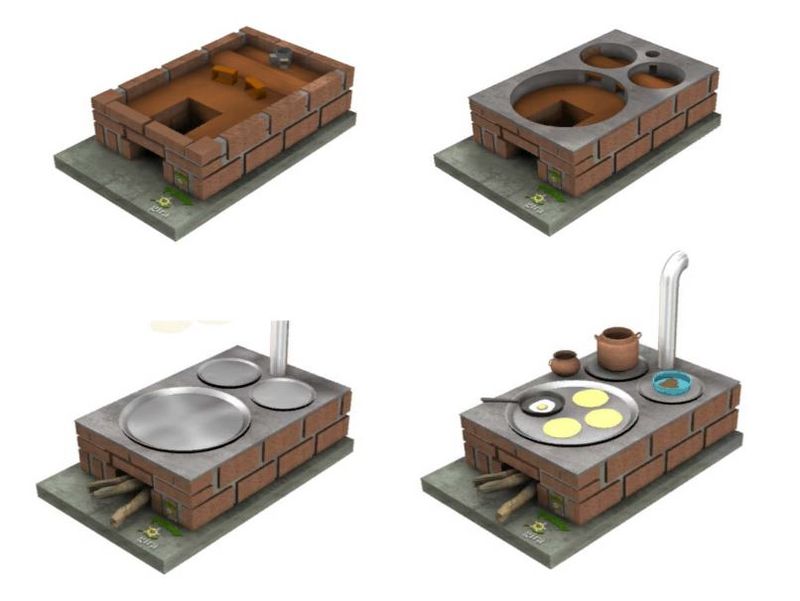
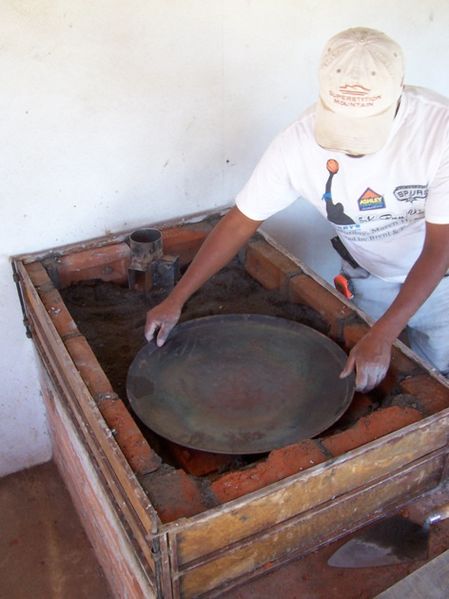
- Position the large hotplate. Make sure it is in the center of the stove.
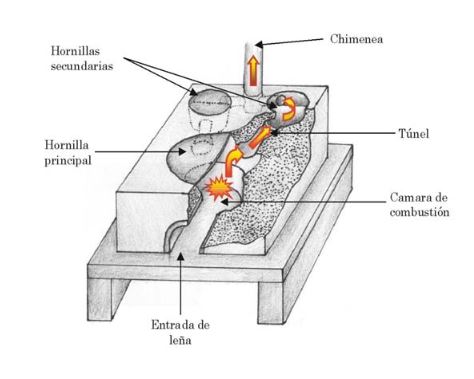
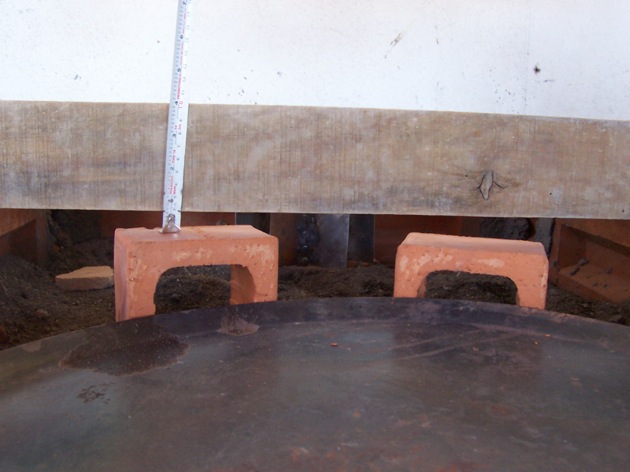
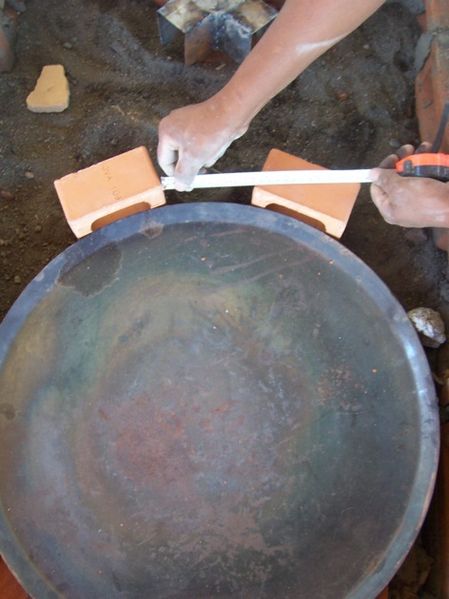
- Position two hollow bricks, two sections of aluminum, or two tin cans (note that tin cans risk oxidizing quite quickly), against the hotplate at the exit of the combustion chamber so as to form two smoke venting tunnels. Make sure to leave a height of 2cm between the top of the tunnel and the edges of the cooker.
Étape 9 - Positioning the Secondary Hotplates
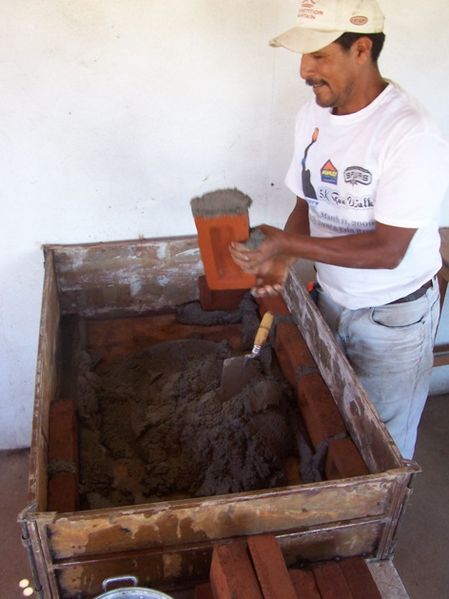
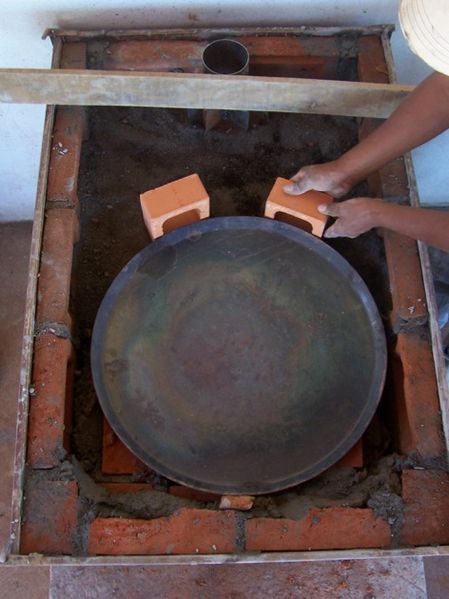
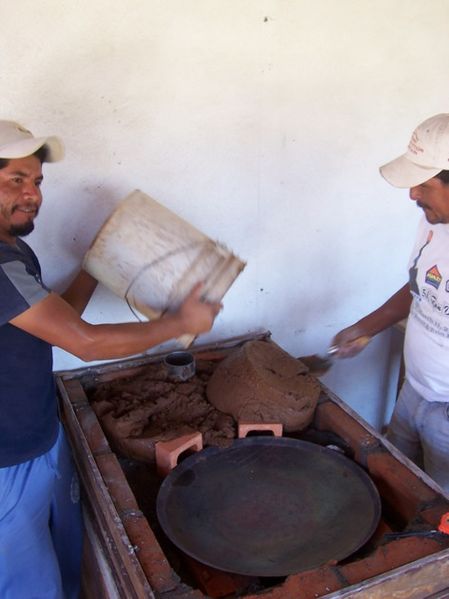
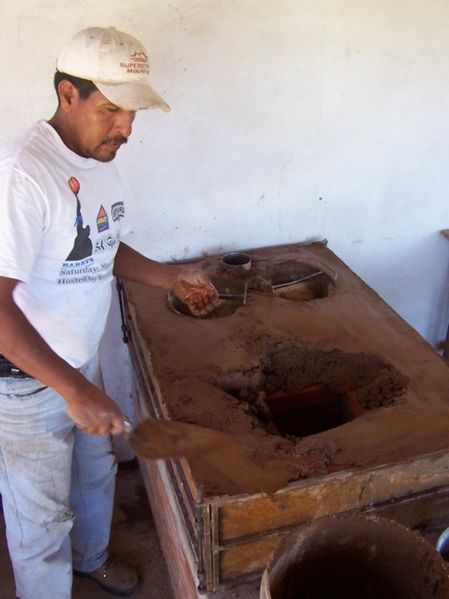
- Pour two buckets of soil mortar at the location of the secondary hotplates.
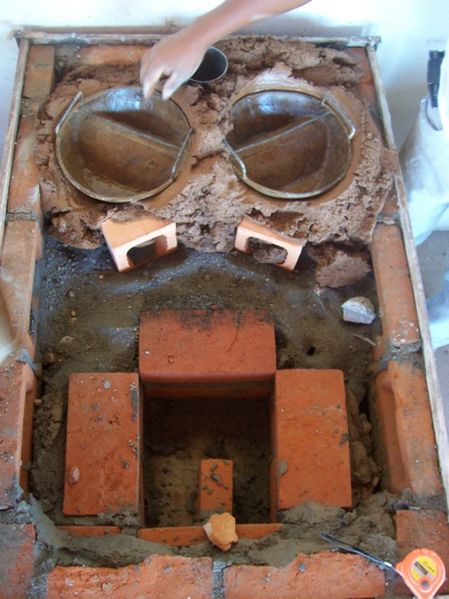
- Insert the molds at the hotplate sites. You could use two plastic bowls of the same diameter as the hotplates + two pieces of wood instead of molds.
- Make sure the hotplates are level with the edges of the stove.
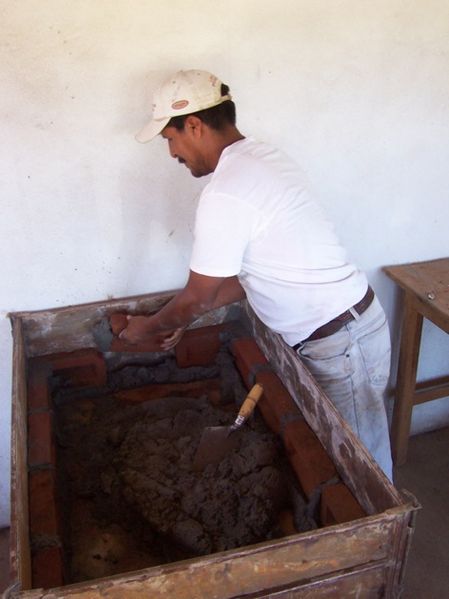
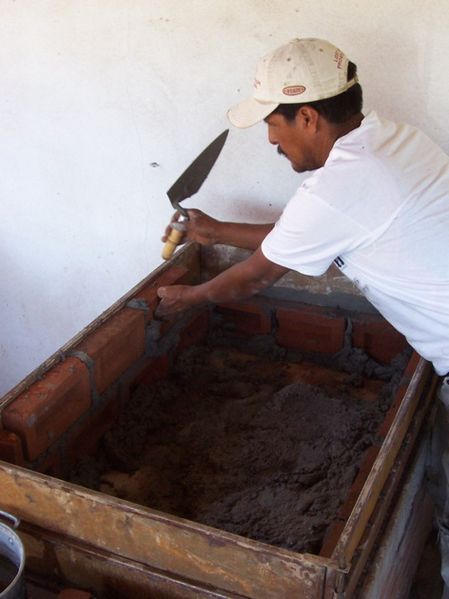
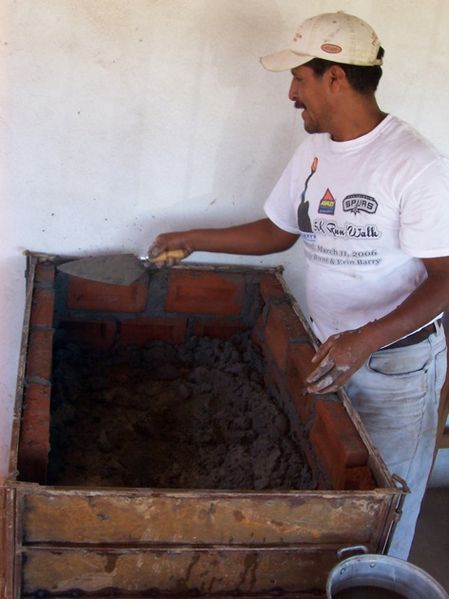
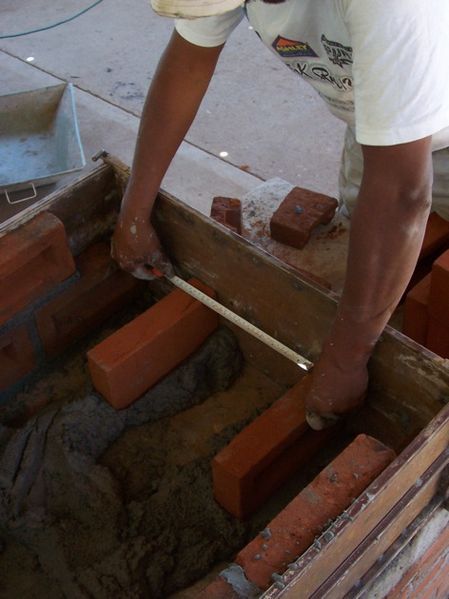
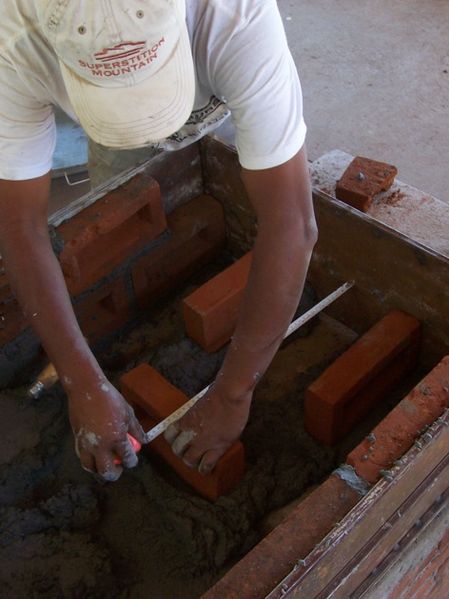
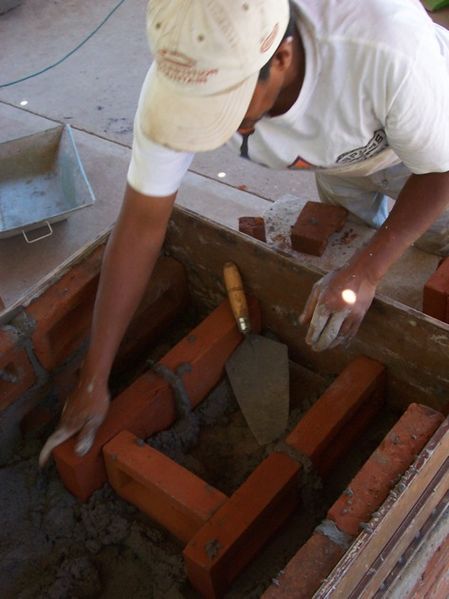
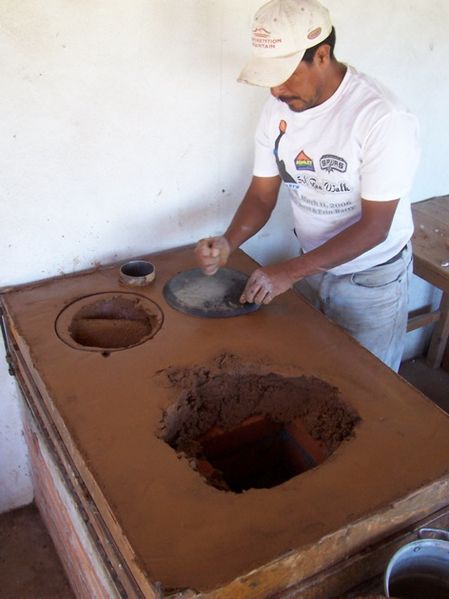
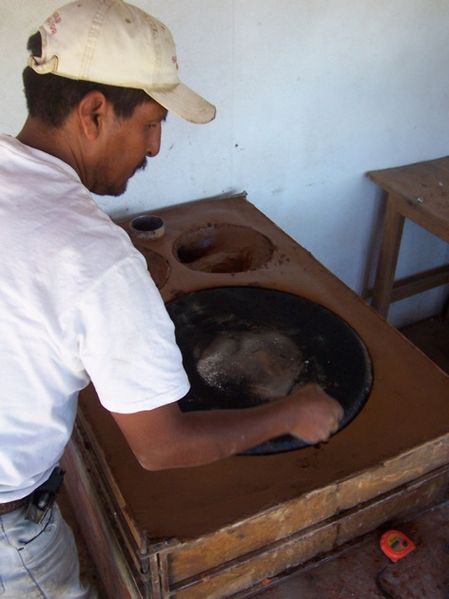
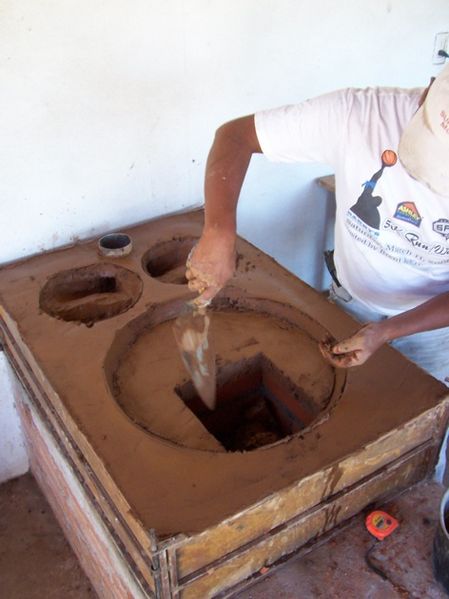
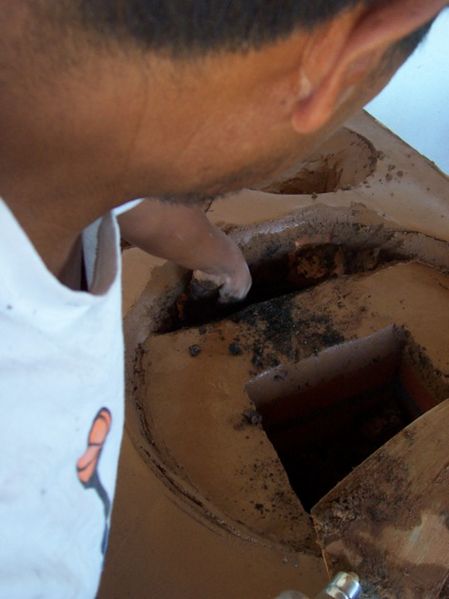
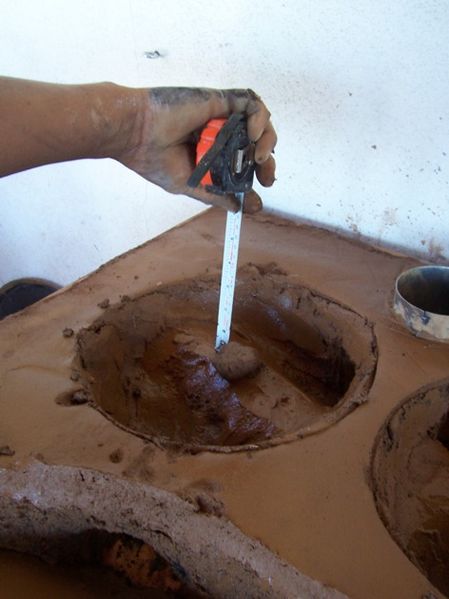
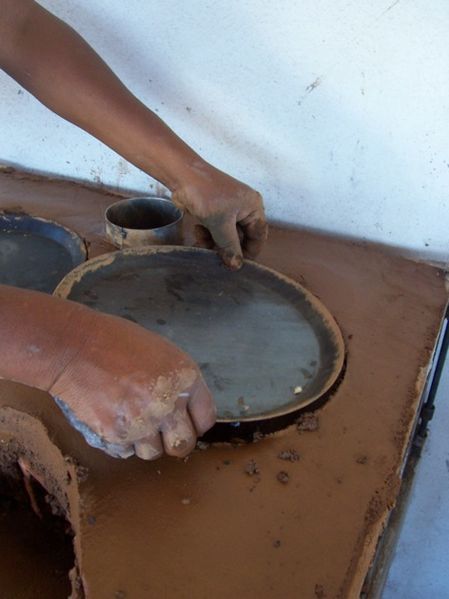
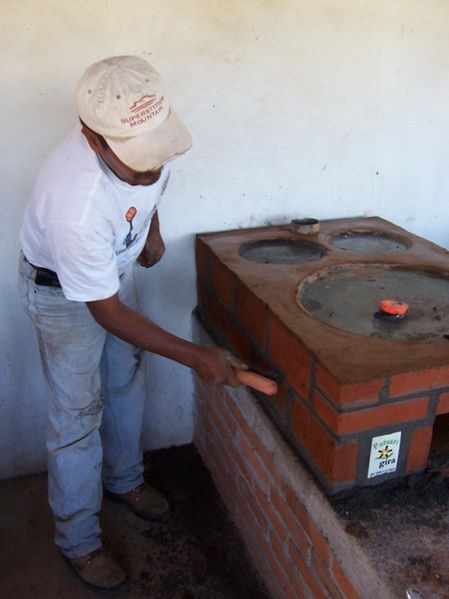
Étape 10 - Filling the Cooker
- Remplir le vide avec du mortier de terre jusqu'au niveau des bordures du four. Laisser des espaces vides au niveau de la chambre de combustion et à l'intérieur des moules de comales secondaires. Veillez également à ne pas obstruer le conduit de cheminée.
- Marquer les mesures exactes des 3 comales et découper le contour à l'aide d'une truelle de maçon.
- Veillez à ne pas obstruer la chambre de combustion.
Étape 11 - Circuit d'évacuation des fumées
- A l'aide d'une truelle, creuser dans le mortier de façon à libérer l'accès aux tunnels d'évacuation des fumées et créer un circuit entre la chambre de combustion et les deux comales secondaires.
- S'assurer de laisser un passage de 2cm de hauteur entre le comal et la bosse dans les chambres secondaires.
- Creuser un passage entre les chambres secondaires et la base du conduit de cheminée.
Étape 13 - Finitions et pose de la cheminée
- Donner un bel aspect lissé à la surface en l'humidifiant un peu et en lissant à la truelle.
- Retirer avec précaution le coffre autour de la cuisinière.
- Au besoin, lisser et frotter les joints des bordures de la cuisinière pour une meilleure finition.
- Insérer les tubes sur le conduit d’évacuation des fumées de façon à former la cheminée.
- Le temps de séchage complet de la cuisinière est d'environ 1 semaine.
Étape 14 - Recommendations d'utilisation
- Bien répartir le bois à l'entrée de la chambre de combustion de manière à avoir une température uniforme sur le comal principal.
Environ une fois par semaine:
- Nettoyer les cendres dans la chambre de combustion.
- Nettoyer les tunnels d'évacuations des fumées.
- Nettoyer le conduit de la cheminée.
Notes et références
- Manuel de construction de la Estufa Patsari en espagnol : http://www.stoves.bioenergylists.org/files/ManualPatsari.pdf
- Tutoriels vidéos pouvant aider à la construction : https://www.youtube.com/watch?v=ecqqWO5hqKs et https://www.youtube.com/watch?v=MohCoH5ODkI
- Plans de construction de la Estufa Patsari : http://bioenergylists.org/files/NuevaEstufaPatsari_GIRA.pdf
- Etude de performance de la Estufa Patsari (espagnol) : http://ecotec.cieco.unam.mx/Ecotec/wp-content/uploads/From-cookstoves-to-cooking-systems.-The-integrated-program-on-sustainable-household-energy-use-in-Mexico.pdf
- Tutoriel de construction de la Estufa Lorena (ancien modèle) en espagnol : https://www.crim.unam.mx/patrimoniobiocultural/sites/default/files/PL6.pdf
- Etude sur l'amélioration de la Estufa Lorena vers la Estufa Patsari: http://www.bioenergylists.org/estufasdoc/Rodolfo_Diaz/DeLorena-a-Patsari.pdf
Published


 Français
 English
 Deutsch
 Español
 Italiano
 Português