Description
This technology allow to heat water thanks to solar energy
Sommaire
Sommaire
Introduction
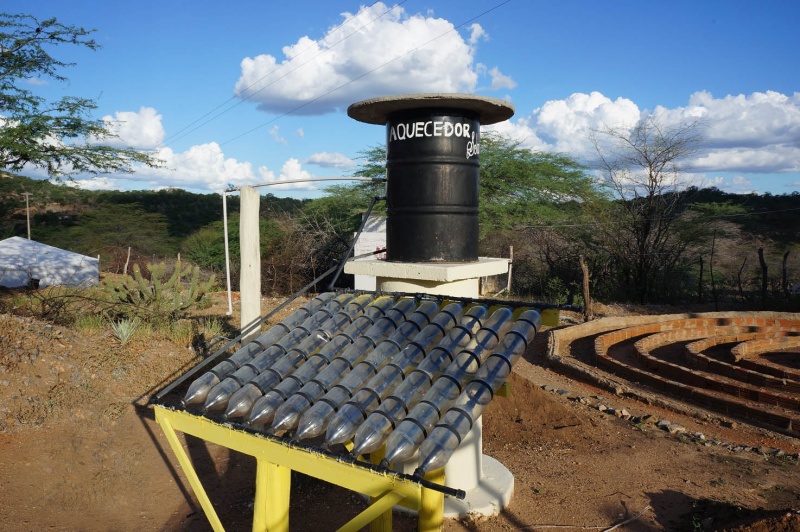
The water heater describe below is inspire by the model present in the SERTA ( service of Alternative Technology) in Brasil
It works perfectly in a tropical or hot climat. It hasn't been tested in a temperate region yet
Matériaux
- Pipe pvc 20mm
- Elbow pipe pvc 20mm
- T pvc 20mm
- Adhesive tape for plumbing
- Plastic bottle
- Reservoir
Outils
- Glue pvc
- Sand paper
- Rag
Étape 1 - The way it work
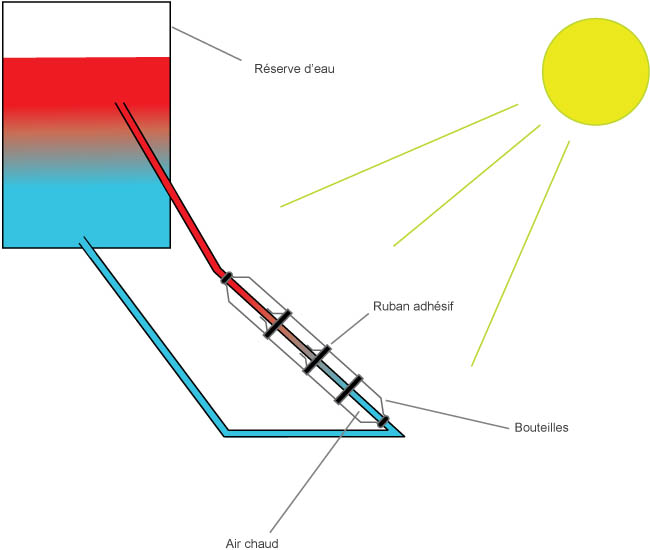
This system work thanks to a thermal expansion concept
When the water heat, it fills more space. So it density is weaker dans the cold water one. So, hot water will always be above the cold water.
Explanation of the system:
The water at the bottom of the reservoir (cold) go down by simple gravity until it reach the end of the system. Little by little, at the contact with the hot air confine in the bottle (greenhouse effect), the water get warmer and by consequences go up in the pipe before going back to the reservoir
Étape 2 - Construction of the reservoir
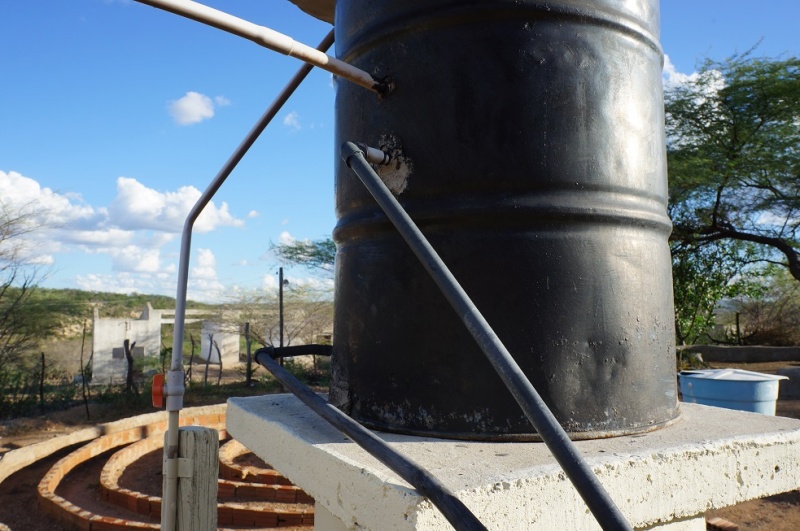
In your reservoir, you will have to make hole for the passage of the pipes
If you have a metal reservoir, it is easier to use metal pipe that you will weld. Otherwise, it is also possible to use pvc pipes fixed with cement.
For a plastic or resin reservoir, the best solution is to use pass-walls. It is also possible with glue or special resin to seal the pipes
Make :
- A hole a the bottom of the reservoir for the exit of cold water
- A hole a little bit upper for the arrival of hot water
- An other hole more higher for the exit of hot water, the one you will use.
Finally, you could choose between making a hole at the top of your reserve for the inlet of cold water, or simply getting the water by a pipe that you will put on the side of the reservoir.
Étape 3 - The heating chamber
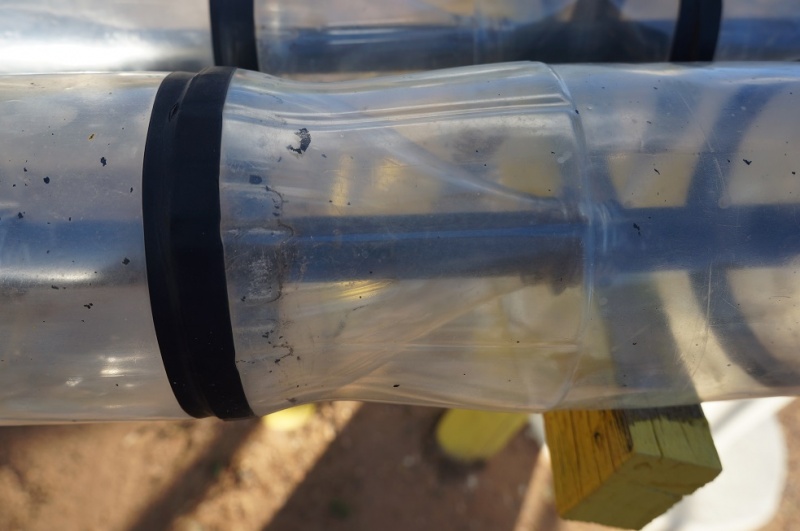
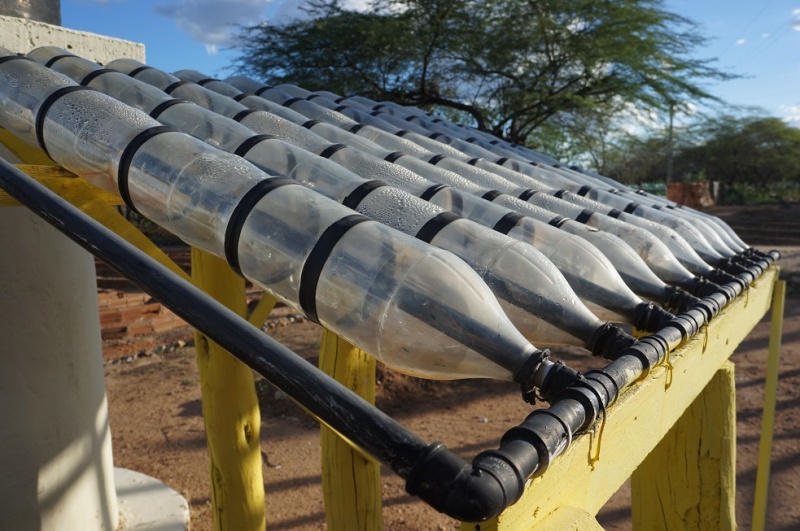
The creation of the chamber is very easy : cut the bottom of the bottle in a way that you could slot them together (picture).
The more complicated step is to slot at the base of your pile two bottle in the opposite direction, in a way that the edge of the chamber are neck.
/!\ Wait before sealing with the adhesive tape !
Étape 4 - assembly of lines
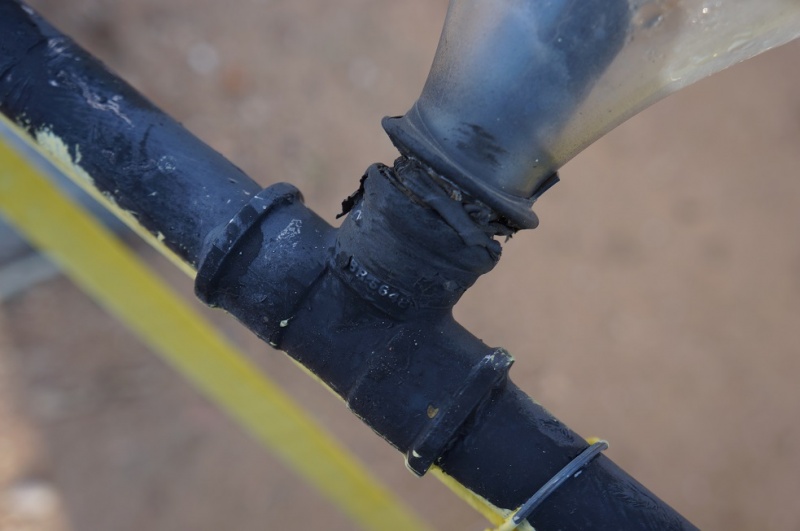
Start by passing the tubes in the chambers created before, and cutting them in way that when you slot the T in the tube, the neck of the bottle be almost in contact with the T.
Stick the T on the tubes (the chamber around the tube) then use adhesive tape to fix the bottle between them, and the necks at the end of the T pipes.
A line must be realized with elbow pipe to close the system.
How to glue :
   Frost with sand paper with thin grain the part you have to assembling.
Clean it with a rag soak in stripper.
Apply the glue at the entry of the female part and on the whole male part.
Slot immediately completely, without twist.
Clean the glue drip.
The drying time is about 1h, but if the water is here to be consume, it is advised to wait between 12 and 24 hours for the toxic solvant to disappear.
Étape 5 - Assemblage
Étape 6 - Support
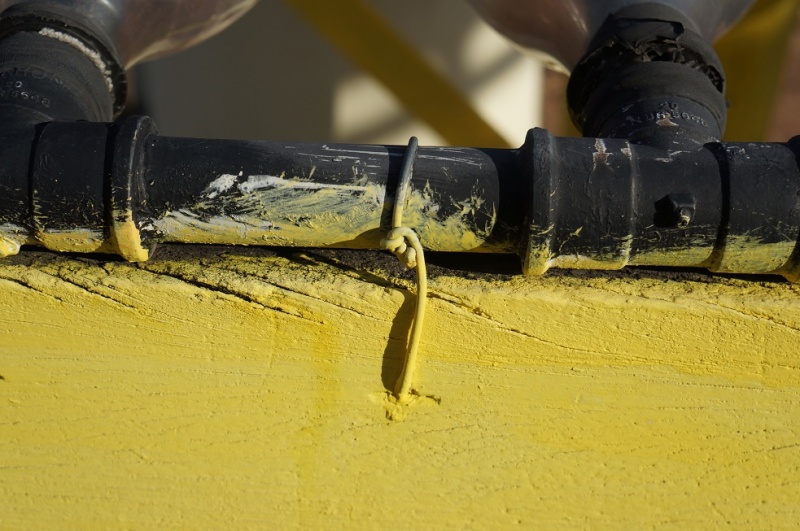
Créez un support (en bois par exemple) comportant deux lignes de hauteurs différentes, qui formeront une pente douce. Seule les lignes de tubes comportant les T seront en contact et fixés (ici à l'aide de fil de fer) à l'armature du support.
Le ligne haute doit être plus basse que le fond du réservoir ! Il est recommandé de mettre le réservoir bien en hauteur.
Étape 7 - Relier
Reliez à l'aide des tubes la ligne de T du bas au trou situé proche du fond du réservoir, et la ligne de T du haut au trou du milieu.
Collez !
Étape 8 - Plus
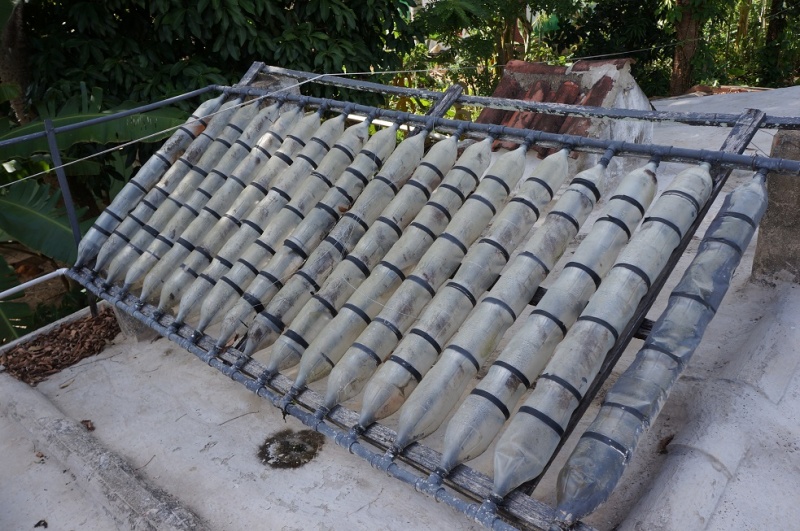
Vous pouvez réaliser ce système avec autant de chambres chauffante que vous le voulez.
La longueur des chambres peut aussi être modifiée, mais plus il y aura de liaisons, plus il y aura de possibles fuites de chaleur.
Il faut orienter le système afin qu'il prenne le plus le soleil au court de la journée (orienté SUD).
(autre exemple de réalisation en photo)
Notes et références
Système installé au SERTA (Serviço de Tecnologia Alternativa) au Brésil
Yes
 Français
 English
 Deutsch
 Español
 Italiano
 Português