(Page créée avec « Lever's completion ») |
(Page créée avec « '''Inspired by :''' the canacla by Jacques Vanhercke ») |
||
| (17 révisions intermédiaires par 2 utilisateurs non affichées) | |||
| Ligne 55 : | Ligne 55 : | ||
{{Tuto Step | {{Tuto Step | ||
|Step_Title=Lever's completion | |Step_Title=Lever's completion | ||
| − | |Step_Content= | + | |Step_Content=Gather 3 transversal battens from the wooden box (1 short / 2 long) et use them to make a T-shaped lever (around 25cm - 10 inch long). Attach those 3 pieces with some glue. |
|Step_Picture_00=Point_d'eau_économe_et_autonome_IMG_20190601_183901.jpg | |Step_Picture_00=Point_d'eau_économe_et_autonome_IMG_20190601_183901.jpg | ||
}} | }} | ||
{{Tuto Step | {{Tuto Step | ||
| − | |Step_Title= | + | |Step_Title=Anchoring the nail |
| − | |Step_Content= | + | |Step_Content=Block the nail between the heads of the 2 screws and let the tip of the nail stick out a bit (don't forget to file the tip of the nail) |
| − | + | Glue / screw the small wooden plank on the batten (at the level of the bottom quarter) | |
|Step_Picture_00=Point_d'eau_économe_et_autonome_canacla_2.jpg | |Step_Picture_00=Point_d'eau_économe_et_autonome_canacla_2.jpg | ||
}} | }} | ||
{{Tuto Step | {{Tuto Step | ||
| − | |Step_Title= | + | |Step_Title=Lever positioning |
| − | |Step_Content=* | + | |Step_Content=*Retrieve a corner of the wooden box and glue/screw it on the batten, over the small plank. |
| − | * | + | *Position the level on the top leaving the space of a child's hand. Mark and drill 2 small holes in the lever at the height of the nail. |
| − | * | + | *Screw the lever on the corner of the wooden box and insert the iron wire in the holes. Twist the ends of the iron wire around the nail. (NB: The iron wire must be tensed). |
|Step_Picture_00=Point_d'eau_économe_et_autonome_canacla_installation_levier.jpg | |Step_Picture_00=Point_d'eau_économe_et_autonome_canacla_installation_levier.jpg | ||
|Step_Picture_01=Point_d'eau_économe_et_autonome_canacla_sch_ma_fil.jpg | |Step_Picture_01=Point_d'eau_économe_et_autonome_canacla_sch_ma_fil.jpg | ||
}} | }} | ||
{{Tuto Step | {{Tuto Step | ||
| − | |Step_Title= | + | |Step_Title=Installation of the hose and bottle |
| − | |Step_Content=* | + | |Step_Content=* Cut the bottom of the bottle. Drill its cap to a diameter slightly inferior than the hose. Insert the hose through and let it go a centimeter beyond the cap. |
| − | * | + | * Position the bottle on the batten over the lever. Adjust the length of the hose. |
| − | * | + | * Attach the bottle with 2 iron wires, blocked by 4 screws. |
| − | * | + | * Let the hose go below the nail and keep it on the side of the plank with a staple. Put the elastic in place (around the nail and screw) and set its tension such as the hose is pinched. |
|Step_Picture_00=Point_d'eau_économe_et_autonome_canacla_sch_ma_bouteille.jpg | |Step_Picture_00=Point_d'eau_économe_et_autonome_canacla_sch_ma_bouteille.jpg | ||
|Step_Picture_01=Canacla_canacla_5L.jpg | |Step_Picture_01=Canacla_canacla_5L.jpg | ||
}} | }} | ||
{{Tuto Step | {{Tuto Step | ||
| − | |Step_Title= | + | |Step_Title=Finishing touches |
| − | |Step_Content= | + | |Step_Content=Depending on the location where we want to install the water source, we can add a container (bowl, bucket, ...) fitted with a hose to make it similar to a sink. We can also collect the dirty water in a bucket in order to water plants or clean dry toilets (in our case). |
| − | + | It is also possible to decorate the small water source in order to hide bottles and make it more esthetic. A casing in wooden boxes will be easy enough and quite fine-looking. | |
|Step_Picture_00=Point_d'eau_économe_et_autonome_canacla_f_te_.jpg | |Step_Picture_00=Point_d'eau_économe_et_autonome_canacla_f_te_.jpg | ||
|Step_Picture_01=Canacla_Canacla_toilettes.jpg | |Step_Picture_01=Canacla_Canacla_toilettes.jpg | ||
| Ligne 93 : | Ligne 93 : | ||
}} | }} | ||
{{Notes | {{Notes | ||
| − | |Notes=''' | + | |Notes='''BricoLowtech association :''' |
bricolowtech@gmail.com | bricolowtech@gmail.com | ||
| Ligne 99 : | Ligne 99 : | ||
https://www.facebook.com/BricoLowtech/ | https://www.facebook.com/BricoLowtech/ | ||
| − | ''' | + | '''Inspired by :''' the canacla by Jacques Vanhercke |
http://canacla.com/blog/?page_id=115 | http://canacla.com/blog/?page_id=115 | ||
Version actuelle datée du 9 avril 2020 à 21:00
Description
Thrifty water point to make your children love washing their hands
Introduction
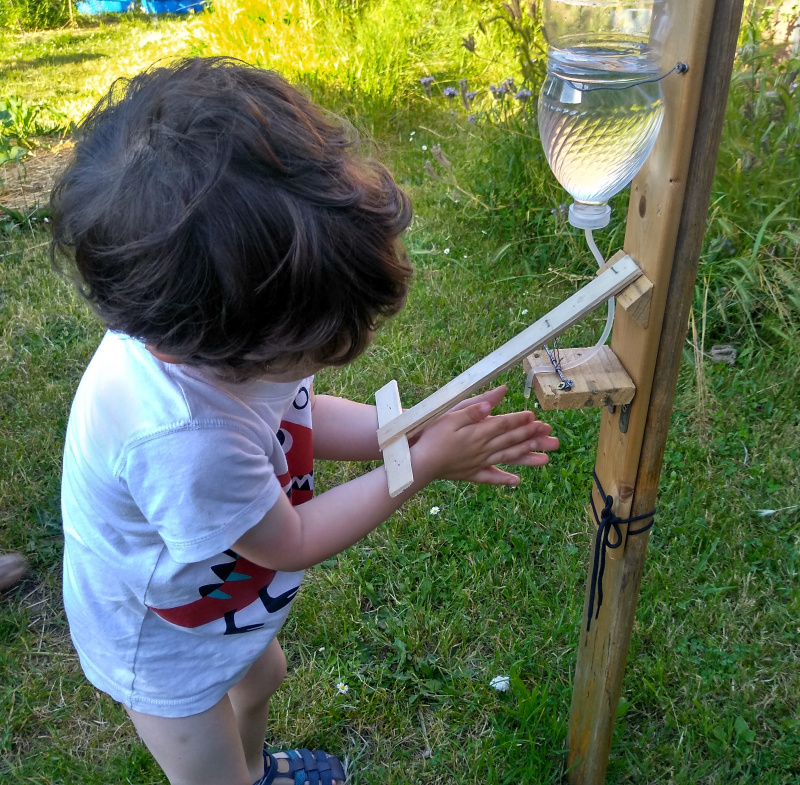
This tiny water point entirely made of recuperation materials allows children to wash their hands in the most thrifty, self-directed and hygienic way.
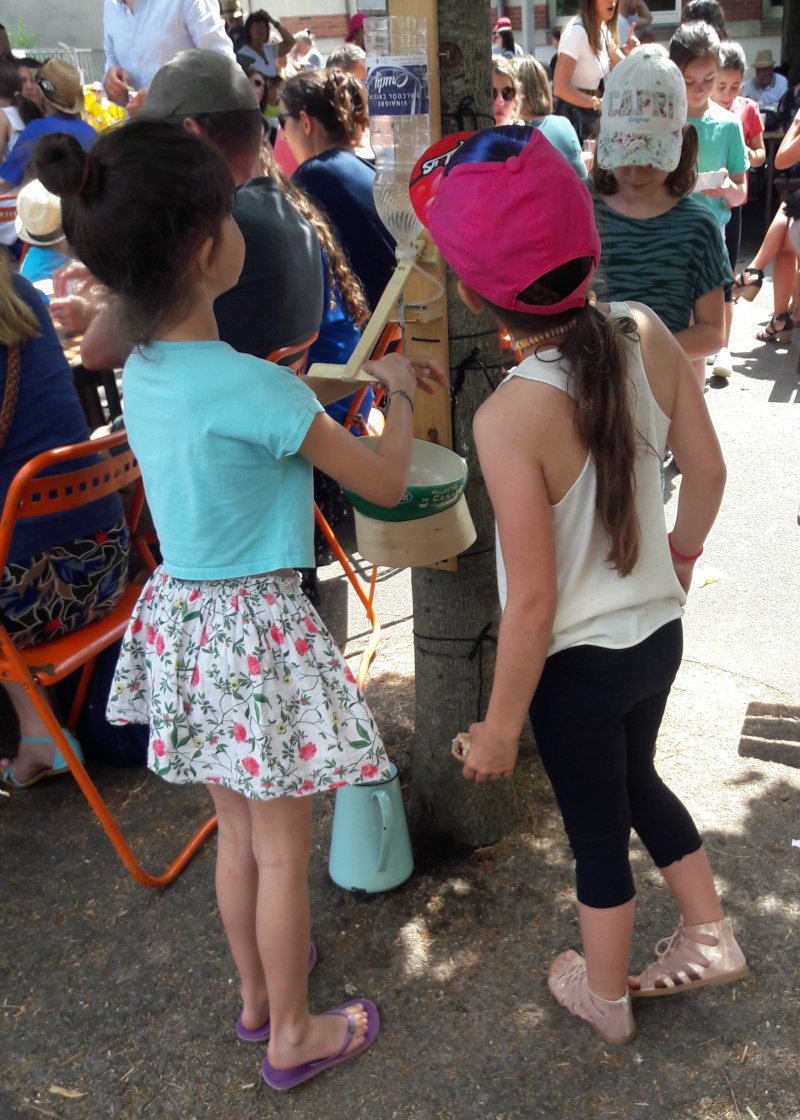
Instead of turning on the tap and using a lot of water, your child will lift a lever with his/her own wrists and use a water trickle, just enough to wet her/his hands and rince them.
Inspiration : This system was freely inspired by the "CANACLA", made with clay in Dakar (http://canacla.com/blog/?page_id=115).
The word "Canari" in western Africa names a traditional vessel made of clay. Jacques Vanhercke used one of those traditional container to invent the "Canacla" (For "Canari" plus "Clapet", which means "valve" in french). It's indeed because of a valve and of a thin hose which simply goes through the wall of the canari that the water gently flows out the Canacla, right when your wrists open the valve by lifting up the lever (Therefore : Your hands don't touch anything !)
Interest by this concept, we thought about an easy to make solution, that our 3 years old son could also use on his own. Though we built this system with wastes gathered around our neighbourhood (plastic bottles, wooden boxes, battens, etc.). We replaced the valve with a crimped hose to make the whole system even easier to build.
What can I use it for ?
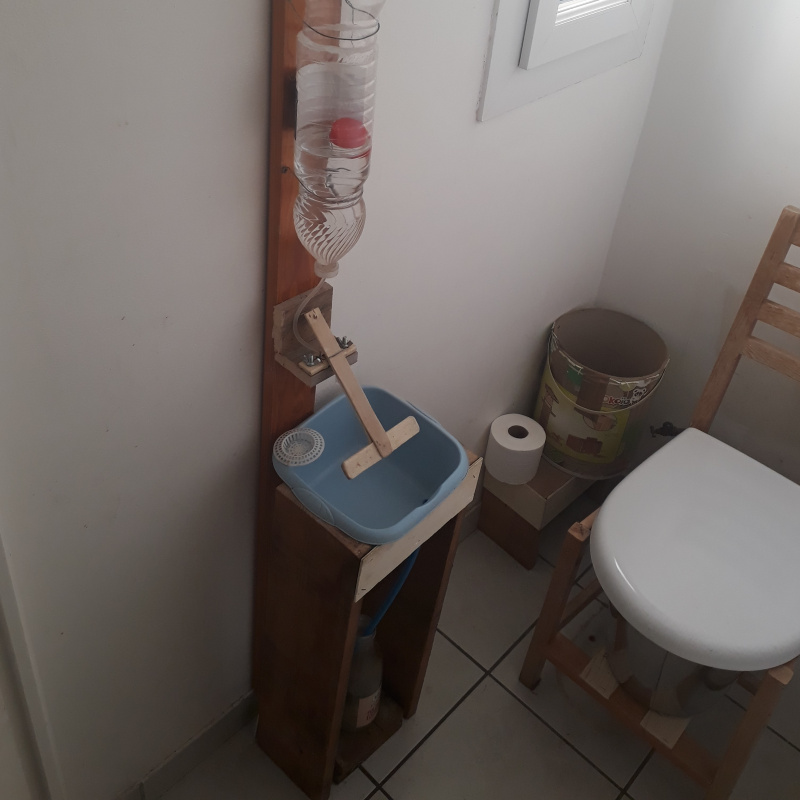
This water point can be installed in your bathroom, if it doesn't have a sink, or in your kitchen (mounted on the wall).
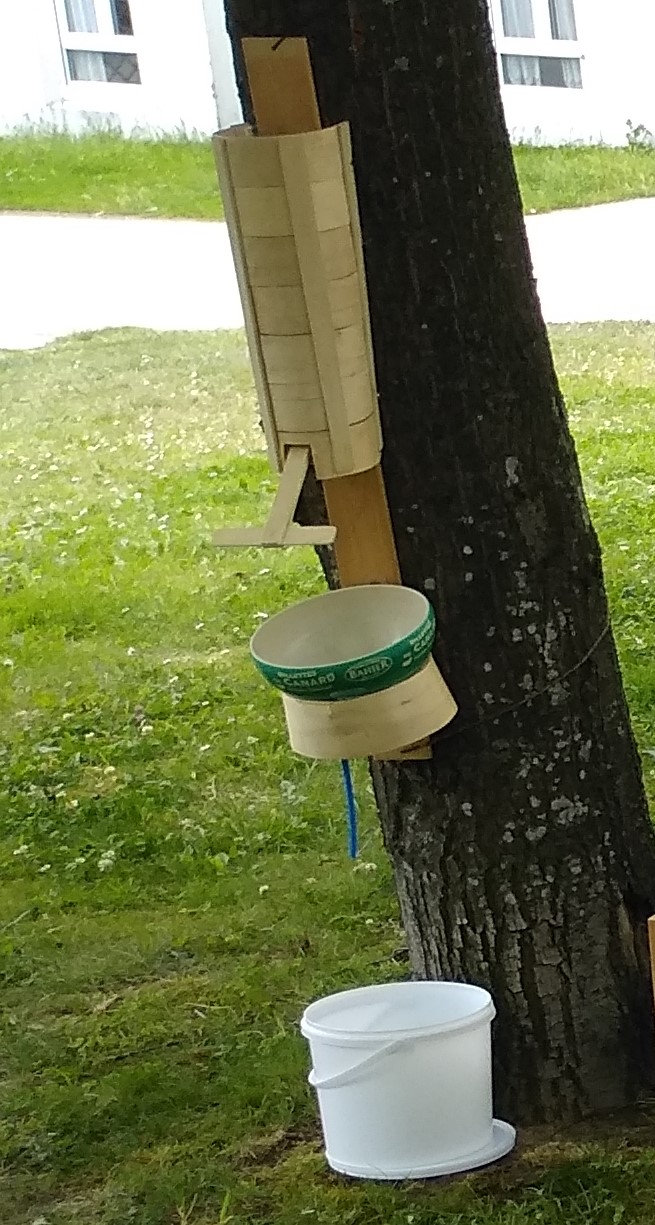
It can also be used outside, in a garden and also during local events, like a school fête for example. It can then be hung to a tree or a streetlight with straps. Its height can then easiliy be adjusted to the one of children.
Matériaux
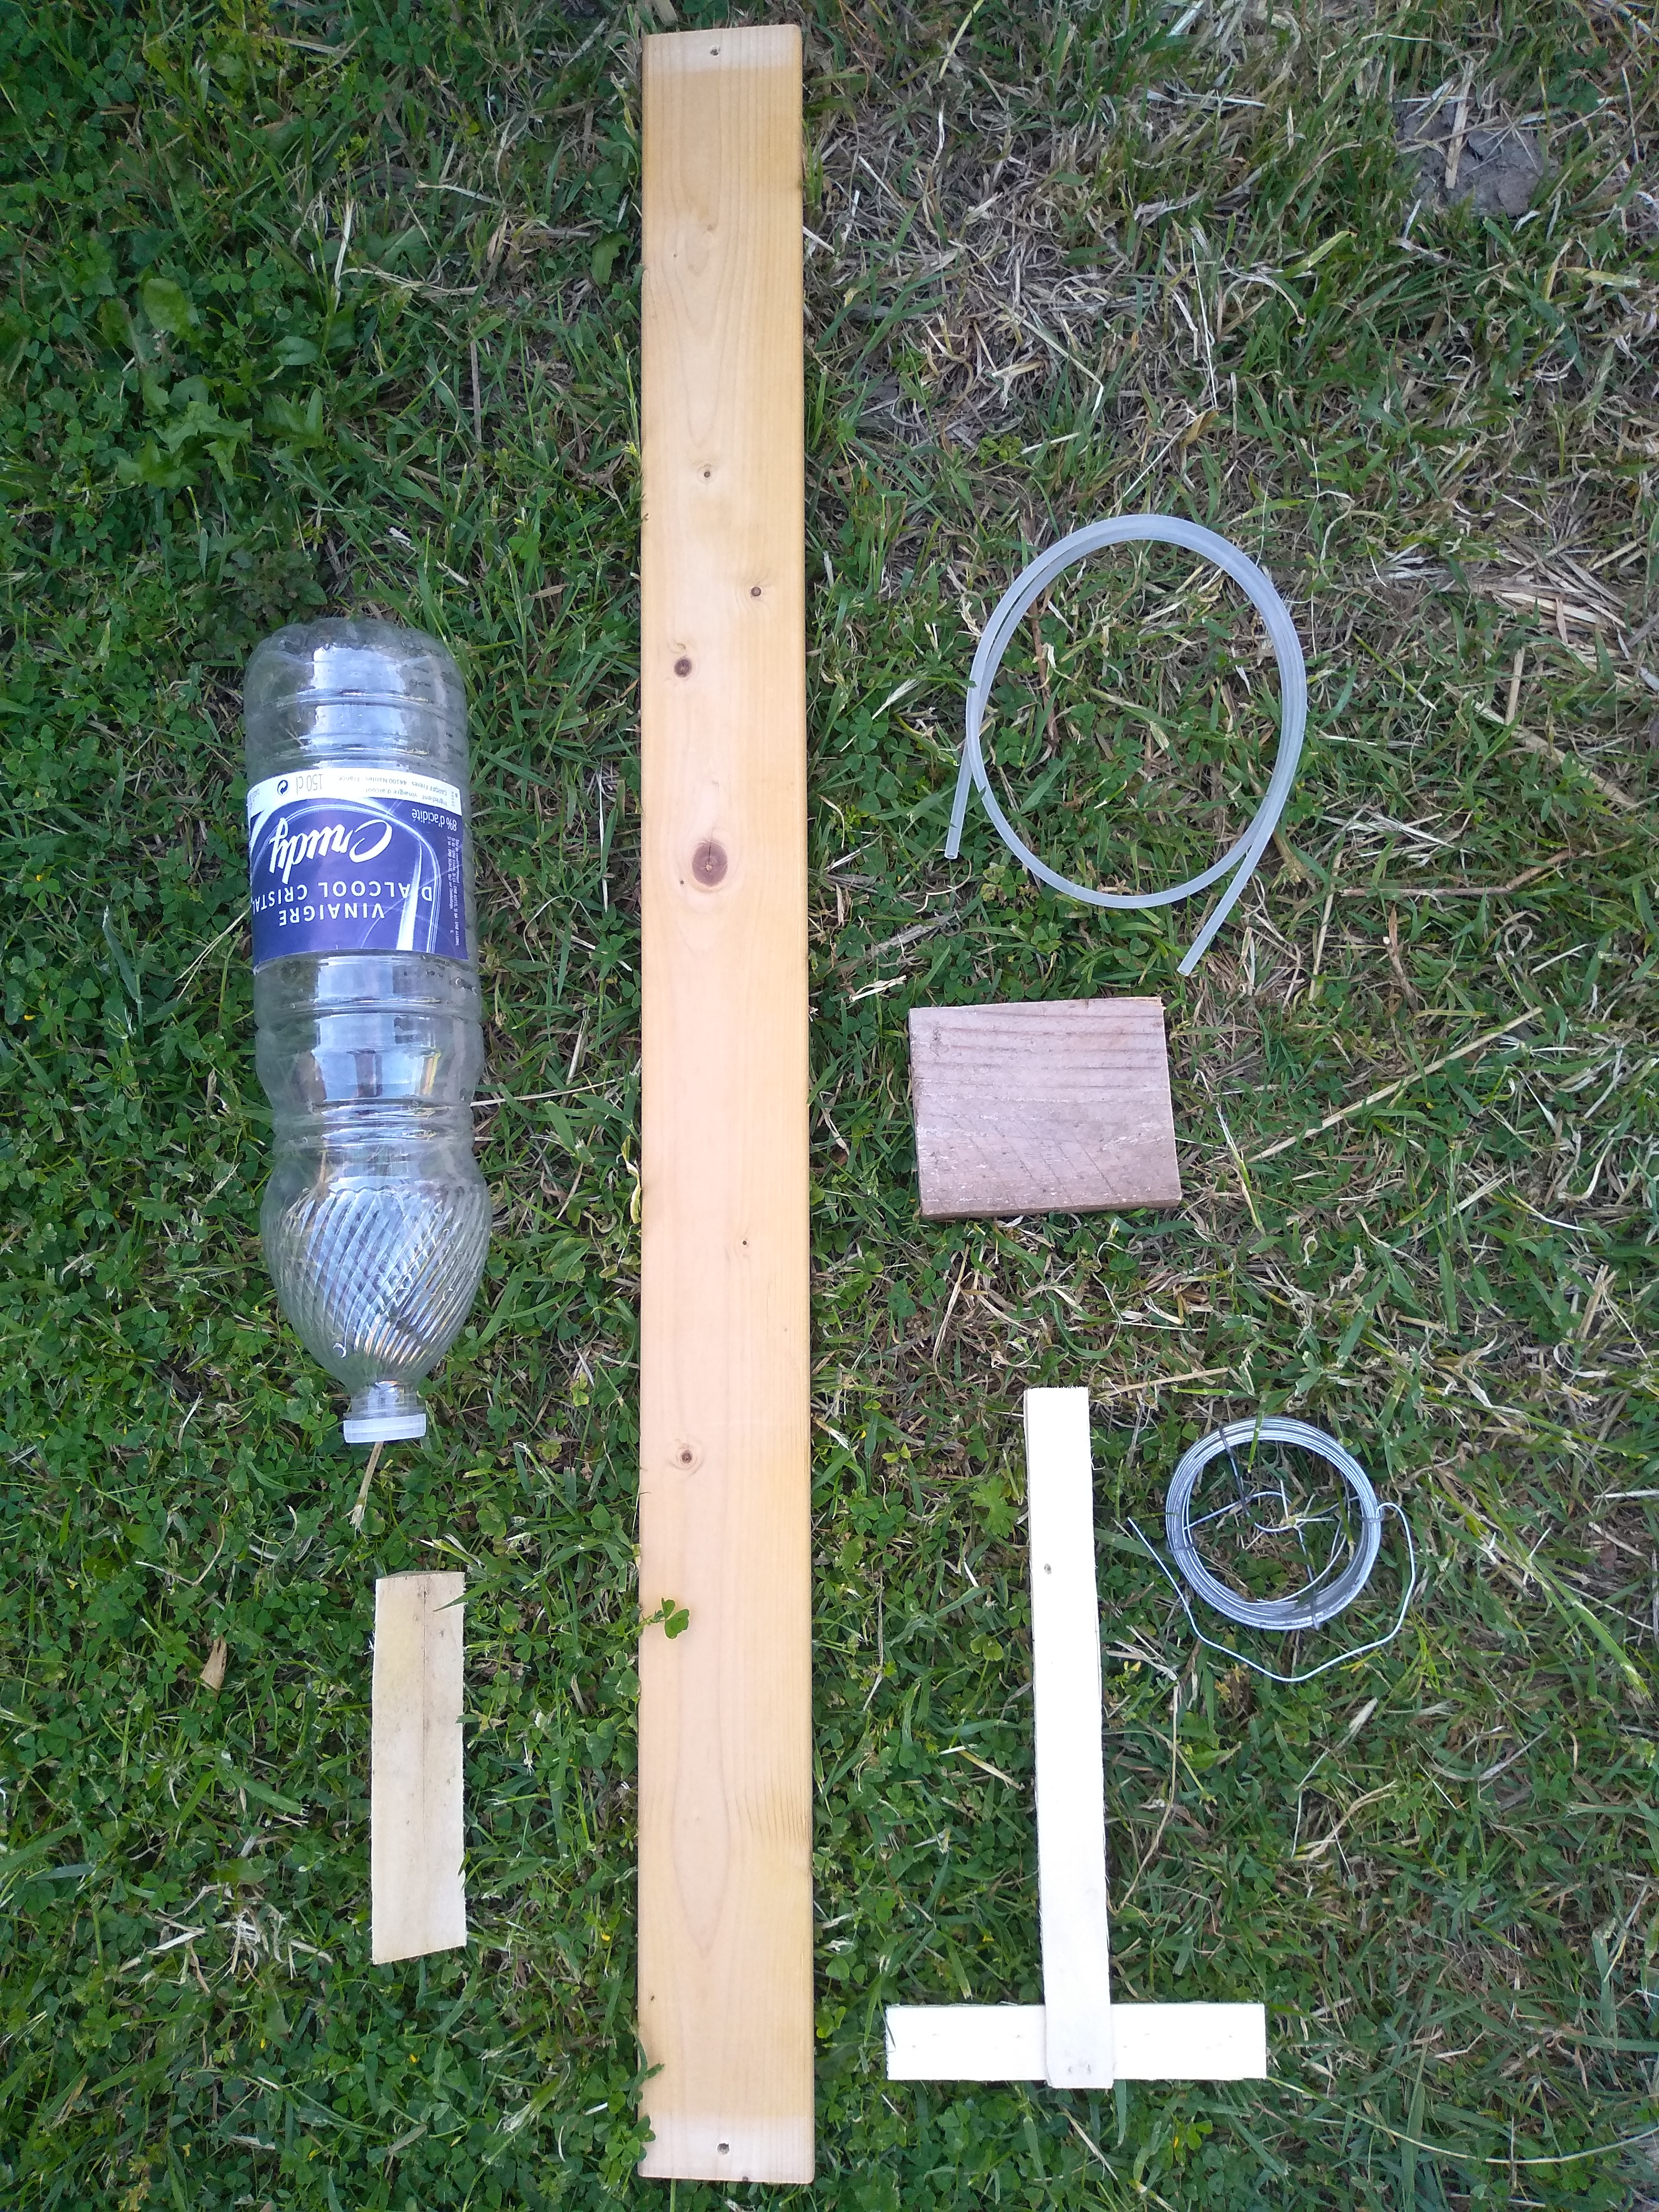
1 wooden box
1 plastic bottle
1 wooden batten
1 small wooden plank (6x8 cm - 2,37x3,15 inch)
1 piece of iron wire
1 thin silicone tube (ex : baby nose cleaner, breast pump ...)
1 elastic
1 big nail (7 to 8 cm - 2,75 to 3,14 inch)
A few screws
1 staple
Outils
Hammer, screwdriver, drill, wood saw, cutter
Étape 1 - Lever's completion
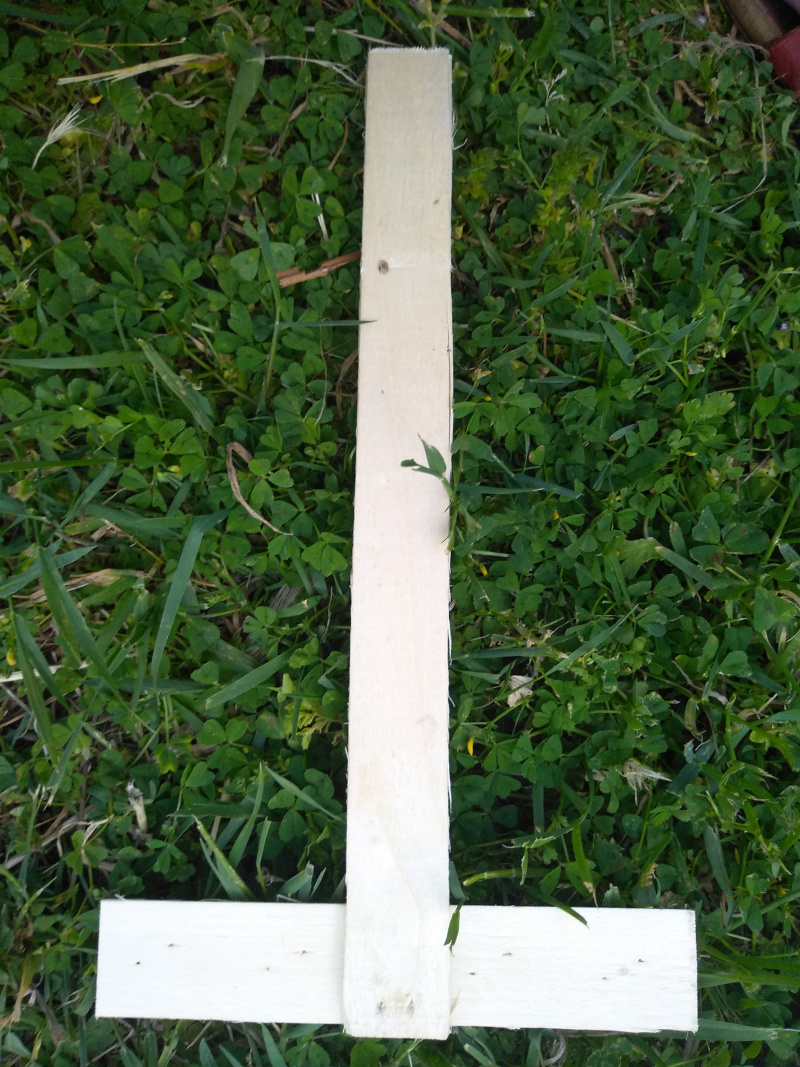
Gather 3 transversal battens from the wooden box (1 short / 2 long) et use them to make a T-shaped lever (around 25cm - 10 inch long). Attach those 3 pieces with some glue.
Étape 2 - Anchoring the nail
Block the nail between the heads of the 2 screws and let the tip of the nail stick out a bit (don't forget to file the tip of the nail)
Glue / screw the small wooden plank on the batten (at the level of the bottom quarter)
Étape 3 - Lever positioning
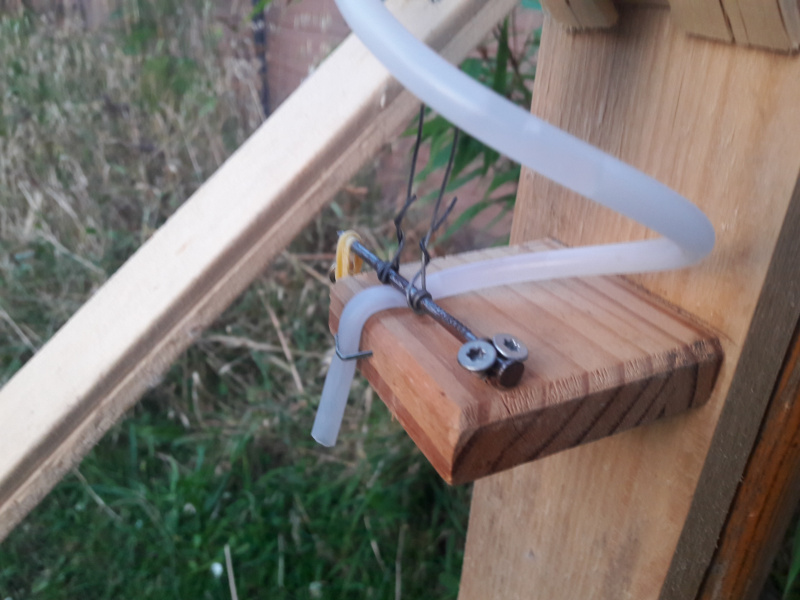
- Retrieve a corner of the wooden box and glue/screw it on the batten, over the small plank.
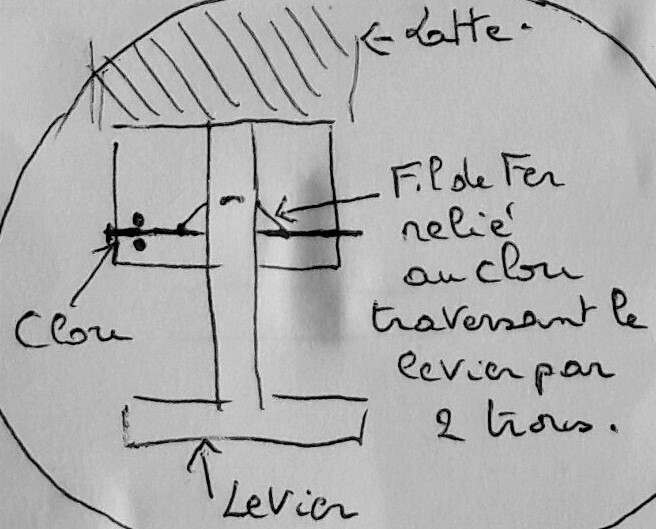
- Position the level on the top leaving the space of a child's hand. Mark and drill 2 small holes in the lever at the height of the nail.
- Screw the lever on the corner of the wooden box and insert the iron wire in the holes. Twist the ends of the iron wire around the nail. (NB: The iron wire must be tensed).
Étape 4 - Installation of the hose and bottle
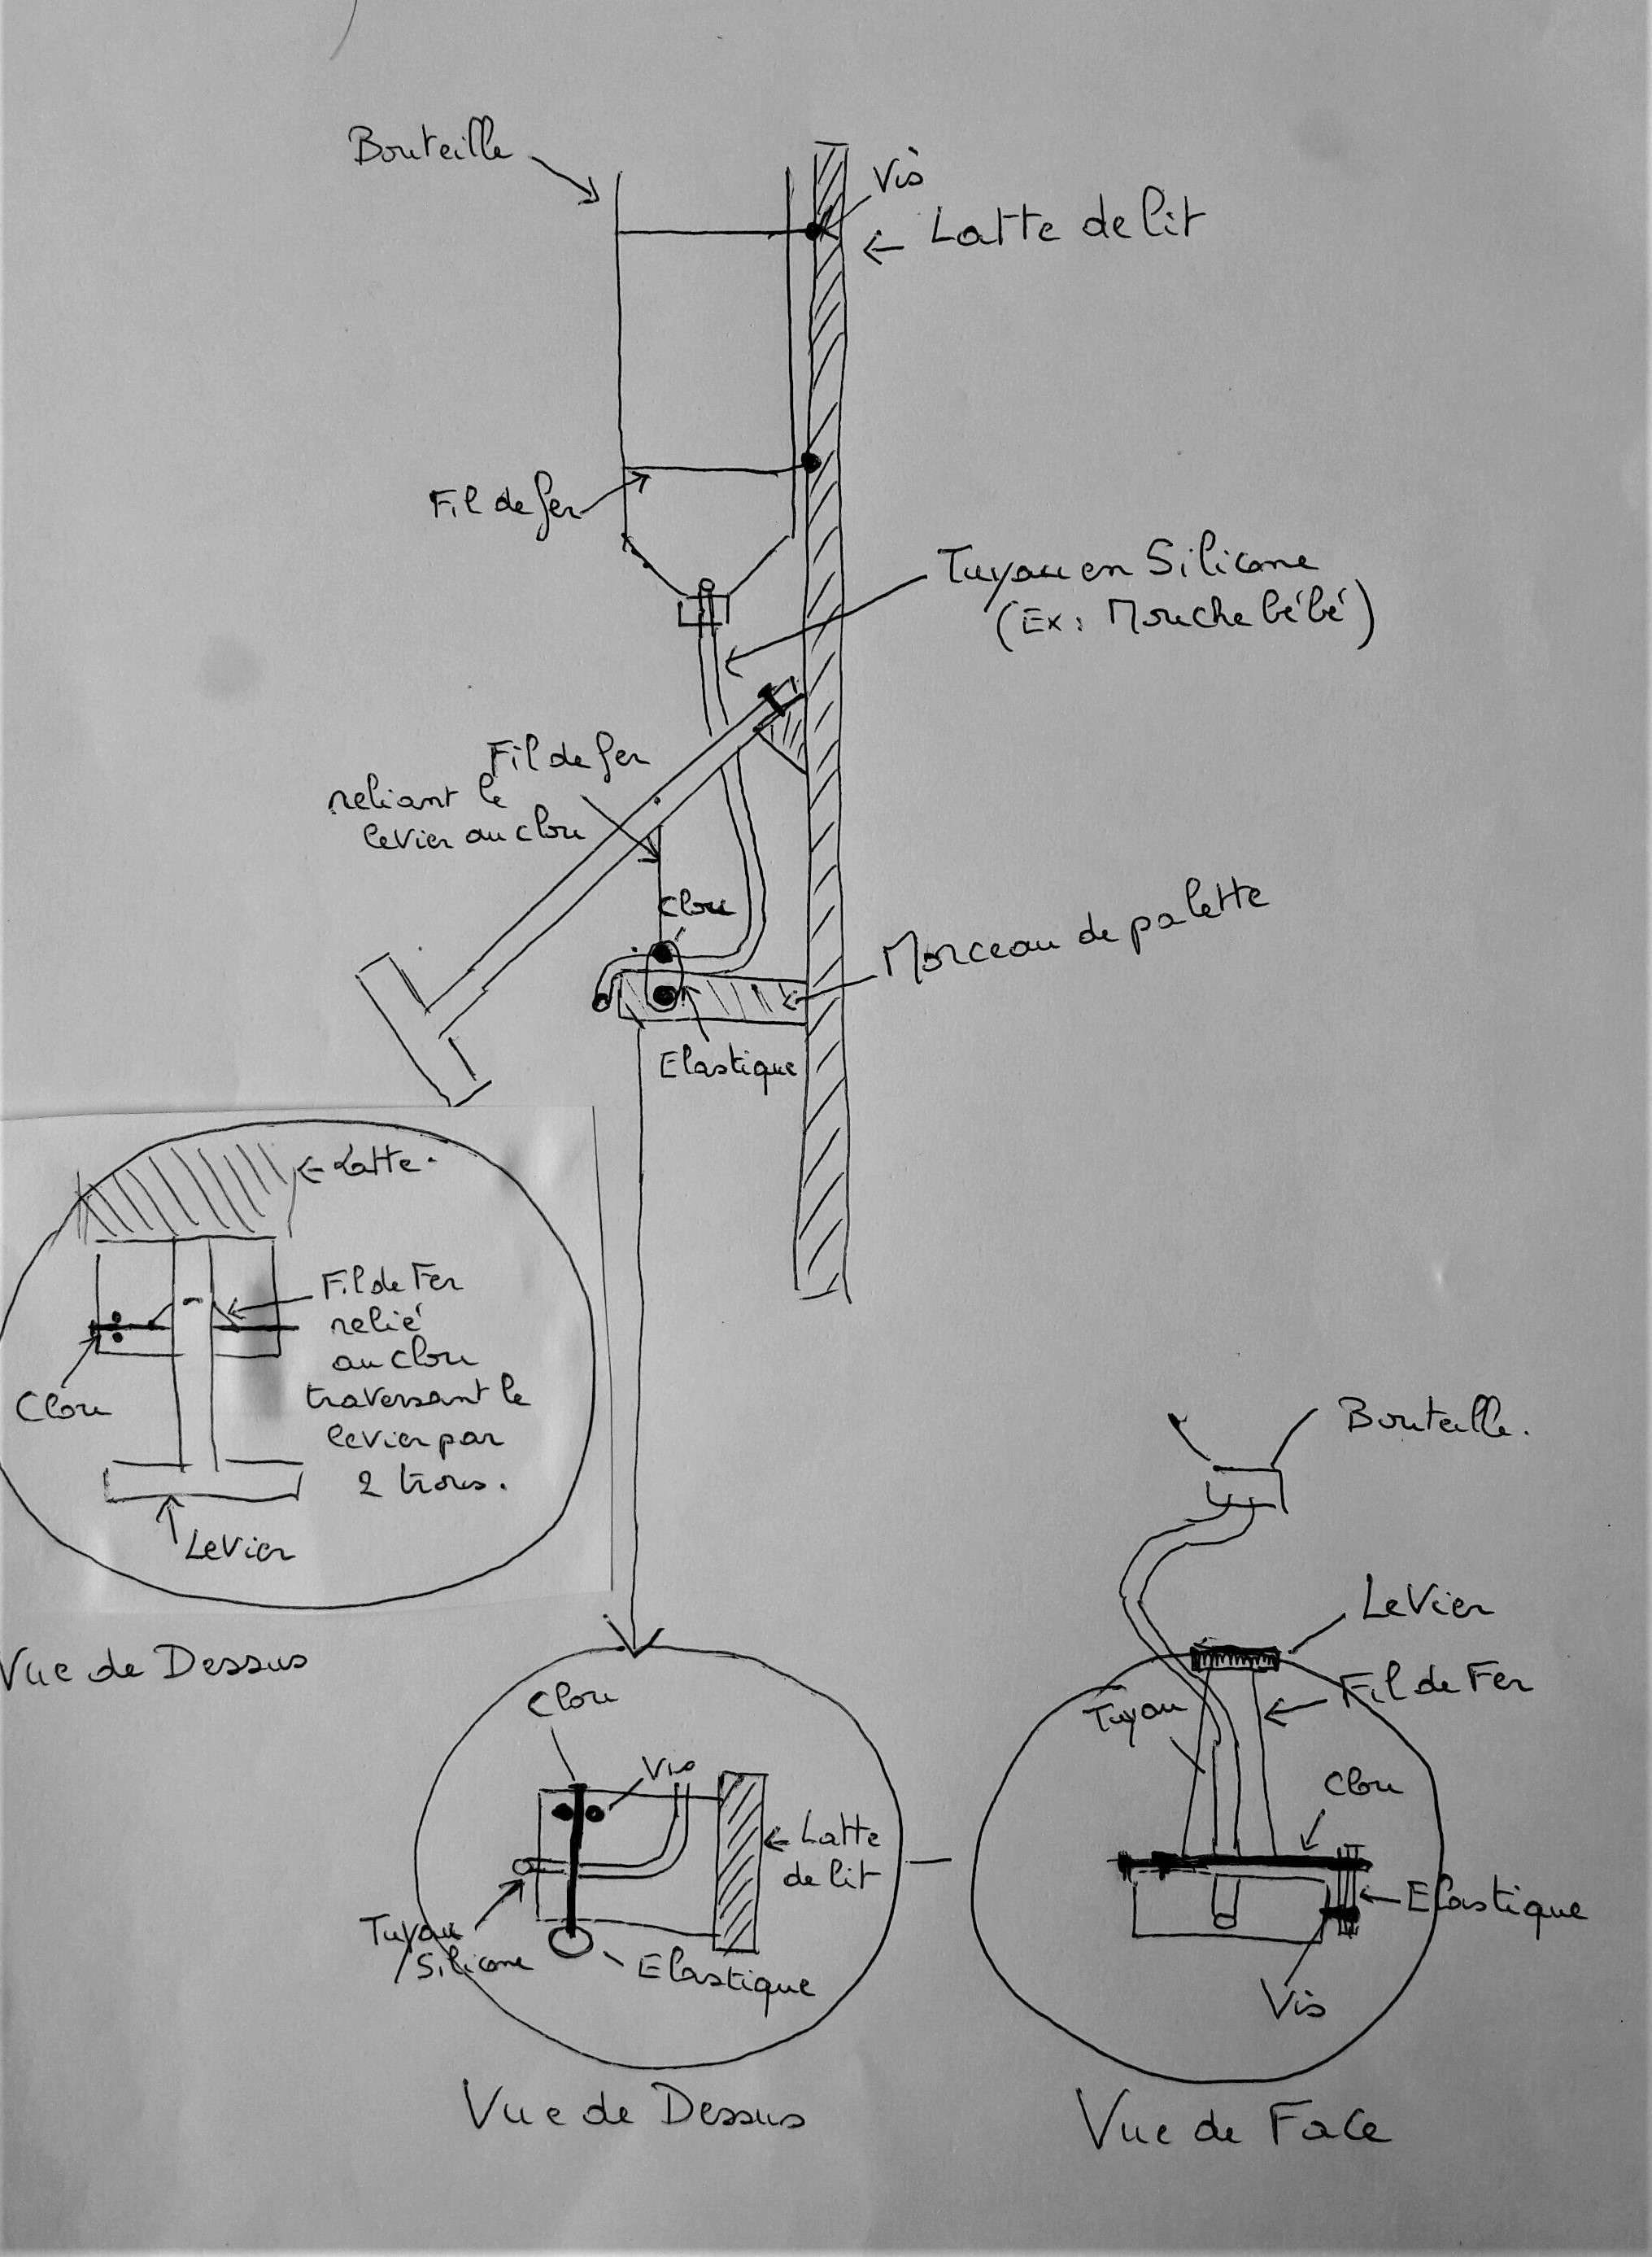
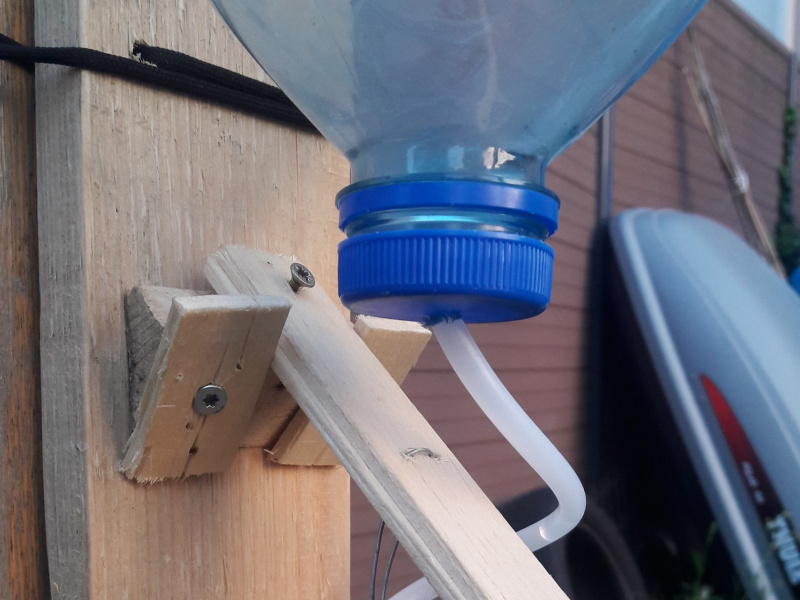
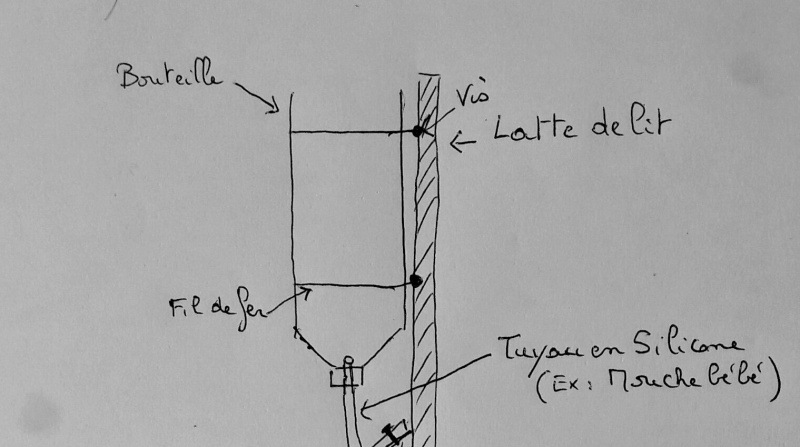
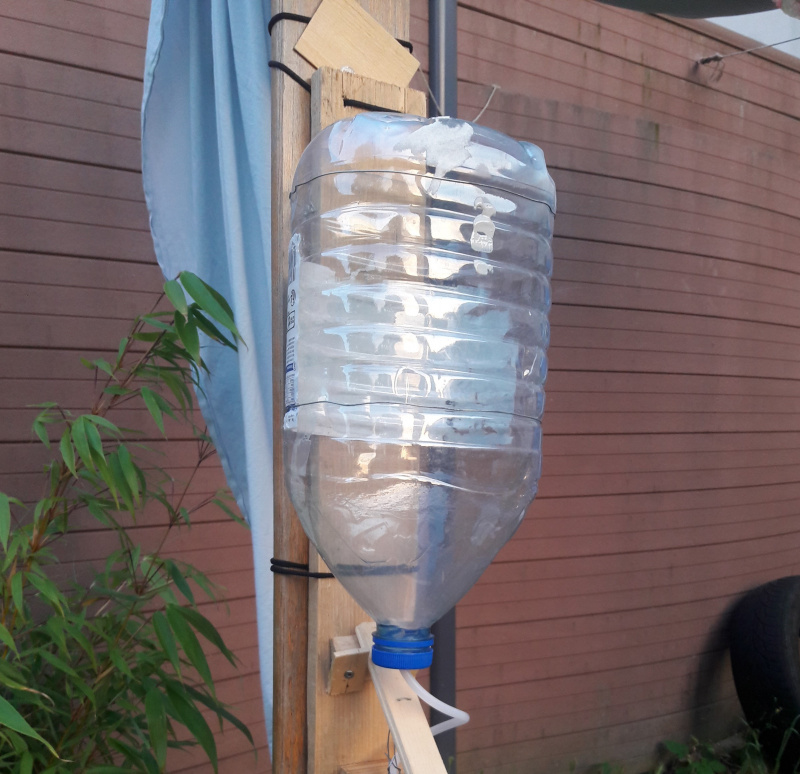
- Cut the bottom of the bottle. Drill its cap to a diameter slightly inferior than the hose. Insert the hose through and let it go a centimeter beyond the cap.
- Position the bottle on the batten over the lever. Adjust the length of the hose.
- Attach the bottle with 2 iron wires, blocked by 4 screws.
- Let the hose go below the nail and keep it on the side of the plank with a staple. Put the elastic in place (around the nail and screw) and set its tension such as the hose is pinched.
Étape 5 - Finishing touches
Depending on the location where we want to install the water source, we can add a container (bowl, bucket, ...) fitted with a hose to make it similar to a sink. We can also collect the dirty water in a bucket in order to water plants or clean dry toilets (in our case).
It is also possible to decorate the small water source in order to hide bottles and make it more esthetic. A casing in wooden boxes will be easy enough and quite fine-looking.
Notes et références
BricoLowtech association :
bricolowtech@gmail.com
https://www.facebook.com/BricoLowtech/
Inspired by : the canacla by Jacques Vanhercke
http://canacla.com/blog/?page_id=115
Published
 Français
 English
 Deutsch
 Español
 Italiano
 Português